How to Paint a Stunning Watercolor Galaxy: A Step-by-Step Guide for Beginners
Learn how to paint a stunning watercolor galaxy in 10 easy steps. This beginner-friendly guide breaks down wet-on-wet blending and star-field techniques.
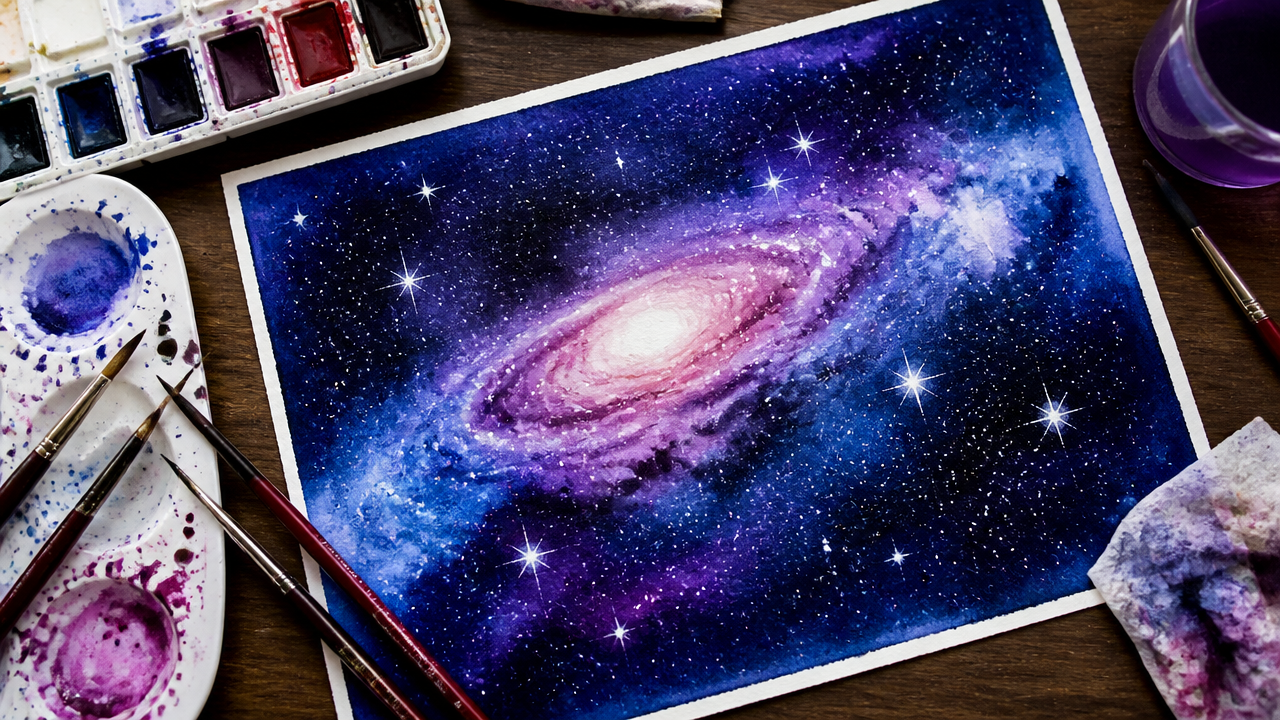
Have you ever looked at the night sky and wondered how to capture that deep, cosmic glow in a watercolor painting? Creating an artistic rendition of the interstellar expanse, whether you are preparing a 13 Easy Art Journal Ideas to Finally Kickstart Your Creativity or just experimenting with color, is a rewarding project for any skill level. By mastering the wet-on-wet technique, you can easily turn simple pigments into a vast, mysterious masterpiece. You do not need expensive supplies to achieve professional results; just patience and the right approach. Let’s start painting your own piece of the cosmos.
Quick Questions and Answers
Question: Why do watercolor galaxys look so dark and mysterious at night?
Answer: Watercolor galaxys look dark because artists layer deep blues, purples, and blacks to mimic the night sky’s depth. The wet-on-wet technique blends these colors smoothly, creating a mysterious gradient that fades from light to dark, enhancing the illusion of infinite space.
Question: Can beginners successfully paint a watercolor galaxy without using masking fluid?
Answer: Yes, beginners can paint a watercolor galaxy without masking fluid by using careful brush control or tape to protect star areas. While masking fluid makes star removal easier, freehand techniques with a damp brush to lift paint or splatter white stars work effectively for simple designs.
Question: Do watercolor galaxys require special brushes or just regular art supplies?
Answer: Watercolor galaxys do not require special brushes; regular flat, wash, and round brushes work well for applying washes and blending colors. The key is using a toothbrush for splattering stars, which is a common household item, making the process accessible with basic art supplies.
Key Takeaways
Preparing your paper with tape is essential to prevent warping during heavy water applications.
The wet-on-wet technique allows colors to bleed naturally, creating soft, realistic transitions.
Layering darker pigments over dry base colors adds the depth needed for a convincing spiral effect.
What You Need
Item
Purpose
Notes
Watercolor Paper
Provides the necessary surface for water absorption
Cold press, at least 300gsm is ideal
Masking Tape
Creates clean borders and prevents buckling
Use low-tack tape to avoid paper damage
Watercolor Paints
Supplies the pigment for the galaxy colors
Magenta, ultramarine, and black or indigo
Brushes
Large for the wash, small for detail
You only need two or three basic brushes
Masking Fluid
Preserves white space for stars or planets
Optional but helpful for beginners
Board
Keeps the paper secure and flat
Any rigid board or table edge works
How to Prepare Your Workspace
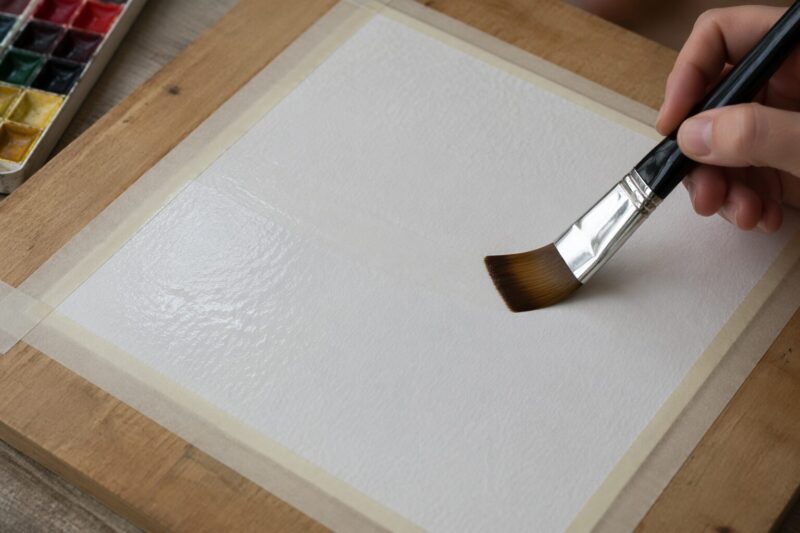
Before you even touch a brush, clear a space that allows your materials to spread out. Secure your watercolor paper to the board using masking tape, creating a clean frame that covers about a quarter-inch of the perimeter. According to the insights from Little Coffee Fox, using your fingernail or a ruler to seal the edges of the tape is vital to ensure no paint leaks underneath. If you are planning to add planets, apply masking fluid now to protect those circular shapes from your dark washes. Ensure your table is slightly elevated if you want the water to flow or move in a specific direction during the painting process.
Step 1: Establish Your Canvas
Uniformly wet the surface of your watercolor paper with clean water. You want the paper to look matte-wet; if there are big “puddles” of water sitting on top, dab them lightly with a paper towel. This hydration allows the paint to flow freely across the page once you start applying color. Research from The Pigeon Letters suggests that this stage is crucial for ensuring that the pigments spread evenly without leaving harsh, unnatural outlines. If you are interested in similar techniques, you might check out a How to Paint a Watercolor Landscape: An Easy Step-by-Step Tutorial to build your confidence with wet-on-wet methods.
Step 2: Set the Base Colors
Take some light blue or magenta and apply a diagonal strip across the center of your paper. Do not worry about perfection; this is just the foundation of your celestial cloud. Let the pigment move naturally across the damp surface to create soft, ethereal gradients. This center burst of color acts as the “light” of your galaxy. Keep your brush loaded with enough paint, but avoid scrubbing the paper, as overworking the surface can damage the natural cotton fibers of the watercolor paper.
Step 3: Blend and Layer
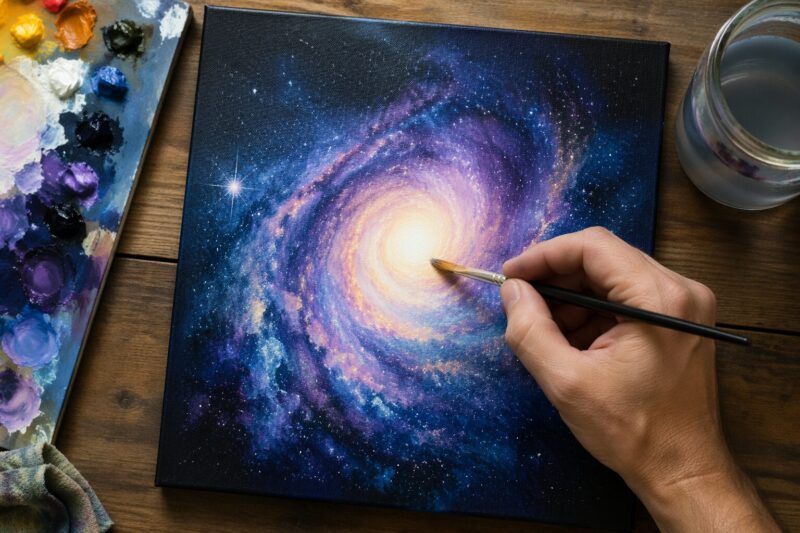
While your first layer is still damp, drop in deeper pigments like ultramarine or dark purple. Let these colors bleed into the magenta and light blue naturally. You can gently tilt your painting board to encourage the paint to flow into the empty white spaces of the paper. This movement creates the fluid, organic shapes characteristic of nebulae. As Gathered notes in their guide for beginners, the key is to avoid over-mixing colors directly on the paper, which can lead to a muddy, brown tone rather than a clear, deep space color.
Step 4: Add Depth and Define the Spiral
Introduce darker indigo or black pigments specifically at the outer corners and edges of your work. As the paper starts to lose its initial sheen, these darker tones will settle in a way that suggests a rotating spiral. Use a clean, semi-dry brush to soften any hard lines where the dark paint hits the lighter center. This technique creates a transition between light and shadow that gives your galaxy a sense of infinite scale and depth.
Step 5: Refine the Galaxy
Look for any areas where the paint might have pooled too heavily. Pooling often happens near the edges of the taped border or in the center of the nebula. Simply take a clean, slightly damp brush and soak up that excess moisture. If you need to fix a shape, this is also the moment to gently lift color to reveal a lighter tone underneath. Ensuring a smooth transition rather than stark blobs helps maintain the professional look you are aiming for.
Step 6: Create the Starfield
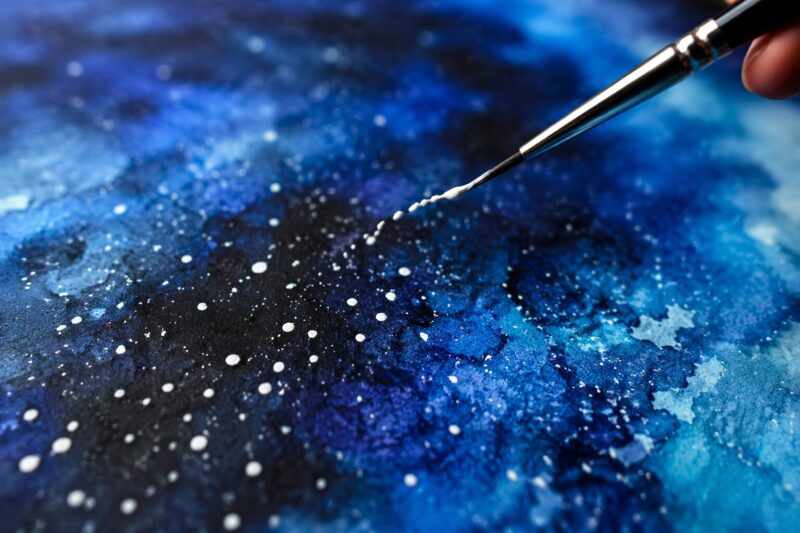
Wait for the paper to be completely dry before moving forward. This might take up to an hour depending on your environment, and rushing this part is a common mistake. Once dry, take a stiff brush or an old toothbrush, load it with white gouache or diluted white watercolor, and flick the bristles with your finger over the galaxy. These tiny, irregular splatters mimic real stars much better than individual hand-painted dots. If you are looking for inspiration for your art journey, check out these 11 Aesthetic Sketchbook Ideas to Refresh Your Daily Art Practice to stay motivated.
Step 7: Final Details and Finishing
Remove the masking fluid if you used it to protect blank circles for planets. You can now paint delicate white rings or slight color shifts inside those shapes to give them more detail. If you want to add long “rays” of light, take a clean, damp brush and scrub the surface gently in the center of your galaxy to lift pigment, revealing the original paper white. This creates a glowing effect that makes the entire painting feel more vibrant.
Steps to Reveal Your Work
The final step is the most satisfying: removing the tape. Wait until the artwork is bone-dry to the touch. Slowly peel the masking tape back at a 45-degree angle. Pulling the tape away from the center of the painting protects the paper fibers from tearing. If the tape feels stuck, apply a little warmth from a hair dryer to soften the adhesive, making it easy to remove without damaging your hard work.
Common Mistakes to Avoid
A frequent error is over-mixing the pigments directly on the paper, which invariably results in a muddy or dull brown color. Another trap is adding your white stars before the background is fully set; this causes the white paint to bloom and bleed into the surrounding dark wash, losing that crisp, bright effect. Lastly, never neglect to tape your paper to a rigid board. Watercolor paper shrinks and swells when it gets wet, and without a solid anchor, it will warp, causing pools of water to drift into the wrong areas of your piece.
Troubleshooting Your Galaxy
If you find that your colors have come out too light or wishy-washy, wait until the paint enters a light “tacky” stage and gently layer a darker, more concentrated pigment over the edges. Do not scrub; just dap the color on and let it sink into the fibers. If you notice unwanted paint blooms or “cauliflowers” where the water moved unpredictably, you can often soften these by re-wetting the spot slightly with a clean brush and smoothing the edge inward, though sometimes a touch of texture adds a nice, organic look.
FAQ
Q: Are watercolor galaxys hard to blend without creating muddy or uneven colors?
Watercolor galaxys are not hard to blend if you apply light colors first and avoid overworking the wet paper. Using clean water brushes to gently push paint and blending edges softly prevents mud, ensuring smooth transitions between dark and light areas for a vibrant effect.
Q: How long does it take to dry a watercolor galaxy painting before adding stars?
A watercolor galaxy painting typically takes 30 to 60 minutes to dry completely, depending on humidity and paper thickness. Adding stars before the paint dries can cause them to bleed, so waiting until the surface is fully dry ensures crisp, bright star details.
Q: Does splattering white paint on a watercolor galaxy make stars look more realistic?
Splattering white paint with a toothbrush creates tiny, irregular dots that mimic real stars in a night sky, adding a realistic texture. This technique covers the darkest areas effectively, making the galaxy appear more dynamic and lifelike compared to painting stars individually.
Q: Will watercolor paint bleed if I use too much water when painting the galaxy?
Watercolor paint will bleed if too much water is used, causing colors to spread uncontrollably and lose their defined edges. To prevent this, wet the paper evenly but not dripping, and control water flow by blotting excess with a clean brush before adding pigment.
Q: When should I add dark colors like black or Payne’s Grey to my watercolor galaxy?
Dark colors like black or Payne’s Grey should be added after the light and medium layers are down but while the paper is still damp. This allows gentle blending toward lighter areas, creating soft gradients that enhance the galaxy’s depth without harsh lines.
Q: Is it necessary to tape watercolor paper to a board when painting a galaxy?
Taping watercolor paper to a board is necessary to prevent warping, as galaxys require large amounts of water that can sag the paper. Securing the edges with masking tape keeps the surface flat, ensuring even paint application and preventing cracks or uneven drying.
Q: What is the easiest way to lift paint to create bright rays in a watercolor galaxy?
The easiest way to lift paint for bright rays is using a clean, damp brush to gently scrub the center of the spiral, then wiping the brush frequently. This removes pigment to reveal the white paper, creating soft, glowing rays that mimic light piercing through the galaxy’s darkness.
My Experience With How to Paint a Stunning Watercolor Galaxy in 10 Easy Steps
I remember the first time I attempted a galaxy painting; I assumed more water meant a better, smoother blend. I ended up with a soggy mess that warped right off my desk! That was a painful lesson in paper management. Now, I always secure my paper tight—no exceptions. The real expert insight I’ve found over the years? It is all about timing the moisture. If you add your dark blue mid-tones while the paper is “shiny wet,” they blend perfectly. If you wait until it turns “matte,” you can create those beautiful, sharp dark edges that define a spiral.
Another tip: don’t fear the “mud.” If you accidentally mix too much color and it looks dull, treat it as a shadow. Space isn’t just bright colors; it’s vast, dark, and deep. Embracing those darker, more muted tones actually makes your bright, splattered stars pop so much more. It’s a forgiving style once you stop trying to control every drop of pigment. Have you ever tried a wet-on-wet technique, or did you find it harder than you expected on your first go?
Next Steps
Once you master these 10 steps, experiment with adding metallic watercolors or gouache to create “glowing” stardust patterns that catch the light differently. Practice your galaxy density by varying how much pigment you add compared to your water; a higher pigment concentration will create a more dramatic, intense space scene. Keep practicing on small scraps of paper to find the balance of color that feels right to you.
A Teacher with 5 years of experience. Our Expertise, is reliable to meet your full Academic development needs . Worked on many crafts and construction projects offering services from design to development to deployment over the years. You will find many of my works in my business portfolio on request.