Every September, as the leaves begin their spectacular color transformation and the air carries that crisp hint of autumn, I find myself eagerly anticipating one of my favorite crafting seasons. There’s something absolutely magical about pumpkin crafting with kids – it captures the essence of fall in ways that few other activities can match. Over the years, I’ve discovered that pumpkins aren’t just for carving jack-o’-lanterns; they’re incredibly versatile crafting materials that spark creativity in children of all ages.
What I love most about pumpkin crafts is their accessibility. Unlike some seasonal activities that require expensive materials or complex techniques, pumpkin crafting uses simple supplies that most families already have at home. The familiar orange gourd serves as a perfect canvas for young imaginations, whether we’re working with real pumpkins, paper versions, or creative interpretations using everyday materials.
The educational value hidden within these seemingly simple projects never ceases to amaze me. While kids think they’re just having fun with orange paint and construction paper, they’re actually developing fine motor skills, learning about shapes and colors, exploring seasonal changes, and building confidence through creative expression. Each completed pumpkin craft becomes a tangible reminder of autumn’s beauty and their own artistic capabilities.
I’ve watched children’s faces light up with pride as they display their handmade pumpkin creations, and that joy is precisely why I’m passionate about sharing these ten easy projects that have become staples in our household every fall season.
Materials You’ll Need for Pumpkin Crafts
Through countless autumn crafting sessions, I’ve learned that preparation makes the difference between smooth, enjoyable projects and frustrating experiences that leave everyone covered in glue and wondering where we went wrong. My pumpkin crafting supply list has evolved over the years to include versatile materials that work across multiple projects.
Orange construction paper forms the foundation of many pumpkin crafts, but I always keep various shades on hand – from pale peach to deep burnt orange – because real pumpkins come in such beautiful color variations. Green construction paper is essential for stems and leaves, while brown adds realistic touches to our creations.
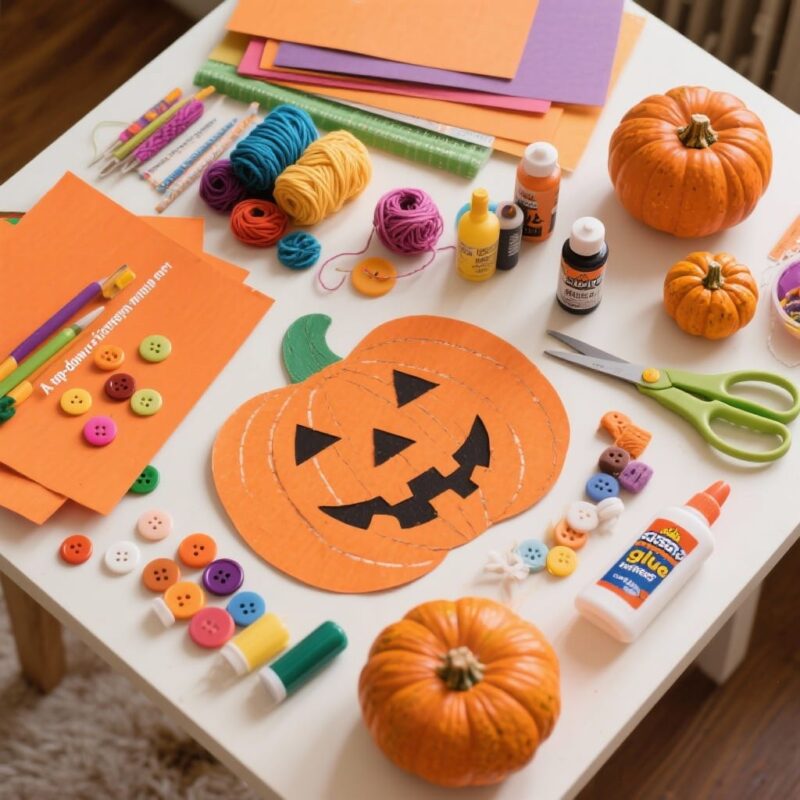
For three-dimensional projects, I maintain a collection of mini pumpkins, paper plates, glass jars of various sizes, and foam pumpkins that can be reused year after year. Orange paint in both washable tempera and acrylic varieties ensures we can tackle any surface, while paintbrushes in different sizes accommodate both detailed work and broad coverage.
My craft supply arsenal includes child-safe scissors, glue sticks, double-sided tape, black markers for facial features, yarn in autumn colors, and an assortment of decorative elements like buttons, sequins, and ribbon scraps. I’ve learned that having wet wipes and paper towels within arm’s reach prevents small spills from becoming major cleanup projects.
Safety supplies remain paramount – aprons or old clothes protect against paint disasters, and I always have a first aid kit nearby, though thankfully we’ve never needed more than a band-aid for the occasional paper cut.
Paper Plate Pumpkins
Paper plate pumpkins have become my go-to project for younger children because they combine simplicity with impressive results that boost confidence and creativity. The sturdy paper plate base provides an excellent foundation that even toddlers can manage successfully, while offering enough surface area for detailed decoration.
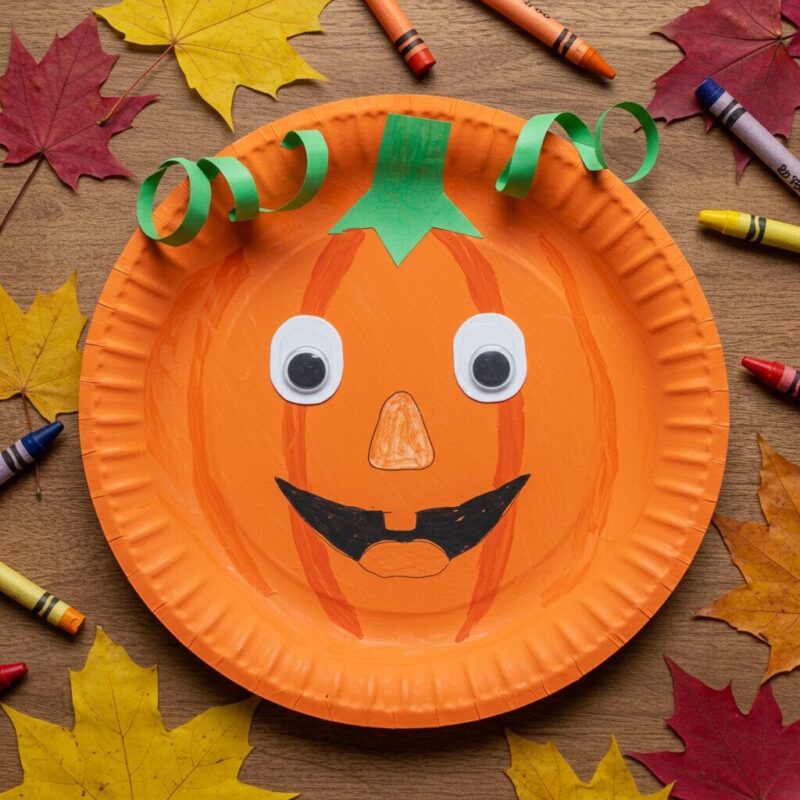
I begin by helping kids paint their paper plates in various shades of orange, encouraging them to blend colors or create patterns if they feel adventurous. While the paint dries, we prepare our embellishments – cutting green paper stems, creating curly vine tendrils from thin paper strips, and gathering any decorative elements they want to include.
The real magic happens during the assembly phase. We attach stems with glue sticks, positioning them slightly off-center for a more natural appearance. Kids love adding personality through facial features, and I encourage them to move beyond traditional jack-o’-lantern expressions to create happy, surprised, or even sleepy pumpkin faces.
Texture additions transform simple painted plates into dimensional artwork. We’ve experimented with tissue paper petals glued around the edges, corrugated cardboard strips that create ridged pumpkin sections, and even cotton ball “fluff” for unique artistic interpretations. Each child’s personality shines through these creative choices.
The beauty of paper plate pumpkins lies in their adaptability – we’ve created entire pumpkin families with different sizes of plates, seasonal garlands by stringing multiple pumpkins together, and even used them as placemats for autumn dinner parties.
Painted Mini Pumpkins
Real mini pumpkins offer an authentic crafting experience that connects children directly with the natural materials of the season. There’s something deeply satisfying about transforming an actual gourd into a personalized work of art, and the three-dimensional canvas challenges kids to think creatively about design and color application.
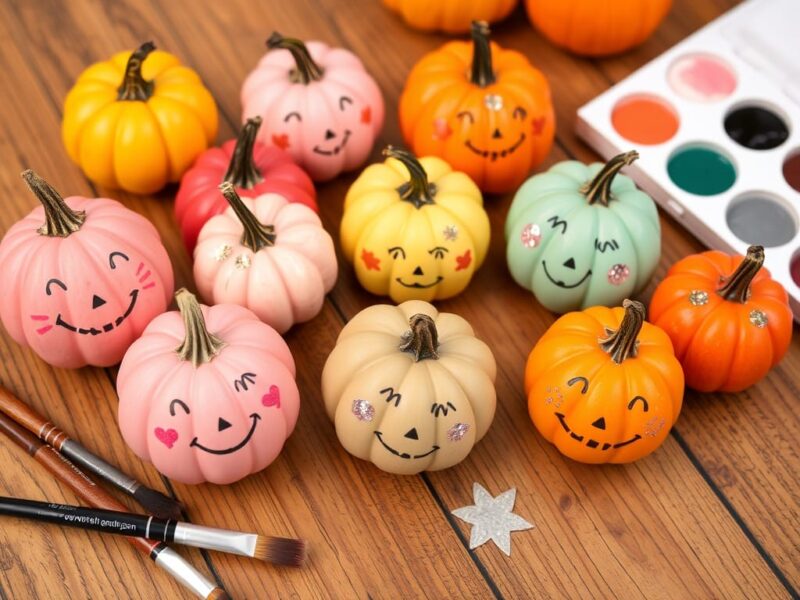
I always select mini pumpkins carefully, choosing ones with smooth surfaces and interesting shapes that will inspire creativity rather than frustrate young artists. We begin each session by washing and drying our pumpkins thoroughly, then discussing the natural ridges and curves that make each one unique.
Base coat application teaches patience and technique. I show kids how to hold their pumpkins steady while applying paint in smooth, even strokes that follow the natural contours. We’ve discovered that foam brushes work exceptionally well for achieving smooth coverage, while traditional brushes are perfect for detailed work and special effects.
Color combinations extend far beyond traditional orange. We’ve created elegant white pumpkins with gold accents, pastel rainbow pumpkins that look like they belong in a fairy garden, and even galaxy-themed pumpkins with deep blues and silver star patterns. The key is encouraging kids to envision their pumpkins in unexpected ways.
Detail work transforms simple painted pumpkins into true masterpieces. We add polka dots with cotton swabs, create striped patterns with painter’s tape, and use stencils for intricate designs that would be impossible to achieve freehand. Glitter, sequins, and other dimensional elements provide finishing touches that make each pumpkin truly special.
Pumpkin Collage Art
Collage work develops spatial reasoning and planning skills while allowing children to experiment with color, texture, and composition in low-pressure environments. Pumpkin collages have become some of our most treasured autumn artwork because they showcase individual creativity while building valuable artistic skills.
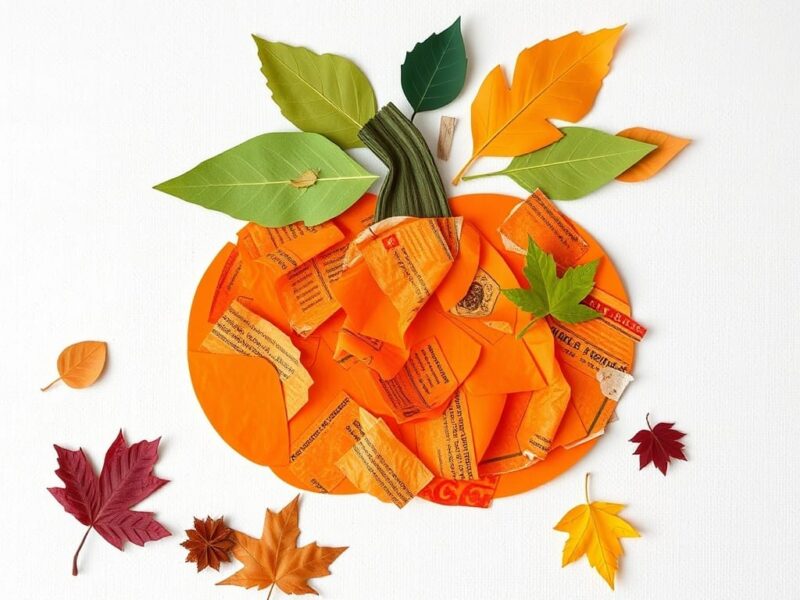
I prepare our workspace with a vast array of collage materials – torn tissue paper in autumn colors, fabric scraps with interesting textures, magazine cutouts featuring fall imagery, natural elements like pressed leaves, and various papers with different surface treatments. The abundance of choices helps children feel empowered to make their own creative decisions.
We start with large paper backgrounds, and I encourage kids to sketch a basic pumpkin outline lightly in pencil. This framework helps guide their collage work while still allowing plenty of room for creative interpretation. Some children prefer realistic proportions, while others create fantastical pumpkin shapes that exist only in their imaginations.
Layering techniques create depth and visual interest in our collages. We begin with background elements, gradually building up layers of material that create shadows, highlights, and textural variety. Kids learn naturally about foreground and background relationships as they decide which elements should appear in front of others.
Color theory lessons emerge organically as children experiment with complementary colors, discover how different oranges work together, and learn to create contrast through strategic placement of light and dark elements. These discoveries feel like play rather than formal instruction, making them more memorable and meaningful.
Yarn-Wrapped Pumpkins
Yarn-wrapped pumpkins combine the meditative qualities of repetitive motion with the satisfaction of creating something beautiful and tactile. This craft has become particularly popular with children who enjoy hands-on activities that engage their sense of touch while producing stunning visual results.
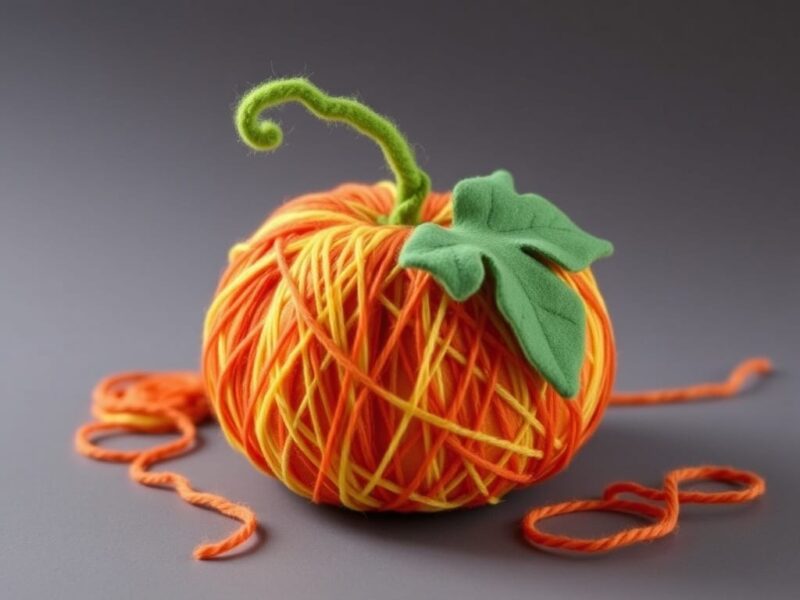
I begin by helping kids select their yarn colors, encouraging them to think beyond traditional autumn hues. We’ve created stunning pumpkins using variegated yarns that shift through multiple colors, metallic threads that catch light beautifully, and even unconventional colors like purples and blues that challenge expectations while remaining beautiful.
The wrapping technique requires patience and steady hands, skills that develop through practice. I demonstrate how to secure the yarn end with a small dab of glue, then wrap consistently in one direction, keeping tension even to avoid loose spots or overly tight areas that distort the pumpkin’s shape.
Pattern creation adds sophistication to our yarn pumpkins. We experiment with alternating colors every few wraps, creating chevron patterns by changing direction strategically, and incorporating different yarn textures within single pumpkins for added visual interest. Advanced crafters enjoy planning complex patterns before beginning their wrapping process.
Finishing touches transform wrapped pumpkins into polished artwork. We create stems using twisted yarn, add felt leaves cut in realistic shapes, and sometimes incorporate beads or buttons as decorative accents. These final details provide opportunities for fine motor skill development while personalizing each creation.
Pumpkin Puppets
Pumpkin puppets breathe life into our autumn crafts, transforming static decorations into interactive toys that encourage imaginative play and storytelling. The combination of crafting and performance elements makes this project particularly engaging for children who love both creating and entertaining.
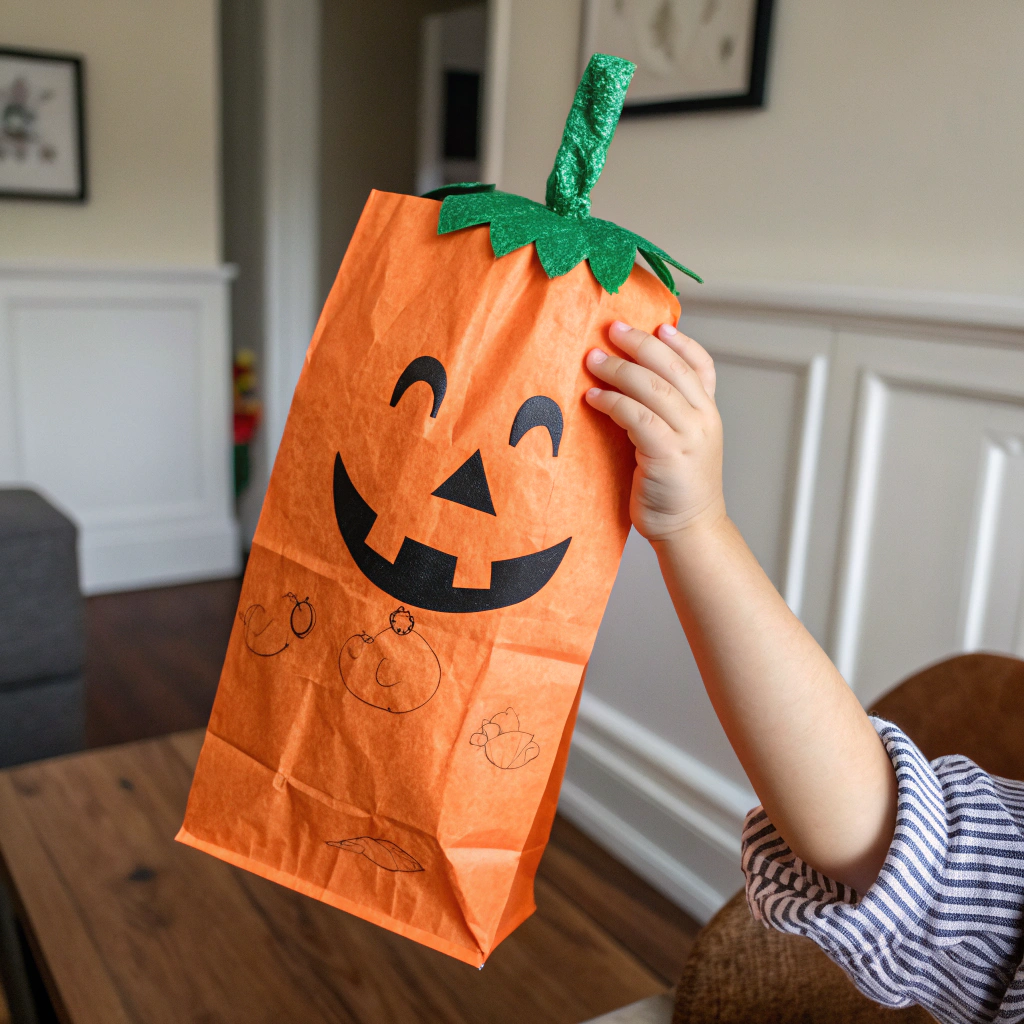
Paper bag bases provide sturdy foundations for our pumpkin puppets while remaining lightweight enough for comfortable manipulation. I help kids position the pumpkin face elements strategically so that the puppet’s mouth aligns with the bag’s fold, creating realistic talking motion when they operate their finished puppets.
Character development begins during the design phase as children decide whether their pumpkin puppet will be friendly, mischievous, wise, or possess other personality traits. These decisions influence color choices, facial expressions, and decorative elements, encouraging kids to think about how visual design communicates character information.
Construction techniques focus on durability since these puppets will see active use during play sessions. We use strong adhesives, reinforce stress points with extra glue, and select materials that can withstand enthusiastic puppet performances. Double-sided tape works excellently for securing lightweight decorative elements.
Performance opportunities extend the crafting experience into creative play. We organize puppet shows where each child’s pumpkin character has opportunities to shine, create group stories that incorporate multiple puppets, and even develop ongoing adventures that continue across multiple play sessions.
Recycled Jar Pumpkins
Recycling glass jars into pumpkin crafts teaches environmental responsibility while creating beautiful, functional decorations that can serve as luminaries, storage containers, or purely decorative elements. This project demonstrates how everyday waste materials can become treasured handmade items through creativity and effort.
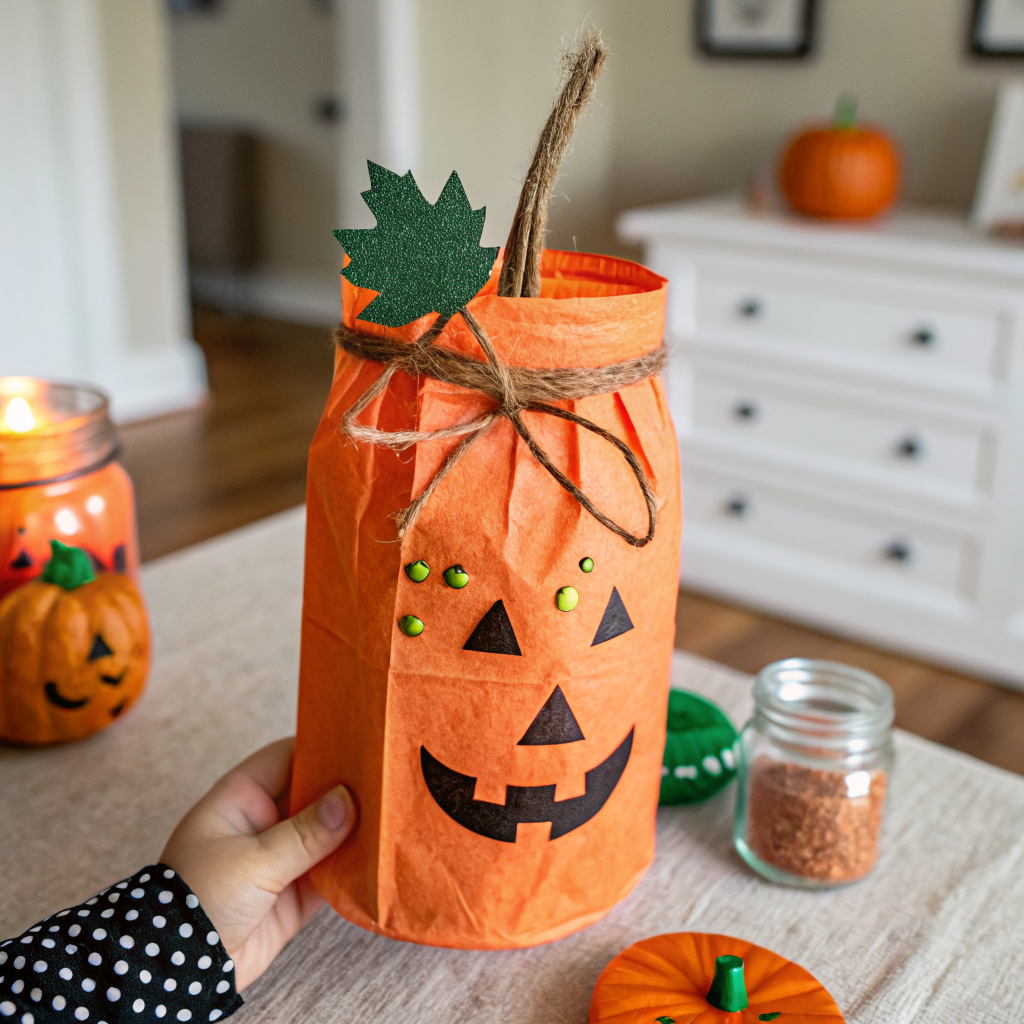
Jar preparation involves thorough cleaning and label removal, tasks that children can help with while learning about the importance of starting with clean surfaces for successful crafting outcomes. We soak stubborn labels in warm water and use plastic scrapers to remove adhesive residue safely.
Paint application techniques vary depending on desired effects. We’ve achieved beautiful translucent results using glass paint that allows light to pass through our finished pumpkins, created solid coverage with acrylic paints for more traditional appearances, and even experimented with spray painting outdoors for smooth, professional-looking finishes.
Dimensional elements transform simple painted jars into sophisticated decorations. We wrap jars with twine or rope to create textured surfaces, add felt cutouts for facial features that won’t wash off, and incorporate natural elements like raffia or dried corn husks for authentic autumn appeal.
Functionality adds value to our jar pumpkins beyond mere decoration. We’ve created candy holders for Halloween treats, luminaries using battery-operated tea lights for safe illumination, and even planters for small succulents that create year-round reminders of our autumn crafting sessions.
Pumpkin Stamps with Apples or Potatoes
Stamping projects introduce children to printmaking concepts while creating opportunities for pattern exploration and repetitive design work. Using apples and potatoes as pumpkin-shaped stamps connects our craft to natural materials while teaching resourcefulness and creative problem-solving.
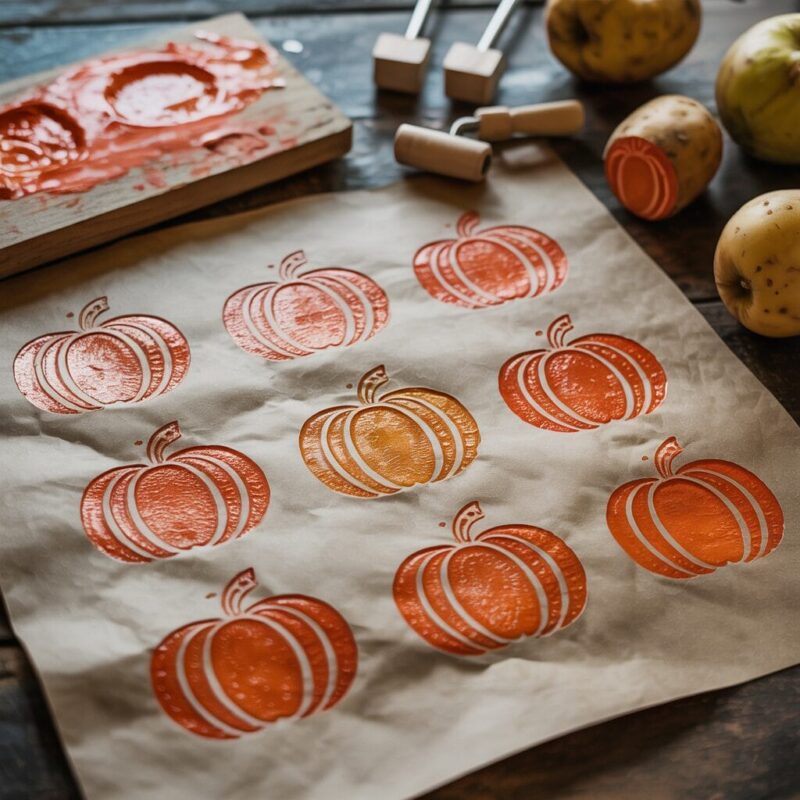
Stamp creation requires adult assistance with cutting tools, but children can participate in design planning and surface preparation. We cut apples in half crosswise to reveal their natural star patterns, then trim them into pumpkin shapes. Potatoes offer more control over final shapes and create stamps with longer usable lifespans.
Paint application techniques affect stamping results significantly. We’ve discovered that foam plates work excellently as paint palettes, allowing for even paint distribution across stamp surfaces. Too much paint creates muddy prints, while too little results in incomplete impressions, so finding the right balance becomes part of the learning process.
Pattern development encourages mathematical thinking as children discover how repeated elements create visual rhythms and designs. We experiment with regular spacing, random placement, overlapping prints, and color variations that transform simple pumpkin shapes into complex decorative patterns.
Paper selection influences final results and helps children understand how different surfaces affect their artwork. We’ve stamped on construction paper, cardstock, fabric scraps, and even brown paper bags that become beautiful gift wrap for autumn presents.
Pumpkin Garland for Decoration
Creating pumpkin garlands provides opportunities for measurement, spacing, and sequence planning while producing beautiful decorations that transform ordinary spaces into autumn wonderlands. The linear nature of garland construction helps children understand patterns, repetition, and design flow.
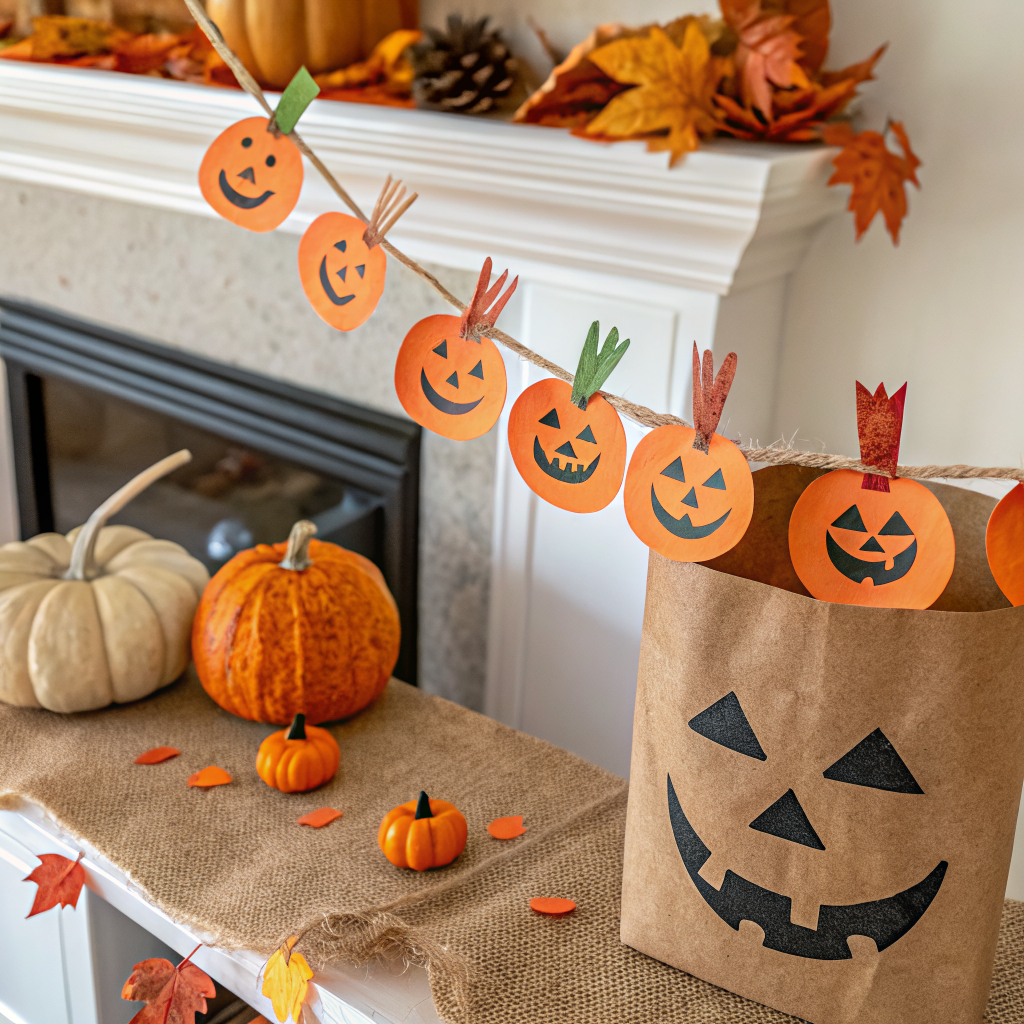
Individual pumpkin creation allows for variety within unity as each child makes multiple pumpkins that will become part of the larger garland. We ensure consistency in size while encouraging variations in color, expression, and decorative details that make each element unique and interesting.
Assembly planning involves decisions about spacing, arrangement order, and connection methods. Children learn to consider how their individual pumpkins will look when displayed together, making adjustments to ensure visual balance and appealing color distribution throughout the finished garland.
String selection and attachment methods require problem-solving skills as kids determine how to connect their pumpkins securely while maintaining the garland’s flexibility and drape. We’ve experimented with yarn, fishing line, and ribbon, each producing different aesthetic effects and handling characteristics.
Display considerations help children think about their intended audience and the spaces where their garlands will hang. We discuss appropriate lengths for different locations, hanging methods that won’t damage walls or furniture, and lighting conditions that will best showcase their finished creations.
Tips for Parents: Making Crafts Kid-Friendly
Through years of crafting with children of various ages and skill levels, I’ve developed strategies that maximize success while minimizing frustration for both kids and adults. The key lies in thoughtful preparation and realistic expectations that allow creativity to flourish within manageable boundaries.
Age-appropriate modifications ensure that every child can participate meaningfully regardless of developmental stage. Younger children focus on painting, gluing, and decorating tasks, while older kids handle cutting, detailed assembly, and complex design planning. Mixed-age groups work beautifully when tasks are distributed according to individual capabilities.
Workspace organization prevents chaos and promotes focus. I designate specific areas for different materials, use shallow containers that prevent spills and make supplies easily accessible, and establish clear boundaries for messy activities. Having cleanup materials readily available encourages responsibility and quick response to accidents.
Time management involves breaking complex projects into manageable segments that accommodate short attention spans while maintaining momentum toward completion. We often spread elaborate projects across multiple sessions, allowing paint to dry thoroughly and giving children time to plan their next steps thoughtfully.
Encouragement strategies focus on effort and creativity rather than perfection. I celebrate unique solutions, unexpected color combinations, and innovative approaches that demonstrate individual thinking. This attitude helps children feel confident about taking creative risks and expressing their personal artistic visions.
Wrapping Up: Celebrating Fall with Creativity
As autumn settles around us each year, I’m continually amazed by how pumpkin crafts capture the essence of the season while providing meaningful creative experiences for children. These ten projects represent just the beginning of endless possibilities for celebrating fall through hands-on creativity and artistic expression.
The true value of pumpkin crafting extends far beyond the finished products, though those certainly bring joy and beauty to our homes throughout the autumn season. The process itself builds skills, confidence, and memories that children carry with them long after the decorations have been stored away for another year.
Each pumpkin craft becomes a unique expression of childhood creativity, a tangible reminder of time spent exploring, experimenting, and creating together. The orange paint under tiny fingernails, the proud smiles as finished projects are displayed, and the excited chatter about what we’ll make next – these are the real treasures of our autumn crafting adventures.
As you embark on your own pumpkin crafting journey this fall, remember that the goal isn’t perfection but rather connection, creativity, and celebration of the season’s natural beauty through the wonderful lens of childhood imagination.

A Teacher with 5 years of experience. Our Expertise, is reliable to meet your full Academic development needs . Worked on many crafts and construction projects offering services from design to development to deployment over the years. You will find many of my works in my business portfolio on request.