Every fall I find myself excited to bring out craft supplies and dive into pumpkin-themed activities. Pumpkins are such a fun part of the season. They represent harvest, Halloween, and cozy autumn days. Over the years I have painted pumpkins, carved them, and even made pumpkin collages. But one of my absolute favorite activities is creating paper pumpkin people. These little paper characters are bursting with personality. Some end up looking silly, others look spooky, and a few even look like they could star in a cartoon.
When I sit down to make them with kids, the joy in their eyes is contagious. They start giggling as they decide if their pumpkin will be happy, angry, or goofy. Every pumpkin person takes on its own story, and I love how much imagination pours into such a simple project. In this post I’ll guide you through how to make paper pumpkin people step by step, share tips for crafting with kids, and give you ideas on how to display and enjoy them.
Materials You’ll Need
One of the best things about this craft is how little it requires. You do not need to run to a store for expensive supplies. I usually gather everything from my own craft box or from school basics. Here’s what I use:
Orange construction paper or cardstock for the pumpkins
Green construction paper for the stems and leaves
Black and white paper for eyes and mouths
Scissors
Glue stick or tape
Markers or crayons
Optional extras can make the pumpkin people even more fun. Think googly eyes, yarn for hair, glitter glue, stickers, or fabric scraps. Kids love variety, so the more options you offer, the more unique each pumpkin person will be.
Step-by-Step Instructions for Pumpkin People
You know that feeling when you walk into a store and see all those cute, colorful fall decorations? I love that cozy, autumn vibe, but sometimes those little decor items can have a surprisingly big price tag. A few years ago, I decided I wanted to make my own decorations instead of buying them. I started with something simple: a paper pumpkin.
It was such a fun and easy project that I’ve been making them every year since. Now, my house is filled with paper pumpkins of all sizes and colors. The best part? They don’t rot on my porch! I want to share how I make them with you. Trust me, if I can do it, you definitely can. All you need are a few basic supplies and a little bit of time. Let’s get our hands crafty!
Gathering Your Pumpkin-Making Gear
First things first, we need to collect our supplies. The coolest thing about this project is that you probably have most of this stuff lying around your house already.
Here’s my go-to list:
Paper: This is the star of the show! You can use so many different kinds.
Construction Paper: This is my top choice. It’s sturdy, comes in every autumn color you can imagine (orange, of course, but also yellow, white, and even purple!), and it’s really cheap.
Scrapbook Paper: If you want to get fancy, scrapbook paper has beautiful patterns. Think polka dots, stripes, or even spooky Halloween designs.
Old Book Pages or Maps: This creates a super cool, vintage-looking pumpkin. I once made a set out of an old road atlas, and they were a huge hit.
Scissors: A good, sharp pair of scissors makes everything easier.
Glue: A glue stick works perfectly. Liquid glue can sometimes warp the paper, so I stick with the stick! A hot glue gun is also awesome for the final step because it dries super fast, but it’s not a must-have.
A Stapler: This is our secret weapon for holding everything together quickly.
A Green Pipe Cleaner: This will become our pumpkin’s stem and vine. If you don’t have one, you can just cut a small strip of green paper and roll it up.
A Hole Punch: This is optional, but it’s helpful for one of the methods we’ll talk about.
A Pencil and a Small Bowl or Cup: For tracing.
Method #1: The Fancy 3D Paper Pumpkin
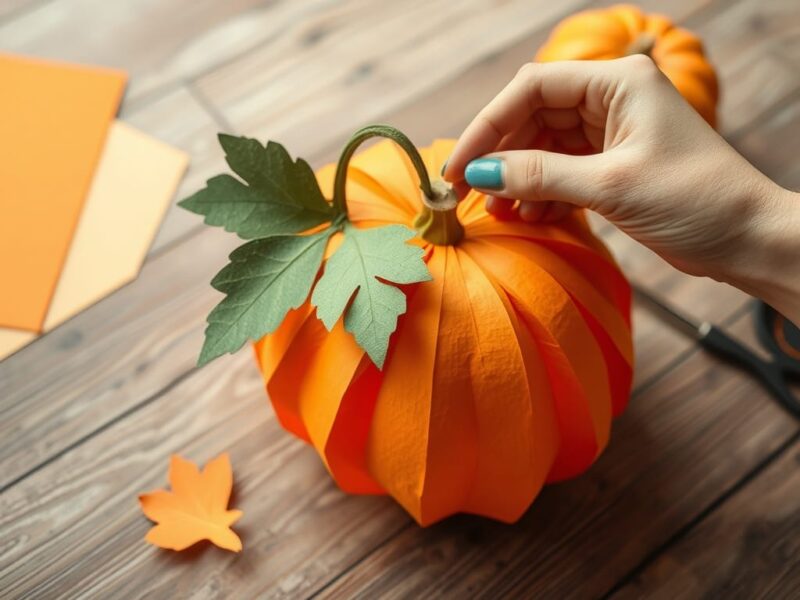
This one looks a little more complicated, but it’s just as easy. It creates a fuller, more rounded pumpkin that looks amazing on a mantelpiece.
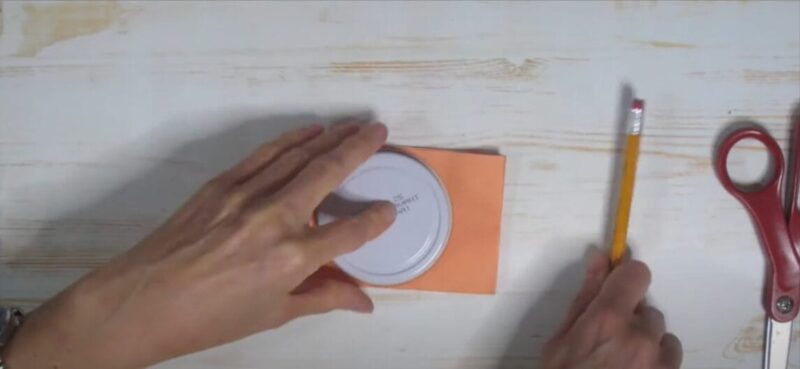
Step 1: Trace and Cut Your Pumpkin Shapes.
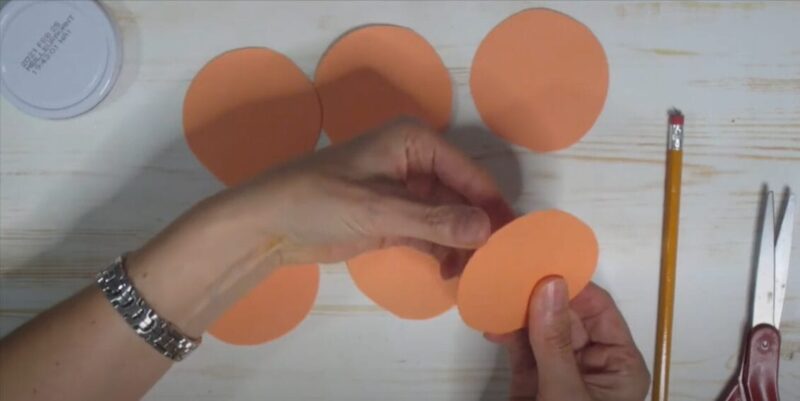
This is the most time-consuming part, but you can make it fun by listening to music while you do it. Grab your small bowl or cup and your pencil. Trace a circle onto your orange paper. You’ll need to trace and cut out about 8-10 of these circles for one pumpkin. The bigger the circle, the bigger your final pumpkin will be.
Step 2: Fold Each Circle in Half.
Take each of your paper circles and fold them perfectly in half. The colored side should be on the outside. Make a nice, sharp crease. You should now have a stack of paper half-circles.
See? Nothing too crazy. Once you have your supplies gathered on a table, we’re ready to start creating. I’m going to walk you through my two favorite methods. The first one is super simple, and the second one has a really cool 3D effect.
Step 3: Glue the Halves Together.
Take one of your folded circles and run your glue stick all over the outside of one half. Now, press another folded circle onto it. You are gluing the backs of the halves together. Continue doing this, gluing one half-circle to the next, until all of them are connected in a long line. It will look like a big, weird paper fan.
Step 4: Connect the Ends to Make a Sphere.
Here’s the cool part. Now, take the two end pieces of your paper chain and glue them together. As you do this, it will naturally pop open into a 3D ball shape! It’s seriously so satisfying to see it transform. You might need to hold the ends for a minute until the glue sets.
Step 5: Secure the Center and Add the Stem. To make sure your pumpkin doesn’t pop apart, take a long piece of string or yarn and tie it around the center crease of the pumpkin, pulling it tight. This also helps to give the pumpkin that classic, pinched-in look.
Finally, take your green pipe cleaner, roll it up a bit to make a stem, and use a dab of hot glue or strong glue to attach it to the top center of your pumpkin.
Getting Creative and Making It Your Own
Now that you know the basics, the real fun begins. This is where you can let your personality shine!
Mix and Match Colors: Don’t just use orange! Make a pumpkin with alternating purple and orange strips. Or use black and white paper for an elegant, modern look.
Add a Face: Want a Jack-o’-Lantern? Just cut out eyes, a nose, and a mouth from black construction paper and glue them on.
Make a Whole Family: Cut different sized strips or circles to make a big mama pumpkin, a medium papa pumpkin, and a tiny baby pumpkin. A pumpkin family!
Add Glitter: If you’re feeling sparkly, put a line of glue along the edges of your strips or circles and sprinkle glitter over it. Shake off the extra, and you have a glamorous pumpkin.
Making these paper pumpkins has become one of my favorite fall traditions. It’s a peaceful way to spend an afternoon, and at the end, you have something beautiful to show for it. They make great gifts for teachers, friends, or family members. So, grab some paper, put on some cozy music, and give it a try. I can’t wait for you to see what you create. Happy crafting
Method #2: The Simple Strip Pumpkin (My Go-To for Beginners)
This is the first method I ever tried, and it’s still one of my favorites. It’s quick, satisfying, and looks great.
Step 1: Cut Your Paper into Strips. Grab your orange paper. You’ll need about 10-12 strips. The size of your strips will decide the size of your pumpkin. For a medium-sized pumpkin, I cut my strips to be about 1 inch wide and 8 inches long. A little trick: if you fold your paper like a fan first, you can cut multiple strips at once. Saves a ton of time!
Step 2: Make a Hole and Stack ‘Em Up. Take your hole punch and punch a hole at both ends of every single strip. Make sure the holes are in the same spot on each strip! If you don’t have a hole punch, you can carefully use the tip of your scissors to poke a small hole. Just be gentle.
Now, line up all your strips. It’s like you’re making a little paper sandwich. Slide a brad through the hole at one end. If you don’t have a brad, no worries! You can just skip the hole-punching part for now and we’ll use the stapler in the next step.
Step 3: Fan Out and Connect the Other End. This is where the magic happens. Start fanning out your paper strips in a circle. It should start to look like a pumpkin already! Once you have them arranged in a nice, round shape, it’s time to connect the other end.
If you used a brad on the bottom, just bring the other ends together and slide another brad through those holes. If you didn’t use a brad, grab your stapler. Carefully gather the tops of all the strips and staple them together. Do the same for the bottom. It might take a little adjusting to get the shape just right. Don’t be afraid to bend and curve the strips!
Step 4: Add the Stem and a Curly Vine. Almost done! Take your green pipe cleaner. Poke one end right through the center of the top of your pumpkin (you might need to make a small hole with your scissors tip). Pull it through so about an inch or two is sticking out. This is your stem.
Now, for the fun, finishing touch. Wrap the rest of the pipe cleaner around your pencil. Slide it off, and you’ll have a perfect, curly vine! Attach this to your stem with a little glue or by just twisting it on.
And there you have it! Your very first paper pumpkin. Give yourself a pat on the back. Now, let’s try the other method.
Why I Love This Craft
I think the reason I come back to paper pumpkin people year after year is because they never get old. Each child brings something new to the table. I have seen shy kids beam with pride as they finish a pumpkin with big cartoon eyes. I have seen energetic kids create wild, funny characters that make everyone laugh. The flexibility of this craft means it works for any age group, and the results are always unique.
Conclusion: A Fun Way to Bring Pumpkins to Life
Paper pumpkin people are more than just a seasonal project. They are a way to encourage creativity, bring families together, and celebrate fall in a playful way. Every time I see a pumpkin person taped to my window or displayed on a classroom wall, I smile at the personality shining through. If you’re looking for a fun and easy fall craft, I highly recommend giving this one a try. You might be surprised by how much joy a little paper pumpkin can bring to your day.
A Teacher with 5 years of experience. Our Expertise, is reliable to meet your full Academic development needs . Worked on many crafts and construction projects offering services from design to development to deployment over the years. You will find many of my works in my business portfolio on request.