Quick answer: The easiest pumpkin carving design ideas use simple stencils for classic faces, animals like cats and owls, or geometric patterns that only need straight cuts. Sketching the design on paper first, then transferring it to the pumpkin with a marker, makes even detailed designs manageable for beginners.
Pumpkin carving does not have to mean hours of work with tiny detail tools. Plenty of great looking designs rely on simple shapes, bold outlines, and a good stencil instead of complicated freehand carving. Once you know a handful of reliable design types, from classic faces to animals to pattern-based cuts, you can pick something that matches your skill level and time budget. Here are 14 easy pumpkin carving design ideas to try this Halloween season.
Pumpkin Carving Basics at a Glance
| Tool | Best Use | Status |
|---|---|---|
| Serrated pumpkin saw | Cutting the lid and thick walls | Standard |
| Small detail knife | Fine lines and small shapes | Standard |
| Paper stencil and pins | Transferring a design accurately | Standard |
| Clay or loop scraping tool | Shaving skin for shallow relief designs | Varies |
| Multi-layer relief carving | Advanced, portrait-style designs | Caution |
| # | Design Idea | Best For |
|---|---|---|
| 1 | Classic Triangle Face | First timers |
| 2 | Silly Grinning Face | Kids and families |
| 3 | Black Cat Silhouette | Any skill level |
| 4 | Spider and Web | Classic Halloween look |
| 5 | Owl Face | Nature lovers |
| 6 | Geometric Star Pattern | Modern decor |
| 7 | Bat Silhouette | Simple silhouettes |
| 8 | Haunted House Scene | Intermediate carvers |
| 9 | Polka Dot Pattern | Beginners |
| 10 | Witch Hat and Moon | Porch displays |
| 11 | Ghost Face | Kids and families |
| 12 | Vine and Leaf Border | Fall-themed decor |
| 13 | Shaved Skin Portrait | Intermediate carvers |
| 14 | No-Carve Painted Face | Very young kids |
Rough Carving Time by Design
1. Classic Triangle Face
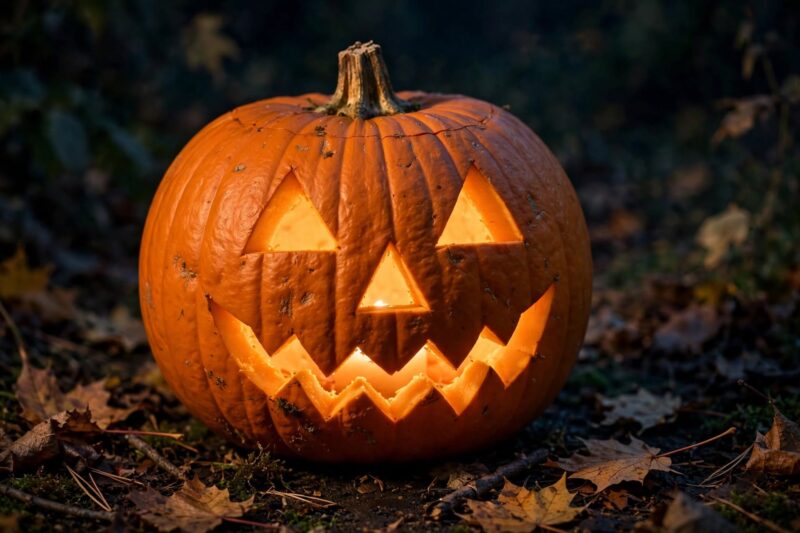
Cut two triangle eyes, a triangle nose, and a jagged zigzag mouth for the traditional jack-o’-lantern look everyone recognizes. This design is the fastest one on the list because every shape is straight lines, which means no curves to worry about getting even. Mark the triangles lightly with a marker first so both eyes end up the same size and height. Cut along your marked lines with a small serrated knife, working slowly through the thick pumpkin wall. This is the design most people learn first, and it still looks great lit up on a porch step.
2. Silly Grinning Face
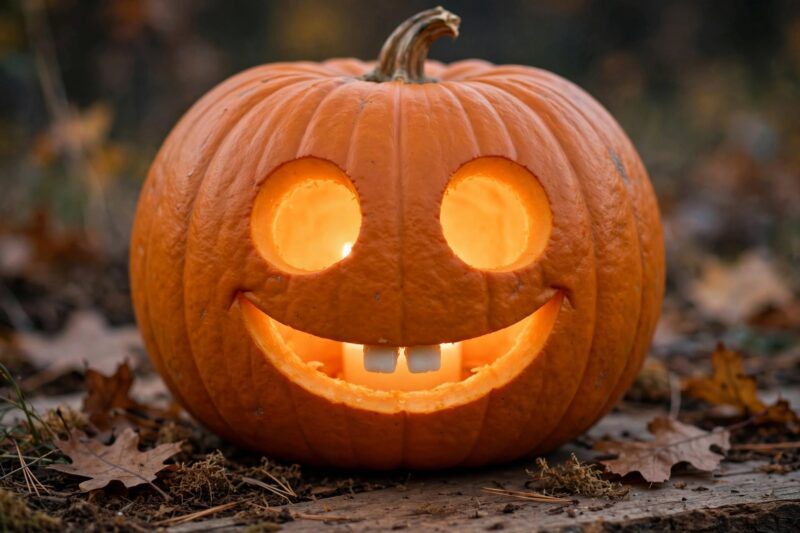
Cut round eyes, a curved smiling mouth, and a couple of visible teeth for a friendlier, less scary jack-o’-lantern. This design works well for families with younger kids who want a fun pumpkin without the traditional spooky face. Draw the eyes as simple circles or ovals instead of sharp triangles for a softer expression. Cut the mouth in one long curved line, then add two or three small tooth shapes along the top edge of the smile. This design is nearly as fast as the classic triangle face but reads as much more playful once it is lit.
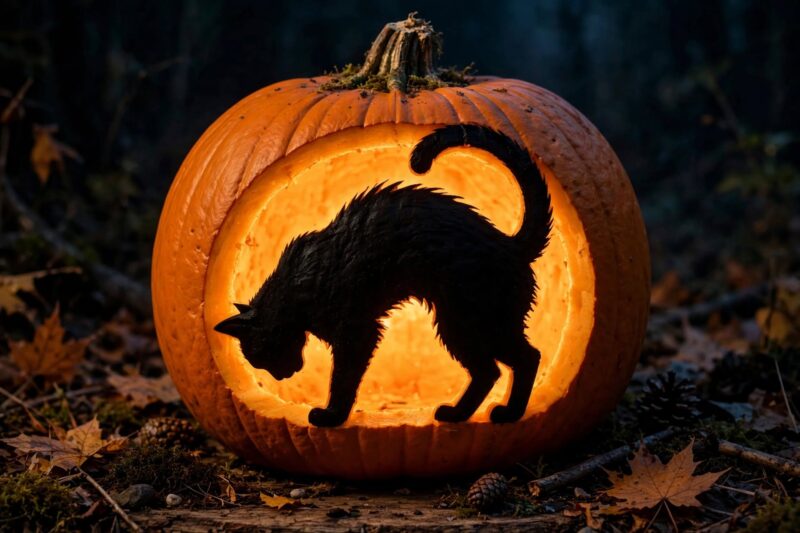
3. Black Cat Silhouette
Carve a full cat silhouette, arched back and tail included, straight through the pumpkin wall for a bold, recognizable shape. Animal silhouettes are popular pumpkin designs because you only need an accurate outline, not detailed shading or texture. Print or draw a simple cat outline on paper, then tape it to the pumpkin and poke small holes along the outline with a pin or toothpick. Connect the dots with your knife, cutting all the way through so light shines out in the exact cat shape. This design looks striking at night since the whole shape glows instead of just small face features.
4. Spider and Web
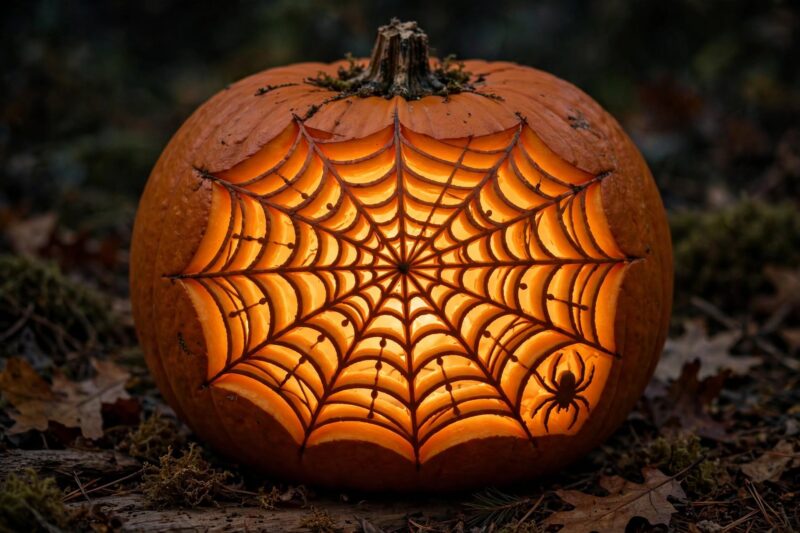
Carve a simple radiating web pattern across one side of the pumpkin with a small spider silhouette sitting in one corner. This design is a Halloween classic because webs are made of straight lines that are easy to plan and cut evenly. Start by marking a center point, then draw straight lines radiating outward like spokes on a wheel. Connect the spokes with curved lines to complete the web pattern, then add a simple oval spider body with eight thin leg lines nearby. This design works well as a stand-alone piece or paired with a face on the opposite side of the pumpkin.
5. Owl Face
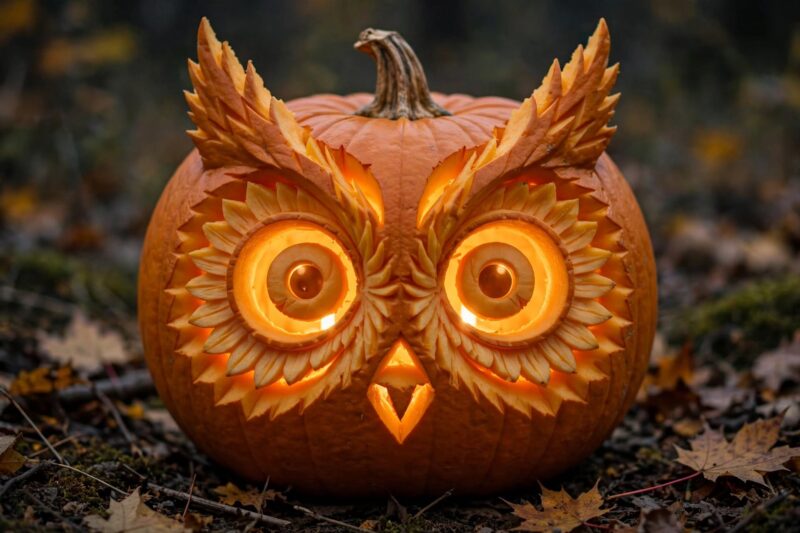
Carve two large round eyes, a small triangle beak, and pointed ear tufts for a friendly owl face pumpkin. Owls translate well to pumpkin carving because the rounded shapes match the natural curve of the pumpkin itself. Draw two big circles for the eyes, spaced evenly on either side of center, with a small triangle beak between them. Add two pointed triangle shapes at the top for ear tufts, and a few short curved lines beneath the eyes for feather detail if you want extra texture. This design fits especially well on a taller, narrower pumpkin since it echoes an owl’s natural head shape.
6. Geometric Star Pattern
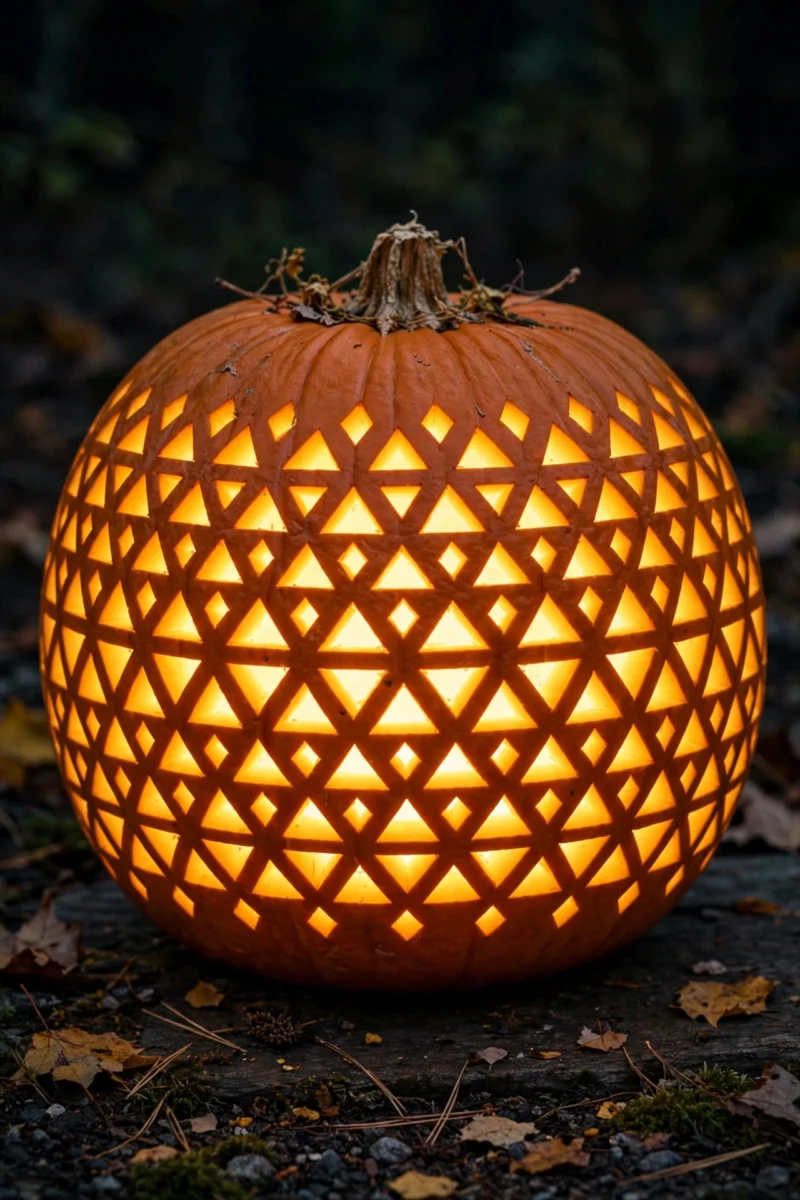
Carve a repeating pattern of small triangles, diamonds, or stars across the pumpkin instead of a single face or figure. Geometric designs have become a popular modern take on pumpkin carving because they rely on simple, repeatable shapes rather than freehand curves. Sketch a light grid across the pumpkin to help you space each shape evenly before cutting anything. Cut the shapes in a consistent size so the finished pattern reads as intentional rather than random. This design looks especially good with an LED light inside, since the many small openings create a speckled glow effect.
7. Bat Silhouette
Carve a wide-winged bat shape straight through the pumpkin for a simple, spooky silhouette design. Like the cat silhouette, a bat only needs an accurate outline to look effective once it is lit from inside. Sketch or print a bat outline with the wings spread wide, then transfer it to the pumpkin using the pin-and-connect method. Cut carefully along the wingtips since these thinner points can crack more easily than the rounder body shape. This design works well scaled up to fill most of one side of a larger pumpkin for maximum visual impact.
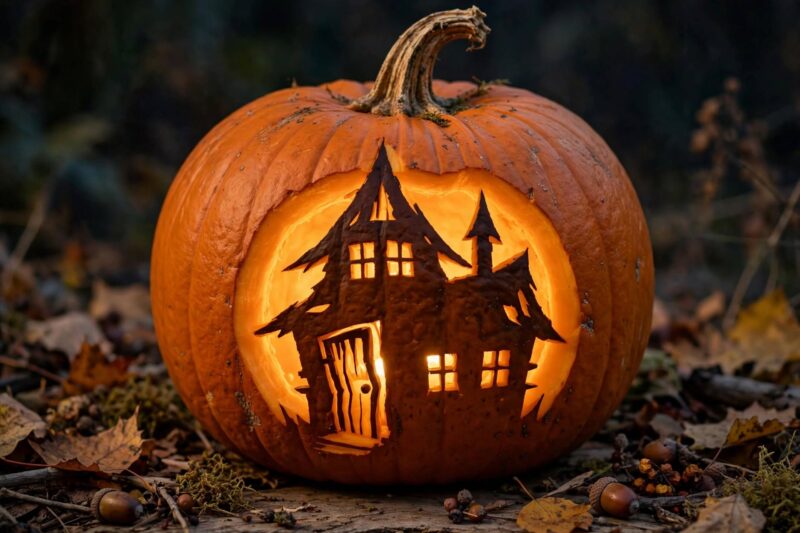
8. Haunted House Scene
Carve a simple haunted house outline complete with pointed roof lines, a crooked door, and a couple of small window shapes. This design takes more planning than a single face but still stays approachable since it is built from basic geometric shapes stacked together. Sketch the house outline first using triangles for the roof peaks and rectangles for the walls and windows. Cut the larger shapes first, like the roofline and walls, before adding smaller details like window panes. Adding a small bat or moon shape near the top of the house rounds out the scene without much extra carving.
9. Polka Dot Pattern
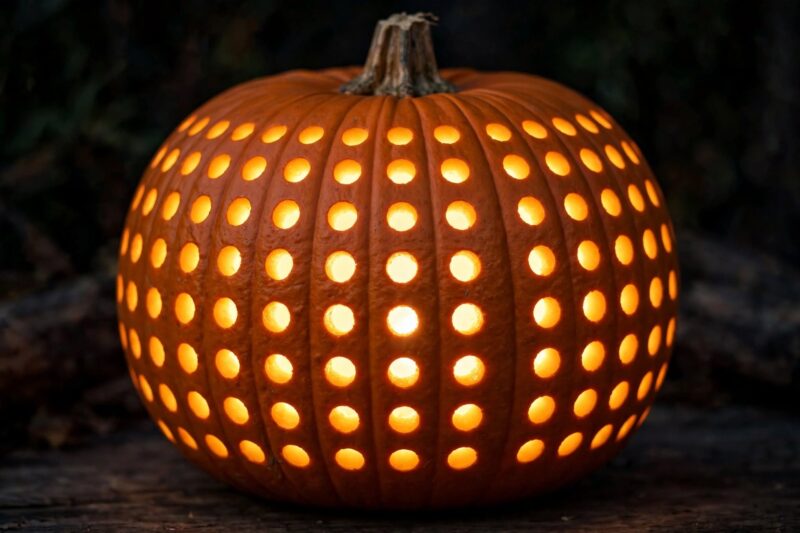
Drill or carve a grid of evenly spaced round holes across the pumpkin for a simple, modern polka dot look. This is one of the easiest patterns for true beginners since it only requires round holes of a consistent size, no straight lines or sharp corners to worry about. Use a drill bit or apple corer to create clean, even circles instead of trying to freehand each hole with a knife. Space the dots using light pencil marks in a grid pattern before you start cutting or drilling. This design looks especially nice with a colored LED light inside, since the dots scatter light in a fun, speckled pattern.
10. Witch Hat and Moon
Carve a simple crescent moon shape alongside a pointed witch hat silhouette for an easy, recognizable Halloween combo. Pairing two simple shapes together like this creates more visual interest than a single object without adding much extra carving time. Draw the crescent moon as one curved outer edge and one curved inner edge close together, then carve straight through both lines. Add the witch hat below or beside it using a simple triangle with a small curved brim at the base. This design works well on the front of a medium-sized pumpkin, especially set on a porch step at night.
11. Ghost Face
Carve a rounded ghost shape with a wavy bottom edge and two simple oval eyes directly onto the pumpkin surface. A ghost shape is forgiving to carve since the outline is just one soft, curving line rather than several separate pieces. Draw a tall oval or rounded rectangle for the ghost’s body, then replace the straight bottom edge with a wavy scalloped line. Cut two oval eyes and a small open mouth into the ghost shape itself for a face that glows from within. This design works well as a smaller accent carved into one side of a pumpkin that also has a face on the front.
12. Vine and Leaf Border
Carve a curling vine line with simple leaf shapes branching off around the top or base of the pumpkin instead of a face in the center. This design leans into the natural, fall-themed side of pumpkin carving rather than the spooky side. Draw one curving line as the main vine, then add small pointed leaf shapes branching off it at a few points along the curve. Keep the leaves simple, just a pointed oval with one center line for a vein, so they carve quickly. This idea works especially well combined with the geometric or polka dot patterns above for a fuller, layered design.
13. Shaved Skin Portrait
Instead of cutting all the way through the pumpkin, shave just the outer skin away in a design so light glows softly through the thinner flesh underneath. This technique creates a more detailed, shaded look than a straight cut-through design, since you control how much skin you remove in different areas. Use a small loop or clay carving tool to scrape away the outer skin layer, leaving the lighter inner flesh exposed in your design shape. Vary the depth of your scraping to create lighter and darker areas, similar to shading in a drawing. This method takes more practice than a simple cut-through design, so it works best once you are comfortable with basic carving.
14. No-Carve Painted Face
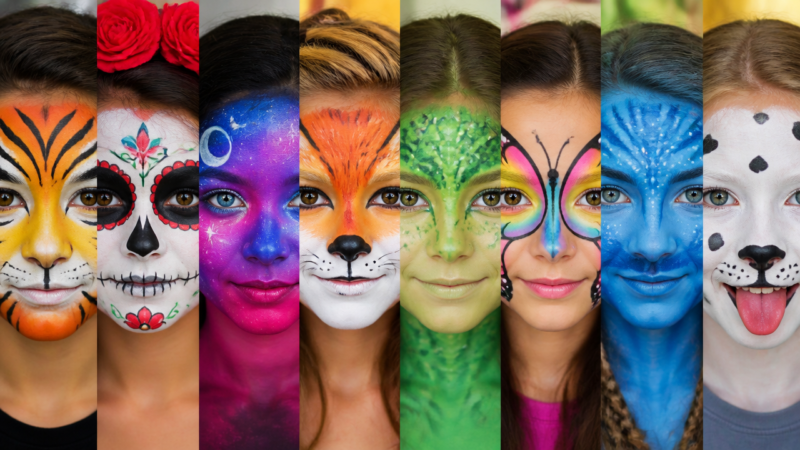
Paint a face or design directly onto the pumpkin using acrylic paint instead of cutting into it at all. This is the safest option for very young kids since there is no knife involved, and it also means the pumpkin lasts longer without rotting from open cuts. Sketch the design lightly in pencil first, then fill it in with acrylic paint in a few simple colors. Letting kids pick their own colors and add extra details, like dots or stripes, makes this a fun group activity. A painted pumpkin will not glow like a carved one, but battery tea lights placed nearby can still add a nice evening glow around it.
How Do You Carve a Pumpkin Step by Step?
Cut a lid or bottom opening at an angle so it does not fall through, scoop out the seeds and stringy pulp, then transfer your chosen design onto the surface before cutting it out with a small serrated knife. Cutting the opening at an angle rather than straight down keeps the lid from slipping into the pumpkin once it is time to close it back up. A metal spoon or dedicated pumpkin scoop makes clearing out the inside much faster than trying to use a regular kitchen spoon. Once the design is transferred, cutting slowly and checking your progress often helps prevent mistakes that are hard to fix once a section is fully cut through.
- Cut a lid or bottom opening at a slight angle so it stays supported when replaced.
- Scoop out the seeds and stringy pulp with a spoon or pumpkin scoop.
- Scrape the inner wall thinner in the area you plan to carve, so cutting is easier.
- Sketch or print your chosen design, then tape it to the pumpkin and poke holes along the outline.
- Connect the dots with a small serrated knife, cutting slowly and checking your progress.
- Remove the cut pieces gently, then add a light source inside to see the finished design glow.
Frequently Asked Questions
What is the easiest pumpkin carving design for beginners?
The classic triangle face is the easiest design since every cut is a straight line with no curves to manage. A silhouette design, like a cat or bat, is also very approachable once you use the pin-and-connect transfer method.
What size pumpkin works best for detailed carving?
Larger pumpkins over about 10 inches in diameter generally hold detail better since there is more surface area to work with. Smaller pumpkins are still fine for simple designs like faces or basic patterns.
How do you transfer a design onto a pumpkin?
Tape a printed or drawn design onto the pumpkin, then poke small holes through the paper and into the pumpkin skin along every line. Removing the paper leaves a dotted outline you can connect with your knife.
Can you carve a pumpkin without cutting all the way through?
Yes, shaving just the outer skin away creates a softer, shaded glow effect rather than a fully open cut-through design. This technique takes more practice but allows for more detailed, shaded designs.
How do you keep a carved pumpkin from rotting quickly?
Cleaning out all the pulp and seeds, then coating the cut edges lightly with petroleum jelly, can slow down rotting. Keeping the pumpkin somewhere cool and out of direct sun also helps it last longer once carved.
References
- Lowe’s, “Easy Pumpkin Carving Ideas for This Halloween” (2026)
- HD Supply, “Best Pumpkin Carving Ideas: 10 Creative Designs to Try” (2024)
- Harvard Foreman Program, “Free Pumpkin Carving Outlines Printable Designs” (2024)
- TicketLog, “25+ Trendiest Pumpkin Jack-O’-Lantern Ideas For 2025” (2025)

A Teacher with 5 years of experience. Our Expertise, is reliable to meet your full Academic development needs . Worked on many crafts and construction projects offering services from design to development to deployment over the years. You will find many of my works in my business portfolio on request.