Discover 13 creative pumpkin drawing ideas for every skill level. From cute jack-o'-lanterns to steampunk designs, learn step-by-step techniques for Hallow
Are you searching for pumpkin drawing ideas that go beyond the standard orange circle? Whether you want to sketch pumpkins for Halloween decorations, autumn crafts, or seasonal sketchbook challenges, there’s a style for every artist. From whimsical character designs to realistic studies, pumpkin drawings invite creativity and work for beginners through advanced artists. This guide walks you through 13 distinct approaches, each with clear techniques and practical tips to help you build confidence and improve your shading, texture work, and compositional skills. Ready to pick up a pencil and bring some pumpkins to life.
Quick Questions and Answers
Question: Why are pumpkin drawing ideas popular for Halloween?
Pumpkin drawing ideas are popular for Halloween because they are versatile symbols of the season that can be transformed into spooky jack-o’-lanterns, cozy cottages, or whimsical characters. Artists enjoy creating unique designs like steampunk pumpkins, sugar skulls, or pumpkins with animal features. These drawings fit perfectly into autumn decor, crafts, and sketchbook challenges, making them accessible for beginners and fun for all skill levels.
Question: Can you draw a pumpkin without using an oval shape?
Yes, you can draw a pumpkin without using a perfect oval by sketching a bumpy, irregular shape that mimics a natural pumpkin’s ridges. Start with a round or slightly wonky base and add curved vertical lines to create segments. This approach often results in a more realistic and organic look compared to a strict geometric oval.
Question: Do pumpkin drawings need to be orange?
While traditional pumpkins are orange, pumpkin drawings can be any color to match artistic styles or themes. Artists often use white pumpkins for sugar skull designs, glass pumpkins with transparency effects, or even pumpkins from other seasons. Creative ideas include steampunk metals, pastel shades, or glowing interiors that shift the color palette beyond standard orange.
Selection Criteria for Your Pumpkin Sketch
Choosing the right pumpkin drawing idea depends on three core factors: your artistic goals, the space you’re working in, and the mood or style you want to capture.
First, think about your end goal. Are you after a whimsical character that makes people smile, a realistic botanical study, or a decorative pattern piece? Each approach uses different techniques. A smiling jack-o’-lantern prioritizes personality and expression, while a realistic pumpkin leans into shading and contour work.
Compositional space matters too. If you’re filling a poster-sized canvas, you can layer in intricate details like plaid patterns or background scenery. Drawing on sticky notes or small sketchbook pages? Stick with bold, minimalist designs that read clearly at small scale. Medium-sized work opens up room for textural experiments without overwhelming complexity.
Your styling choice shapes everything else. Classic Halloween jack-o’-lanterns work year-round and suit holiday cards, invitations, and seasonal décor. Autumn-themed pumpkins—maybe surrounded by falling leaves or paired with scarecrows—feel homier and less spooky. Character-driven designs (pumpkins wearing hats, holding props, or with animal features) invite playful energy and work well for kids’ art projects or journal spreads.
## 1. Classic Smiling Jack-O’-Lantern Face
This is where most people start, and for good reason. The classic jack-o’-lantern has broad, forgiving proportions and teaches core principles without frustration.
Start by drawing a simple oval or circle. Add a stem at the top—make it wider at the base and taper it slightly toward the stalk. Then comes the personality: two large, round or almond-shaped eyes, a triangular nose, and a wide crescent or toothy grin. The key is keeping the features large and symmetrical enough that asymmetry reads as charm, not mistake.
Beginners often rush the smile. Slow down and sketch light guidelines first. The mouth should span roughly two-thirds of the pumpkin’s width. Curve it upward at the ends to amplify friendliness. Once you’re happy with the outline, darken your lines and erase the guides.
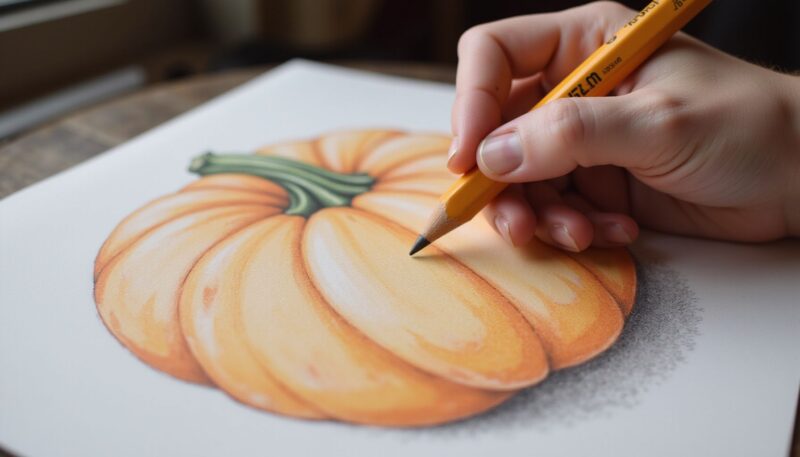
Add depth by shading the underside of the pumpkin and the inside of the mouth darker than the top. Even simple pencil shading transforms a flat drawing into something with volume.
## 2. Cute Pumpkin with Rosy Cheeks and Expressive Eyes
Build on the basic structure but dial up the charm with character details. This style works beautifully for autumn greeting cards, journal spreads, or quick sticky-note sketches.
Draw your pumpkin oval, then position the eyes higher and closer together than the classic jack-o’-lantern. Make them larger and rounder—maybe even add a little shine or highlight dot inside each eye to suggest light and life. Skip the aggressive grin; instead, draw a small, gentle smile or a closed, content mouth. The real magic happens with the cheeks: small circles or ovals placed just below the eyes, lightly shaded with pink, peach, or a warm colored pencil.
This sweet version appeals especially to younger artists and works on smaller canvases. The proportions are nearly forgiving, and adding rosy cheeks is a failsafe way to inject personality without technical skill.
## 3. Pumpkin Wearing a Witch’s Hat
Adding a witch’s hat elevates a simple pumpkin into a full character and opens up room for compositional storytelling.
Start with your pumpkin base as usual. For the hat, draw two distinct shapes: a wide, flat brim and a tall, pointed crown above it. A thin band or belt line separates the two. The brim should be slightly wider than the pumpkin’s own width so it sits naturally atop the oval. Add a buckle or band detail on the crown for charm.
The structure matters here. If the brim and crown feel disconnected or unstable, the whole drawing falls flat. Sketch lightly first, checking proportions before committing to final lines.
Shading the hat darker (black or deep purple) creates automatic contrast and makes the pumpkin pop forward. A small cast shadow beneath the hat’s brim adds realism. This design works especially well for Halloween cards or autumn wall art, and the hat construction teaches foundational hat-drawing skills you can apply to other characters later.
## 4. Pumpkin with Plaid or Textile Pattern
Texture transforms a basic pumpkin into something decorative and visually rich. Plaid is forgiving and teaches pattern consistency.
Begin with your stem and a sturdy oval body. Once the pumpkin shape is solid, lightly sketch a grid pattern across the surface using curved lines that follow the pumpkin’s contour—this is crucial. Straight gridlines flatten the form; curved ones honor the roundness underneath.
Now layer the plaid: draw vertical lines in one color or pencil shade, then horizontal lines in a contrasting shade. Where they intersect, you might add a small X or diamond if you want extra detail. The pattern doesn’t need to be perfect; slight irregularities make it read as hand-drawn and charming.
Colors enhance this idea dramatically. Use warm oranges and deep reds for a classic autumn plaid, or shift to cool purples and teals for something more whimsical. This design teaches patience and consistency—both skills that pay off across all drawing work.
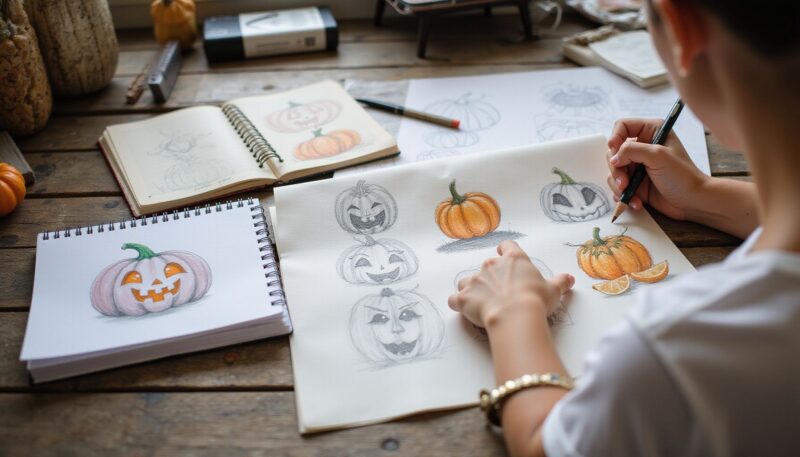
## 5. Three Stacked Pumpkins with Different Expressions
Stacking pumpkins introduces composition, scale variation, and the chance to explore multiple emotional expressions in one drawing.
Draw three pumpkins, each slightly smaller as they go up (or keep them the same size for a different look—your choice). Position them so they overlap slightly, with the bottom pumpkin largest and most forward. Give each pumpkin its own face: maybe a sleepy, content expression on the bottom; a surprised or confused look in the middle; and a happy, wide-eyed grin on top.
The challenge here is making sure each face feels distinct without the overall drawing becoming chaotic. Use consistent line weights and stick to a limited expression vocabulary—eyes, nose, mouth, no more. Overlapping naturally creates depth, but you can reinforce it with slight shading: the top pumpkins cast subtle shadows on the ones below.
This design appeals to intermediate artists and kids alike. It’s engaging enough to hold attention and teaches grouping and composition basics.
## 6. Pumpkin as a Cozy Cottage
Transform the pumpkin’s form into a dwelling—windows, a door, maybe a little chimney. This whimsical take merges still-life and architecture.
Draw your pumpkin oval as the house body. Add a stem that extends upward like a chimney, with a small rectangle at the top to suggest the flue opening. Now add windows: small squares or rectangles spaced evenly across the pumpkin, and a door—maybe a rounded rectangle or arched entrance—toward the bottom center. Small details sell the concept: window panes sketched inside the windows, a doorknob, maybe a small step or stoop leading up to the door.
Add warmth with shading. Make the windows glow by leaving them light and adding dark shadows around their frames. A small curl of smoke from the chimney, rendered in gentle pencil strokes, suggests life inside.
This design works beautifully as a centerpiece illustration for fall-themed children’s books, greeting cards, or season-specific journal spreads. The narrative quality—the sense that tiny creatures live inside—invites viewers to engage emotionally with the drawing.
## 7. Steampunk Pumpkin with Gears and Mechanical Details
For artists seeking a challenge and a more mature aesthetic, steampunk pumpkins blend organic form with intricate mechanical elements.
Start with your pumpkin outline, but this time add exoskeletal details. Draw small gears of varying sizes emerging from or embedded across the surface. Add pipes that curve and connect around the form—they can be simple straight or curved lines with small circles at joints. Include a pressure gauge, dials, or valve shapes. A windmill propeller on top or mechanical legs extending from the bottom push the concept further.
The key is restraint. Too many details overwhelm the core pumpkin; too few and it reads as decoration rather than integration. Aim for gear clusters in 3-4 strategic locations. Use darker, crisper lines for metal elements to distinguish them from the softer pumpkin contours.
Shading becomes more complex here. Metal reflects light differently than organic matter, so gears and pipes should have sharper highlights and more defined shadows. This design teaches value control and the importance of visual hierarchy—deciding what draws the eye first, second, and third.
## 8. Pumpkin with Animal Features (Cat Ears, Owl Wings)
Anthropomorphizing the pumpkin by adding animal characteristics creates immediate personality and appeals to a wide audience.
Start with your pumpkin base. For a cat-pumpkin, add two pointed ears at the top—simple triangles work, or sketch slightly more detailed feline ears with inner pink or lighter shading. Draw whiskers extending from the sides using fine, curved lines. Add a tiny pink nose and cat-eye shapes (slightly slanted, almond-like).
For an owl-pumpkin, add large wing shapes extending from the sides of the pumpkin—think rounded, feathered silhouettes. Big, round owl eyes (two large circles) with heavy eyelids create that characteristic stern-but-wise expression. A small curved beak completes the look.
These hybrids are remarkably forgiving. The animal elements are simple enough that a child can execute them, yet the results feel instantly more expressive and character-driven. They work especially well for children’s art projects, bulletin boards, or quick sketches in a journal.
## 9. Melting or Dripping Pumpkin
Challenge your understanding of form by depicting pumpkin material literally melting or dripping, like wax from a candle.
Draw your pumpkin as usual, but let parts of it deform and run downward in elongated, organic drips. Keep the basic pumpkin outline recognizable at the top, then allow the bottom third to dissolve into wavy, flowing forms that puddle on the ground. Add thin drip lines extending from the pumpkin body down to the puddle, suggesting liquid motion.
Shading is essential here. The dripping sections should be darker and more translucent-looking than the solid pumpkin top, creating a visual sense of weight and gravity. Highlight the edges of puddles to suggest reflective surface.
This design suits more advanced artists and those exploring surrealism or whimsy. It teaches dynamic line work, exaggeration, and how to convey movement in a static drawing. Perfect for a themed sketchbook or concept art portfolio.
## 10. Pumpkin with Glowing Interior or Transparent Glass Effect
Create depth and luminosity by drawing a pumpkin as if lit from within or made of translucent glass.
Sketch your pumpkin outline, then divide it into sections with curved contour lines. Lightly shade the outer skin with a warm orange, but leave strategic areas much lighter—these are where inner glow shines through. Add candles or a glowing energy source inside, visible through the form, using bright yellows and oranges. Enhance the effect by darkening areas where the glass or skin blocks the light most heavily.
For a glass pumpkin, use parallel highlight lines along edges and curves to suggest reflective surfaces. Distort background elements slightly where glass warps light. Add subtle shadows on the ground to ground the form.
This advanced technique teaches understanding of light behavior, translucency, and how to suggest different materials through shading and line work alone. It’s ambitious but incredibly rewarding and produces gallery-quality sketches when executed well.
## 11. Sugar Skull Pumpkin
Combine Day of the Dead aesthetics with pumpkin form by covering the surface with intricate skull and flower patterns.
Draw your pumpkin base, then lightly map out regions for pattern placement. Sketch ornamental designs inside the pumpkin outline: small skulls, marigolds, scrolls, diamonds, and swirls. Use consistent line weight and rhythm to keep the design cohesive. Mirror patterns across a vertical center line for balance—this traditional approach feels intentional and polished.
Fill solid areas with color or shading (purples, golds, blacks traditionally) and leave other areas negative space. The contrast between pattern and empty space is what makes sugar skull designs sing.
This design works beautifully when rendered in markers, colored pencils, or digital media. It appeals to artists interested in cultural traditions and intricate detail work. Scaling up to large format makes it suitable for framed wall art or community mural projects.
## 12. Pumpkin in a Scenic Background (Sunset, Pumpkin Patch, Moonlit Field)
Contextualize your pumpkin by surrounding it with complementary scenery, turning a simple study into a full illustration.
Draw your pumpkin as the focal point in the foreground. Behind it, add a dramatic sky: a glowing sunset with layers of warm orange, pink, and purple gradually fading to cooler tones at the horizon. Or sketch a nighttime scene with a moon, stars, and silhouetted distant trees. For a pumpkin patch concept, draw several smaller pumpkins in the background, slightly out of focus or smaller in scale to emphasize distance.
Foreground elements ground the composition: grass, fallen leaves, a wooden fence, or scattered harvest vegetables add narrative context and fill the lower frame. Keep background details simpler than foreground details—this reinforces spatial depth.
Lighting becomes crucial. If the sky is sunset, warm light should graze the pumpkin’s top and left edge, leaving cooler shadows on the right. This lighting consistency ties foreground to background visually.
## 13. Pumpkin with Personality—Scared, Surprised, or Confused Expression
Push beyond the standard smile by exploring a full range of emotional expressions, teaching facial anatomy and subtlety in feature placement.
Draw your pumpkin structure. Now, move the eyes close together and up toward the brow line for a scared expression, with the mouth forming a small “O” of surprise. For a confused look, angle the eyes slightly inward and upward, add a crooked smile or tilted mouth, maybe even tiny lines above the eyes like eyebrows furrowing. A worried pumpkin might have a downturned mouth and wide, anxious eyes.
The magic is in small shifts. A centimeter difference in eye placement or mouth curve completely transforms the mood. Sketch lightly and test multiple expressions before committing to final lines. Pay attention to eyebrow placement too, even if your pumpkins don’t have distinct brows—subtle shadow work can suggest them.
These emotional expressions teach that drawing isn’t about photorealism; it’s about communication. A well-executed worried pumpkin tells a story in seconds. These designs work wonderfully in comic strips, character design sheets, or as emotional vocabulary lessons for children’s art.
Common Mistakes to Avoid
Stiff, vertical stems. Real pumpkins have character, and their stems lean. Add slight curves or angles instead of perfectly vertical lines. A tilted stem also makes the pumpkin feel more alive.
Symmetrical faces that feel cold. Humans find slight asymmetry more endearing than perfect mirror images. Let one eye sit fractionally lower than the other, or angle the smile slightly. These tiny imperfections warm up a drawing immediately.
Overworking details without establishing form first. Beginners often jump to pattern or texture before the pumpkin’s basic shape and proportions are solid. Always nail the foundational form first. Details can’t save a wonky foundation.
Ignoring contour lines. Curved, flowing lines that follow the pumpkin’s roundness create volume. Straight horizontal lines flatten everything. Let your pattern or shading lines wrap around the form.
Forgetting the stem. The stem grounds the pumpkin and provides a natural anchor point for the eye. Even a tiny stem makes a massive difference. Neglecting it leaves the pumpkin feeling adrift.
Using uniform darkness everywhere. Shading should vary. Shadows are darkest in corners or undersides; highlights are brightest on top-facing surfaces. This contrast teaches the eye about form.
Style
Difficulty
Best For
Key Technique
Classic Jack-O’-Lantern
Beginner
First-time artists, cards
Large symmetrical features
Cute with Rosy Cheeks
Beginner
Greeting cards, journals
Soft proportions + color accents
Witch’s Hat
Intermediate
Holiday art, character design
Layered hat construction
Plaid Pattern
Intermediate
Art journals, decoration
Contoured grid lines
Stacked Pumpkins
Intermediate
Composition practice
Overlapping + varied expression
Cozy Cottage
Intermediate
Storybook illustration
Architecture + narrative
Steampunk Mechanics
Advanced
Concept art, fan projects
Gear + pipe integration
Animal Hybrid
Beginner-Intermediate
Kids’ projects, journals
Additive character features
Melting Effect
Advanced
Surrealism, digital
Dynamic form distortion
Glass/Glowing Interior
Advanced
Portfolio pieces
Light + translucency
Sugar Skull Pattern
Intermediate-Advanced
Cultural art, detail work
Ornamental symmetry
Scenic Background
Intermediate-Advanced
Full illustration, framing
Atmospheric perspective
Emotional Expression
All levels
Character studies, comics
Subtle feature placement
Who These Designs Are Best For
Kids and Beginners: Start with classic jack-o’-lanterns or cute pumpkins with rosy cheeks. These designs have large, forgiving proportions and teach core drawing fundamentals without overwhelming complexity. The satisfaction of finishing a complete drawing builds confidence faster than struggling with intricate details.
Journaling Enthusiasts: Sticky-note-friendly designs like small cute pumpkins, emotional expressions, or simple cottage pumpkins are perfect for quick, regular sketching. These small-scale works emphasize expressive features over technical detail, making them ideal for logging moods or capturing seasonal moments in a visual diary.
Intermediate Hobbyists: Try stacked pumpkins, plaid patterns, or pumpkins wearing hats. These designs build on foundational skills by introducing composition, pattern consistency, and accessory design. They’re challenging enough to keep learning interesting but accessible enough not to frustrate.
Advanced Artists and Portfolio Builders: Steampunk pumpkins, glass-effect work, sugar skull designs, and scenic backgrounds let you showcase technical skill and conceptual thinking. These pieces work beautifully in professional portfolios, social media, or framed wall art. They teach sophisticated shading, spatial awareness, and design thinking.
Character Designers and Illustrators: Emotional expressions, animal hybrids, and character pumpkins with accessories are foundational studies for character work. These sketches teach how tiny shifts in feature placement communicate personality and emotion—skills that transfer directly to human and creature design.
Professional Tips for Better Sketches
Master the stem first. A strong stem grounds the entire drawing and prevents the pumpkin from feeling like it’s floating. Make the base wider than the tip, and let it connect naturally to the pumpkin body. Practice drawing 10 stems before moving to full pumpkins if you’re struggling.
Follow the contour. This is the single most transformative technique. Instead of drawing horizontal lines across a pumpkin, imagine lines wrapping around its curve like latitude lines on a globe. Curved, flowing lines create volume; straight lines flatten everything. This principle applies to shading, pattern work, and ridge lines.
Leverage strategic shading. You don’t need to shade every surface to create form. Instead, identify the shadow areas—typically the underside and bottom third of the pumpkin—and keep them consistently darker than top-facing surfaces. This simple choice alone elevates a sketch from flat to sculptural.
Enhance with staging. Background elements don’t need to be detailed. A simple glowing sunset, a silhouetted tree line, or scattered fallen leaves immediately transforms a single pumpkin into a complete scene. Even subtle additions—a faint moon, a few stars, or a texture line suggesting ground—anchor the pumpkin in a believable space.
Vary your line weight. Thicker lines attract the eye; thinner lines recede. Use slightly thicker lines for the pumpkin’s outer edge and thinner lines for internal details like ridge lines or pattern elements. This hierarchy helps viewers understand what to look at first.
Practice restraint. The urge to add more is real, but empty space around your pumpkin gives it room to breathe. A busy, detailed background can actually minimize your main subject. Let the pumpkin be the focus and use supporting elements sparingly.
FAQ
Q: Are there easy pumpkin drawing ideas for beginners?
Yes, beginners can start with simple ideas like a basic pumpkin outline with a stem and vertical ridge lines, or a cute pumpkin with rosy cheeks and a smile. Tutorials often suggest sketching an oval, adding a stem, and drawing curved lines for ridges. Other easy options include stacking three pumpkins with different faces or drawing a pumpkin patch at night with simple glowing eyes.
Q: How do you make a pumpkin drawing look 3D?
To make a pumpkin drawing look 3D, add curved vertical lines that follow the pumpkin’s round form to create ridges and depth. Use shading techniques by applying lighter tones on the top and sides while darkening the bottom and shadowed areas. Adding contour lines on the stem and overlapping colors with oil pastels or pencils also enhances the three-dimensional effect.
Q: Will pumpkin drawing ideas work for kids?
Pumpkin drawing ideas work well for kids because they are simple, recognizable shapes that can be customized with fun faces, animals, or seasonal themes. Children can easily draw stacked pumpkins with different moods, a pumpkin with cat ears, or a pumpkin as a cozy cottage with windows. These projects encourage creativity while remaining accessible for young artists using pencils or markers.
Q: When is the best time to draw pumpkins?
The best time to draw pumpkins is during autumn, especially in October and November when Halloween and Thanksgiving are celebrated. However, pumpkin art is also popular for general fall decor, sketchbook challenges, or seasonal crafts anytime of the year. Artists often create pumpkin drawings for holiday cards, party invitations, or home decorations leading up to these events.
Q: What are some fun pumpkin drawing themes?
Fun pumpkin drawing themes include a pumpkin as a cozy cottage, a steampunk pumpkin with gears and pipes, or a pumpkin planet for sci-fi scenes. Other creative ideas involve pumpkins with animal features like owl wings or cat ears, a melting pumpkin dripping with candles, or a pumpkin expressing emotions like nervousness or confusion. Sugar skull and haunted pumpkin head themes are also popular.
Q: Is drawing a pumpkin hard for adults?
Drawing a pumpkin is not hard for adults because it starts with simple shapes like ovals or circles and basic ridge lines. Adults can challenge themselves with advanced techniques like transparency in glass pumpkins, detailed shading for realism, or complex themes like steampunk mechanics. Many tutorials break the process into easy steps, making it accessible for any skill level.
Q: Where can I find step-by-step pumpkin drawing tutorials?
You can find step-by-step pumpkin drawing tutorials on YouTube, art blogs, and educational sites. Artist Been offers a comprehensive guide with 50+ easy pumpkin drawing ideas, while Smiling Colors provides detailed video walkthroughs for 7 distinct pumpkin sketches. Many tutorials include printable guides or detailed instructions for beginners and advanced artists alike.
My Experience With 13 Popular Pumpkin Drawing Ideas for Every Home
I’ve sketched probably two hundred pumpkins at this point—some on napkins, some in dedicated sketchbooks, way too many on the margins of grocery lists. What strikes me most is how forgiving pumpkins are as a teaching tool. You can fail gloriously and still end up with something charming. That rounded form hides a multitude of proportion sins.
The witch’s hat design taught me something I use constantly now: complexity isn’t about filling every inch of the page. The hat works because it’s three simple shapes—brim, crown, buckle—arranged with intention. That restraint is harder than adding details; it requires knowing what to leave out.
I spent weeks frustrated with contour lines until I realized I was thinking of them as decoration instead of structure. The moment I started imagining them as wrapping around the pumpkin’s body like latitude lines, everything clicked. Flat pumpkins vanished overnight. That single shift in mindset pays off across all form drawing.
The emotional expression variations are where pumpkins stopped being cute and started feeling like character work. A pumpkin with slightly inward-angled eyes and a crooked smile has personality, while perfectly symmetrical features fall flat. Asymmetry isn’t a mistake—it’s a feature. I apply that lesson constantly now to faces, posture, and design.
Which of these 13 ideas appeals most to you? Are you drawn to the technical challenge of steampunk mechanics, or do the simpler expressions suit your current skill level better?
Latest Updates
Pumpkin drawing remains a cornerstone of seasonal art practice, especially as bullet journaling and digital illustration platforms make sharing quick sketches effortless. In 2025 and beyond, artists are blending traditional pumpkin concepts with digital effects—combining hand sketches with digital glow overlays or using tablet apps to layer textures over drawn pumpkins. Sugar skull pumpkins have grown increasingly popular as artists explore cultural aesthetics and ornamental design traditions.
Community challenges on platforms like Instagram and TikTok regularly feature pumpkin sketches in October and November, exposing new audiences to these designs and encouraging participation across skill levels. The accessibility of tutorials means that even absolute beginners see quick wins, which builds momentum for continued art practice.
For those picking up pumpkin drawing as a skill-building exercise, the foundation remains unchanged: master your stem, respect contour lines, and let shading communicate form. Whether you’re creating work for a sketchbook, a greeting card, or social media, the principles transfer directly.
References
Artist Been. (n.d.). 50+ Easy Pumpkin Drawing Ideas for Beginners. Artist Been. https://artistbeen.com/pumpkin-drawing-ideas/
Vondy. (n.d.). Best Pumpkin Drawing Ideas Easy. Vondy. https://www.vondy.com/pumpkin-drawing-ideas-easy–7KWzTORs
Shihori Obata. (n.d.). How to Draw a Pumpkin: Step-by-Step Easy Drawing Tutorial. Shihori Obata. https://www.shihoriobata.com/blog/how-to-draw-a-pumpkin/
A Teacher with 5 years of experience. Our Expertise, is reliable to meet your full Academic development needs . Worked on many crafts and construction projects offering services from design to development to deployment over the years. You will find many of my works in my business portfolio on request.