Quick Answer
Quick answer: Bleach custom tops transform dark cotton garments using chemical discharge technique to create light patterns. Popular methods include freezer paper stencils, spray bottle reverse tie-dye, paintbrush lettering, and foliage silhouettes. Dilute household bleach with water at a 1:1 ratio for optimal fabric control.
Bleach art is one of the most popular ways to upcycle dark cotton shirts into custom apparel. By stripping away shirt dye, you can create high-contrast graphics, celestial patterns, or vintage distressing without buying expensive screen printing inks. In 2026, bleach customization ranges from sharp stencil art to painterly brush techniques.
The table below summarizes essential bleach design styles, recommended application tools, and suitable shirt base colors.
| Bleach Technique | Application Tool | Best Base Color | Contrast Result |
|---|---|---|---|
| Freezer Paper Stencil | Fine Mist Spray Bottle | Black Cotton Tee | Bright Rust Orange |
| Reverse Tie-Dye Spiral | Squeeze Bottle | Navy Blue Tee | Soft Coral Pink |
| Paintbrush Fine Line Art | Synthetic Detail Brush | Dark Green Tee | Warm Tan Yellow |
| Natural Fern Silhouettes | Press Spray Bottle | Maroon Red Tee | Cream White |
| Bleach Gel Stamp Art | Silkscreen Stamp | Charcoal Grey Tee | Light Grey White |
Processing Time Required for Color Change (Minutes)
1. Freezer Paper Stencil Graphics
Freezer paper stenciling allows you to create sharp graphic prints on dark tops using liquid bleach spray. The plastic coating on freezer paper adheres temporarily to cotton under a warm iron.
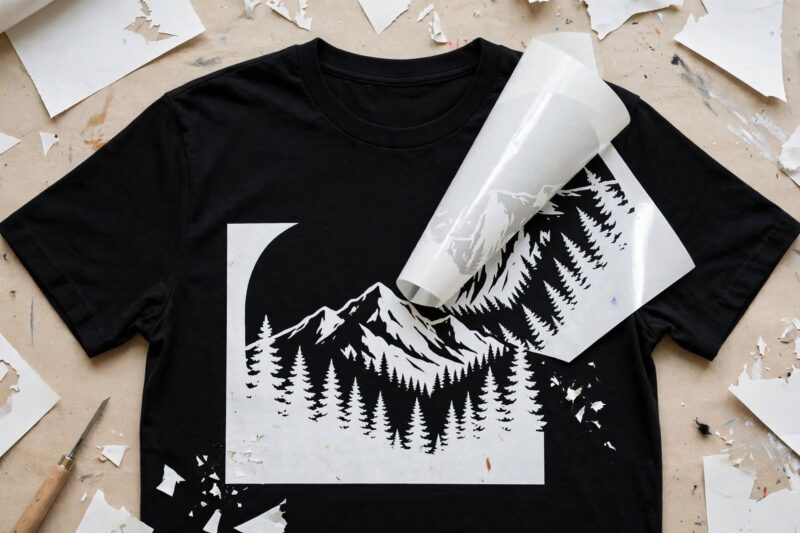
Trace your design onto the paper side of freezer paper and cut out your graphic using a craft knife. Iron the stencil shiny-side down onto the front of your shirt. Lightly mist a 50/50 bleach and water mixture over the stencil, then peel off the paper once the fabric changes color.
This technique prevents bleach from bleeding under stencil edges, giving crisp graphic outlines.
2. Reverse Spiral Tie-Dye
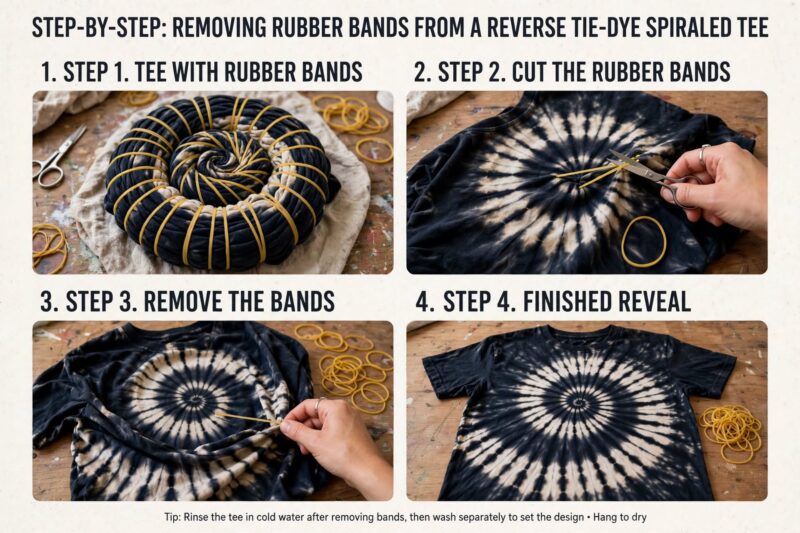
Reverse tie-dye uses bleach on dark garments instead of applying traditional dye to white shirts. Pinch the center of a black or navy shirt, twist it into a flat disc, and secure it with rubber bands.
Apply diluted bleach to alternating wedges using a squeeze bottle. Watch the color shift from black to deep orange, then submerge the shirt in a cold water bath to halt the chemical reaction.
According to textile tutorials on Upcycle Design Lab, rinsing in hydrogen peroxide neutralizes remaining active bleach and preserves cotton fiber strength.
3. Freehand Brush Lettering
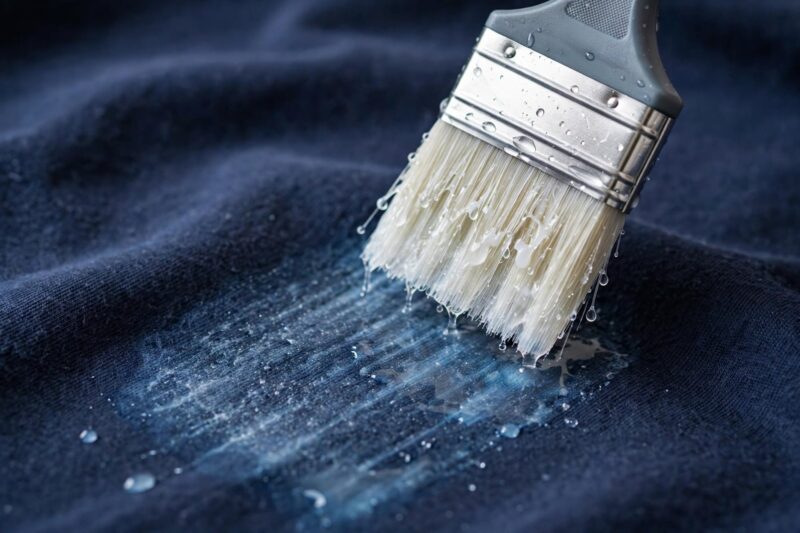
Dipping synthetic paintbrushes into household bleach allows you to paint calligraphy or illustrations directly onto fabric. Synthetic bristles resist chemical breakdown far better than natural animal hair brushes.
Insert a sheet of thick cardboard inside the shirt to prevent liquid from soaking through to the back panel. Work in smooth, steady strokes. The bleach marks will appear faint at first before brightening into warm cream tones after several minutes.
This method offers complete artistic freedom for handwritten quotes or line art.
4. Botanical Plant Silhouettes
Fresh botanical elements like fern fronds, palm leaves, or monstera foliage make organic stencils for beachy tops.
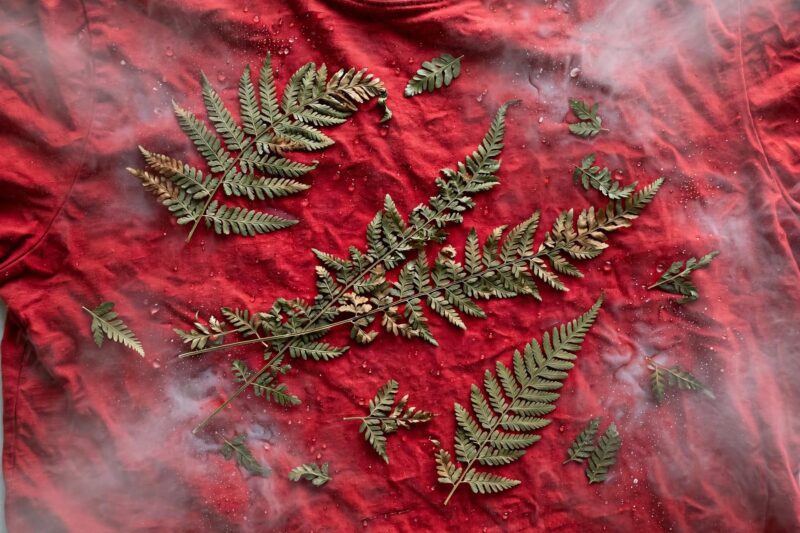
Lay real pressed leaves flat on a dark top. Lightly mist a fine bleach spray overhead, directing the bottle straight down so mist lands evenly around the leaf borders. Lift the leaves away to reveal dark botanical silhouettes surrounded by pale sunburst halo effects.
Pressed leaves lie flatter against fabric than freshly picked stems, preventing mist drift beneath the borders.
5. Bleach Gel Stamping
Commercial bleach gel pens or thick bleach paste provide superior control compared to liquid formulas. The gel consistency prevents unwanted drips and runs across the fabric.
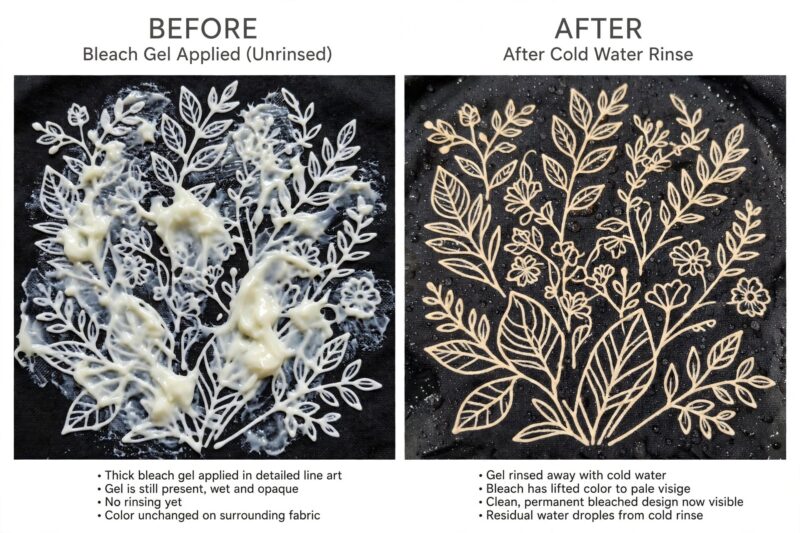
Apply bleach gel onto rubber craft stamps or silkscreen templates and press them onto dark cotton tops. Let the gel react for five to ten minutes before thoroughly rinsing under cold running water.
Thick gel stays exactly where stamped, making it ideal for repeating geometric patterns.
6. Celestial Galaxy Splatter
Galaxy splatter designs recreate cosmic starscapes across black cotton backgrounds using old toothbrushes.
Dip a stiff toothbrush into full-strength bleach. Flick your thumb across the bristles to spray fine micro-dots across the upper chest and shoulders. Add a few larger bleach drops using an eyedropper to represent distant planets or bright stars.
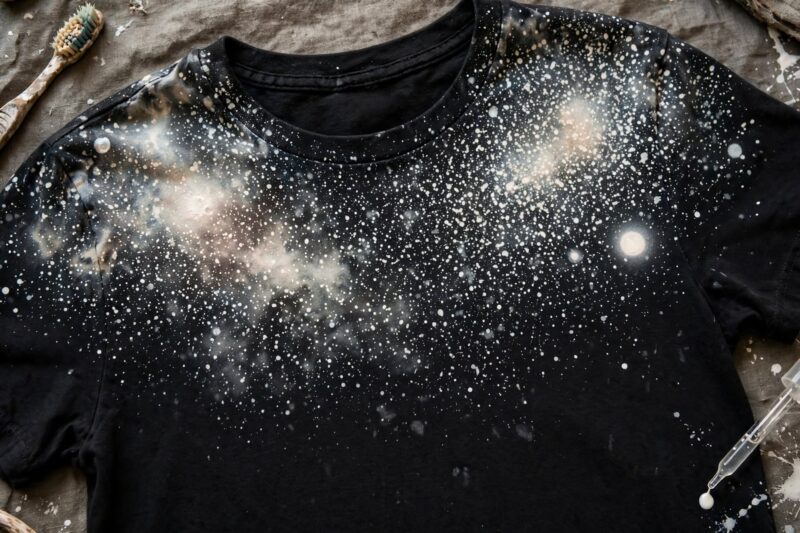
Varying the spray distance creates depth with both soft faded clusters and sharp bright stars.
7. Dip-Dye Ombre Hem
An dip-dye ombre hem lightens the bottom half of a top, creating a smooth transition from dark chest fabric to a pale hemline.
Submerge the lower third of a shirt into a basin containing equal parts water and bleach. Slowly raise the garment out of the liquid in stages every three minutes. The bottom edge stays submerged longest, producing a light tone that fades upward into the original shirt shade.
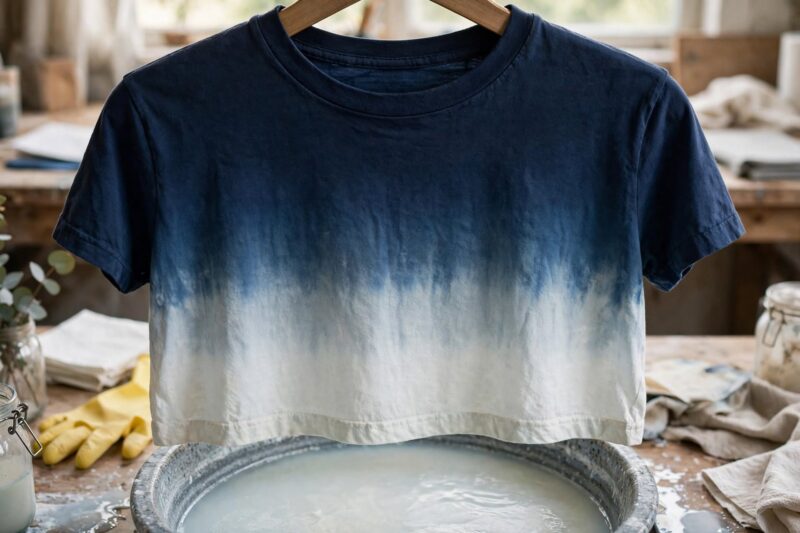
This subtle gradient pairs nicely with dark denim or leggings.
8. Distressed Acid Wash Grid
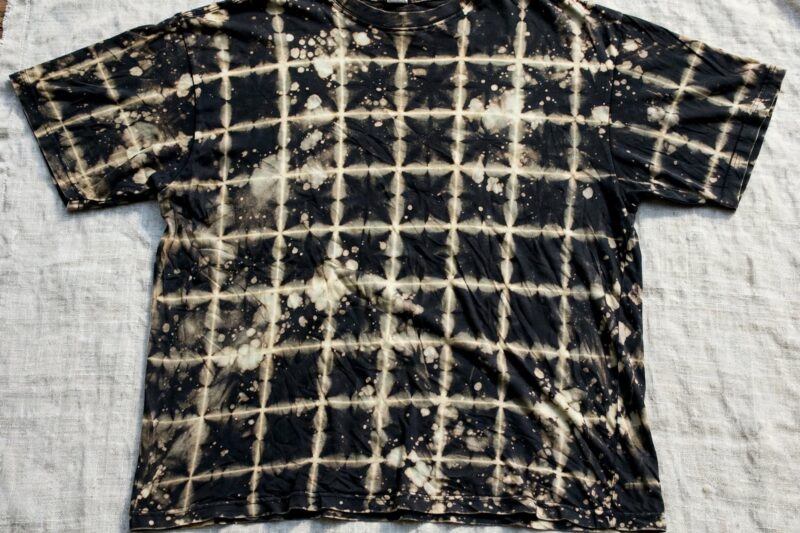
Acid wash grid patterns give plain shirts a worn retro look popular in vintage streetwear fashion.
Soak cotton rags in concentrated bleach, wring out excess liquid, and crumple them firmly against a dark top. Secure the bundle with string or clamps and let it rest for ten minutes before opening and rinsing.
The random contact points create a distressed texture reminiscent of 1980s denim finishing.
9. Lace Fabric Transfer Masking
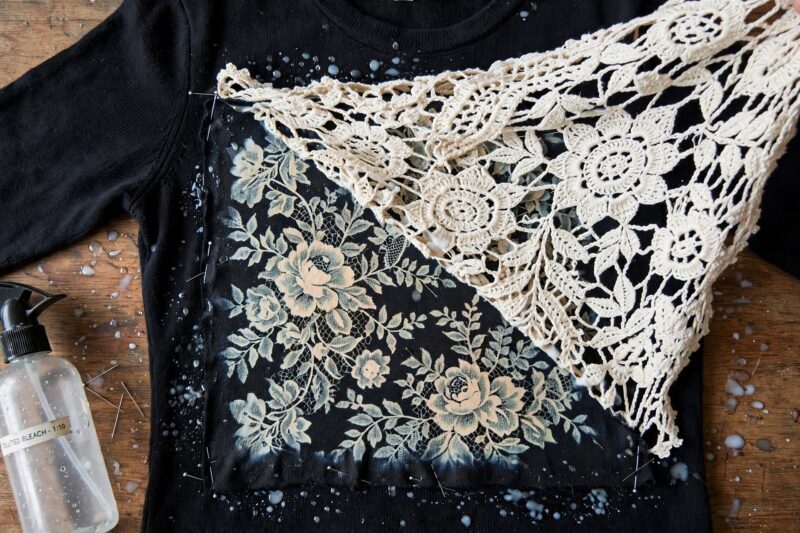
Using lace fabric as a stencil mask creates vintage floral prints across dark knit cotton tops.
Pin a piece of heavy lace fabric flat over the shirt panel. Spray diluted bleach mist evenly over the lace and let it soak in for two minutes. Remove the lace to reveal a romantic pattern of dark thread work against lightened cotton.
Heavier crocheted lace yields bolder graphics than delicate sheer tulle netting.
10. Painter Tape Geometric Lines
Blue painter tape acts as a quick mask for sharp geometric stripes and chevron patterns on casual tees.
Press strips of painter tape firmly onto your shirt in diagonal grid formations. Spray bleach solution onto the uncovered open fabric sections. After the color lightens, pull off the tape strips to reveal clean dark line art.
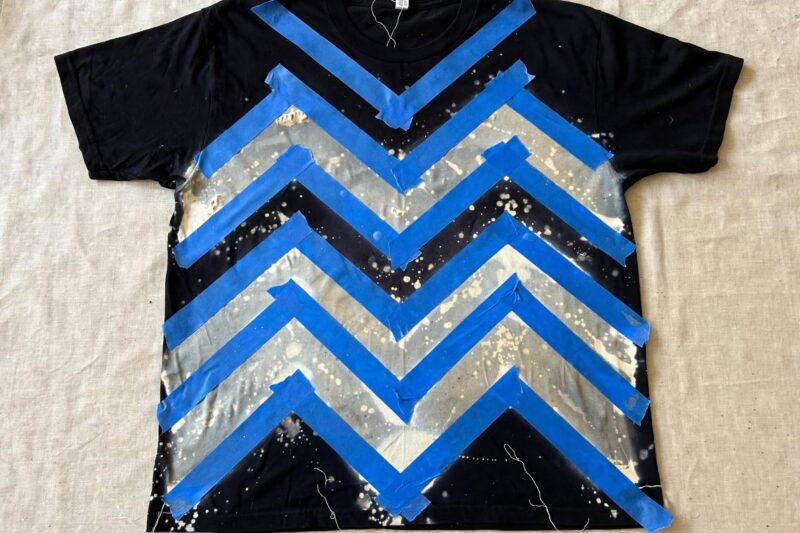
Rubbing tape edges firmly with a plastic card ensures crisp lines without bleed-through.
11. Sunburst Bullseye Fold
The sunburst bullseye fold centers a striking circular ring pattern right across the middle chest area.
Pinch a point on the shirt front and pull upward to form a long fabric tube. Wrap rubber bands tightly at two-inch intervals along the tube length. Apply bleach spray between alternate band bands, then wash out once the desired tone appears.
Unwrapping the bands reveals glowing concentric rings radiating from the center pinch point.
12. Bleach and Alcohol Ink Combo
Combining bleach discharge with bold alcohol-based craft inks adds multi-colored highlights to black cotton shirts.
Bleach your stencil graphic onto a black shirt until the area turns pale orange or white. After rinsing and drying the fabric, drop alcohol ink colors directly onto the lightened spots. The alcohol ink bonds quickly to stripped cotton fibers.
According to DIY tutorials from The King of Random, setting alcohol ink with a warm iron keeps colors vivid through repeated machine washings.
13. Double Layer Stencil Shadow
Double layer stenciling creates a three-dimensional depth effect using two rounds of bleach application.
Spray bleach over a large background stencil for two minutes until it turns light tan. Place a smaller stencil offset over the same spot and mist again for another two minutes. The overlapping exposure creates distinct light and dark shadow layers.
This shadow depth gives flat graphic designs a printed dimensional look.
14. Distressed Skeleton Ribcut
Combining bleach painting with back slashes produces a realistic distressed skeleton graphic on dark apparel.
Paint white bone shapes onto the front and back of a black top using a synthetic brush dipped in bleach gel. Once washed and dried, cut narrow horizontal slits between each painted rib bone for ventilation and movement.
This dual-technique piece blends graphic art with structural cutting.
Frequently Asked Questions
What ratio of bleach and water should I use?
A 1:1 mixture of household bleach and water works best for fabric spray stencils. Full-strength bleach can weaken cotton fibers if left on too long.
How do I stop bleach from damaging shirt fabric?
Rinse your shirt in cold water immediately after reaching the desired color. Soaking in a water bath mixed with one cup of hydrogen peroxide neutralizes active bleach completely.
Can you bleach 100% polyester shirts?
Bleach does not react well with synthetic polyester fibers. Stick to 100% cotton or high-cotton blend garments for bright color discharge.
Conclusion
Bleach t-shirt art is a adaptable upcycling craft that turns plain dark garments into custom apparel. Whether you choose crisp freezer paper stencils, painterly brush lettering, or botanical leaf prints, working with diluted bleach offers high-contrast results without complex tools. Always insert cardboard backing inside your shirt to protect the rear panel, and neutralize active chemical bleach in a cold rinse bath. Start with a simple spray stencil on an old tee to test your fabric reaction before moving on to detailed designs. Pick a technique and transform your dark tops today.
References
- Upcycle Design Lab. “Bleach T-Shirt Designs Beyond the Basics.” 2025. https://www.youtube.com/watch?v=hof-UMCez30
- Broke Girls Art School. “How to Bleach Designs onto Shirts.” 2026. https://www.youtube.com/watch?v=MUSRHdfBWq0
- The King of Random. “Making Custom Shirts with Bleach.” 2025. https://www.youtube.com/watch?v=140vNQ3pDVw
- Transformazing. “Easy DIY T-Shirt Design with Bleach.” 2026. https://www.facebook.com/transformazing.official/videos/1822804971662996/

A Teacher with 5 years of experience. Our Expertise, is reliable to meet your full Academic development needs . Worked on many crafts and construction projects offering services from design to development to deployment over the years. You will find many of my works in my business portfolio on request.