Making your own beaded sunglasses is a fun way to show your style. You can take a plain pair of shades and turn them into a piece of art. As of the latest fashion trends, colorful beadwork on glasses is very popular. This guide will show you how to do it yourself. It takes about two hours. It is an easy project, but you need patience. You will feel great wearing glasses you made yourself. You only need a few craft supplies to get started.
Before you start, it helps to know how many beads you need. Use the simple calculator below to estimate the number of beads for your frames. Just enter the length of the frame you want to cover and the size of your beads.
Bead Quantity Estimator
Enter frame length (inches) and bead size (mm).
Quick answer: To make beaded sunglasses, clean the frames, plan your design, apply strong craft glue like E6000, and use tweezers to place beads along the frame. Let the glue dry fully before wearing them.
| Tool / Material | Why You Need It | Difficulty |
|---|---|---|
| Sunglasses | Base item | Easy |
| Seed Beads | Decoration | Easy |
| Tweezers | Placing beads | Medium |
| E6000 Glue | Holds beads | Easy |
| Toothpicks | Applies glue | Easy |
Time Spent On Each Phase
Materials And Tools You Need
Gather your supplies before you start. You need a pair of sunglasses. Thick plastic frames work best. You need seed beads or small pearls. You need strong craft glue. Beadaholique says E6000 is the best choice. It bonds well to plastic and dries clear. Do not use superglue. It can frost the plastic and ruin the look. You need tweezers to pick up small beads. You need toothpicks to put glue on the frame. You also need a clean cloth and some rubbing alcohol.
Having everything ready makes the work go faster. E6000 is a gel glue. It does not run. It stays where you put it. This keeps the glue off the lenses. Put your beads in a small dish. This stops them from rolling away on the table. Work in a room with good airflow. E6000 has strong fumes until it dries.
Tip: Work in a well-lit room. You need to see the small beads clearly. A magnifying glass can help too.
Step 1: Clean The Sunglasses Frame
Start by cleaning the sunglasses. Put some rubbing alcohol on a clean cloth. Wipe the frames where you want to put beads. This removes dirt and oils. It also removes any factory residue. Let the alcohol dry completely.
This step is very important. Glue will not stick to a dirty frame. The Spruce Crafts notes that oils from your skin can make the glue weak. If the frame is clean, the beads will stay on for a long time. Do not touch the frame with your bare fingers after you clean it. Hold the glasses by the lenses or the temple arms while you work.
Tip: If you do not have rubbing alcohol, use a mix of half water and half white vinegar.
Step 2: Plan Your Bead Design
Plan your design before you use glue. Lay your beads out on a bead board or a piece of paper. Decide what colors you want to use. You can make a pattern. You can use all one color. Or you can use random colors.
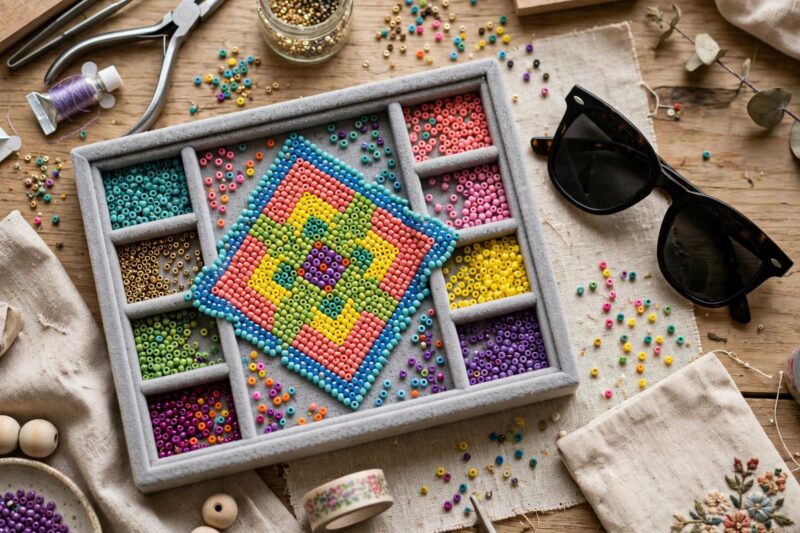
Planning stops you from making mistakes. It is hard to take a bead off once the glue is on. Consumer Crafts says to lay the beads next to the glasses. This shows you how many beads you need. It also shows you if the colors look good together. Take a picture of your design. You can look at the picture while you work.
Tip: Sort your beads by size first. Using beads that are the same size makes a straight line easier to achieve.
Step 3: Apply The First Layer Of Glue
Now you start gluing. Do not put glue on the whole frame at once. Work in small sections. Put a small drop of glue on the end of a toothpick. Spread the glue on a one-inch section of the frame. You want a thin layer of glue.
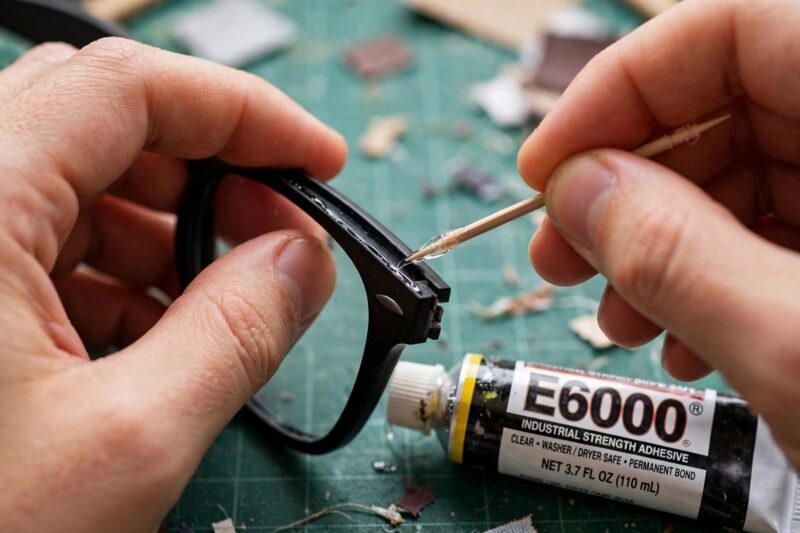
Working in small sections stops the glue from drying out. If you put glue on the whole frame, the first part will be dry before you finish placing beads. Beadaholique says to use just enough glue to cover the frame. Too much glue makes a mess. It squishes out when you press the bead down. Keep a damp paper towel near you. Wipe the toothpick clean after each use. This stops the glue from building up.
Tip: If the glue starts to form strings, wipe the toothpick and start with a fresh drop.
Step 4: Place The Main Beads
Use your tweezers to pick up a bead. Place the bead into the wet glue. Start at the hinge of the glasses. This is the thickest part. Press the bead down gently. Do not push too hard or the glue will squeeze out.
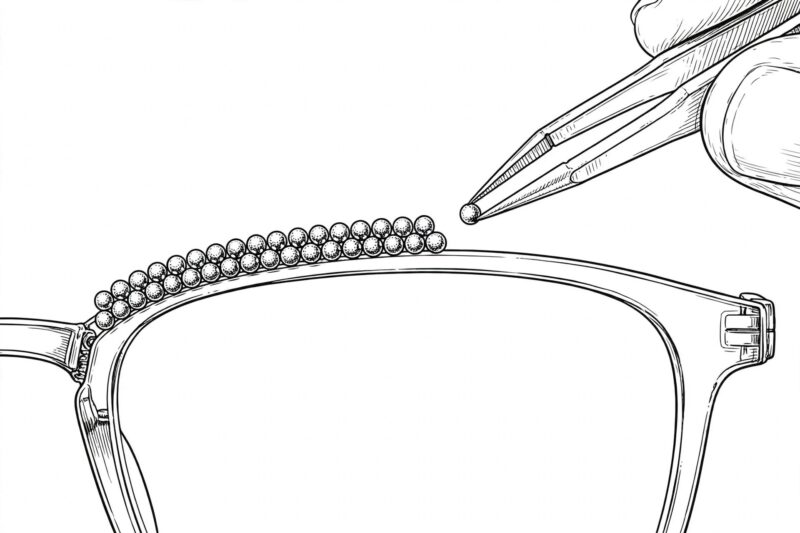
Place the next bead right next to the first one. Keep the beads close together. The Spruce Crafts says to start at the hinge because it is the hardest part. If you get past the hinge, the rest is easy. Make sure the beads sit flat on the frame. If a bead slips, use the toothpick to push it back into place. The tweezers can be too rough.
Tip: Dip the tip of the toothpick in a tiny bit of glue. Use the sticky tip to pick up beads. This is easier than using tweezers.
Step 5: Fill In The Gaps
After you place the main row of beads, you might see gaps. You can fill these gaps with smaller beads. Use a toothpick to put a tiny dot of glue in the gap. Use the tweezers to place a tiny seed bead in the gap.

This makes the frame look full and neat. It hides the plastic underneath. Fire Mountain Gems says filling gaps makes the glasses look professional. It also makes the row of beads stronger. The beads support each other. Use a wax pencil or a wet toothpick to pick up the tiny beads. They are too small for tweezers.
Tip: Do not worry if every gap is not perfect. A few small gaps look natural.
Step 6: Let The First Side Dry
Once you finish one side, stop. Put the glasses down on a flat surface. Do not touch the beads. Let the glue dry for at least 24 hours. This is very important. If you touch the beads too soon, they will move.
Be patient. E6000 glue takes a long time to cure. But once it is dry, it is very strong. AllFreeSewing says to leave the glasses in a dust-free room while they dry. Dust can stick to the wet glue. After 24 hours, the beads will be locked in place. Do not use a hair dryer to speed up the drying. The heat can melt the plastic frames or make the glue bubble.
Tip: Place a small box over the glasses to keep dust off while they dry.
Step 7: Bead The Temple Arms
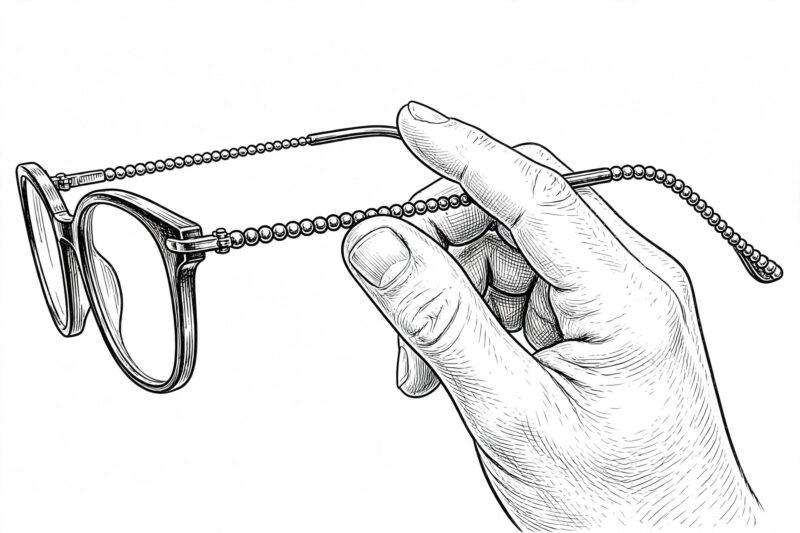
The next day, you can work on the temple arms. These are the long parts that go over your ears. Be careful here. Do not put beads where the arm bends over your ear. The beads will break when the arm bends.
Only put beads on the flat part of the arm. Use the same gluing method. Work in small sections. Crafts by Amanda says to stop beading about two inches from the end. This leaves room for the arm to bend comfortably. Put a piece of tape on the arm where you want the beads to stop. This gives you a clear line.
Tip: Put a thick towel under the arm so it sits flat while you bead it.
Step 8: Bead The Second Side
Now you need to bead the other side. Try to make it look like the first side. Use the same pattern and colors. Work in small sections just like before. Start at the hinge and work your way up.
It is hard to make both sides exactly the same. Do not stress about it. Small differences make the glasses look handmade. DIY Candy says you can make the sides mirror images. If you put a red bead on the left side, put a red bead on the right side in the same spot.
Tip: Lay the finished side next to the side you are working on. This helps you match the pattern.
Step 9: Final Cure And Check
After you finish all the beading, let the glasses cure for another 24 hours. E6000 reaches its full strength after 72 hours. Keep them in a safe place. Once they are fully dry, check your work. Run your finger gently over the beads. Feel for any sharp edges. Sometimes a bead is placed on its side. It can scratch your face.

If you find a sharp bead, pull it off. Put a new drop of glue and place a flat bead there. Fire Mountain Gems says to check the inside of the frame too. A bead on the inside can rub against your nose. If a bead is stuck and sharp, use a nail file to gently sand the edge down.
Tip: If a bead falls off later, you can always glue it back on. Keep a few extra beads in a bag.
Step 10: Clean The Lenses
The last step is cleaning the lenses. You might have gotten glue or fingerprints on the glass. Use a soft lens cloth to wipe them clean. If there is glue on the glass, use a little bit of glass cleaner.
Do not use acetone nail polish remover. It will melt the plastic lenses. Beadaholique says to be gentle. You do not want to knock the new beads off. Once the lenses are clean, your beaded sunglasses are ready to wear. Keep your glasses in a hard case when you are not wearing them. This protects the beads from getting crushed.
Tip: Spray the glass cleaner on the cloth, not directly on the glasses. This stops liquid from running under the beads.
FAQ
What glue is best for beaded sunglasses?
Use E6000 craft glue. It dries clear, bonds to plastic, and is waterproof. Do not use hot glue because it melts in the sun. Do not use superglue because it frosts the plastic.
Can I put beaded glasses in water?
No. While E6000 is waterproof, water can weaken the bond over time. If your glasses get wet, pat them dry with a soft cloth right away.
Do the beads make the glasses heavy?
A few beads will not add much weight. But if you cover the whole frame, they might get heavy on your nose. Use plastic seed beads instead of glass beads to keep them light.
Where can I buy beads for this project?
You can buy beads at craft stores. You can also find them online from bead shops. Look for size 11/0 seed beads or small flat back pearls.
Conclusion
Making beaded sunglasses is a fun and easy craft. You can turn a cheap pair of glasses into a custom fashion piece. The secret is taking your time. Clean the frames first with rubbing alcohol. Use E6000 glue for a strong, clear hold. Work in small sections so the glue does not dry out. Use tweezers or a sticky toothpick to place the beads. Fill in the gaps to make it look neat. Let the glue dry for a full day before you wear them. These glasses make great gifts for friends. They are also perfect for summer festivals or beach trips. Pick out your favorite beads and grab an old pair of sunglasses. You can create a beautiful accessory in just one afternoon.
References
- Beadaholique, “How to Glue Beads to Plastic”
- The Spruce Crafts, “Best Glues for Jewelry Making”
- Consumer Crafts, “DIY Beaded Sunglasses Tutorial”
- Fire Mountain Gems, “Jewelry Glue Guide”
- AllFreeSewing, “Embellishing Clothing and Accessories”

A Teacher with 5 years of experience. Our Expertise, is reliable to meet your full Academic development needs . Worked on many crafts and construction projects offering services from design to development to deployment over the years. You will find many of my works in my business portfolio on request.