

What makes a truly great beaded star stand out from every other homemade ornament you’ve tried? Achieving a perfect geometric shape requires attention to thread tension and the right sequence of loops. Whether you are preparing for a festive holiday dinner or just want a quiet weekend craft, this beaded star is a wonderful project. Making a beaded star feels satisfying because of its symmetrical geometry. Each beaded star project uses basic supplies to turn simple beads into a striking centerpiece. Let’s get started so you can make your first star today.
Quick Questions and Answers
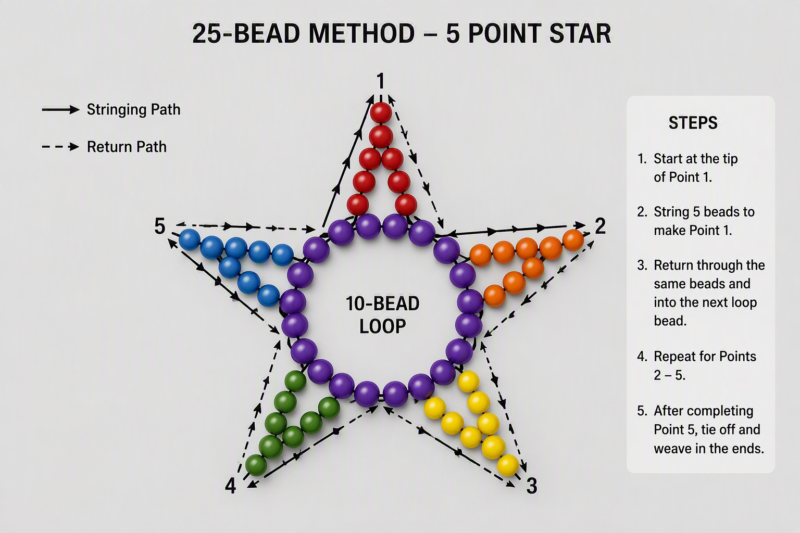
Question: How do you make a beaded star step by step? Answer: The simplest versions start with a center loop, usually 10 beads, that is tied into a circle first. Then you repeat a pattern around the loop to create five points, often by adding 2 or 3 beads at a time and skipping the right bead space, before tying off and reinforcing the shape.
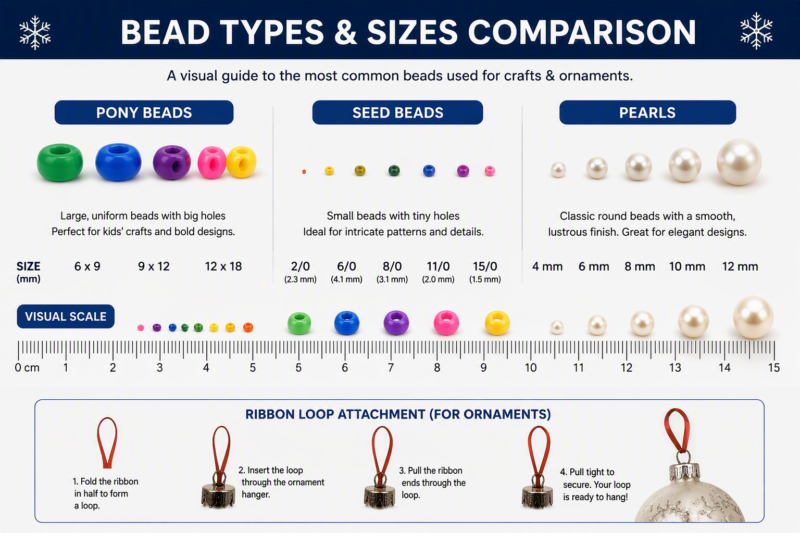
Question: What beads do I need for a beaded star tutorial? Answer: That depends on the style. Pony-bead versions use 25 total beads with stretchy string, seed-bead versions often use size 15 seed beads with beading thread and a needle, and decorative versions may use 4 mm or 5 mm pearl/crystal beads with nylon thread.
Question: How many beads are needed to make a star? Answer: Many beginner tutorials use 25 beads total. In the most common structure, 10 beads form the center loop and 15 more beads create the five outer points, though some bead-weaving designs use different counts and extra finishing stitches.
What You Need
| Item | Purpose | Notes |
|---|---|---|
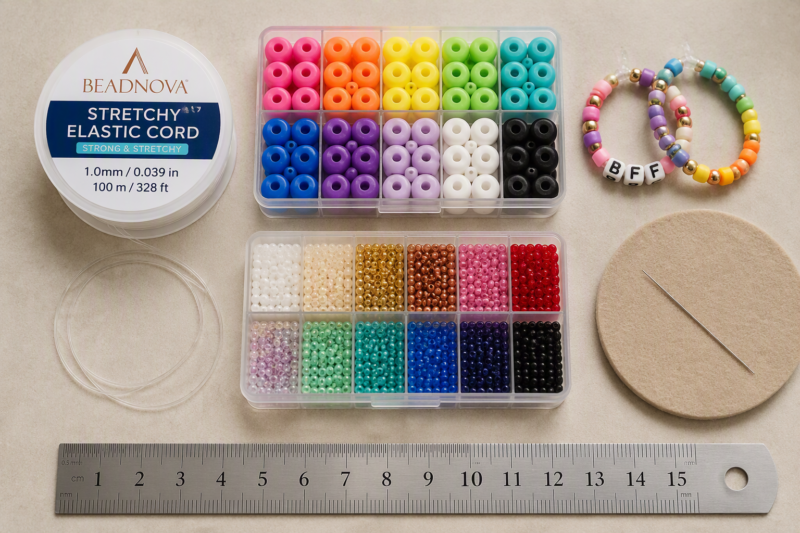
| Beads | Structural base | Pony, size 15 seed, or 4mm pearls |
| Thread/Cord | Holding the beads | Stretchy for kandi, nylon for pearls |
| Needle | Precision threading | Optional for pony beads, vital for seed beads |
| Scissors | Trimming ends | Must be sharp for clean thread cuts |
| Hardware | Finishing touch | Jump rings or keychains for hanging |
| Ruler | Measuring thread | Keeps your tail long enough to weave |
The Beginner 25-Bead Method
Start by stringing 10 beads to create the inner center ring. Tie these off with a secure overhand knot to form a firm circle. This ring is the heart of your project. If it is too loose, the star will lose its shape instantly.
Form the star points by adding 3 beads at a time. Skip every other bead on your base loop as you move around. Keep doing this until you complete 5 distinct points.
Ensure the thread tension remains firm throughout this process. You want the beads to sit flush against one another. If you find the structure feels loose, you can learn more about specific techniques in these 12 Must-Know Melt Bead Patterns Made Simple to get a better feel for handling small shapes.
Advanced Bead Weaving: The Warped Square Technique
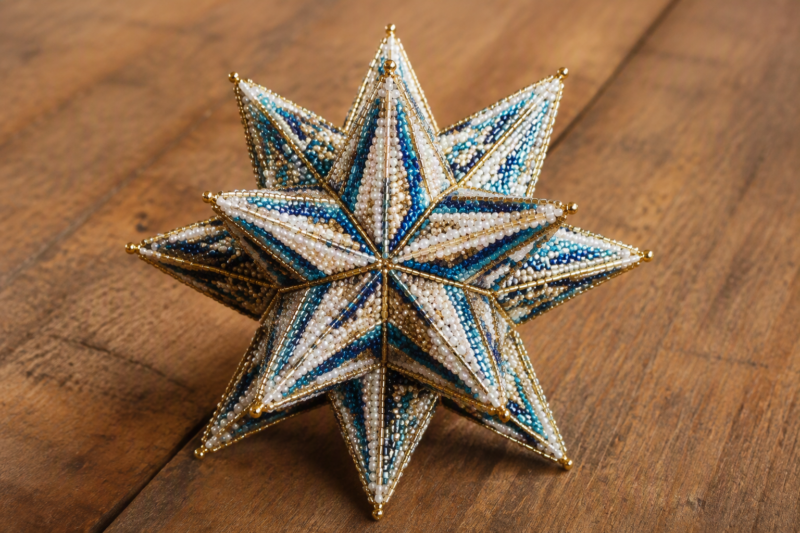
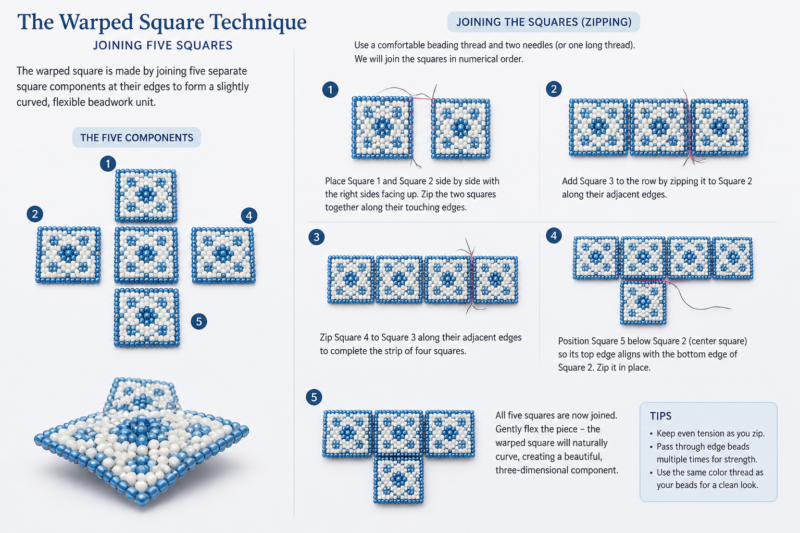
Construct five individual warped squares by building them in rounds of alternating colors. For instance, use silver and dark purple to keep the pattern consistent. Each square needs to be identical to ensure the finished piece folds into a star correctly.
Align the squares once you have finished them. Zip them together by passing your needle through the matching beads on adjacent pieces. This step takes patience.
Fold and join the pieces carefully to ensure the star maintains its 3D geometric shape. If a section looks off, undo that specific seam and realign the beads. According to the Beadwork Society, consistency in tension across these connections is the secret to a professional finish.
Mistakes to Avoid
Cutting the working thread too early is a common pitfall. Always keep the tail long enough to weave back through the beadwork twice for added strength. You need that extra length to anchor the knot.
Miscounting the center loop is another error. Starting with any number other than 10 can throw off the symmetry of the five points. Even one extra bead makes the star look lopsided.
Using incorrect thread tension ruins the look. If the loop is too loose, the points will not stand up. If it is too tight, the star may buckle under the pressure.
Troubleshooting Your Star Shape
If the points are uneven, re-thread the structure. Pass the needle through each point again to tighten the loops. Most of the time, this extra pass is all you need to fix a sagging star.
For projects that feel flimsy, perform a second or third pass through the entire beadwork. This locks the beads in place. It acts like a skeleton for your design.
If you are adding jump rings for a keychain, attach the ring to one of the outer points before you perform the final reinforcement stitch. You can find inspiration for other projects in this guide on 9 Stunning Bedazzle Designs for Canvas Projects.
FAQ
Q: Can I use any size beads for these tutorials?
While the 25-bead method works best with pony beads, seed bead tutorials require a needle and specific thread like Nymo to handle the smaller, more delicate bead sizes. Larger beads are often too heavy for thin nylon thread, while seed beads will simply slip off thicker elastic cord. Match your thread gauge to the hole size of your chosen beads for the most successful result.
Q: How do I turn my beaded star into an ornament?
Simply use a piece of fishing line or decorative ribbon looped through one of the top points instead of a jump ring. This creates a lightweight hanger that won’t distract from the star’s geometry. Fishing line is particularly good because it is nearly invisible, letting the star appear to float on your tree or window.
Q: Why does my beaded star not hold its shape?
The most common reason is loose tension or missing reinforcement stitches. Several tutorials advise pulling snug but not too tight, leaving enough thread to weave in later, and stitching through the star multiple times to lock the shape in place.
Q: How long does it take to make a beaded star?
The exact time is not stated in the sources, but the beginner tutorials are presented as quick projects with only a small number of beads and a short sequence of steps. More advanced warped-square beadwork will take longer because it requires making multiple pieces and joining them carefully.
Q: Should I use stretchy string or thread for a beaded star?
Use stretchy string for pony-bead or kandi-style stars when you want a flexible project, especially for bracelets or keychains. Use beading thread such as Nymo or nylon monofilament for seed beads or finer decorative stars, since those methods depend on control, tighter stitching, and repeated weaving.
Q: How do you finish and tie off a beaded star?
Most tutorials finish by weaving the remaining thread through nearby beads, tying a secure knot, and trimming the excess only after the knot is locked. Some versions also add jump rings or keychain hardware if the star is meant to hang from something.
Q: What mistakes should I avoid when making a beaded star?
Avoid cutting the working thread too early, because several tutorials rely on the leftover thread to build the points and secure the piece. Also avoid skipping the wrong bead or pulling the thread unevenly, since those errors can distort the star’s symmetry and make the points look lopsided.
My Experience With How to Make a Beaded Star Like a Pro
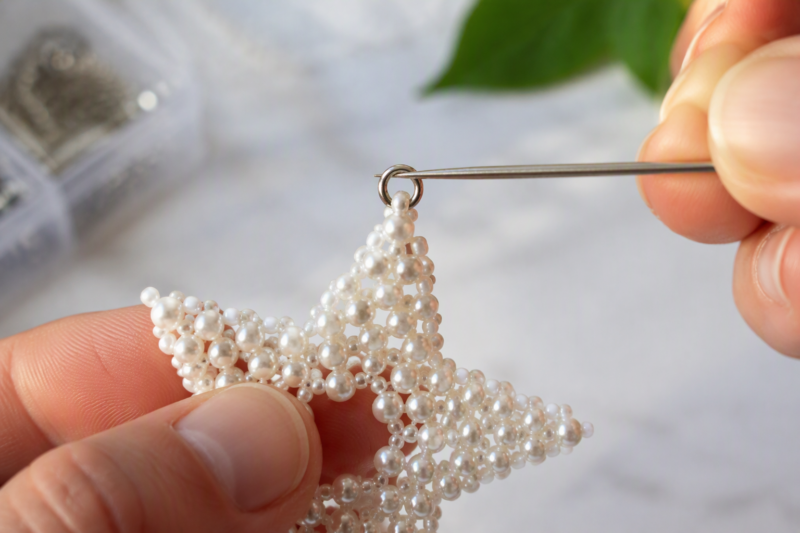
I remember the first time I tried making one of these. My initial attempt looked more like a lumpy hexagon than a star. I realized halfway through that I had miscounted my center loop, and adding more points just made the structure sag. It is tempting to pull the thread as hard as possible to fix the sag, but that is actually the wrong approach. You need steady, consistent tension rather than brute force.
Once I started using a proper beading needle and high-quality nylon thread, everything changed. The points actually stood up! There is a real rhythm to the “add 3, skip 1” motion that feels meditative once you get into the flow. My favorite pro tip? If your star feels a bit soft, don’t be afraid to thread your needle through the entire outer perimeter one extra time. Think of it as a structural spine for your creation. It turns a flimsy plastic ring into something that feels like a real ornament. Have you ever tried to make a star and ended up with a slightly different shape instead?
Next Steps
Experiment with color blocking to create multi-tone stars that mimic geometric crystals. You can use metallic seed beads on the points to add a bit of shimmer.
Try creating multiple stars and connecting them via jump rings to form a beaded garland. This makes a great decoration for windows or doorways during the winter season.
References
- Instructables. (n.d.). How to Make a Poney Bead Star. https://www.instructables.com/How-to-make-a-poney-bead-star/
- YouTube. (n.d.). How to Make a Beaded Star. https://www.youtube.com/watch?v=YIerP9VRKhU
- YouTube. (n.d.). How to Make a Kandi Star | DIY Pony Bead Star Keychain. https://www.youtube.com/watch?v=joomu_4IyrY
- Come Bead With Me. (n.d.). How to Bead a Star – Detailed Tutorial. https://comebeadwithme.com/how-to-bead-a-star/
- Luxe DIY. (n.d.). Beaded Stars – How Did You Make This? https://howdidyoumakethis.com/beaded-stars/
- YouTube. (n.d.). How to Make a Beaded Star || Beaded Star Tutorial || Native Beadwork. https://www.youtube.com/watch?v=Y1G9DAHhU7c
- YouTube. (n.d.). Beaded Star | How To Make Star With Beads Easy. https://www.youtube.com/watch?v=V7Mw1offpR4
- YouTube. (n.d.). Quick and Easy Seed Bead Stars / Bead Weaving Stars / Beginner Beading Earring Tutorial. https://www.youtube.com/watch?v=ZsJRy3-UGdw

A Teacher with 5 years of experience. Our Expertise, is reliable to meet your full Academic development needs . Worked on many crafts and construction projects offering services from design to development to deployment over the years. You will find many of my works in my business portfolio on request.