Perler beads turn a quiet afternoon into a little craft factory. You pick a design, place the beads on a pegboard, and an adult melts them together with an iron. No painting skill needed, no drying time, just color by color placement until the picture is done. If you are staring at a bucket of beads wondering what to make first, this list gives you twelve patterns that go from super simple to a bit more detailed, plus the steps to fuse them properly so your project holds together.
Quick Answer
Great beginner perler bead patterns include a smiley face, heart, mushroom, ice cream cone, and small animal like a cat or panda. Start with a design that uses only two or three colors on a small pegboard, then move up to bigger animals, food shapes, and keychain charms once you get comfortable placing beads and using the iron.
| Detail | What To Know |
| Pegboard size needed | Varies |
| Skill level for most designs on this list | Beginner |
| Iron heat setting | Medium, adult only |
| Time to place beads per design | Varies |
Roughly How Many Beads Each Pattern Uses
Bead count is an estimate based on typical small to medium pegboard designs. Larger, more detailed versions of any pattern will use more beads.
1. Classic Smiley Face
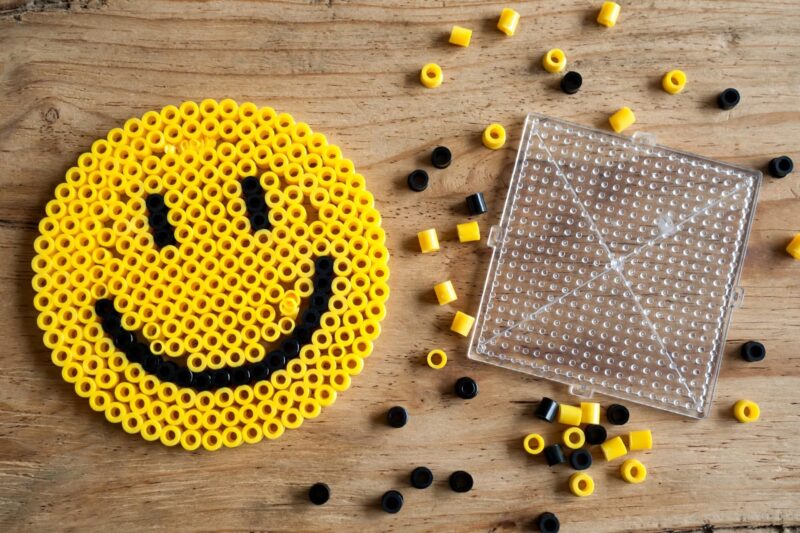
A smiley face is where most people start with perler beads, and for good reason. It only needs two colors, yellow for the round face and black for the eyes and mouth. Set your yellow beads in a circle shape on a small square pegboard, filling in a rough round outline first, then packing in the middle rows. Add two black dot eyes and a curved black mouth. Because the shape is simple and symmetrical, it is forgiving if a bead or two ends up in the wrong spot. This one is a good test piece to practice your ironing technique before moving to a bigger project.
2. Simple Heart
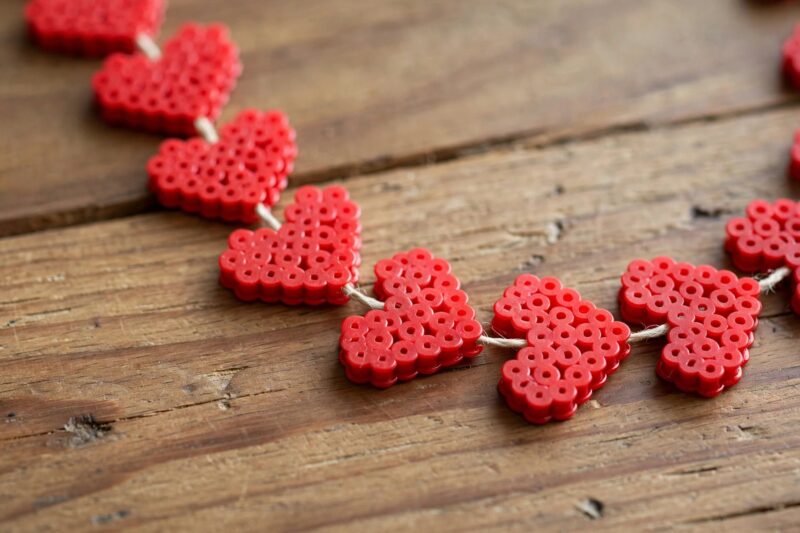
A heart shape uses straight diagonal lines and one center dip at the top, which makes it another good early project. Pick one solid color like red or pink for the whole shape, or use a darker shade around the edge and a lighter fill in the middle for a two-tone look. Hearts also work well strung onto a bracelet or hung as a small ornament once they are fused and cooled. Kids often like making a whole set of hearts in different colors to give out as tiny gifts.
3. Rainbow Arch
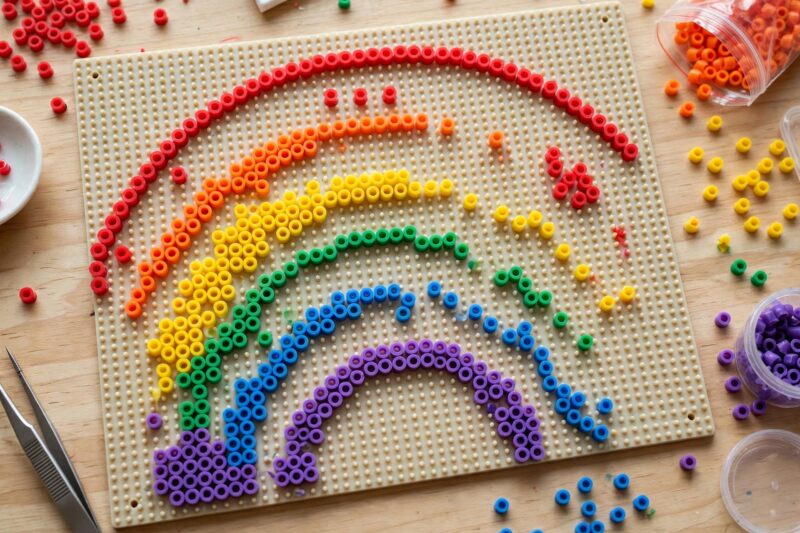
A rainbow pattern is really just six or seven curved rows of color stacked on top of each other, so it teaches good bead placement without demanding fine detail work. Start with red on the outside curve and work inward through orange, yellow, green, blue, and purple. Add a few white or light blue beads underneath for clouds. Because each row is one solid color, this pattern is easy to fix if you run out of a shade partway through, since you can simply swap in a close color for that row.
4. Ice Cream Cone
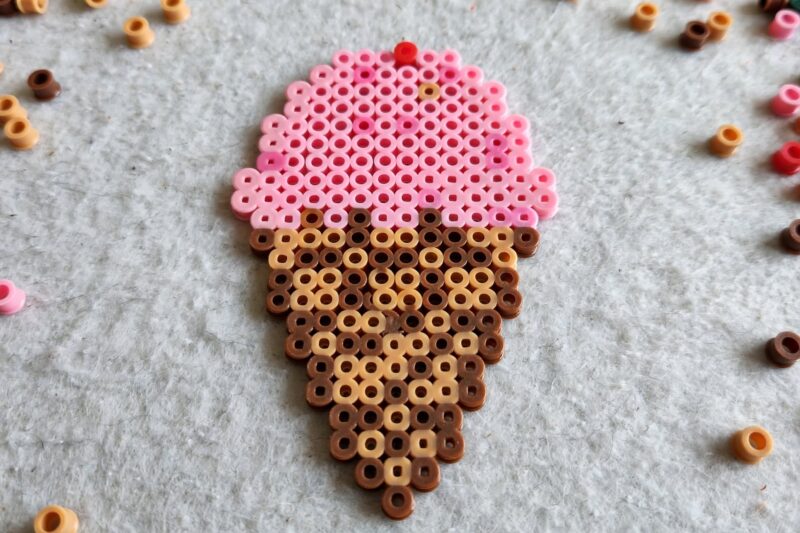
An ice cream cone splits into two easy parts, a tan waffle-pattern triangle on the bottom and a scoop of color on top. For the cone, alternate tan and brown beads in a criss-cross grid to look like a waffle texture. For the scoop, pick pink, brown, or mint and round off the top edge. Add a small red bead or two at the top for a cherry. This pattern looks great as a keychain or magnet once it is fused, and it is a fun one to make in a few different flavors.
5. Red and White Mushroom
A mushroom pattern is a rounded red cap over a short cream stem, and it teaches curved edges without much difficulty. Build the cap first using red beads shaped into a dome, then dot a few white beads across it for spots. Under the cap, fill in a small rectangle of cream or tan beads for the stem. This design fits on a small pegboard, so it is a quick one to finish in a single sitting, and it pairs nicely with the rainbow pattern above if you want a matching set.
6. Cat Face Keychain
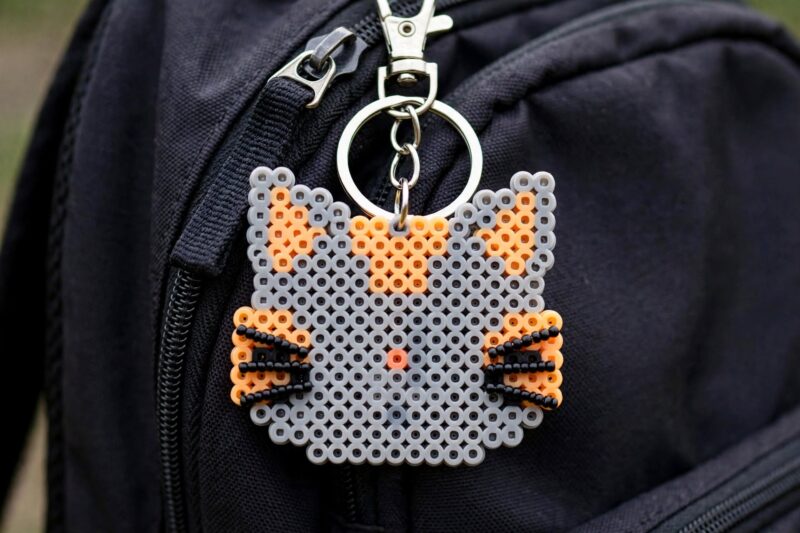
A cat face pattern uses a rounded head shape with two triangle ears poking out the top, plus small details for the eyes, nose, and whiskers. Fill the head in gray, orange, or black depending on the cat you want, then add pink or white for the inner ears. Use small black or green beads for the eyes and a tiny pink triangle for the nose. Once fused, you can loop a keychain ring through one of the top holes to turn it into a bag charm, which makes this an easy first accessory project.
7. Panda Face
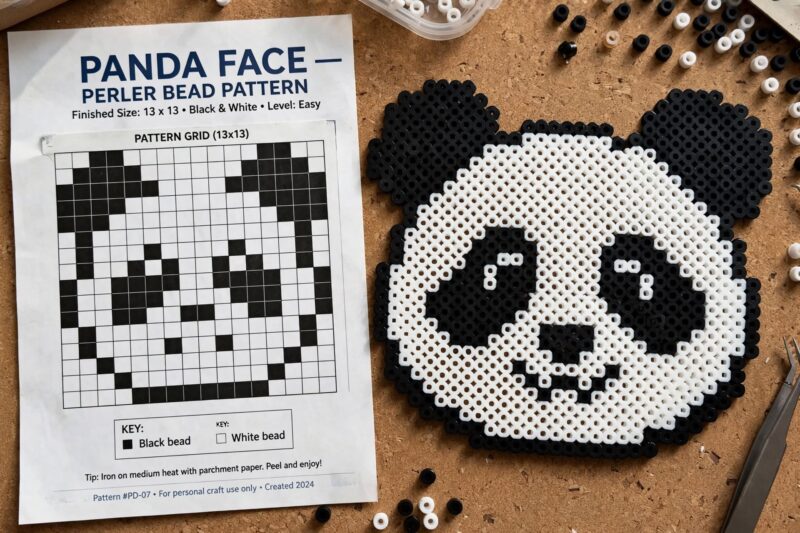
A panda face pattern uses mostly white beads with black patches for the ears, eye markings, and nose, which makes the color plan very easy to follow even for a first-timer. Shape the face as a rounded square, then add two black circles at the top for ears. The eye patches are the trickiest part since they are oval-shaped rather than round, so take it slow and check your placement against a reference picture before you commit to a row. This pattern looks great on a medium pegboard and makes a nice gift tag or ornament.
8. Sitting Fox
A fox pattern steps up the difficulty slightly because it needs three colors working together, orange for the body, white for the chest and tail tip, and black for the legs, ears, and nose. Build the body as a rounded triangle shape sitting upright, then add the bushy tail curling around one side. This is a good pattern to try once you have finished a few of the simpler designs above, since the color blending between orange and white takes a little more planning than a single-color shape.
9. Chevron Coaster
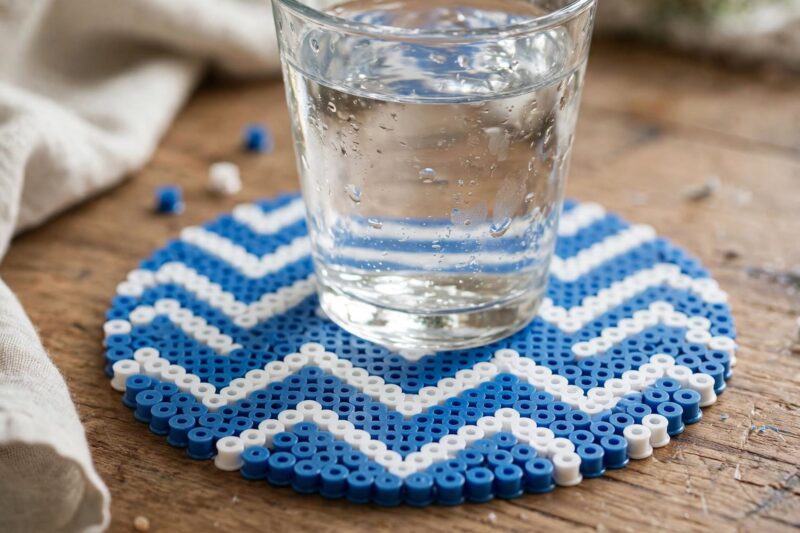
A chevron design is a repeating zig-zag pattern that fills a whole square or circle pegboard, making it a good project when you want to use up a mix of leftover bead colors. Pick two or three colors and lay diagonal lines that meet in the middle to form a V shape, then repeat the V pattern outward to fill the board. Because coasters get iron-fused on both sides for extra strength, this pattern doubles as a practice run for the double-sided fusing method described later in this article.
10. Pixel Style Flower
A pixel flower pattern uses small blocks of color arranged in a boxy, 8-bit video game style rather than smooth curves, which is actually easier for beginners since every edge is a straight step instead of a curve. Build five or six petal blocks in pink, purple, or red around a yellow center block, then add a short green stem and two leaf blocks underneath. This blocky style works for almost any subject, so once you get the hang of it you can turn hearts, stars, and animals into the same chunky pixel look.
11. Watermelon Slice
A watermelon slice is shaped like a half circle, with a green rind, a white inner ring, and a red center dotted with black seeds. Build the outer curve in dark green first, add a thin band of white just inside it, then fill the rest with red. Scatter a handful of single black beads across the red section for seeds. Because the shape only needs one curved edge, this is an easier fruit pattern to try before moving on to more detailed food designs.
12. Starry Sky Coaster
A starry sky pattern is a dark blue or purple background scattered with small yellow star and dot shapes, which makes it one of the more relaxing designs to build since there is no strict outline to follow. Fill most of the pegboard with a deep blue, then place small star clusters using four or five yellow beads arranged in a plus or diamond shape. Add single scattered yellow beads between the stars for a night sky feel. This pattern works well as a coaster or a small framed piece once it is fused on both sides.
How Do You Fuse A Perler Bead Pattern Step By Step?
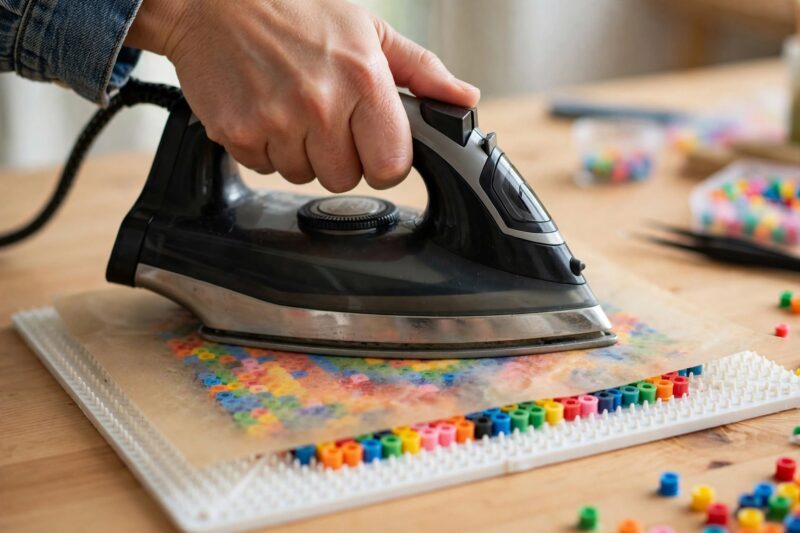
Once your beads are placed on the pegboard, fusing them is a short process. An adult should always handle the iron, since the plastic beads and pegboard can warp or burn at the wrong heat.
- Set a household iron to a medium, dry heat setting with the steam turned off.
- Place your finished pegboard on a flat, heat-safe surface.
- Lay a sheet of ironing paper or parchment paper over the beads, with a couple of extra inches of paper on every side.
- Move the iron in slow, small circles over the paper for about 10 to 20 seconds, without pressing down hard.
- Lift a corner of the paper to check the beads. They should look fused at the edges but still show a small open hole in the center of each bead.
- Let the design cool completely, then gently peel it off the pegboard.
- Flip the design over, cover it with paper again, and repeat the ironing on the back side for a stronger, more durable finish.
- Place a heavy book or two on top of the still-warm design for several minutes to keep it from curling as it cools.
What Supplies Do You Need To Start?
You need three basic things to make any pattern on this list: perler beads in a few colors, a pegboard shaped like a square, circle, or hexagon depending on your design, and ironing or parchment paper for fusing. A household iron handles the melting step, and tweezers can help with placing small beads precisely if little fingers find it tricky. A pattern picture, either printed or on a screen next to your workspace, makes it much easier to keep track of where each color goes as you build. None of these supplies are expensive, and the pegboards and ironing paper are reusable for future projects. If you are buying beads for the first time, a mixed bucket with a wide range of colors is usually a better value than single-color bags, since most patterns need small amounts of many colors rather than a lot of just one or two. Store loose beads in a container with small compartments so you are not digging through one giant pile every time you need a specific shade.
What Mistakes Should Beginners Watch For?
Most beginner mistakes happen either during placement or during ironing. On the placement side, it is easy to lose count of rows partway through a design, so check your pattern picture often rather than trusting memory once you get several rows in. Loose beads can also shift or fall out of the pegboard if it gets bumped, so keep the finished board flat and out of the way of pets or younger siblings until it has been fused.
On the ironing side, the most common problem is heat that is either too high or too low. Too much heat closes up the little holes in the center of each bead and can warp the pegboard itself, while too little heat leaves the beads loosely connected so the design falls apart when handled. Making a small test patch with a few spare beads before ironing your actual project is one of the easiest ways to avoid both problems, since it lets you find the right time and temperature without risking the piece you actually want to keep.
Frequently Asked Questions
What temperature should the iron be for perler beads?
A medium, dry heat setting with steam off works for most beads. This is roughly 275 to 300 degrees Fahrenheit, and it is best to test on a few spare beads first since irons vary.
Do you have to iron both sides of a perler bead design?
Ironing both sides makes the piece stronger and more durable for everyday handling. A single-sided fuse can work for a picture that will be framed and not touched much.
Why do my perler beads warp after ironing?
Warping usually happens when the heat is uneven or the piece cools without any weight on it. Placing a heavy book on the warm design for several minutes after ironing helps it dry flat.
What pegboard shape should a beginner use?
A small square pegboard is the easiest starting point for simple shapes like hearts and smiley faces. Circle and hexagon boards work better once you move on to rounder designs like animal faces.
Can different bead brands be mixed in one pattern?
Standard 5mm beads from different brands are generally the same size and can be mixed in one design. They fuse at slightly different speeds, so keep an eye on the piece while ironing.
References
- Perler, “Standard Fusing Method” (2026)
- Perler, “Frequently Asked Questions” (2025)
- DotDotBead, “How to Iron Perler Beads: A Beginner’s Complete Guide” (2026)
- MakeBead, “How to Iron Perler Beads: Temp, Time & No-Burn Tips” (2026)

A Teacher with 5 years of experience. Our Expertise, is reliable to meet your full Academic development needs . Worked on many crafts and construction projects offering services from design to development to deployment over the years. You will find many of my works in my business portfolio on request.