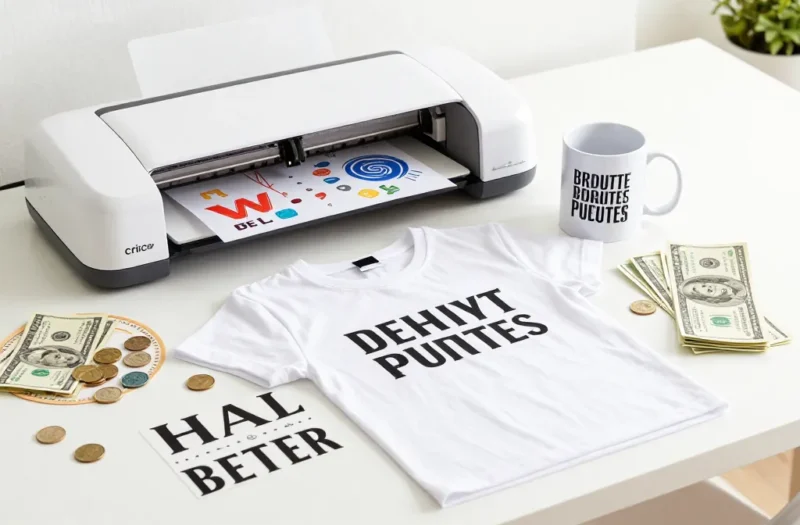
If you want to learn how to cricut screen print, the basic method is simple: cut a stencil with your Cricut, apply the stencil to a screen, spread fabric ink through the mesh with a squeegee, and cure the print. This works best for single-color, bold designs on shirts, tote bags, and other flat fabric items.
Key Takeaways
- How to cricut screen print usually means making a vinyl stencil with a Cricut and using it on a mesh screen.
- This method is best for simple graphics, text, and one-color prints.
- A clean screen and firmly applied stencil make the biggest difference in print quality.
- Choose fabric screen printing ink, not regular acrylic paint.
- Use cotton or cotton-blend fabric for the easiest results.
- Avoid tiny details and very thin lines because vinyl stencils can lift or leak.
- One firm squeegee pass is often better than several messy passes.
- Let the print dry, then cure it as the ink manufacturer recommends before washing.
- Cricut screen printing is great for small batches, but not ideal for high-volume production.
- If you want multicolor or photo-quality prints, traditional emulsion screen printing is usually better.
What does “how to cricut screen print” actually mean?
How to cricut screen print usually means using a Cricut cutting machine to make a stencil for screen printing, rather than using photo emulsion. It is a shortcut method that helps crafters make custom prints at home with less setup.
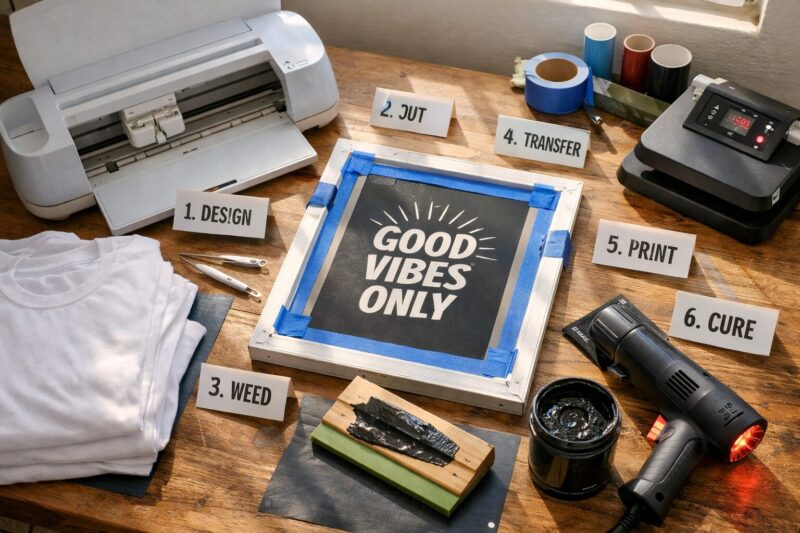
In practice, you:
- Design artwork in Cricut Design Space
- Cut the design from adhesive vinyl
- Weed the design
- Apply the vinyl stencil to a screen
- Print with screen ink and a squeegee
This method is a good fit for:
- Beginners
- Etsy sellers testing designs
- Small apparel projects
- One-off gifts
- Classroom or home craft setups
It is not the best fit for:
- Fine-detail artwork
- Large production runs
- Complex multicolor registration
- Photorealistic prints
A Cricut does not replace the screen printing process. A Cricut mainly replaces the stencil-making step.
What supplies do you need to Cricut screen print?
To Cricut screen print, you need a cutting machine, stencil material, a screen, screen printing ink, and something to print on. Most beginners can start with a small setup and add tools later.
Basic supply list
- Cricut machine
- Permanent adhesive vinyl for stencil making
- Transfer tape
- Screen printing frame with mesh
- Squeegee
- Fabric screen printing ink
- Blank shirt, tote, or fabric item
- Masking tape or painter’s tape
- Weeding tool
- Lint roller or clean cloth
- Cardboard insert for shirts

Nice-to-have extras
- T-shirt ruler for placement
- Heat press or iron for curing help, if your ink allows
- Gloves
- Scrap paper for test prints
Quick material rules
- Choose adhesive vinyl if you want a simple stencil that sticks well to the screen.
- Choose bold artwork if you are new to screen printing.
- Choose fabric ink if printing on shirts. Regular craft paint can crack or wash out.
Common mistake: buying the wrong ink. If the label does not say it works for fabric screen printing, skip it.
How to cricut screen print step by step
The easiest way to learn how to cricut screen print is to follow a short, repeatable process. For most first projects, a simple one-color design on a cotton T-shirt gives the best chance of success.
Step 1: Make a simple design
Create or upload your design in Cricut Design Space.
Best design choices:
- Thick text
- Bold shapes
- Simple logos
- One-color graphics
Avoid:
- Tiny script fonts
- Hairline details
- Very distressed art on your first try
Decision rule: If a line looks hard to weed in vinyl, it will probably be hard to print cleanly too.
Step 2: Cut the stencil
Cut the design from permanent adhesive vinyl. Mirror only if your specific process requires it for placement logic, but for most vinyl screen stencils, you cut it in the normal orientation.
Then weed away the parts where ink should pass through the screen.
Step 3: Apply stencil to the screen
Use transfer tape to move the weeded stencil onto the mesh screen. Burnish it well so the edges stick tightly.
Then tape off any open mesh around the design so ink only goes where you want it.
Step 4: Prep the shirt or fabric
Place cardboard inside the shirt so ink does not bleed through. Lint roll the surface and smooth out wrinkles.
Step 5: Print the design
Lay the screen on the fabric. Add a line of ink above the design, then pull the squeegee across with firm, even pressure.
A good beginner approach:
- Hold the screen steady
- Use a moderate amount of ink
- Make one solid pass
- Lift the screen carefully
Step 6: Dry and cure the ink
Let the print dry, then cure it based on the ink manufacturer’s instructions. Some inks air dry first and then need heat setting. Others need a heat press or specific cure temperature.
Common mistake: washing too soon. Even if the surface feels dry, uncured ink can still fail in the wash.
What designs work best when learning how to cricut screen print?
The best designs for how to cricut screen print are bold, simple, and open enough for ink to pass through cleanly. Thick shapes print better than fussy details, especially when you are using vinyl as the stencil.
Best beginner-friendly design types
- Block lettering
- Silhouettes
- Basic icons
- One-color brand marks
- Simple holiday graphics
Harder designs to avoid at first
- Thin serif fonts
- Small script words
- Tiny stars, dots, or outlines
- Layered multicolor art
Mini example
If I were printing a tote bag that says FARMERS MARKET, I would choose:
- A bold sans serif font
- Large lettering
- One ink color
- Plenty of spacing between letters
That design weeds faster, seals better to the mesh, and prints cleaner.
How long does Cricut screen printing take and what does it cost?
For a beginner, a first Cricut screen print project usually takes about 1 to 2 hours, depending on design complexity and drying time. Cost depends on what tools you already own, especially whether you already have a Cricut and screen frame.
Time breakdown for one simple shirt
| Task | Typical time |
|---|---|
| Design setup | 10 to 20 minutes |
| Cut and weed stencil | 15 to 30 minutes |
| Apply stencil to screen | 10 to 15 minutes |
| Print setup | 10 minutes |
| Actual printing | 5 minutes |
| Drying and curing | varies by ink |
Cost factors
Your cost can include:
- Vinyl
- Transfer tape
- Blank shirt
- Ink
- Screen
- Squeegee
If you already own a Cricut, each additional print often becomes much cheaper than the first setup.
Choose this method if you want small-batch custom printing without buying full photo emulsion supplies.
Cricut screen printing vs other methods: which should you choose?
Cricut screen printing is best for simple, handmade runs. Heat transfer vinyl, sublimation, and traditional screen printing each solve different problems.
| Method | Best for | Main drawback |
|---|---|---|
| Cricut screen printing | Small batches, bold one-color prints | Limited fine detail |
| HTV | Fast one-off shirts | Feels thicker on fabric |
| Sublimation | Full-color polyester items | Needs special blanks |
| Traditional screen printing | Larger runs, pro results | More setup and learning |

Quick decision guide
- Choose Cricut screen printing if you want a soft ink feel and simple artwork.
- Choose HTV if you need one shirt fast.
- Choose sublimation if you want full color on polyester.
- Choose traditional screen printing if you want repeatable production.
What mistakes cause bad Cricut screen prints?
Most bad Cricut screen prints come from poor stencil adhesion, too much ink, or designs that are too detailed. Fixing these basics usually improves results fast.
Common problems and fixes
Problem: Ink bleeds under the stencil
Fix: Burnish the vinyl edges harder and use less ink.
Problem: Print looks patchy
Fix: Add a little more ink or use firmer, even pressure.
Problem: Vinyl lifts off the screen
Fix: Clean the screen well before applying the stencil and avoid overly tiny cut pieces.
Problem: Shirt print smears
Fix: Do not shift the screen while printing, and lift it straight up.
Problem: Ink goes through the shirt
Fix: Put cardboard inside and use less pressure.
Edge case to know
Textured fabrics and uneven seams can make clean prints harder. For your first project, use a smooth, flat cotton shirt.
How do you clean the screen and reuse it?
You can often reuse the screen frame after removing ink and stencil residue. Clean screens last longer and print better.
Basic cleanup routine
- Remove excess ink right after printing
- Wash the screen before ink dries fully
- Peel off the vinyl stencil
- Remove adhesive residue if needed
- Let the screen dry flat or upright
If you plan to reuse the same design soon, some crafters leave the stencil on for short-term use. But for storage, a clean screen is usually easier to manage.
Common mistake: letting ink dry in the mesh. Dried ink can block the screen and ruin future prints.
FAQ
Can you really screen print with a Cricut?
Yes. A Cricut can cut a vinyl stencil that you apply to a screen for simple screen printing projects.
What vinyl should I use for Cricut screen printing?
Most crafters use permanent adhesive vinyl because it sticks well to the mesh during printing.
Is Cricut screen printing good for T-shirts?
Yes. Cricut screen printing works well for T-shirts, especially for bold one-color designs on cotton or cotton blends.
Can I do multicolor prints with a Cricut screen print setup?
Yes, but it is harder. Multicolor prints need careful alignment and separate screens or stencil setups.
Do I need photo emulsion for Cricut screen printing?
No. The Cricut stencil method is usually chosen specifically to avoid photo emulsion.
Why is my Cricut screen print blurry?
Blurry prints usually come from stencil lift, too much ink, screen movement, or uneven pressure.
How do I wash a Cricut screen printed shirt?
Wait until the ink is fully cured, then wash inside out in cold water if the ink manufacturer allows that care method.
Can I use acrylic paint instead of screen printing ink?
You can experiment, but fabric screen printing ink is the safer choice for durability and washability.
How many shirts can one stencil print?
It varies by stencil quality, mesh, ink, and handling. A simple stencil may handle a small batch, but vinyl stencils wear out faster than emulsion screens.
Is Cricut screen printing beginner-friendly?
Yes. Cricut screen printing is one of the easier ways for beginners to try screen printing at home.
Conclusion
If you want a practical way to print custom shirts at home, how to cricut screen print comes down to four basics: use a simple design, cut a clean vinyl stencil, apply it well to the screen, and print with controlled pressure. That combination gives the best results for beginners.
My advice is to start small. Pick one bold design, one shirt, and one ink color. Test on scrap fabric first, then print your final piece once the setup feels right. After that, you can try tote bags, holiday shirts, or small product batches for your shop.
Next steps:
- Choose a bold one-color design
- Gather a screen, vinyl, and fabric ink
- Do one test print on scrap fabric
- Cure the ink properly before washing
That first clean print is the fun part. Once you get it, the process makes a lot more sense.

A Teacher with 5 years of experience. Our Expertise, is reliable to meet your full Academic development needs . Worked on many crafts and construction projects offering services from design to development to deployment over the years. You will find many of my works in my business portfolio on request.