There’s something truly magical about capturing the delicate beauty of a hibiscus flower on canvas. Whether you’re a complete beginner picking up a paintbrush for the first time or an experienced artist looking to refine your floral painting skills, hibiscus flowers offer the perfect subject to practice with. These tropical beauties, with their large, ruffled petals and vibrant colors, provide an excellent opportunity to explore color mixing, brushwork techniques, and the art of capturing light and shadow.
What makes hibiscus flowers particularly appealing to paint is their forgiving nature – unlike some flowers that require precise detail work, hibiscus blooms have a natural, organic flow that allows for artistic interpretation. The large petals give you plenty of space to practice blending techniques, while the dramatic center with its prominent stamen creates a striking focal point. Plus, hibiscus flowers come in such a wonderful array of colors – from classic reds and pinks to sunny yellows and deep purples – that you’ll never run out of inspiration for your next masterpiece.
Featured Tutorial Video
Before we dive into our step-by-step guide, check out this excellent hibiscus painting tutorial that demonstrates the process beautifully:

“Easy way to paint Realistic Hibiscus Flowers/Hibiscus Flowers Acrylic Painting” by Eram Art – A comprehensive 16-minute tutorial perfect for beginners
Table of Contents
- Materials You’ll Need
- Understanding Hibiscus Flower Anatomy
- Setting Up Your Workspace
- Color Mixing Fundamentals
- Step-by-Step Painting Process
- Adding Details and Finishing Touches
- Common Mistakes and How to Fix Them
- Variations and Creative Ideas
- Conclusion
Materials You’ll Need
Let’s start with the essentials. You don’t need to break the bank to create beautiful hibiscus paintings, but having the right materials will make your journey much more enjoyable. For acrylic painting, grab a canvas or canvas board, acrylic paints in primary colors plus white and black, a variety of brushes including flat and round brushes in different sizes, a palette for mixing colors, water containers, and paper towels or rags for cleanup.
If you’re leaning toward watercolors, you’ll want watercolor paper (at least 140lb weight), watercolor paints or tubes, watercolor brushes, a spray bottle for keeping paints moist, and masking tape if you want clean edges. The beauty of both mediums is that they each offer unique advantages – acrylics are forgiving and opaque, while watercolors create that dreamy, translucent effect that works wonderfully with flowers.
Understanding Hibiscus Flower Anatomy
Before you start painting, take a moment to really observe a hibiscus flower. Notice how the five large petals overlap and create depth, how they’re often slightly ruffled at the edges, and how they form a trumpet-like shape. The center of the flower features a prominent column called the stamen, which extends beyond the petals and creates a beautiful focal point with its delicate structure and often contrasting color.
Understanding the basic structure will help you create more believable paintings. The petals aren’t perfectly symmetrical – they have natural variations and curves that give the flower its organic beauty. The way light hits these curves creates areas of highlight and shadow that you’ll want to capture in your painting.
Setting Up Your Workspace
Creating the right environment for painting is half the battle won. Find a spot with good natural light if possible, or invest in a decent daylight lamp. Set up your easel or table at a comfortable height where you won’t strain your neck or shoulders during longer painting sessions. Keep your water containers, paper towels, and palette knife within easy reach.
I always recommend having a reference photo or, even better, a real hibiscus flower nearby. This allows you to observe the subtle color variations and how light plays across the petals. Don’t worry about creating an exact replica – the goal is to capture the essence and beauty of the flower while developing your own artistic style.
Color Mixing Fundamentals
Here’s where the magic happens! Hibiscus flowers offer fantastic opportunities to practice color mixing. For a classic red hibiscus, start with cadmium red as your base, then mix in touches of alizarin crimson for depth and cadmium orange for warmth. Don’t forget that flowers are never just one solid color – they have subtle variations throughout.
For the shadows, try mixing your base color with a touch of its complement (for red hibiscus, that would be green) or add a small amount of purple. For highlights, mix your base color with white and perhaps a tiny bit of yellow to keep it warm. The key is to mix several variations of your main color rather than using one flat tone throughout the painting.
Step-by-Step Painting Process
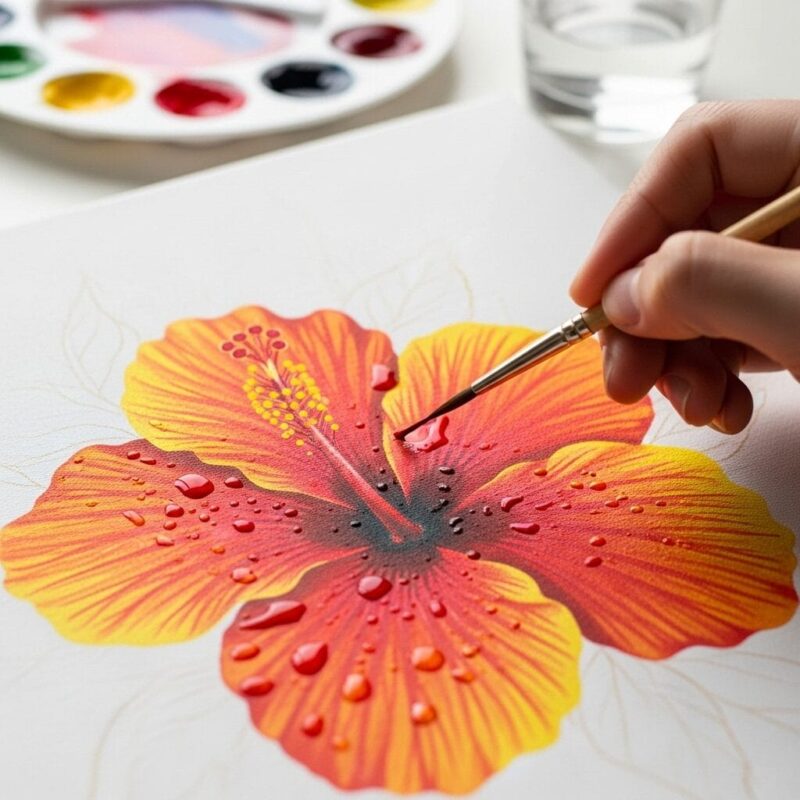
Let’s dive into the actual painting process! Start by sketching the basic shape of your hibiscus lightly with pencil. Don’t worry about perfection – you’re just establishing the overall composition and size. Begin with the largest shapes first, blocking in the basic petal forms with your base colors.
Work from light to dark if you’re using watercolors, or establish your mid-tones first if you’re using acrylics. Paint each petal as a separate shape initially, then blend where they overlap. Use confident brush strokes that follow the natural curve of the petals – this will give your painting energy and life.
Pay special attention to the center of the flower. The stamen is usually a different color than the petals and creates a wonderful contrast. Use a smaller brush for this detail work, and don’t be afraid to make it prominent – it’s often the star of the show in hibiscus paintings.
Adding Details and Finishing Touches
Once your basic flower is established, it’s time for the fun details that really bring your hibiscus to life. Look for the subtle vein patterns in the petals and add these with a liner brush using a slightly darker version of your petal color. These veins typically radiate out from the center of the flower.
Add the delicate anthers at the tip of the stamen using a small brush and often a contrasting color like yellow or orange. Don’t forget about the sepals – those small, leaf-like structures at the base of the flower that add realism to your painting. Finally, consider adding a few water droplets for extra sparkle, or deepen some of the shadows to create more drama.
Common Mistakes and How to Fix Them
Even experienced artists run into challenges when painting flowers. One common issue is making petals too stiff or geometric. Remember, hibiscus petals are soft and organic – they curve and flow naturally. If your petals look too rigid, try softening the edges with a clean, damp brush.
Another frequent mistake is using colors that are too intense or flat. Real flowers have subtle color variations throughout, so avoid using paint straight from the tube. Always mix your colors and create several variations. If your painting looks too bright or artificial, try glazing over it with a thin wash of a more neutral color to tone it down.
Variations and Creative Ideas
Once you’ve mastered the basic hibiscus, why not explore some creative variations? Try painting hibiscus flowers in unusual colors – perhaps a blue or purple version for a more artistic interpretation. Experiment with different backgrounds – a simple gradient can make your flower pop, while a more detailed tropical background can create a complete scene.
Consider painting multiple hibiscus flowers at different stages of bloom, from tight buds to fully opened flowers to create a more dynamic composition. You could also try different painting styles – perhaps a loose, impressionistic approach or a more detailed botanical illustration style.
Conclusion
Painting hibiscus flowers is truly a rewarding artistic journey that combines technical skill with creative expression. These magnificent blooms offer endless opportunities to practice color mixing, brush control, and observational skills while creating something genuinely beautiful. Remember, every artist’s interpretation will be unique – embrace your personal style and don’t be afraid to experiment.
The most important thing is to enjoy the process. Each painting session is a chance to learn something new, whether it’s a more effective way to blend colors or a brushstroke technique that creates just the right texture. Keep practicing, stay patient with yourself, and most importantly, have fun bringing these tropical beauties to life on your canvas. Before you know it, you’ll be creating hibiscus paintings that capture not just the appearance of these stunning flowers, but their very essence and spirit as well.

A Teacher with 5 years of experience. Our Expertise, is reliable to meet your full Academic development needs . Worked on many crafts and construction projects offering services from design to development to deployment over the years. You will find many of my works in my business portfolio on request.