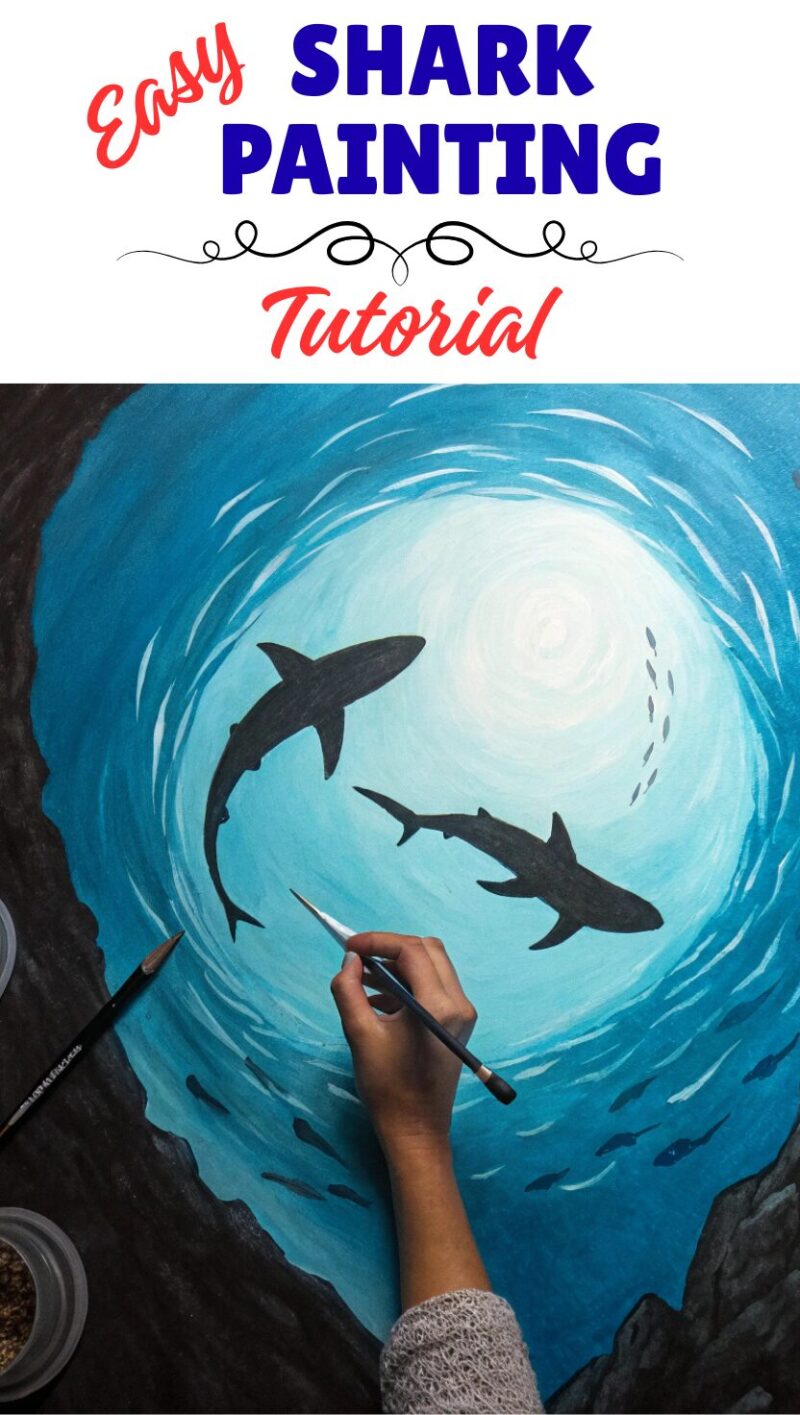
Painting sharks in acrylics opens up a world of creative possibilities that goes far beyond simple drawing. There’s something incredibly powerful about capturing these magnificent predators with bold brush strokes, rich colors, and dynamic compositions. Acrylic paints offer the perfect medium for shark paintings – they’re versatile enough to create both photorealistic details and impressionistic underwater scenes, they dry quickly allowing for efficient layering, and they’re forgiving enough for beginners while offering professional results for experienced artists.
What makes shark painting particularly exciting is the opportunity to explore the underwater environment. You’re not just painting the shark itself, but creating an entire aquatic world with flowing water, filtered light, bubbles, and the mysterious depths of the ocean. Acrylics excel at capturing these effects – from the subtle color gradations of deep water to the dramatic lighting that illuminates a shark’s sleek form. Whether you want to paint a close-up portrait showcasing every detail or a dynamic scene with sharks gliding through their natural habitat, acrylics provide the versatility and control you need to bring your vision to life.
Featured Tutorial Video
Here’s an excellent comprehensive tutorial that will guide you through the entire process:

“Acrylic Painting for Beginners – Paint a Shark Tutorial” by Lachri Fine Art – A detailed 54-minute tutorial perfect for learning proper techniques
Table of Contents
- Acrylic Painting Materials
- Color Theory for Underwater Scenes
- Setting Up Your Workspace
- Composition and Planning
- Step-by-Step Painting Process
- Painting Water and Light Effects
- Advanced Techniques and Details
- Finishing Touches and Varnishing
- Conclusion
Acrylic Painting Materials
Success in acrylic shark painting starts with having the right materials. For paints, you’ll want a good selection of colors including ultramarine blue, prussian blue, phthalo blue, burnt sienna, raw umber, titanium white, and payne’s gray. These colors will form the foundation of your underwater palette. Add cadmium yellow medium, alizarin crimson, and ivory black to round out your basic set.
Brush selection is crucial for achieving different textures and effects. You’ll need flat brushes in various sizes (from 1-inch for large areas down to ¼-inch for details), round brushes for fine work and organic shapes, and a fan brush for creating water textures and light effects. A palette knife can be invaluable for mixing colors and creating unique textures.
Choose a canvas or canvas board appropriate to your skill level and desired painting size. Beginners might start with an 11×14 inch canvas, which provides enough space for details without being overwhelming. You’ll also need a palette for mixing colors, water containers, paper towels or rags, and an easel or stable surface for painting.
Color Theory for Underwater Scenes
Understanding color behavior underwater is essential for creating believable shark paintings. Water acts as a natural filter, absorbing certain wavelengths of light more than others. Red light is absorbed first, followed by orange and yellow, which is why deeper waters appear predominantly blue and green. This means your shark’s coloration will shift depending on its depth and the lighting conditions.
The concept of atmospheric perspective applies underwater as well – objects become less distinct and more blue-tinted as they recede into the distance. This effect helps create depth in your painting and can make your shark appear to emerge dramatically from the murky depths. Use cooler, less saturated colors for background elements and warmer, more saturated colors for your main subject.
Consider the light source in your composition. Sunlight filtering down from the surface creates dramatic lighting effects with bright highlights and deep shadows. Backlighting can create stunning silhouettes, while side lighting emphasizes the shark’s three-dimensional form and muscular structure.
Setting Up Your Workspace
Proper lighting is crucial for accurate color mixing and painting. Set up your easel near a north-facing window for consistent natural light, or use a daylight-balanced lamp if painting indoors. Position your palette and supplies within easy reach, and have clean water containers readily available since acrylics dry quickly.
Prepare your canvas with a light pencil sketch of your composition. Don’t worry about details at this stage – focus on getting the basic shapes and proportions right. You can also tone your canvas with a thin wash of color to eliminate the stark white surface and help you judge colors more accurately as you paint.
Composition and Planning
Strong composition is the foundation of any compelling shark painting. Consider using the rule of thirds to place your shark in a dynamic position rather than centering it perfectly. Diagonal lines create movement and energy, so position your shark at an angle that suggests motion through the water.
Think about the story you want to tell. Is your shark cruising peacefully through clear waters, or emerging menacingly from darker depths? The mood you want to convey will influence your color choices, lighting, and composition decisions. Sketch several thumbnail compositions before committing to your final canvas.
Consider the viewing angle carefully. A profile view showcases the shark’s classic silhouette, while a three-quarter view adds dimensionality. Head-on compositions can be dramatic and intimidating, while views from below can emphasize the shark’s impressive size and power.
Step-by-Step Painting Process
Begin by establishing your background first, working from the furthest elements forward. Mix various blues and greens to create the underwater environment, using lighter, cooler colors for distant areas and darker, warmer tones for closer regions. Work in broad strokes with a large flat brush, creating smooth gradations that suggest the depth and mystery of ocean water.
Once your background is established, begin blocking in your shark with basic color masses. Don’t worry about details yet – focus on getting the overall form and value relationships correct. Sharks typically have a countershading pattern with darker tops and lighter bellies, but remember how underwater lighting affects these natural colors.
Use confident brushstrokes that follow the shark’s form and suggest its streamlined shape. The direction of your brushstrokes can help convey the sense of movement through water and the smooth texture of shark skin. Avoid overworking these initial layers – acrylics can build up nicely, but you don’t want to lose the freshness of your brushwork.
Build up your forms gradually, adding successive layers of color to develop the three-dimensional appearance. Pay attention to how light wraps around the shark’s cylindrical body, creating highlights along the top and sides while leaving the belly and undersides in relative shadow.
Painting Water and Light Effects
Water effects are what truly bring underwater paintings to life. Use various techniques to suggest the movement and transparency of water. Dry brush techniques can create the illusion of light filtering through water, while wet-on-wet blending can suggest the soft, flowing nature of ocean currents.
Bubbles add life and movement to your composition. Paint them with small touches of white or very light blue, making them progressively smaller and less distinct as they rise toward the surface. Don’t make them all perfectly round – water distorts their shapes as they move.
Light rays filtering down from the surface create some of the most dramatic effects in underwater scenes. Use a fan brush or palette knife to create these streaming light effects, starting with lighter colors at the top and gradually fading them as they penetrate deeper. These light rays should interact with your shark, creating highlights and casting shadows that enhance the three-dimensional effect.
Advanced Techniques and Details
Once your basic shark form is established, begin refining the details that make it come alive. The eye is crucial – it should be dark and intense, with a small highlight that makes it appear wet and alive. The position and expression of the eye can completely change the mood of your painting.
Add the gill slits with careful brushwork, making sure they follow the contour of the shark’s head. These details are important for anatomical accuracy and help identify your subject as a shark rather than a generic fish. The mouth area requires careful attention to form and proportion – even if closed, it should suggest the power contained within.
Work on the fins with particular care, as they’re crucial for conveying the shark’s grace and power. The dorsal fin should appear to cut through the water, while the pectoral fins suggest the shark’s ability to maneuver with precision. Pay attention to the way water flows around these appendages.
Finishing Touches and Varnishing
The final details often make the difference between a good painting and a great one. Add any final highlights that suggest light catching on wet surfaces, and deepen shadows where necessary to enhance the three-dimensional form. Consider adding environmental details like distant fish, coral formations, or debris floating in the water to enhance the sense of place.
Step back from your painting frequently during this final phase to assess the overall effect. Sometimes less is more – avoid the temptation to overwork details at the expense of the painting’s overall impact and unity.
Once your painting is completely dry, consider applying a protective varnish. This not only protects your artwork but can also enhance color saturation and provide a uniform surface finish. Choose between matte, satin, or gloss finishes depending on your preference and the effect you want to achieve.
Conclusion
Painting sharks in acrylics combines technical skill with creative vision to create powerful, dynamic artworks. The process teaches you about color theory, light behavior underwater, and the importance of strong composition while allowing you to explore one of nature’s most fascinating predators. Each painting session offers new challenges and opportunities to grow as an artist.
Remember that mastery comes through practice and experimentation. Don’t be afraid to try different techniques, color combinations, and compositional approaches. Study photographs and videos of sharks in their natural environment, paying attention to how light, color, and movement interact in the underwater world.
The ocean provides endless inspiration, and sharks offer a subject that’s both challenging and rewarding to paint. Whether you develop a realistic style or create more interpretive works, the fundamental techniques covered in this tutorial will serve as your foundation. Keep painting, keep learning, and most importantly, enjoy the process of bringing these magnificent creatures to life on canvas. Each brushstroke is an opportunity to capture not just the appearance of a shark, but its power, grace, and the mysterious beauty of the underwater world it calls home.

A Teacher with 5 years of experience. Our Expertise, is reliable to meet your full Academic development needs . Worked on many crafts and construction projects offering services from design to development to deployment over the years. You will find many of my works in my business portfolio on request.