
Have you ever wanted to create a beautiful rose that lasts forever? Origami roses are the perfect craft project that combines creativity, patience, and paper-folding skills. The best part is that you only need a square piece of paper to get started! Thanks to YouTube, learning origami has never been easier. In this guide, we’ll explore three different methods for making origami roses, each with its own special look and difficulty level. Whether you’re a complete beginner or ready for a challenge, there’s a perfect rose-folding method waiting for you.
What is Origami and Why Make Paper Roses?
Origami is the traditional Japanese art of paper folding. The word comes from “ori” (folding) and “kami” (paper). For centuries, people around the world have practiced this art form, creating everything from simple butterflies to incredibly detailed flowers. Roses are among the most popular origami designs because they’re beautiful, meaningful, and make perfect gifts.
Unlike real roses that wilt and die after a few days, origami roses last forever. You can make them in any color imaginable, create entire bouquets, and use them to decorate your room or give as heartfelt gifts for Valentine’s Day, Mother’s Day, birthdays, or just to brighten someone’s day. Plus, making origami helps improve your concentration, hand-eye coordination, and problem-solving abilities. It’s like giving your brain a fun workout while creating something beautiful!
What You’ll Need to Get Started
Before we dive into the three methods, let’s talk about supplies. The wonderful thing about origami is that you don’t need expensive materials:
Square Paper: This is the most important item. You can buy colorful origami paper at craft stores, or simply cut regular printer paper into a square. For beginners, paper that’s 15cm x 15cm (about 6 inches) works perfectly. Red and pink are classic rose colors, but feel free to experiment with any color you like!
A Flat Working Surface: Find a clean table or desk with good lighting where you can see all your fold lines clearly.
Patience and Practice: Some roses take 5-25 minutes to complete, and your first attempts might not be perfect. That’s completely normal! Even professional origami artists had to practice many times before mastering these designs.
Optional Items: Once you get comfortable with folding, you might want to add stems using green paper, pipe cleaners, or wooden skewers wrapped in green tape. Some people use a tiny dot of glue to secure parts, though traditional origami uses only folding.
Now, let’s explore three different methods for creating origami roses!
Method 1: The Simple Spiral Rose (Best for Complete Beginners)
Difficulty Level: Easy
Time Needed: 5-7 minutes
Perfect For: First-time folders and quick projects
If you’ve never made an origami rose before, this is the perfect starting point. The Simple Spiral Rose creates a lovely flower using basic folds and a rolling technique. It looks impressive but doesn’t require complex folding patterns.
How This Method Works: This rose design uses a technique where you fold the paper to create triangular sections, then roll and twist the paper to form petals that spiral around a center point. The finished rose has a charming, whimsical look with soft, curved petals.
Step-by-Step Overview:
- Start with your square paper, colored side down
- Fold the paper in half diagonally both ways to create crease lines
- Fold the corners toward the center point
- Create smaller triangular folds on each section
- Carefully roll the sections to create the spiral petal effect
- Shape the petals by gently curling them outward
Tips for Success: Make sharp, crisp creases by running your fingernail along each fold. When you get to the rolling part, work slowly and gently. If the paper starts to tear, you’re using too much force. This rose is forgiving, so even if your folds aren’t perfectly symmetrical, it will still look beautiful. The organic, slightly irregular shape actually makes it look more like a real flower!
Why Beginners Love It: Students particularly enjoy this method because you can see results quickly. It’s not intimidating, and within just a few minutes of following the video, you’ll have a completed rose in your hands. This builds confidence and gets you excited to try more complex designs.
Method 2: The Traditional Fractal Rose (Intermediate Level)
Difficulty Level: Intermediate
Time Needed: 10-13 minutes
Perfect For: Folders ready for more detail and structure
Once you’ve successfully made a few spiral roses, you’re ready to level up to the Traditional Fractal Rose. This design creates a more structured, geometric-looking flower with distinct layers of petals. It has a sophisticated appearance that really showcases your origami skills.
How This Method Works: This rose uses a “fractal” folding pattern, which means you create repeating geometric shapes that build upon each other. You’ll make a square grid of creases first, then collapse the paper into a swirled pattern, and finally shape it into a three-dimensional rose with defined petals. The result is a rose that looks almost architectural, with clean lines and symmetrical petals.
Step-by-Step Overview:
- Begin with precise creasing to divide your paper into sections
- Create diagonal folds that form an X pattern across the square
- Collapse the paper following the crease lines to form a twisted square base
- Work with each corner section to create individual petals
- Shape and curl the four main petals outward
- Refine the center and add dimension to make the rose three-dimensional
Tips for Success: The key to this rose is accuracy in the early creasing stages. Take your time making those initial folds perfectly straight and evenly spaced. Use the pause button frequently on the YouTube video – there’s no rush! When collapsing the paper into the twisted base, you might feel like you’re doing it wrong because the paper gets a bit bunched up. That’s normal! Trust the process and keep following the video. The “magic moment” comes when you start shaping the petals and suddenly see the rose take form.
Why Intermediate Folders Love It: This rose strikes the perfect balance between challenge and achievability. It introduces you to more advanced origami concepts like pre-creasing and collapse folds without being overwhelming. The finished product looks professional and impressive, making it perfect for gifts or special occasions. Many students report feeling a great sense of accomplishment after completing their first Traditional Fractal Rose.
Method 3: The Kawasaki Rose (Advanced Challenge)
Difficulty Level: Advanced
Time Needed: 20-25 minutes
Perfect For: Experienced folders wanting a masterpiece
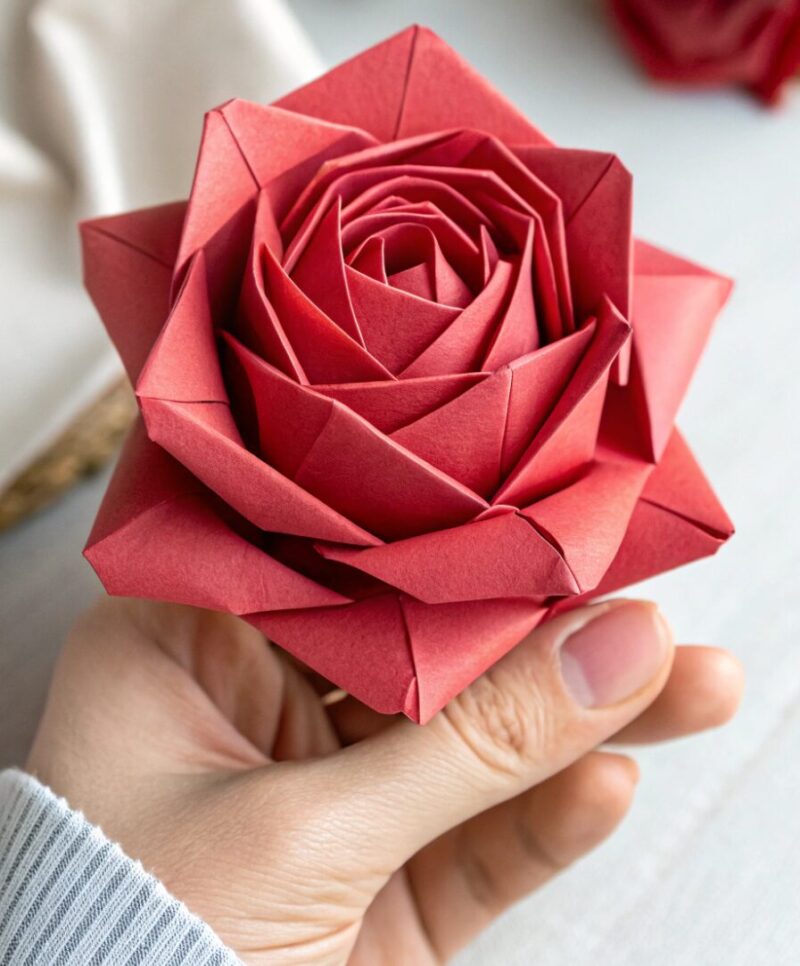
The Kawasaki Rose is considered one of the most beautiful and iconic origami rose designs in the world. Created by Japanese origami master Toshikazu Kawasaki, this rose features an intricate swirling pattern, multiple layers of petals, and incredible detail. It’s definitely challenging, but completing one is like earning your origami black belt!
How This Method Works: The Kawasaki Rose uses an incredibly complex folding pattern that involves dividing your paper into a precise grid, creating numerous crease lines, and then collapsing everything into a twisted, spiraling structure. The rose has four main petals that twist dramatically around the center, with smaller petal details visible throughout. When light hits the folds, it creates beautiful shadows that make the rose look incredibly realistic.
Step-by-Step Overview:
- Create an extensive grid of crease lines across your entire paper (this takes several minutes)
- Add diagonal creases that intersect throughout the grid
- Begin the complex collapse, where all those creases work together to form the base structure
- Twist and lock the four corners to create the signature Kawasaki spiral
- Carefully shape each of the four main petals, working from the center outward
- Add final touches by curling petal edges and refining the three-dimensional form
Tips for Success: Before you even start folding, watch the entire 25-minute video once without touching your paper. This gives you a mental roadmap of where you’re going. When you’re ready to fold, work in a quiet space where you won’t be interrupted or distracted. The pre-creasing stage can feel tedious, but those creases are absolutely essential – they’re like a roadmap that guides the paper into the final shape.
Use the pause button constantly. Seriously, pause after every single step, complete your fold, double-check it matches the video, and only then move forward. When you get to the collapse stage (around the middle of the tutorial), things might feel confusing. The paper will resist and seem like it doesn’t want to fold the way you’re trying to make it go. This is normal! Be gentle but persistent, and suddenly everything will click into place.
Why Advanced Folders Love It: Completing your first Kawasaki Rose is an unforgettable moment. Many folders report spending 45 minutes to an hour on their first attempt (which is fine!), and feeling incredibly proud when they finish. The rose is so detailed and beautiful that people often can’t believe it’s made from a single, uncut square of paper. This rose makes an exceptional gift for someone special because the recipient can see how much time, effort, and skill went into creating it.
Tips That Apply to All Three Methods
No matter which method you choose, these universal tips will help you succeed:
Watch Before You Fold: Always watch the tutorial video all the way through once before starting. This helps you understand the overall process and mentally prepare for tricky sections.
Use the Pause Button: YouTube’s pause and rewind features are your best friends. Fold at your own pace, not the video’s pace. You can even slow down the playback speed in YouTube’s settings if needed.
Practice with Regular Paper First: Save your beautiful colored origami paper for when you’ve practiced the method at least once. Use cheap printer paper or scrap paper for your first attempts.
Make Crisp, Precise Folds: Sharp creases make all the difference. Use your fingernail or a ruler edge to really press down each fold. Messy folds create messy roses.
Check Your Orientation: Before making each fold, make sure your paper is oriented exactly like the paper in the video. It’s easy to accidentally flip something the wrong way!
Take Breaks: If you get frustrated or confused, walk away for a few minutes. Come back with fresh eyes and the confusing step often becomes clear.
Don’t Give Up: Your first attempt might not be perfect, and that’s totally okay! Even the YouTube instructors had to practice many times. Each rose you make will be better than the last.
From Single Rose to Beautiful Bouquet
Once you’ve mastered one or more of these methods, why stop at a single rose? You can create entire bouquets by making multiple roses in different colors. Try making roses in various sizes by starting with different-sized squares of paper. Add stems using green pipe cleaners, painted wooden skewers, or even origami stems (there are tutorials for those too!). Arrange several roses together in a vase for a stunning decoration that lasts forever, or create a bouquet as a gift that shows how much you care.
Some creative ideas include making a dozen roses for an anniversary gift, creating a rainbow bouquet with roses in every color, or making tiny roses from 5cm paper to use as package decorations or jewelry charms.
Conclusion: Your Origami Journey Begins
Learning to make origami roses is a rewarding journey that anyone can take. Start with Method 1’s Simple Spiral Rose to build your confidence and get comfortable with basic techniques. When you’re ready for more challenge, move up to Method 2’s Traditional Fractal Rose to develop precision and learn intermediate folding concepts. Finally, when you want to create something truly spectacular, tackle Method 3’s legendary Kawasaki Rose.
Remember, every expert folder was once a beginner who made plenty of crumpled mistakes before creating beautiful roses. The YouTube tutorials from Origami Princess and Easy Origami and Crafts are there to guide you every step of the way, and you can watch them as many times as you need. Be patient with yourself, enjoy the meditative process of folding, and soon you’ll have gorgeous paper roses that never need water and never wilt.
So grab a square piece of paper, choose your method, pull up the YouTube tutorial, and start your origami adventure today. Before you know it, you’ll be creating beautiful roses that amaze your friends and family.

A Teacher with 5 years of experience. Our Expertise, is reliable to meet your full Academic development needs . Worked on many crafts and construction projects offering services from design to development to deployment over the years. You will find many of my works in my business portfolio on request.