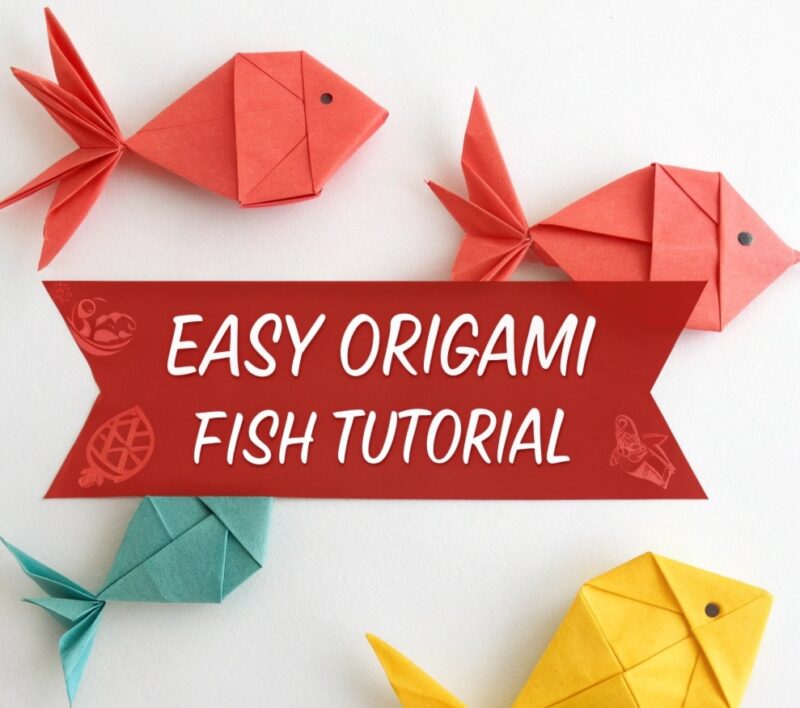

Learning how to make origami fish step by step is one of the most rewarding paper-folding projects for beginners. This traditional Japanese craft requires just a single square of paper and about 5-10 minutes of your time. Whether you’re looking for a fun activity with kids, a creative way to decorate your space, or simply want to learn a new skill, folding an origami fish gives you immediate, satisfying results.
Key Takeaways
- The basic origami fish requires only one square sheet of paper and takes 5-10 minutes to complete
- No cutting, gluing, or special tools needed—just your hands and paper
- The traditional origami fish uses approximately 12-15 folds and works best with 6-inch square paper
- Beginners should start with standard origami paper or any thin, crisp paper that holds creases well
- Sharp, precise folds are more important than speed when learning the technique
- Once you master the basic fish, you can create variations by adjusting fin shapes and tail styles
- Common mistakes include uneven folds and skipping the crease-setting step
- Completed origami fish work beautifully as decorations, gift toppers, or mobile elements
Quick Answer
To make an origami fish, start with a square piece of paper, fold it diagonally to create a triangle, then follow a series of valley and mountain folds to shape the body, fins, and tail. The entire process involves about 12-15 folds and takes beginners roughly 5-10 minutes. The key is making crisp, accurate creases at each step and working on a flat surface.
What Materials Do You Need for Origami Fish?
You only need one square piece of paper to create an origami fish—no scissors, glue, or special equipment required. Standard origami paper (called “kami”) works best because it’s thin enough to fold multiple times while being sturdy enough to hold its shape.
Best paper choices for beginners:
- Origami paper (6×6 inches): Pre-cut squares in various colors, typically 70gsm weight
- Printer paper: Cut into squares, though slightly thicker and harder to fold
- Wrapping paper: Works well if it’s not too thick or glossy
- Scrapbook paper: Good for decorative fish, though some patterns are too heavy
Choose paper that’s at least 6 inches square if you’re just starting out. Smaller paper makes the folds trickier to execute, while larger paper (8-10 inches) gives you more room to work but creates a bigger finished product. Avoid cardstock or thick construction paper—they won’t hold the detailed folds properly.
One common mistake: Using paper that’s too slippery (like magazine pages) or too textured (like watercolor paper). Both make it difficult to create the sharp creases that give your fish its defined shape.

How to Make Origami Fish Step by Step: The Basic Technique
The traditional origami fish follows a straightforward folding sequence that builds from a simple triangle base. I’ll walk you through each fold in order, and you should complete each step fully before moving to the next one.
Step 1: Create the foundation triangle
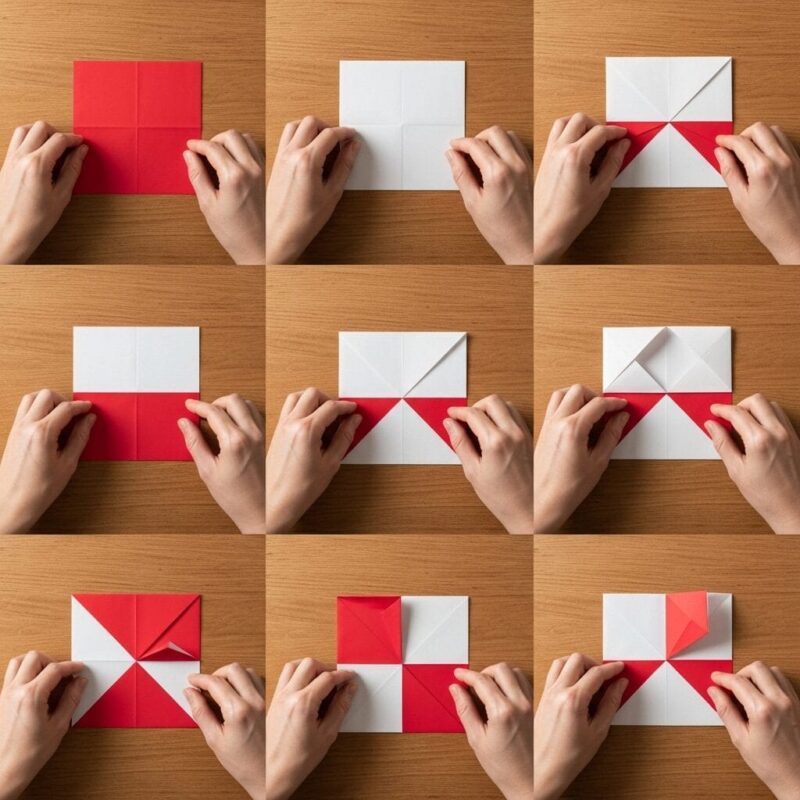
Place your square paper colored-side down on a flat surface. Fold it diagonally in half to form a triangle, bringing one corner to meet the opposite corner exactly. Press down firmly along the fold to create a sharp crease, then unfold the paper back to a square.
Step 2: Make the second diagonal
Fold the paper diagonally in the opposite direction, corner to corner, creating an X-shaped crease pattern when you unfold it. These crease lines serve as guides for the remaining folds.
Step 3: Fold to the center line
With the paper as a square (colored side down), fold the bottom edge up to meet the horizontal center line. Then fold the top edge down to meet the same center line. You should now have a rectangle shape with the colored side showing.
Step 4: Create the fish body
Fold the rectangle in half lengthwise, bringing the top edge down to meet the bottom edge. You’ll have a long, narrow rectangle.
Step 5: Shape the head
Take the right corner of your rectangle and fold it diagonally upward at about a 45-degree angle. This creates the fish’s pointed head. The exact angle isn’t critical, but steeper angles make a more streamlined fish.
Step 6: Form the tail
On the opposite end, fold the left corner up at an angle to create the tail fin. You can make this fold match the head angle or create a different shape for variety.
Step 7: Add the bottom fin
Flip the fish over. Take the bottom layer’s corner and fold it down slightly to create a small triangular fin. This gives your fish dimension and helps it stand out visually.
Step 8: Define the tail details
Make a small reverse fold on the tail section by opening it slightly and pushing the tip inward, then flattening. This creates a more realistic forked tail appearance.
Step 9: Final shaping
Gently curve the body by running your finger along the length of the fish. This subtle three-dimensional shaping makes it look more lifelike.
Pro tip: Work on a hard, smooth surface like a table or book. Soft surfaces like carpet or your lap make it harder to create the crisp folds that define a clean-looking origami fish.
What Are the Most Common Mistakes When Learning How to Make Origami Fish Step by Step?
The biggest mistake beginners make is rushing through the creasing process, which leads to sloppy folds that don’t hold their shape. Each fold should be pressed firmly and run over with your fingernail or a flat tool to set the crease properly.
Mistakes that ruin your results:
- Misaligned corners: When folding corner to corner, even a 2-3mm gap creates asymmetry that compounds through later steps
- Weak creases: Folds that aren’t pressed firmly will unfold partially, making the fish look messy
- Skipping the unfold step: Some folds need to be made, creased, then unfolded to create guide lines
- Using the wrong paper side: Starting with the colored side up when instructions say colored-side down flips your final result
- Forcing thick paper: If the paper won’t fold smoothly, it’s too thick for this design
If your fish looks lopsided, the problem usually traces back to the initial diagonal folds. Those foundation creases need to be perfectly aligned, or everything built on top of them will be off-center.
Edge case to watch for: If you’re using patterned paper where one side is white, decide before starting which side you want visible in the finished fish. The side facing down when you start will be the dominant visible side in the completed model.
How Can You Customize Your Origami Fish?
Once you’ve mastered the basic technique for how to make origami fish step by step, you can create variations by adjusting fin shapes, tail styles, and paper choices. Small modifications to the standard folds produce surprisingly different results.
Simple customization ideas:
- Tropical fish: Use bright, multi-colored paper and make the fins larger and more angular
- Koi fish: Choose red, orange, or white paper and create a rounded, fuller body by adjusting fold angles
- Goldfish: Use metallic gold or orange paper and make the tail fins more flowing with gentle curves
- Angelfish: Extend the top and bottom fins by folding them out at sharper angles
You can also add details after folding. Draw eyes with a marker, add scales with a pen, or use small stickers for embellishment. Just remember that adding wet media like paint might cause the paper to warp or the folds to weaken.
Choose dual-sided paper if you want both colors to show in the finished fish, creating a two-tone effect that highlights different sections. Choose patterned paper if you want visual interest without adding decorations afterward.

What Can You Do With Completed Origami Fish?
Origami fish serve both decorative and functional purposes once you’ve folded them. Because they’re lightweight and three-dimensional, they work particularly well for hanging displays and interactive projects.
Popular uses for origami fish:
- Baby mobiles: Hang multiple fish at different heights using fishing line
- Gift decorations: Attach to wrapped presents instead of bows
- Garland: String several fish together for party decorations
- Greeting cards: Glue flat against cardstock for dimensional cards
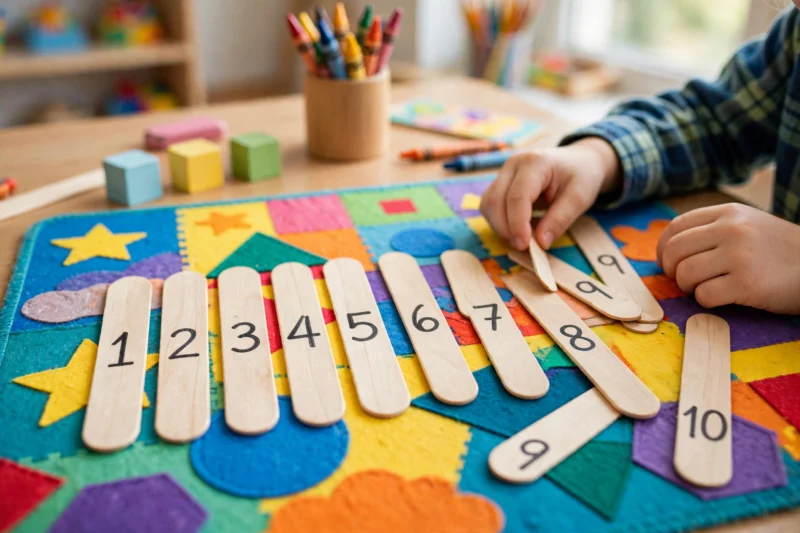
- Educational tools: Use for counting activities with young children
- Aquarium scenes: Create underwater dioramas with paper fish “swimming” through seaweed
I’ve found that making 10-15 fish in various sizes and colors creates enough variety for an eye-catching mobile or garland. The repetition also helps you refine your technique—your tenth fish will look noticeably better than your first.
For teachers and parents: Origami fish projects work well for ages 7 and up. Younger children can participate with pre-creased paper where you’ve already made the first few folds, letting them complete the simpler final steps.
How Long Does It Take to Learn How to Make Origami Fish Step by Step?
Most beginners successfully complete their first origami fish within 15-20 minutes, including time to reference instructions. By your third or fourth fish, you’ll likely have the sequence memorized and can finish one in 5-7 minutes.
Learning timeline for typical beginners:
- First attempt: 15-20 minutes with frequent instruction checking
- Second attempt: 10-12 minutes with occasional reference to steps
- Third attempt: 7-10 minutes with minimal instruction checking
- After 5-6 fish: 5-7 minutes from memory
The learning curve is gentler than many origami projects because the fish uses mostly basic folds (valley folds and simple diagonal creases) rather than advanced techniques like reverse folds or petal folds.
If you’re struggling after 30 minutes, the issue is usually paper choice or working environment. Switch to thinner paper, move to a harder work surface, and make sure you have good lighting so you can see the fold lines clearly.
What’s the Difference Between Origami Fish Designs?
Several traditional origami fish patterns exist, each with different complexity levels and final appearances. The basic fish I’ve described above is the simplest version, ideal for beginners and quick projects.
| Fish Type | Folds Required | Difficulty | Time | Best For |
|---|---|---|---|---|
| Basic Fish | 12-15 | Beginner | 5-10 min | Learning fundamentals, kids’ projects |
| Koi Fish | 20-25 | Intermediate | 15-20 min | Decorative displays, gifts |
| Angelfish | 25-30 | Intermediate | 20-25 min | Advanced decoration, collections |
| Inflatable Fish | 18-22 | Beginner-Intermediate | 10-15 min | Interactive play, 3D displays |
The basic fish lies flat or has minimal dimension, while the inflatable fish includes a step where you blow air into a small opening to puff out the body. The koi and angelfish use more complex folding sequences to create realistic features like layered fins and scaled bodies.
Choose the basic fish if you’re new to origami, working with children, or need to make multiple fish quickly. Choose the koi or angelfish if you want a showpiece and have already mastered basic folding techniques.
How Do You Fix Mistakes in Origami Fish?
Small errors in origami fish can usually be corrected by carefully unfolding back to the mistake and re-creasing properly. Paper has some tolerance for re-folding, though the creases become slightly weaker each time.
Fixable mistakes:
- Misaligned corners: Unfold to that step, align precisely, and re-crease
- Weak creases: Unfold and re-fold with more pressure
- Wrong fold direction: Unfold and reverse the fold (mountain to valley or vice versa)
Unfixable mistakes that require starting over:
- Torn paper: Once ripped, the structural integrity is compromised
- Multiple re-folds in the same spot: Paper becomes too weak and won’t hold shape
- Crumpled sections: Wrinkles can’t be removed and will show in the final model
If you’re more than halfway through and make a major error, I recommend starting fresh with new paper rather than trying to salvage a heavily re-folded piece. The time investment in starting over is usually less than trying to fix compounded mistakes.
Prevention tip: Before making each fold, double-check which direction it should go and where the edges should align. Taking three extra seconds to verify saves the frustration of unfolding and redoing work.
Frequently Asked Questions
What size paper is best for origami fish?
Six-inch square paper works best for beginners learning how to make origami fish step by step. This size is large enough to handle comfortably but small enough to create a manageable finished product. You can use 8-10 inch paper if you want a larger display piece.
Can you use regular printer paper for origami fish?
Yes, but you’ll need to cut it into a perfect square first. Printer paper is slightly thicker than traditional origami paper, making the folds a bit harder to crease sharply, but it works fine for practice and learning the basic technique.
How do you make origami fish stay folded?
Sharp, firm creases are the key to making origami fish hold their shape. Press each fold firmly with your fingernail or a flat tool like a ruler edge. If the fish still unfolds, you can add a tiny dot of glue on the inside layers where they overlap.
What’s the easiest origami fish for kids?
The basic traditional fish with 12-15 folds is the easiest design for children ages 7 and up. Younger kids (ages 5-6) can complete simplified versions where an adult pre-folds the first few steps and the child finishes the final shaping.
Can you make origami fish with tissue paper?
Tissue paper is too thin and fragile for most origami fish designs. It tears easily when folding and won’t hold crisp creases. Stick with standard origami paper, printer paper, or wrapping paper for better results.
How do you make a 3D origami fish?
The inflatable origami fish creates a 3D effect by including a small opening where you blow air into the body, puffing it out. This design requires a few additional folds compared to the basic flat fish but is still beginner-friendly.
What does origami fish symbolize?
In Japanese culture, origami fish often symbolize good fortune, perseverance, and abundance. Koi fish specifically represent strength and determination because they swim upstream against currents.
How many origami fish do you need for a mobile?
A balanced mobile typically uses 5-9 origami fish in varying sizes and colors. Odd numbers create more visual interest than even numbers, and varying the heights at which they hang adds dimension to the display.
Can you make origami fish waterproof?
Standard origami paper isn’t waterproof, but you can seal completed fish with clear acrylic spray or decoupage medium to make them water-resistant. This works well for bathroom decorations or outdoor displays, though the paper will still deteriorate if fully submerged.
What’s the hardest part of making origami fish?
Most beginners find the tail shaping and fin definition the trickiest parts because they require visualizing the three-dimensional result while working with flat folds. The solution is to follow photos or diagrams closely and not rush these final shaping steps.
How do you display origami fish?
Origami fish display beautifully when hung with fishing line or thread, glued to cards or frames, arranged in shadow boxes, or incorporated into mobiles and garlands. You can also stand them on surfaces by creating a small fold at the bottom for stability.
Can you unfold and reuse origami paper?
You can unfold origami fish and reuse the paper, but the crease lines will remain visible and the paper will be slightly weaker. This works fine for practice but not for display pieces where you want a clean appearance.
Conclusion
Learning how to make origami fish step by step opens the door to a relaxing, creative hobby that requires minimal materials and space. The basic fish design I’ve shared takes just 5-10 minutes once you’ve practiced a few times, and the skills you develop transfer to more complex origami projects.
Start with standard 6-inch origami paper, work on a hard flat surface, and focus on making each crease sharp and precise. Your first fish might look a bit rough, but by your third or fourth attempt, you’ll see significant improvement. The repetitive nature of folding multiple fish actually helps—you’re building muscle memory with each one.
Your next steps:
- Gather a few sheets of square paper (origami paper or cut printer paper)
- Clear a flat workspace with good lighting
- Follow the step-by-step instructions above, completing each fold before moving forward
- Make at least three fish to build your skills and confidence
- Experiment with different paper colors and sizes to create variety
- Try one of the customization ideas to make the design your own
Once you’ve mastered the basic fish, challenge yourself with the koi or angelfish variations, or explore other beginner-friendly origami animals like cranes, frogs, or butterflies. The fundamental folding techniques you’ve learned here apply across hundreds of origami designs.
Remember, origami is about the process as much as the result. Even imperfect fish have charm, and each one you fold improves your technique. So grab some paper and start folding—your school of origami fish awaits.

A Teacher with 5 years of experience. Our Expertise, is reliable to meet your full Academic development needs . Worked on many crafts and construction projects offering services from design to development to deployment over the years. You will find many of my works in my business portfolio on request.