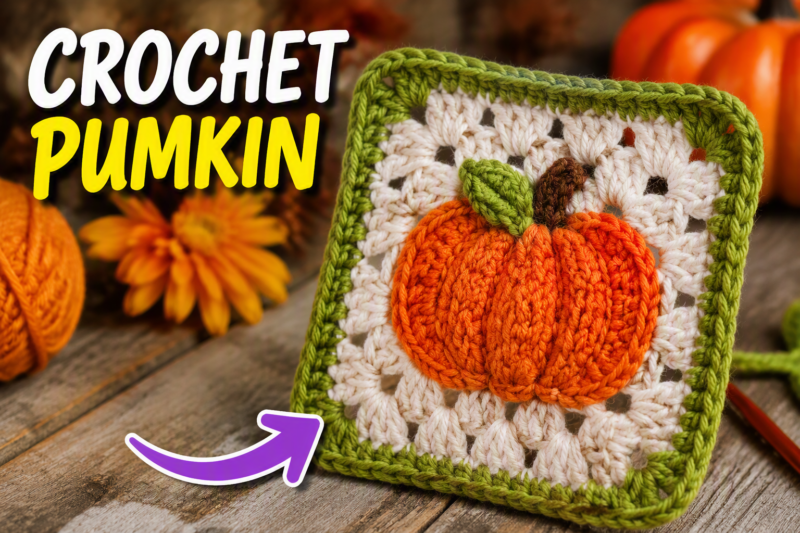


Want to stitch together a cozy seasonal craft that doubles as home decor? A crochet pumpkin granny square blends the classic granny square structure with a festive pumpkin theme, making it perfect for autumn projects. Whether you’re assembling a fall throw blanket, crafting Halloween decorations, or looking for a beginner-friendly project before the season changes, this DIY combines simple stitches with colorful results. The beauty of the pumpkin granny square is that it works as a flat modular panel for blankets or as a stuffed 3D piece that sits on a shelf. Let’s get you started.
Quick Questions and Answers
Question: What is a crochet pumpkin granny square DIY project? A seasonal crochet motif that combines a pumpkin design with a granny square structure, this project can be made flat for blankets or decor, or assembled and stuffed to look like a small decorative pumpkin. Most versions use three colors—one for the pumpkin body, one for the border, and one for the stem—and finish between 4 and 5 inches depending on yarn weight.
Question: What materials do I need for a pumpkin granny square? You’ll need yarn in at least three colors, a matching crochet hook, scissors, and a yarn or tapestry needle. Depending on your style choice, you may also need polyfil or fiber fill for stuffing and a short scrap of brown or green yarn specifically for the stem detail.
Question: How do you make the pumpkin shape in crochet? One common method is to crochet the square or pumpkin panel, stitch two pieces together by aligning corners with dips, stuff the center, and then pull a needle-threaded strand through the middle to cinch it inward. Another approach is to build the pumpkin look directly into the square through color changes and strategic stitch placement.
Choosing Your Yarn and Hook Size
The yarn you pick shapes everything about your finished piece. Cotton worsted weight is a solid choice if you want crisp edges and a defined square that holds its shape for blankets or bag panels. [Crochetcakes measured their pumpkin granny square at 4 by 4 inches before blocking when using a 5 mm hook with worsted weight cotton][3]—useful intel if you’re planning a specific project size.
Bulky yarn is the move if you’re after something soft and plush, especially for stuffed pumpkins. Crafting for Weeks recommends 44 to 240 yards of bulky size 5 yarn depending on how many pumpkins you want to make.
Hook size matters just as much as yarn weight. Cotton worsted typically pairs with a 4.00 mm or 5.00 mm hook, while bulky yarn calls for 6.00 mm to 8.00 mm. The key is matching your hook to your yarn weight—mismatched sizing means your edges will either pucker or sag.
Grab at least 2 yards of scrap green or brown yarn just for the stem. You don’t need much, but having it prepped saves you hunting through your stash mid-project.
| Yarn Type | Hook Size | Finished Square Size | Best For | Notes |
|---|---|---|---|---|
| Worsted Cotton | 4.00–5.00 mm | 4–5 inches | Blankets, bags, flat decor | Crisp edges, structured look |
| Worsted Acrylic | 5.00–5.50 mm | 4–5 inches | Quick projects, scraps | Softer than cotton, easy care |
| Bulky Weight | 6.00–8.00 mm | 5–6 inches | Stuffed pumpkins, statement pieces | Works up fast, plush texture |
What You Need
| Item | Purpose | Notes |
|---|---|---|
| Yarn in 3+ colors (orange, border color, green/brown) | Main square structure and stem | Worsted or bulky weight; total yardage depends on project size |
| Crochet hook (4.00–8.00 mm) | Creates the stitches | Match size to your yarn weight |
| Tapestry needle | Weaves in ends and joins squares | Blunt end prevents splitting yarn |
| Scissors | Cuts yarn | Any craft scissors work fine |
| Poly-fil or fiber fill (optional) | Stuffs 3D pumpkins | Not needed for flat squares |
| Measuring tape (optional) | Tracks square dimensions | Helps with sizing before blocking |
| Foam board (optional) | Blocks finished squares | Ensures even edges and consistent sizing |
Step 1: Prepare Your Workspace and Materials
Lay out your yarn, hook, and needle on a clean, flat surface. Sort your three yarn colors into separate piles so you’re not hunting for the right shade mid-stitch. Wind a small ball of green or brown yarn for the stem—you’ll only need a few yards, so no need to unravel a full skein.
Thread your tapestry needle and have it within arm’s reach. Cut a small piece of scrap yarn and practice threading it through to make sure your needle works smoothly. Loose threads tangle easily, so keeping your workspace organized now saves frustration later.
Step 2: Create the Pumpkin Square Center in Orange
Start with your orange yarn using a magic ring or slip knot. The standard granny square begins with a chain and slip stitch or a magic ring with single crochets. Work three double crochets into the center, chain two, then repeat three times to create four corners.
Chain two between each set of stitches—these gaps become the characteristic corners of a granny square. Keep your tension even; too loose and your square wobbles, too tight and it cups inward. The center should lie flat.
After round 1, you’ll have a small square outline. Fasten off and weave in the orange yarn tail with your tapestry needle. Don’t cut it flush—leave enough tail to tuck inside later when you stuff the pumpkin.
Step 3: Add Border Rounds in Your Chosen Accent Color
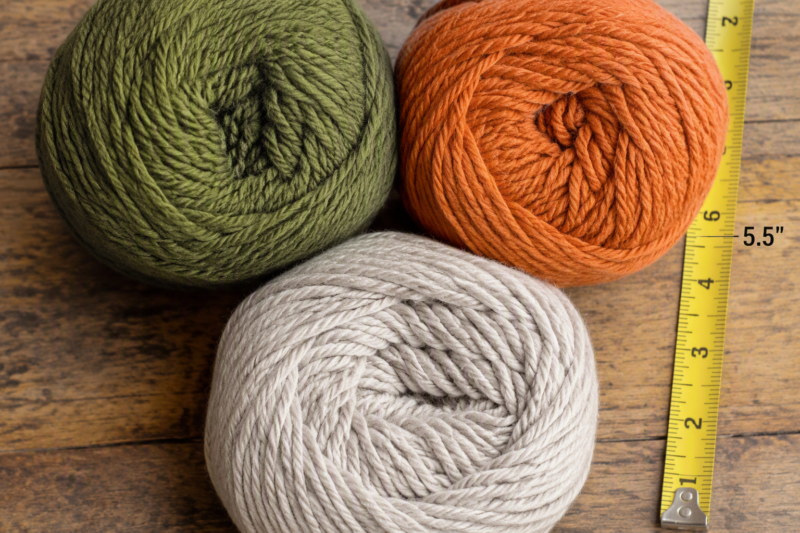
Switch to your border color (typically a green or cream shade) and attach it to one of the chain-two corners from round 1. Work two double crochets, chain two, then two double crochets in each corner space. In the sides between corners, work three double crochets and chain one.
Complete 2–3 border rounds depending on your desired finished size. [Blackstone Designs specifies that rounds 1–3 measure 2.75 inches, reaching a final square size of 5.5 by 5.5 inches][7]—useful if you’re building a multi-square project.
Maintain consistent tension through each round. Weave in the border yarn tail, again leaving enough length if you plan to stuff the piece later.
Step 4: Construct the Stem Using a Magic Ring

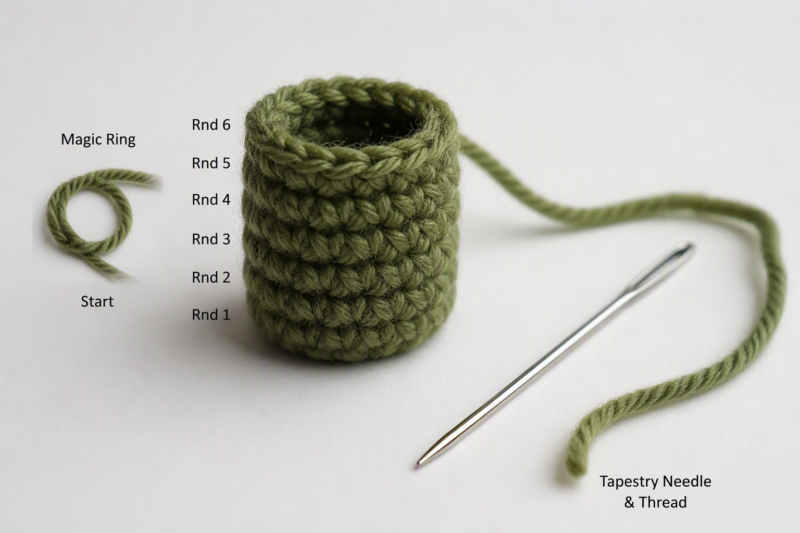
Create a separate small stem piece using your green or brown scrap yarn. Start with a magic ring and work 5 single crochets into the center. Pull the ring tight so there are no gaps in the middle.
Work in rounds. Move to round 2 by chaining 1 and single crocheting into each stitch from round 1. Repeat this pattern for a total of 6 rounds. The stem should look like a tiny cylinder about 0.5 to 1 inch tall depending on your yarn weight.
Fasten off, leaving a 6-inch tail for sewing. This tail is your attachment point—do not weave it in. Thread it through your tapestry needle and set the stem aside.
Step 5: Join Two Squares to Form the 3D Pumpkin Shape
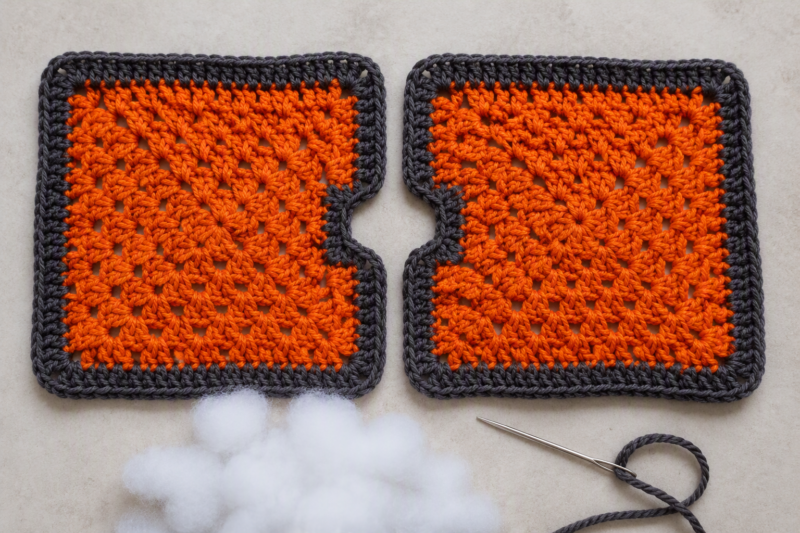
Place two finished orange-and-border squares with their orange centers facing outward (like a sandwich with the borders on the inside). Position the first square’s corners so they line up with the dips or spaces of the second square. This staggered alignment is what creates the rounded pumpkin silhouette instead of a flat panel.
Use your tapestry needle and matching yarn to stitch the two squares together along their edges. Whip stitch or single crochet them together—both work. Leave about a 2-inch gap along one edge for stuffing. Your stitches should be tight so poly-fil doesn’t poke through later.
Step 6: Stuff and Close the Pumpkin
Gently stuff poly-fil into the gap you left, packing it firmly but not so hard that the seams strain. A properly stuffed pumpkin feels squishy but holds its shape. Use your fingers to distribute the fill evenly so there are no lumpy spots or hollow areas.
Once stuffed, stitch the opening closed using your tapestry needle. Then thread the stem’s tail through the needle and push it through the top center of the pumpkin, pulling gently to cinch the fabric inward. This creates the characteristic pumpkin indents and holds the stem in place.
Weave in all remaining tails. Your pumpkin is done.
Tips

Keep tension consistent from start to finish. Even tension means your squares lie flat and join neatly without puckering. If your first round feels loose, don’t panic—subsequent rounds tighten things up.
Blocking your finished squares on a foam board before assembly is worth the extra 10 minutes. It evens out any wonky edges and ensures all your squares are the same size, which matters if you’re making a blanket or bag with multiple squares.
If you’re making multiple pumpkins, consider using variegated yarn to skip the color-switching game. Red Heart All in One Granny Square Yarn handles this automatically, saving you from fastening off and reattaching yarn multiple times.
Polyfil is denser than typical fiberfill, so it stuffs pumpkins more solidly. If you only have loose fiberfill on hand, pack it tighter to avoid a saggy result.
Save all your scrap yarn in a dedicated box. You’ll always have stems, accents, and smaller project pieces within reach.
FAQ
Q: Which yarn works best for a pumpkin granny square?
Worsted weight cotton holds crisp edges and works well for flat modular squares, while acrylic and bulky yarn suit softer or larger decorative pumpkins. The best yarn depends on whether you want a structured square for a blanket or a plush stuffed decoration. Bulky yarn also works up faster if you’re on a deadline.
Q: Can I make this project with leftover yarn scraps?
Absolutely. Several tutorials explicitly mention using scrap yarn for the stem, and many patterns say the square can be made from assorted scraps as long as the yarn weight and hook size are compatible. Just test your hook-to-yarn pairing first on a practice chain to confirm the sizing feels right.
Q: How long does a pumpkin granny square take to crochet?
The exact time depends on yarn weight, hook size, and whether you’re making a flat square or a stuffed pumpkin assembly. A bulky-yarn version works up in 30–45 minutes, while worsted weight takes closer to 60–90 minutes. The step-by-step formats across tutorials suggest it’s a small project rather than a large garment piece.
Q: Do I need to block a pumpkin granny square?
Blocking is optional for decorative pieces, but it helps even out the edges and improves consistency if you plan to join the square with others. Blocking on a foam board can also change the final size slightly, so if you’re building a multi-square project, it’s worth doing.
Q: Why does my pumpkin granny square look misshapen?
Common causes include uneven corner counts, skipping or adding stitches in the chain-two gaps, and inconsistent center tension when cinching or stuffing. One tutorial notes omitting the chain-two in the last round entirely, which shows that small stitch tweaks can affect the final shape. Recount your stitches in each round if the piece feels off.
Q: What size crochet hook should I use for this DIY?
There’s no single standard size. Examples range from 2.50 mm to 8.00 mm, with hook choice tied to yarn weight and the finished look you want. The safest approach is to match the hook to the pattern’s yarn recommendation or do a test swatch with your chosen yarn and hook before starting the full square.
Q: How do I finish the stem on a pumpkin granny square?
A common approach is to crochet a tiny stem separately with a scrap of yarn, fasten it off, and sew it to the top center using a tapestry needle. In the stuffed version, the stem attachment can also double as the cinch point—pull the tail gently through the center to create pumpkin indents while anchoring the stem in place.
My Experience With How to Make a Crochet Pumpkin Granny Square
I’ve made more pumpkin granny squares than I care to admit, mostly because they’re stupidly fast and everyone wants one come October. The moment that clicked for me was realizing the staggered square joining—corners to dips—actually works. Your first attempt will probably look lopsided. Mine did. But once you nail that alignment and stuff it firmly, the thing suddenly reads as unmistakably pumpkin-shaped. No ambiguity.
What nobody tells you is how satisfying the cinching step feels. Threading that yarn tail through the center and watching the fabric pucker into those little pumpkin ridges is the payoff for three rounds of repetitive stitching. It’s the difference between “decorative square” and “actual pumpkin.” That tension control—gentle pull, not yanking—is the real skill here.
The yarn-weight choice makes or breaks the vibe. Bulky yarn gives you a chunky, almost rustic pumpkin that reads well from a distance. Worsted cotton makes a neater, more polished square that’s better if you’re thinking blanket assembly or gift-giving. Neither is wrong; it just depends on what you’re after. If you’re making these for an [11 amazing spooky season home decor ideas for beginners][spooky], bulky is probably your faster route.
Have you made pumpkin squares before, or is this your first seasonal crochet project? I’d love to know which yarn weight you lean toward.
Conclusion
Crochet pumpkin granny squares are a straightforward way to capture autumn in yarn form. The project doesn’t demand advanced techniques—just basic granny square knowledge, three colors, and a little patience with stuffing. Whether you’re planning a seasonal blanket, stocking up on handmade Halloween decorations, or hunting for a [12 creative scrap fabric projects for every budget][scrap], this DIY fits into almost any maker’s schedule and stash.
The real joy is in the customization. Swap colors to match your home, experiment with yarn weights, add faces for jack-o’-lanterns, or keep them simple and neutral. Collect a dozen and toss them in a basket for instant fall decor. String them as garland. Sew them into a baby blanket. The granny square format means these pieces play well with other projects, so nothing goes to waste.
Start with one. Master the corners, practice your tension, and get the cinching right. Once you’ve made your first pumpkin, you’ll want to make ten more.
References
- Repeat Crafter Me. (2024, August). Granny Square Crochet Pumpkin. Repeat Crafter Me. https://www.repeatcrafterme.com/2024/08/granny-square-crochet-pumpkin.html
- Crafting for Weeks. (n.d.). How to Crochet a Granny Stripe Pumpkin (no holes!). Crafting for Weeks. https://craftingforweeks.com/granny-stripe-gourds/
- Crochet Cakes. (2024, August 12). Pumpkin Granny Square. Crochet Cakes. https://crochetcakes.com/2024/08/12/pumpkin-granny-square/
- YouTube. (n.d.). EASY Crochet Pumpkin Granny Square | Step by Step Tutorial!. YouTube. https://www.youtube.com/watch?v=zyogbDtn20I&vl=en
- YouTube. (n.d.). Crochet Pumpkin Granny Square. YouTube. https://www.youtube.com/watch?v=gzeaov1i2aY
- YouTube. (n.d.). Crochet Autumn Blossom Pumpkin with 5 Granny Squares. YouTube. https://www.youtube.com/watch?v=fXHH9eILQ4A
- Blackstone Designs. (2024). 4-in-1 Pumpkin Granny Square Crochet Pattern. Blackstone Designs. https://blackstone-designs.com/pumpkin-granny-square/
- YouTube. (n.d.). EASY CROCHET: How to Crochet a Granny Square for Beginners. YouTube. https://www.youtube.com/watch?v=n-x88m8_6Ac
- [spooky]: https://myruler.co.uk/11-amazing-spooky-season-home-decor-ideas-for-beginners/
- [scrap]: https://myruler.co.uk/12-creative-scrap-fabric-projects-for-every-budget/

A Teacher with 5 years of experience. Our Expertise, is reliable to meet your full Academic development needs . Worked on many crafts and construction projects offering services from design to development to deployment over the years. You will find many of my works in my business portfolio on request.