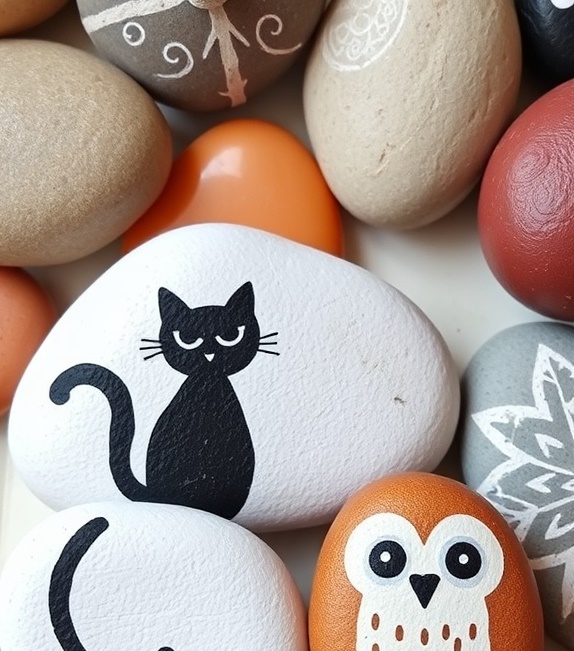
Rock painting combines artistic expression with accessible craft techniques, creating a hobby that welcomes absolute beginners while offering depth for experienced artists. This comprehensive step-by-step tutorial addresses common frustrations that derail beginners and provides proven solutions developed through the collective experience of Reddit’s rock painting communities. By following these detailed steps, you’ll create sealed, durable painted rocks suitable for display, hiding in your community, or weatherproofing for garden decoration.
Step 1: Gather Your Materials
Success in rock painting begins before your brush touches stone. Having proper materials readily available prevents mid-project frustrations and ensures optimal results.
Required Supplies for Getting Started
Your rock supply doesn’t require expeditions to riverbeds or mountain hiking. Home Depot and Lowe’s both stock bags of Mexican Beach Pebbles for approximately fifteen to twenty dollars, providing dozens of smooth, consistently shaped stones ideal for painting. These commercially available rocks offer clean surfaces and manageable sizes perfect for beginners. However, pay attention to product descriptions and avoid purchasing rocks labeled as coated or sealed. These treated varieties feature wax or similar coverings that prevent paint adhesion, making them useless for painting despite appearing identical to uncoated stones.
When selecting from a bag, prioritize rocks with relatively flat surfaces for your first projects. Highly rounded or irregularly shaped stones present challenges in design layout and require more advanced techniques to paint effectively. Save the interesting oddly-shaped rocks for after you’ve mastered basics on simpler surfaces.
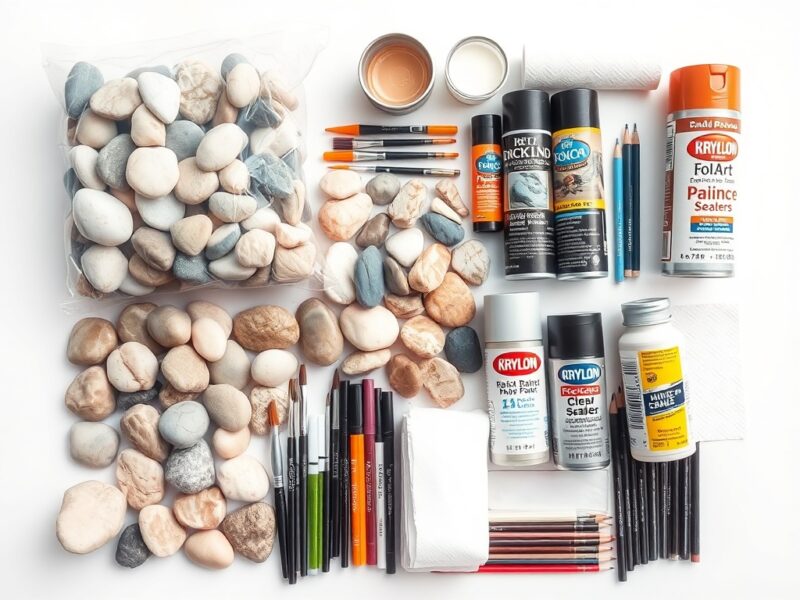
For paint, invest in acrylic craft paint from reliable brands. FolkArt, Apple Barrel, and Magicfly consistently receive recommendations from the rock painting community for offering good quality at accessible prices. A basic color set with primary colors, black, and white allows color mixing to expand your palette. As you develop skills and preferences, you can add specialty colors or upgrade to premium miniature paints from brands like Vallejo or Reaper for superior coverage.
Brushes represent another essential component. A variety pack containing multiple sizes serves beginners well, providing broad brushes for base coating large areas and fine detail brushes for precision work. You don’t need expensive artist brushes initially—mid-range craft brushes perform adequately for learning.
White paint deserves special mention because it serves the dual purpose of design color and base coating. Purchase extra white, as you’ll use significantly more than any other color. Regular white acrylic works perfectly, though some painters prefer white masonry paint for base coating outdoor rocks.
Detail work requires paint pens, specifically Posca brand pens in fine and ultra-fine point sizes. These pens create crisp lines and details impossible to achieve with brushes, and unlike regular markers, they won’t bleed when sealed. A black Posca pen and a white one cover most detailing needs for beginners.
Sealing supplies include Mod Podge and clear acrylic spray sealer. Krylon and Plaid brands receive strong community endorsements for spray sealers, with choices among glossy, matte, and satin finishes based on personal preference. For rocks destined for outdoor display, verify that your spray sealer includes UV protection to slow color fading.
Optional but Helpful Tools
While not strictly necessary, certain items significantly improve the painting experience. Pencils or chalk pencils allow sketching designs directly on rocks, with chalk pencils offering the advantage of erasability. Carbon paper facilitates transferring printed designs onto rock surfaces, perfect for those who lack confidence in freehand drawing.
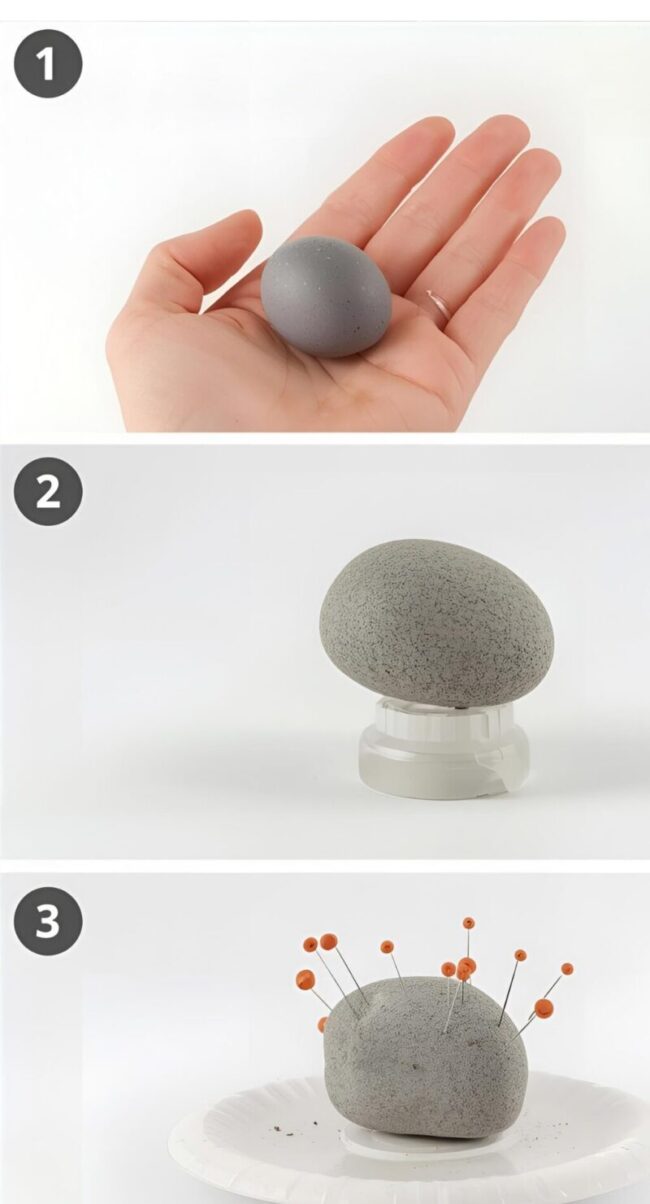
A rock-holding device solves the common problem of smudging wet paint while working. The commercial Hobby Holder device receives enthusiastic recommendations, but simple DIY alternatives work nearly as well. Paper plates with push pins arranged to create elevated platforms cost virtually nothing and function effectively.
A small palette for mixing colors, paper towels for cleaning brushes and wiping mistakes, and a dedicated water cup complete your setup. Having these items ready before beginning prevents interruptions during the creative process.
Step 2: Prepare Your Rocks Properly
Proper preparation represents the unglamorous foundation that determines whether your finished rock lasts for years or deteriorates within weeks. Rushing through preparation reliably leads to problems later, while patience during these initial steps prevents countless frustrations.
The Cleaning Process
Rocks collected from natural environments carry dirt, dust, organic matter, and minerals on and within their porous surfaces. Even store-bought rocks contain dust and handling residue that interferes with paint adhesion. Begin by soaking rocks in plain water, which loosens debris lodged in surface crevices and porous areas. Soaking time doesn’t need to be extensive—thirty minutes to an hour suffices for most rocks.

After soaking, scrub each rock thoroughly with a stiff brush, such as an old toothbrush or vegetable brush. Pay particular attention to crevices, rough areas, and any visible dirt deposits. The goal is removing all foreign matter, leaving only clean stone. Rinse rocks thoroughly under running water to wash away dislodged particles, then set them aside to dry.
The Critical Drying Period
Here comes the step where impatient beginners most frequently go wrong: drying time. Rocks must dry completely before painting, and “completely” means significantly longer than surface dryness suggests. The rock painting community, drawing from years of collective experience and countless ruined projects, consistently emphasizes that rocks require two to three full days of drying time minimum.
This isn’t arbitrary overcaution or unnecessary perfectionism. Rocks are naturally porous materials that absorb water into their internal structure. While surfaces may feel dry within hours, moisture remains trapped inside, gradually working its way outward. Painting over this hidden moisture causes several problems: paint bubbling as internal moisture pushes upward, poor adhesion leading to peeling, and uneven drying creating texture irregularities.
Testing for dryness involves more than visual inspection. Hold the rock in your hand—does it feel cool to the touch? That coolness indicates retained moisture. Completely dry rocks feel the same temperature as the surrounding air. If there’s any doubt about dryness, wait another day. No one regrets waiting an extra day for rocks to dry; many people regret starting too soon.
Position drying rocks in a warm, well-ventilated area away from water sources. If you’re in a humid climate, drying may take longer than three days. Consider the waiting period an opportunity to plan designs or prepare other materials rather than wasted time.
Verify Before Proceeding
Before moving to the next step, verify that every rock is thoroughly dry. Check all surfaces, paying special attention to undersides and areas that were in contact with drying surfaces. Feel each rock, ensuring no cool spots remain. This final verification prevents proceeding with rocks that seem dry but retain internal moisture.
Step 3: Apply the Base Coat
Base coating transforms rocks from raw stone into optimal painting surfaces while solving multiple problems simultaneously. This step separates successful projects from frustrating experiences plagued by transparency issues and endless additional coats.
Why Base Coating Matters
A white base coat creates an opaque, uniform foundation that allows design colors to appear vibrant and true. Without base coating, painting light colors like yellow, pink, or orange over dark stones requires numerous coats to achieve adequate opacity, and even then colors often appear muddy or muted. The white base eliminates this problem, reducing coverage requirements to one or two coats while ensuring colors remain bright and clear.
Base coating also prevents the appearance of visible brush strokes in finished designs. Multiple thin coats applied over a white base blend together visually, creating smooth, professional-looking color without streaky texture. Additionally, white base coats provide consistent surfaces regardless of underlying stone color variations, ensuring that your design looks uniform even when painted across different-colored rock areas.
Choosing Your Holding Method
The physical challenge of painting an entire rock without constantly touching wet paint requires strategy. The simple palm method works well for smaller stones: lay the rock flat in your palm, paint all visible surfaces, then use your thumb to gently push the rock onto a drying surface from underneath. This minimizes wet paint contact while maintaining control.
For those willing to invest approximately twenty dollars, the Hobby Holder device transforms the painting experience. This tool uses standard 20-ounce bottle caps as platforms, securing rocks with sticky tack and providing a handle that keeps fingers away from painted surfaces. Rocks can be quickly swapped by changing caps, allowing efficient work on multiple pieces.
Budget-friendly DIY solutions work remarkably well. Create a rock stand by pushing several push pins or small nails through a paper plate or piece of cardboard, points upward. The rock balances on these points, elevating it above the surface and providing access to all sides while minimizing contact points. These homemade stands cost essentially nothing and function effectively for most painting situations.
The Strategic Two-Stage Approach
Experienced rock painters employ a strategic sequence when base coating: paint the bottom half first, let it dry completely, then flip and paint the top half. This approach ensures that if any smudging or imperfections occur during handling, they affect the bottom rather than the surface that will display your design. The bottom’s appearance matters far less than the top, making this simple sequencing adjustment valuable.
Begin with your rock secured in your chosen holding device. Apply white acrylic paint to the bottom and lower sides using smooth, even brush strokes. Avoid thick paint applications—thin coats dry faster and create smoother surfaces. Work the paint into any texture or porous areas to ensure complete coverage. Allow this first application to dry for ten to fifteen minutes, or until it no longer feels tacky when gently touched.

Assess coverage after the first coat dries. Most rocks will show some transparency, with underlying stone color visible through the white. This is normal and expected. Apply a second thin coat following the same technique, working in the same direction for consistency. After this coat dries, evaluate whether a third coat is needed. Darker stones or highly porous surfaces may require three coats for complete opacity, while lighter stones might need only two.
Once the bottom half achieves solid, opaque white coverage with no stone color showing through, allow complete drying—at least thirty minutes to ensure full cure. Then flip the rock and repeat the process on the top half, which will become your design surface.
Paint Consistency for Optimal Application
Paint consistency significantly impacts how smoothly base coats apply and how visible brush strokes appear. Paint straight from the bottle sometimes applies too thickly, creating visible texture and brush marks. If you notice pronounced brush strokes or paint that doesn’t flow smoothly, thin it slightly by adding one or two drops of water and stirring thoroughly. The goal is paint that flows easily without becoming runny or watery.
Test consistency on paper or a practice rock before applying to your good pieces. Properly thinned paint glides on smoothly, self-levels to minimize brush marks, and dries to an even, matte finish. If paint becomes too thin and appears transparent even after drying, you’ve added too much water—start with fresh paint and add less water or none at all.
Multiple thin coats invariably produce better results than attempting full coverage in one thick application. Thin coats dry faster, allowing quicker progression through base coating stages. They also blend together visually, creating smooth surfaces, whereas single thick coats dry slowly, show every brush texture, and may crack as they cure.
Step 4: Plan Your Design
With a completely dry, white-based rock ready for decoration, taking time to plan your design prevents common mistakes and improves final results significantly. This planning phase separates haphazard attempts from intentional, successful projects.
Design Planning for Non-Artists
Many people interested in rock painting hesitate because they don’t consider themselves artistic or skilled at drawing. The rock painting community offers several solutions that allow non-artists to create impressive results.
The print-and-trace method offers another path for those who lack drawing confidence. Find a design you like online or in books, print it at an appropriate size for your rock, and use carbon paper to transfer the outline onto your white base coat. This technique allows you to work with complex designs without freehand drawing skills. Some people trace printed designs but then simplify or adapt details when painting, creating personalized versions rather than exact copies.
Abstract approaches provide perhaps the most forgiving entry point for beginners. Rather than attempting realistic or detailed images, focus on color combinations, patterns, geometric shapes, and pleasing arrangements. Dots, stripes, swirls, and simple shapes create attractive designs without requiring drawing ability. Once comfortable with paint handling and color application, add words or inspirational quotes using paint markers to create meaningful finished pieces. This progression builds confidence through success rather than risking discouragement from attempting too much too soon.
For Those Comfortable with Drawing
If you have drawing skills or have practiced with tutorials until comfortable, sketch your design directly onto the white base coat. Regular pencils work fine on acrylic painted surfaces, creating visible lines for painting guidance. Alternatively, chalk pencils create easily removable lines if you want the option to erase and adjust designs.
When sketching, consider your rock’s shape and ensure your design fits appropriately. Leave adequate spacing around design elements rather than crowding the composition. Mark areas designated for different colors if working with complex, multi-colored designs. This preliminary mapping prevents discovering mid-project that elements are positioned awkwardly or don’t fit as planned.
Simple designs generally work better than complex compositions, especially for first projects. A single large flower looks more impressive than a cluttered field of tiny blooms. Bold, clear shapes read better from a distance than intricate details that may become muddy when painted. As skills develop, you can progressively attempt more complex designs.
Step 5: Apply Your Design
With your design planned and sketched, the actual painting becomes remarkably straightforward. Following the layering technique developed within the rock painting community produces clean, vibrant results that look professional.
The Professional Double-White Technique
This technique, widely shared in rock painting communities, produces exceptionally clean, vibrant designs and deserves detailed explanation. After sketching your design onto the white base coat, take what seems like a backward step: re-apply white paint to fill in the areas where your design elements will be. Yes, you’re painting white over white, which initially seems unnecessary.
This selective second white layer serves multiple purposes. It ensures absolute opacity beneath design colors, guaranteeing that no underlying stone color shows through regardless of how many coats your chosen colors typically require. It creates a fresh, smooth surface for detailed sketching, as the initial pencil sketch has now been painted over. Most importantly, colors painted over this double-white foundation reach full opacity and vibrancy with fewer coats, saving time and producing better-looking results.
After this selective white layer dries—again, ten to fifteen minutes typically—re-sketch your design with greater detail and precision. Now you have a perfectly prepared surface for color application, with crisp white areas ready to showcase your chosen colors at their most vibrant.
Color Application Strategy
Begin painting your design colors, working methodically through different areas. The community recommends allowing each colored section to dry before painting immediately adjacent areas to prevent colors from bleeding into each other. While waiting for sections to dry might seem to slow progress, the clean, sharp color transitions that result justify the patience.
Apply colors in thin layers rather than thick single coats. Building color gradually provides better control over coverage and intensity. Thin layers also dry more quickly and evenly than thick applications, allowing you to assess whether additional coats are needed without committing to excessive thickness. Most colors will reach full vibrancy in one to two coats over the double-white foundation, though certain colors like red or yellow may require an additional coat.
Work from larger areas toward smaller details. Paint the main body of a design before adding fine details or small elements. This progression prevents accidentally brushing over careful detail work and naturally develops designs from general shapes to specific features.
As you work, keep paint consistency appropriate by adding tiny amounts of water if paint becomes too thick or gloppy. Acrylic paint dries relatively quickly, and paint on your palette may thicken during work sessions. A drop or two of water stirred in restores proper consistency. However, remember that too much water breaks down acrylic paint, so add conservatively.
Drying Time Between Sections and Coats
Matte finish acrylic paints typically become touch-dry in ten to fifteen minutes under normal conditions, though humidity, temperature, and paint thickness affect drying speed. Paint that feels dry to gentle touch may still be vulnerable to smudging if significant pressure is applied, so err on the side of caution when determining whether paint has dried sufficiently.
When in doubt, wait longer. An extra five minutes of drying time prevents ruining work that took much longer to create. Use drying intervals to plan subsequent painting steps, clean brushes, or work on additional rocks if you’re painting multiple pieces.
Step 6: Add Details and Outlines
Details and outlines transform good painted rocks into impressive finished pieces. This step requires patience and the right tools but makes dramatic differences in how professional and polished your work appears.
Working with Paint Pens
Posca pens represent the community’s clear favorite for creating crisp, consistent lines and fine details. Available in multiple nib sizes from broad markers to ultra-fine points, Posca pens deliver opaque, permanent lines without the bleeding problems that plague regular markers. A fine-point black Posca pen handles most outlining needs, while a white pen adds highlights and details over dark colors.
Before using paint pens on your finished rock, test them on paper to gauge paint flow and get comfortable with pressure requirements. Paint pens sometimes release too much paint if pressed firmly, creating blobs rather than fine lines. Light, consistent pressure produces the best results. If a pen releases excess paint, dab the tip on a paper towel to remove the excess before returning to your rock.
Keep pens perpendicular to the rock surface rather than angled for the most consistent line width. Move the pen smoothly rather than stopping and starting frequently, which can create irregular lines with visible beginning and end points. For very long lines, such as horizon lines or long borders, consider using a straightedge to guide your pen, though this requires careful technique to avoid paint wicking under the edge.
The Best Approach to Outlining
Timing matters when adding outlines and details. All color work must be completely dry—not just touch-dry, but fully cured—before outlining begins. Paint that seems dry may still be vulnerable to smudging or may react with pen ink, causing bleeding or color migration. When in doubt, wait longer. Waiting an extra hour costs nothing; ruining careful color work by outlining too soon requires starting over.
Consider outlining in stages rather than completing all outlines in one session. Outline one section or element, let it dry, then move to the next section. This progression prevents accidentally resting your hand on wet outline work while working on adjacent areas. While more time-consuming, staged outlining produces cleaner results with fewer smudges and mistakes.
For designs featuring multiple elements, outline larger, central elements first, then progress to smaller details. This sequence ensures that if any mistakes occur or adjustments become necessary, they affect less critical design components rather than focal points.
Using Waterproof Pigment Pens
If using fine-point pens for details or writing, verify that they’re specifically waterproof pigment pens rather than standard markers. Regular Sharpie permanent markers seem like logical choices for rock painting but create serious problems when sealed. The inks in regular permanent markers react with the solvents in spray sealers, causing colors to bleed, run, and smear dramatically. Community members have watched carefully drawn details dissolve into blurry messes during sealing after making this mistake.
Waterproof pigment pens designed for art applications don’t suffer from this problem. Their inks are formulated to resist solvents, preventing bleeding when sealed. While these specialty pens cost more than regular markers, they’re essential for any detail work involving ink.
Step 7: First Seal – The Mod Podge Layer
Proper sealing separates rocks that last for months or years from those that deteriorate within weeks. The two-step sealing method recommended by experienced community members provides optimal protection, beginning with a Mod Podge layer.
Why the Mod Podge Step Matters
This first sealing step creates a protective barrier that prevents colors from running when spray sealer is subsequently applied. Paint markers, ink pens, and even some paints can react to the solvents and propellants in spray sealers. Without protection, these materials may smudge, run, or bleed when spray sealer hits them, ruining hours of careful work in seconds.
Mod Podge creates a sealed layer that locks everything in place before spray sealer application. It also provides initial protection to the paint itself, adding durability even before the spray sealer coat. While some painters skip this step and apply spray sealer directly, those using any ink-based materials or paint pens risk significant problems without the Mod Podge barrier.
Application Process and Technique
Before beginning, verify that your rock is completely dry. All paint and ink work should have dried for at least thirty minutes, though waiting several hours or overnight provides additional security. Even paint that feels dry to touch may not have fully cured, and sealing over insufficiently cured paint can cause haziness or tackiness.
Apply Mod Podge using a large, soft paintbrush, working in smooth, even strokes. The consistency resembles Elmer’s school glue—slightly thick but flowing. Mod Podge applies appearing milky white, which can be alarming initially, but trust the process. It dries completely clear, typically within one to two hours depending on thickness and environmental conditions.
Brush in consistent directions rather than scrubbing back and forth, which can disturb underlying paint or ink. Apply a thin, even coat covering all painted surfaces. Avoid excessively thick applications, which take longer to dry and may create a cloudy appearance instead of drying crystal clear. If you can see the design clearly through the wet Mod Podge, you’ve applied an appropriate amount.
Pay attention to edges and curved surfaces, where Mod Podge tends to pool if over-applied. Use your brush to redistribute excess, evening out the coat. Don’t worry about occasional brush strokes visible in wet Mod Podge—these disappear as it dries and levels.
Drying and Curing Considerations
After application, set the rock aside in a safe location where it won’t be disturbed, touched, or exposed to dust and debris. Mod Podge remains tacky during drying, and anything that contacts it will become embedded in the surface.
Drying time varies based on application thickness, humidity, and temperature, but plan for one to two hours minimum. Mod Podge transitions from milky white to clear as it dries, providing visual confirmation of progress. The surface should feel completely dry and non-tacky before proceeding to spray sealing.
For maximum durability, some community members apply a second Mod Podge coat after the first dries completely. This double layer provides additional protection and can improve the final appearance by creating an especially smooth, clear surface. If applying a second coat, allow the same drying time before spray sealing.
Once your Mod Podge layer has dried completely clear and feels non-tacky to touch, your rock is ready for the final sealing step—but that’s a procedure requiring its own detailed attention, involving spray technique, ventilation considerations, and curing time that will transform your Mod Podge-sealed rock into a fully weatherproof, display-ready finished piece.
These seven steps—gathering materials, preparing rocks, applying base coats, planning designs, applying colors, adding details, and first sealing—represent the core process that transforms ordinary stones into artistic creations. Each step builds upon previous ones, with shortcuts or rushed work at any stage compromising final results. The rock painting community emphasizes that patience throughout the process produces far more satisfying outcomes than hurrying through steps in an attempt to reach completion quickly. By following these detailed procedures developed through thousands of community members’ collective experience, your painted rocks will showcase clean designs, vibrant colors, and the professional appearance that makes rock painting such a satisfying and shareable craft.

A Teacher with 5 years of experience. Our Expertise, is reliable to meet your full Academic development needs . Worked on many crafts and construction projects offering services from design to development to deployment over the years. You will find many of my works in my business portfolio on request.