Have you ever walked through a park and found a colorful painted rock hiding by a tree? That’s rock painting! It’s a super fun hobby where people paint designs on smooth stones and leave them around their neighborhood for others to discover. Think of it like creating tiny pieces of art that can brighten someone’s day. The best part? You don’t need to be a professional artist to get started. Anyone can pick up a brush and create something special on a rock. People paint everything from simple smiley faces to detailed landscapes, cute animals, and inspiring messages.
Why People Love This Hobby
Rock painting has exploded in popularity over the past few years, and it’s easy to see why. First, it’s incredibly cheap to start – you probably already have some supplies at home! Second, it’s relaxing. Many people say painting rocks helps them unwind after a stressful day at school or work. Third, there’s something magical about hiding your painted rocks around town and imagining someone’s face when they find your creation. Some communities even have rock painting groups where members hide and seek rocks together. It’s like a treasure hunt mixed with art class. Plus, you can paint rocks while watching TV or listening to music. The possibilities are endless!
Finding the Perfect Rocks
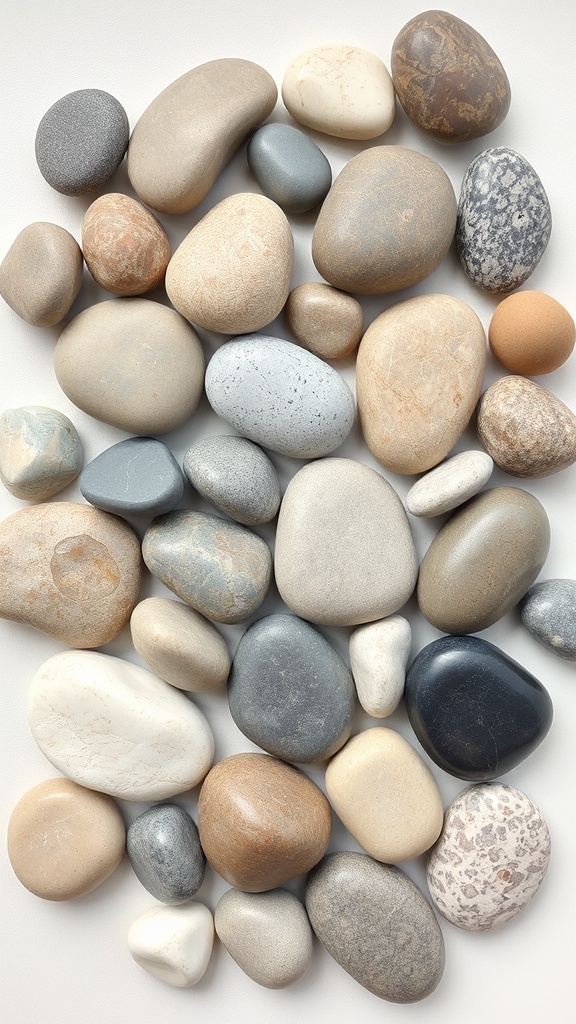
Before you can paint, you need rocks! The best rocks for painting are smooth, flat, and about the size of your palm. River rocks work great because water has already smoothed them out. You can find these at craft stores, garden centers, or even in your own backyard. Some people collect rocks from beaches or hiking trails. When choosing rocks, look for ones without too many bumps or holes – they’re easier to paint on. Avoid rocks that are too rough or porous because paint won’t stick well. A good test is to run your hand over the rock. If it feels nice and smooth, it’s perfect for painting. Don’t worry if you can’t find the “perfect” rock right away.
Heavier rocks stay put better if you’re planning to leave them outside. Lighter, smaller rocks are great for hiding around town. Most beginners start with medium-sized rocks about three to five inches across. These give you enough space to create a design without being overwhelming. Remember, part of the fun is searching for rocks that speak to you. Maybe one looks like it could be a ladybug, or another has the perfect shape for a cactus design.
Essential Supplies You’ll Need
Getting started with rock painting doesn’t require a shopping spree. Here’s what you really need: acrylic paint, paintbrushes, a cup of water, and paper towels. That’s it! Acrylic paint is the go-to choice because it sticks well to rocks and dries fast. You can find acrylic paint at any craft store, and brands like Apple Barrel or Magicfly work wonderfully. According to experienced rock painters on Reddit, you’ll want several brush sizes – a big one for covering large areas and smaller ones for details.
Paint pens are also super helpful, especially Posca pens that Reddit users rave about. These pens let you draw crisp lines and add fine details without struggling with a tiny brush. For sealing your finished rocks (more on that later), you’ll need a clear spray sealer. Many rock painters recommend outdoor sealers like Krylon clear acrylic varnish or Triple Thick glaze. Don’t forget a palette for mixing colors – even a paper plate works fine. Optional supplies include pencils for sketching your design first, and Mod Podge for an extra layer of protection.
Preparing Your Rocks
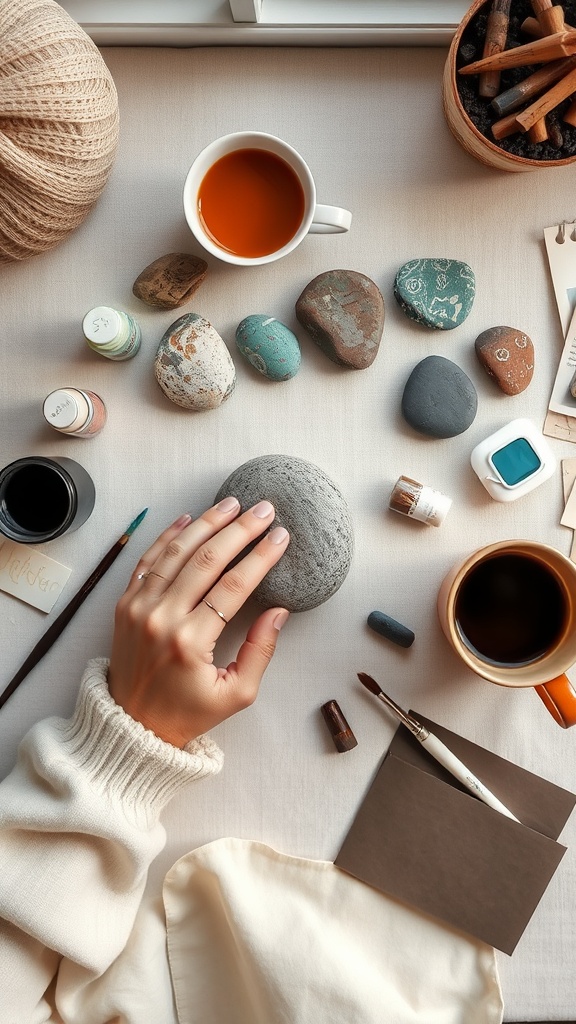
Okay, you’ve got your rocks – now what? First things first: wash them! This step is super important. Scrub your rocks with soap and water using a stiff brush to get all the dirt out of cracks and crevices. Rocks can hide a surprising amount of dirt. Rinse them thoroughly and then let them dry completely. And I mean completely! According to tips from Reddit rock painters, rocks are porous and can hold moisture for days. If you paint on a damp rock, your paint might bubble or peel off later. Some people let their rocks dry overnight just to be safe.
Once your rock is dry, you might want to apply a base coat. Many beginners skip this step, but it actually makes painting much easier. A white base coat helps your colors show up brighter and means you won’t need as many coats of colored paint. You can use white acrylic paint applied with a brush, or some people prefer white spray paint for a super smooth finish. Let this base coat dry completely before moving to the next step. If your rock is especially dark or rough, you might need two coats of white.
Choosing Your Design
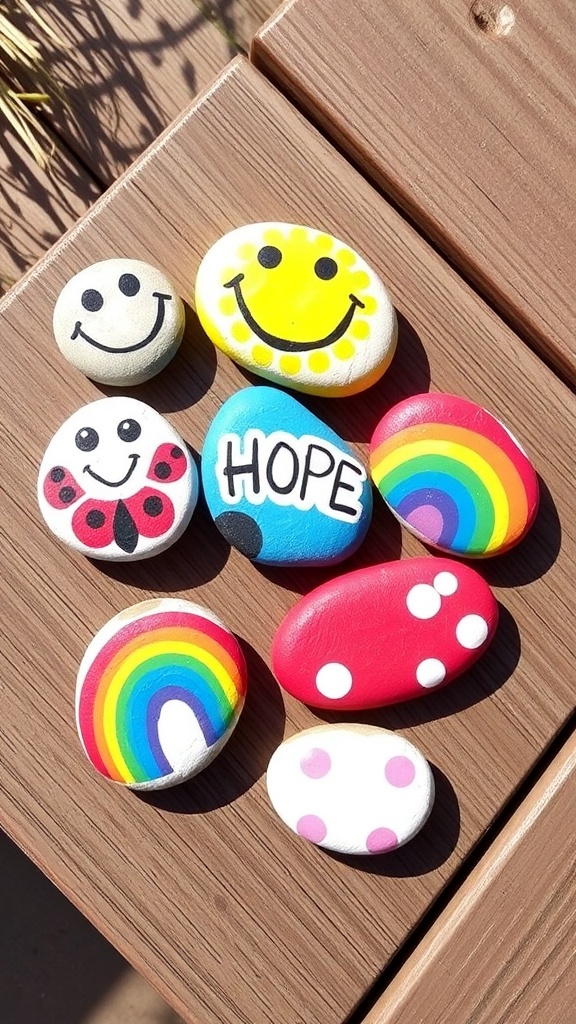
This is where the fun really begins! What should you paint? For your first rock, keep it simple. Geometric patterns, polka dots, or stripes are perfect starting points. You could paint a ladybug (just a red oval with black dots), a bumblebee, or a rainbow. Inspirational words like “HOPE” or “SMILE” make great beginner projects too. Don’t worry about creating a masterpiece on your first try.
As you gain confidence, you can try more complex designs. Nature themes are popular: flowers, trees, butterflies, or beach scenes. Animals like cats, dogs, and owls show up on rocks everywhere. Some artists paint portraits or recreate famous paintings in miniature. Pinterest and YouTube are goldmines for rock painting ideas. The Rock Painting 101 YouTube channel has tons of step-by-step tutorials. Browse through designs until something catches your eye and makes you think, “I could do that!” Remember, copying designs to learn is perfectly fine – every artist starts somewhere.
Let’s Start Painting!
Time to paint! Start with your base design – the big shapes and background colors. Don’t stress about being perfect; rock painting is meant to be fun, not stressful. Use your larger brush for filling in big areas. Let each color dry before adding another color next to it, or your colors will blend together (unless that’s what you want!). Acrylic paint dries pretty quickly, usually within ten to fifteen minutes.
Work from back to front and big to small. Paint the background first, then add medium-sized elements, and finish with the smallest details last. If you make a mistake, no worries! Let it dry and paint over it. That’s the beauty of acrylic paint – it’s very forgiving. Some artists sketch their design with pencil first, while others paint freehand. Try both ways and see what feels comfortable. Mix colors on your palette to create custom shades. Don’t forget to rinse your brush when switching colors!
Adding Details and Finishing Touches
Once your main design is painted and dry, it’s time to add details that make your rock special. This is where paint pens really shine! Use them for outlining shapes, adding eyes to animals, writing words, or creating patterns. Fine-tipped brushes work too if you’re careful. Black outlines can make designs pop and look more cartoon-like. White highlights add dimension – think of adding a white dot to an eye to make it sparkle, or white edges to clouds to make them fluffy.
Dots are your best friend in rock painting. You can create entire designs using just dots! Dip the handle end of your brush (or a toothpick or Q-tip) in paint and press it onto the rock for perfect circles. Mandala designs are made entirely from dots arranged in patterns. Details don’t have to be complicated. Sometimes a simple white highlight or black outline transforms a good rock into a great one. Step back occasionally to look at your rock from a distance. This helps you see if anything needs adjusting.
Sealing Your Masterpiece
You’ve finished painting – congratulations! But you’re not quite done yet. To protect your artwork, you need to seal it. Sealing prevents paint from chipping, protects against weather if your rock will be outside, and adds a nice finished look. Let your painted rock dry completely first – wait at least a few hours, or better yet, overnight.
Most rock painters use spray sealers. Take your rock outside or to a well-ventilated area (spray sealers smell strong!). Hold the can about ten inches away from your rock and spray in light, even coats. Don’t spray too close or too much at once, or you’ll get drips. Let the first coat dry (check the can for drying time), then flip your rock over and spray the other side. Many people apply two or three light coats total. Popular sealers include Krylon clear acrylic spray, Triple Thick glaze, and outdoor Mod Podge. Reddit users recommend sealers specifically labeled for outdoor use if your rocks will face weather. Some artists also brush on a layer of Mod Podge before spray sealing for extra protection.
Common Mistakes to Avoid
Every beginner makes mistakes – it’s part of learning! Here are some common ones so you can avoid them. First, painting on dirty or wet rocks. Always clean and dry your rocks thoroughly! Second, using too much paint at once. Thin layers work better than thick, goopy ones. Third, not letting each layer dry before adding the next. Patience is key! Fourth, forgetting to seal your rocks. Unsealed rocks will fade and chip quickly, especially outdoors.
Another mistake is using the wrong type of paint. Tempera or watercolor paints wash off easily – stick with acrylics! Some people try to use regular Sharpie markers, but these fade badly in sunlight. Paint pens (like Posca) work much better. Also, don’t get discouraged if your first few rocks don’t look like Pinterest photos. Rock painting is a skill that improves with practice. Even “ugly” rocks can make someone smile when they find them! Finally, remember to sign your rocks (on the back) so finders know who created the art.
Simple Design Ideas for Beginners
Let’s talk about specific designs that are perfect for beginners. A rainbow is super easy: paint curved stripes in red, orange, yellow, green, blue, and purple. Add some clouds on the ends with white paint. Boom – adorable rainbow rock! For a cactus, paint the rock green, add white dots for spines, and maybe a little flower on top. Simple but cute.
Hearts are another easy option. Paint the whole rock red or pink, then add a white outline or pattern. For a beach rock, paint the bottom half blue (water) and the top half light blue (sky). Add a yellow circle for the sun and maybe some tiny birds. Polka dots never fail – paint your rock one color, let it dry, then add dots in another color using the end of a brush handle. Try a checkerboard pattern with two contrasting colors. Paint inspirational words like “Breathe,” “Love,” or “Be Kind” in fun letters. Flowers with simple petals around a center circle look great too. Don’t overthink it!
Advanced Techniques to Try Later
Once you’ve mastered the basics, you can explore more advanced techniques. Blending colors creates beautiful sunset skies and ombre effects. While paint is still wet, add another color next to it and use your brush to blend where they meet. Stippling means using the tip of your brush to create texture – great for painting fluffy animals or tree foliage. You pounce the brush up and down instead of stroking it across the rock.
Dry brushing creates a weathered, vintage look. Dip your brush in paint, wipe most of it off on a paper towel, then lightly brush across the rock surface. Sponging involves dabbing paint on with a sponge for texture. Some artists use toothbrushes to create splatter effects for stars or texture. For really intricate designs, try using a fine-point permanent pen to draw on painted rocks, or experiment with masking tape to create sharp lines and geometric patterns. Water effects can be achieved by mixing blue and white paint. Layer different shades for depth.
Rock Painting with Kids
Rock painting is an awesome activity for kids! It helps develop fine motor skills, creativity, and patience. For young children, stick with simple designs they can actually complete. Big, bold shapes work better than tiny details. Let them choose their own colors and designs – even if it’s just covering the rock in purple paint! That’s perfectly fine.
Make rock painting less messy by using paint pens instead of liquid paint, or putting down newspaper or a plastic tablecloth first. Kids love painting creatures like bugs, fish, and monsters. Googly eyes from the craft store can be glued onto painted rocks for instant personality. Pet rocks (remember those?) make a comeback when kids paint faces on rocks and name them. You could paint rocks as garden markers – write vegetable names on them for your garden. Story stones are fun too: paint pictures on rocks, then use them to tell stories. For birthday parties or playdates, set up a rock painting station where each kid paints and takes home their creation.
Where to Hide Your Rocks
Now for the exciting part – sharing your art with the world! Many communities have rock painting groups on Facebook where members hide rocks around town and post clues. Check if your town has one! When hiding rocks, choose public places where people walk: parks, hiking trails, near playgrounds, outside libraries, or along shopping center sidewalks. Don’t hide them on private property or places where they might create problems.
The best hiding spots are visible but not too obvious – on a low wall, beside a bench, tucked by a tree root, or on a windowsill. You want people to find them but feel like they’ve discovered treasure! Some rock painters write “If you find me, post a photo to [group name]” on the back. Others add “Keep me or rehide me.” The joy of rock painting is that once you hide your rock, you might never know who finds it or where it travels next. Some rocks have traveled across countries! You can also keep your rocks – they make great paperweights or decorations for your garden.
Troubleshooting Common Problems
Paint not sticking to your rock? The rock might be dirty or oily. Wash it again with dish soap. Paint looking streaky? Apply a white base coat first, or add more layers of your color. Paint drying too fast? Mist your palette with water occasionally, or use a wet palette (you can make one with a damp sponge in a container). Brush strokes showing too much? Water down your paint slightly, or use a larger brush and fewer strokes.
Details getting messy? Switch to paint pens for precision, or steady your painting hand by resting it on something. Sealer making colors run? Let the paint dry longer before sealing, or apply a coat of Mod Podge first. Rock paint chipping after a few days outside? Use a better quality sealer rated for outdoors, and apply multiple coats. Colors looking dull? Use brighter paints, or add a glossy sealer to make colors pop. Having trouble mixing colors? Start with a tiny amount of the darker color and gradually add it to the lighter color – it’s easier to darken than lighten!
Building Your Skills
Like any hobby, rock painting gets easier and more fun the more you practice. Start a rock painting journal with photos of your rocks to track your progress. You’ll be amazed at how much you improve! Watch tutorial videos on YouTube – channels like Rock Painting 101, Jessica Rocks, and others offer fantastic free lessons. Follow rock painters on Instagram for daily inspiration and tips.
Try painting one rock each week, experimenting with different techniques each time. One week focus on blending, the next week try dotwork, then try painting animals. Set small goals for yourself. Join online rock painting communities on Reddit or Facebook to share your work, ask questions, and encourage others. Don’t compare your rocks to experts who’ve been painting for years – compare them to your own rocks from last month. Challenge yourself to paint outside your comfort zone occasionally. If you always paint cute animals, try an abstract design. If you love bright colors, experiment with pastels. Growth happens outside our comfort zone.
Making It Your Own
The best rock painters develop their own style over time. Maybe you’ll become known for painting tiny detailed scenes, or bold geometric patterns, or uplifting messages in beautiful lettering. Some artists stick with one theme – only painting animals, or only painting in black and white. Others paint whatever they feel like each day. There’s no wrong way to do this!
Consider adding your own personal touch to every rock – a specific color combination, a small signature design, or a particular style of lettering. Think about what makes you happy and paint that. Love coffee? Paint coffee cups! Obsessed with space? Paint planets and stars! Your rocks should reflect your personality. Don’t worry about following trends or painting what’s popular. Paint what speaks to your heart. The rocks that you create with genuine joy and interest will be the ones that really shine and touch others when they find them. That’s the real magic of rock painting.
Conclusion: Your Rock Painting Journey Starts Now
Rock painting is more than just a hobby – it’s a way to spread joy, express creativity, and connect with your community. You’ve learned everything you need to get started: finding rocks, choosing supplies, preparing your rocks, painting designs, adding details, and sealing your masterpieces. You know common mistakes to avoid and have plenty of design ideas to try. Now it’s time to actually do it! Gather some rocks, grab your paints, and create something. Your first rock won’t be perfect, and that’s absolutely okay.
Remember, every rock painter started exactly where you are now. The experts whose work you admire on social media painted countless “practice rocks” before creating their masterpieces. So be patient with yourself, have fun, and enjoy the process. Paint some rocks to hide, some to keep, and some to give as gifts. Join your local rock painting community. Most importantly, let your creativity flow and see where this colorful hobby takes you. Happy painting! The world needs more brightness and beauty, and you can provide that – one painted rock at a time.
A Teacher with 5 years of experience. Our Expertise, is reliable to meet your full Academic development needs . Worked on many crafts and construction projects offering services from design to development to deployment over the years. You will find many of my works in my business portfolio on request.