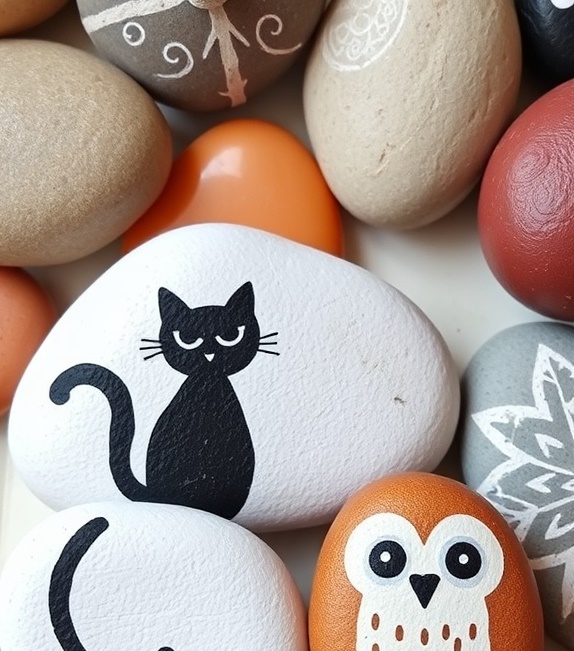

Rock painting has evolved from a simple children’s craft into a sophisticated art form embraced by hobbyists, gardeners, and creative souls worldwide. Whether you’re looking to create weatherproof garden decorations or craft colorful stones to hide in your community, mastering the right techniques makes all the difference between rocks that last for years and those that fade or peel within weeks. Drawing from the extensive experience shared by members of Reddit’s vibrant rock painting communities, this guide compiles the most effective techniques that actually work in real-world conditions.
GETTING Essential Materials
The foundation of any successful rock painting project begins with selecting the right materials. After countless experiments and shared experiences, the rock painting community has reached a strong consensus on what works and what doesn’t.
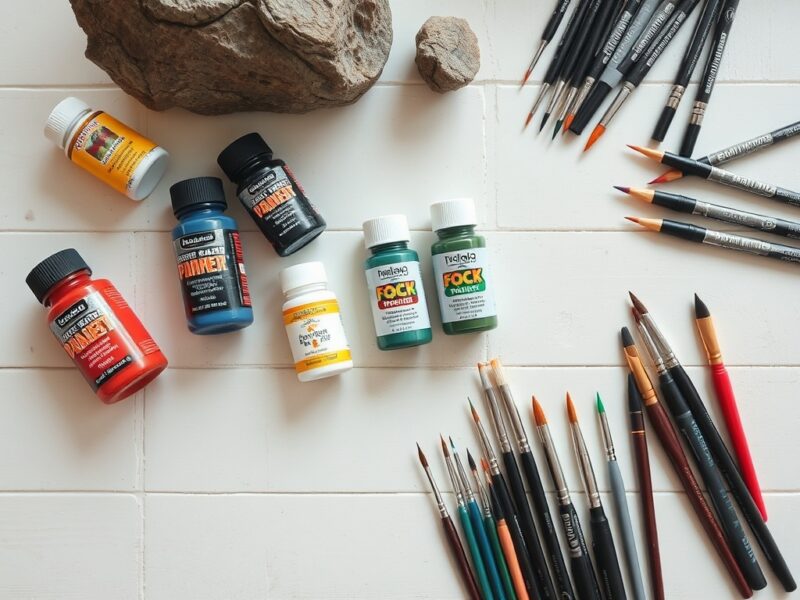
START WITH THE RIGHT ACRYLIC PAINT SELECTION
When it comes to paint selection, acrylic reigns supreme in the rock painting world. Members of r/rockpainting consistently recommend acrylic paint for its durability, versatility, and resistance to the elements. Unlike watercolors, which fade rapidly when exposed to sun and weather, acrylic paint maintains its vibrancy for extended periods, especially when properly sealed.
For budget-conscious crafters, several affordable brands deliver excellent results. Magicfly, available through Amazon, receives high praise from experienced rock painters who appreciate its consistency and color payoff. Apple Barrel and FolkArt, both readily available at major craft stores like Michael’s, offer reliable performance at accessible price points. These craft paints work wonderfully for most projects and provide beginners with a low-risk entry point into the hobby.
However, for those seeking superior coverage and professional-quality results, miniature paints represent a significant upgrade. Games Workshop, Vallejo, Reaper Mini’s, and Monument Hobby paints, originally designed for painting miniature figurines, offer exceptional pigment density and coverage. While these premium options cost considerably more than craft paints, the rock painting community agrees they’re worth the investment, particularly for base coats and areas requiring solid, opaque coverage. The difference becomes immediately apparent when comparing how many coats are needed to achieve full opacity.
The community strongly advises against watercolors for outdoor rocks. One Arizona-based painter learned this lesson the hard way, watching their carefully painted rocks fade dramatically after exposure to the intense Tucson sun. Watercolors simply cannot withstand outdoor elements, making them suitable only for indoor display pieces or temporary projects.
Detail Work Tools That Deliver
For fine details, crisp lines, and intricate designs, We recommend Posca pens. These paint markers come in various nib sizes, from broad tips for filling larger areas to ultra-fine points perfect for delicate details. Available at Michael’s, art supply stores, and online retailers, Posca pens deliver consistent, opaque lines without the bleeding problems that plague standard markers.
Sharpie paint pens also earn community approval for creating borders and bold outlines. However, experienced painters warn against using regular Sharpie permanent markers, which inevitably bleed when sealed with spray finishes, ruining hours of careful work. One community member discovered this the hard way when their Sharpie details ran dramatically during the sealing process.
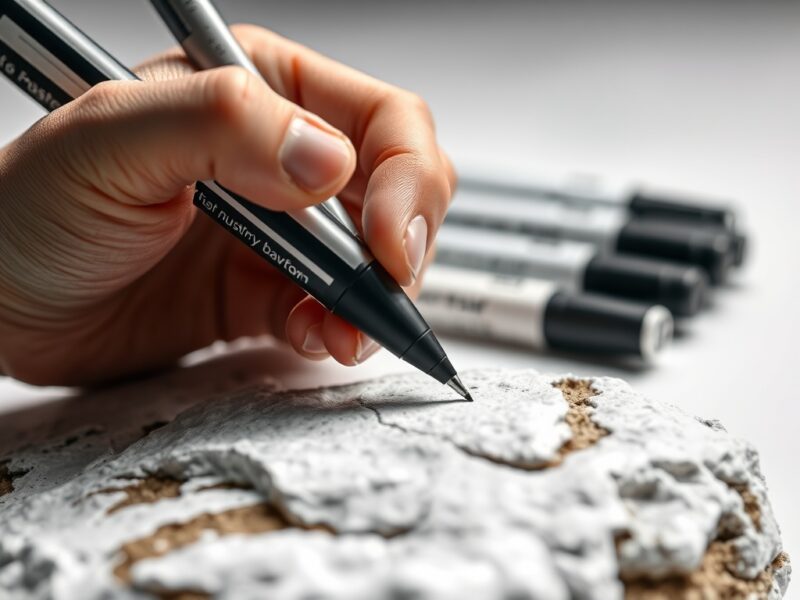
Traditional paintbrushes remain essential for applying base coats and painting larger design elements. The community recommends maintaining a collection of various sizes, from broad brushes for base coating entire rocks to fine detail brushes for precision work.
Rock Selection and Preparation
Finding suitable rocks doesn’t require wilderness expeditions or expensive specialty suppliers. Home Depot and Lowe’s sell bags of Mexican Beach Pebbles for approximately fifteen to twenty dollars, providing an abundant supply of smooth, painting-ready stones. These commercially available rocks offer consistent shapes and surfaces ideal for beginners.
However, not all store-bought rocks work equally well. The community cautions against purchasing coated rocks, which feature a wax or similar covering that prevents paint adhesion. These treated stones will frustrate any painting attempt, as paint simply refuses to stick properly. Always verify that rocks are uncoated before purchasing.
For beginners, rocks with flat surfaces prove most forgiving. Highly rounded or irregular rocks present challenges in design layout and paint application, making them better suited for painters who’ve already mastered basic techniques.
Section 2: Proven Preparation Techniques
Proper preparation separates long-lasting, professional-looking rocks from disappointing projects that peel or flake. The rock painting community emphasizes that rushing through preparation inevitably leads to problems down the road.
Easy Cleaning tips
Rocks collected from natural environments or even purchased from stores require thorough cleaning before painting. The recommended process begins with soaking rocks in water, which loosens dirt, dust, and debris lodged in surface crevices and porous areas. After soaking, scrub rocks thoroughly with a stiff brush, ensuring all visible dirt has been removed. Rinse completely to wash away any remaining particles.
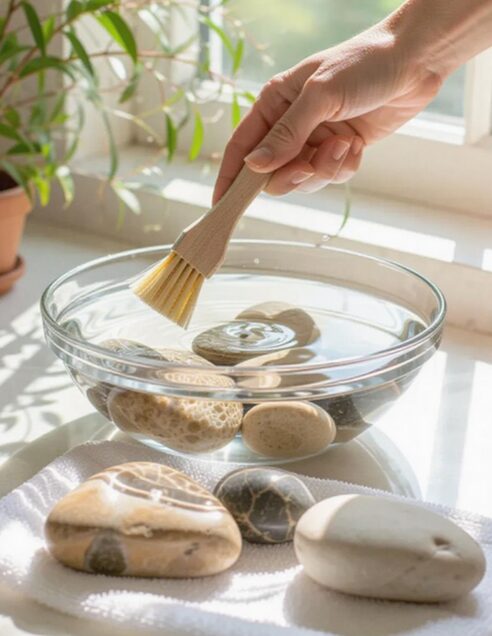
Here comes the step that impatient crafters often skip to their detriment: drying time. Rock painters with years of experience consistently stress that rocks must dry completely before painting begins—and “completely” means two to three full days minimum. This isn’t arbitrary caution; rocks are naturally porous materials that absorb and retain moisture far longer than their surfaces suggest.
As one experienced community member explained, painting on insufficiently dried rocks causes paint bubbling, poor adhesion, and eventual peeling. The moisture trapped within the rock gradually works its way to the surface, disrupting the paint layer and creating unsightly bubbles or causing the paint to lift away. Testing for dryness involves checking whether the rock feels cool to the touch, which indicates retained moisture. If there’s any doubt, wait another day.
PAINTING DIRECTLY ON CLEAN SURFACES
Many successful rock painters never use primer, finding that acrylic paint adheres perfectly well to properly prepared stone surfaces.
However, some painters prefer applying a gesso base coat before beginning their designs. Gesso, a traditional art primer, creates an extremely smooth, uniform surface that some artists find easier to work on. It also provides additional “tooth” or texture for paint to grip, potentially improving adhesion on particularly smooth or glassy rock surfaces.
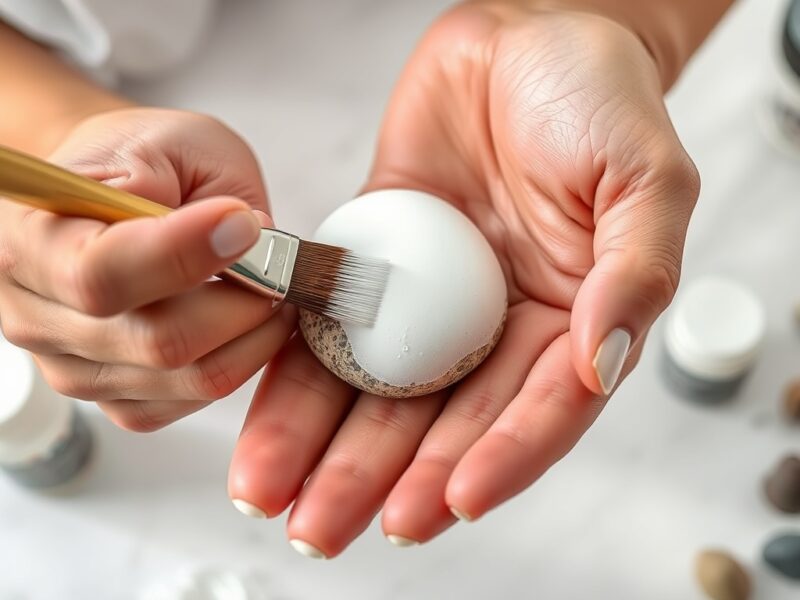
For painters working with dark-colored rocks, a white base coat has become the community’s standard recommendation, though this serves a different purpose than traditional priming. Rather than improving adhesion, white base coating solves the coverage problem that occurs when painting light colors over dark stones. Without this white foundation, colors like yellow, pink, and orange require numerous coats to achieve opacity, and even then may appear muddy or muted.
Using regular white acrylic paint for base coating, while others prefer white masonry paint, an outdoor-rated paint designed for stone and brick. Masonry paint offers the advantage of being specifically formulated for porous stone surfaces, potentially providing better long-term durability for outdoor rocks.
Section 3: Base Coating Techniques
Base coating represents the technique that most dramatically separates successful rock painters from frustrated beginners. Inadequate base coating causes countless problems: thin, transparent-looking designs; visible brush strokes; poor color vibrancy; and designs that require exhausting numbers of coats to achieve acceptable coverage.
Why the White Base Layer Method Works
The white base layer technique has become standard practice in the rock painting community because it solves multiple problems simultaneously. First and foremost, it creates an opaque, uniform foundation that allows true colors to shine through. When you paint yellow directly onto a dark gray rock, the underlying darkness mutes the yellow, requiring coat after coat to build up sufficient opacity. With a white base, that first coat of yellow appears vibrant and true to color.
This technique proves especially critical for notoriously low-coverage colors. Yellow, red, pink, orange, and all neon shades share the characteristic of poor opacity—their pigments simply don’t cover well on their own. Community members who once struggled with these colors, applying five or six coats and still seeing transparency issues, report that white base coating reduces coverage requirements to just one or two coats.
The white base also eliminates the problem of visible brush strokes marring the final design. When multiple thin coats are applied over white, the cumulative effect creates smooth, professional-looking color without the streaky texture that plagues single heavy coats applied directly to stone.
How to HOLD During Base Coating
One challenge that frustrates beginners involves the physical logistics of painting an entire rock without constantly smudging wet paint. The community has developed several solutions to this common problem.
The palm method works well for smaller rocks and requires no special equipment. Place the rock flat in your palm, paint all visible surfaces, then gently slide your thumb underneath to lift and transfer the rock to a drying surface. This technique minimizes contact with wet paint while maintaining control.
For those willing to invest in tools, the Hobby Holder device receives enthusiastic recommendations from serious rock painters. This ingenious tool uses a standard 20-ounce bottle cap as a platform, combined with sticky tack to secure the rock. The handle design allows easy maneuvering while keeping fingers away from painted surfaces, and rocks can be quickly swapped by simply changing the cap when working on multiple pieces simultaneously.
Budget-friendly DIY alternatives include paper plate stands with push pins arranged to elevate the rock, or pieces of cardboard with nails or thumbtacks serving the same purpose. These homemade solutions cost virtually nothing and work remarkably well for most painting situations.
Experienced painters employ involves painting the rock’s bottom first. Let this dry completely, then flip the rock and paint the top, which will become the design surface. This method ensures that if any smudging or imperfections occur during handling, they affect the bottom rather than the visible design area.
HOW TO ENSURE CONSISTENT PAINTING for Smooth Coverage
Paint consistency significantly impacts coverage quality and the visibility of brush strokes. Acrylic paint straight from the bottle sometimes applies too thickly, creating visible texture and brush marks. The community’s solution involves thinning paint with small amounts of water—just a drop or two at a time—and stirring thoroughly to achieve a consistency that flows smoothly without becoming runny.
For more advanced control over paint properties, pouring medium or airbrush medium can be mixed with acrylics to improve flow and leveling without the risks associated with water. However, the community cautions that excessive water breaks down acrylic paint’s binder, compromising adhesion and durability. The key is adding just enough water to improve application without over-thinning.
Experienced painters consistently advise applying multiple thin coats rather than attempting full coverage in one thick application. Thin coats dry faster, self-level more effectively, and build up to create smoother, more professional-looking surfaces. Patience during this stage pays dividends in the quality of the finished piece.
Section 4: APPLYING THE BEST DESIGN
With a properly prepared and base-coated rock, the actual design work becomes far more enjoyable and successful. The rock painting community has refined techniques that help both artistic and non-artistic painters create impressive results.
Planning Your Design
Beginning with a plan prevents common mistakes like running out of space or discovering that elements are positioned awkwardly. The community recommends sketching designs directly onto the white base coat using regular pencil or, for those who prefer easily removable guidelines, chalk pencil. These preliminary sketches allow you to verify that your design fits the rock’s shape and that all elements are properly proportioned and positioned.
For those who lack confidence in their drawing abilities, the print-and-trace method offers an excellent alternative. Print your desired design at an appropriate size, reverse the image if necessary to account for transfer orientation, and use carbon paper to trace the outline onto your rock. This technique allows non-artists to create complex designs with accurate proportions and details.
YOU SHOULD explore abstract approaches. Rather than attempting realistic or detailed designs immediately, focusing on color combinations, patterns, and geometric shapes builds confidence and familiarity with how paint behaves on stone surfaces. Once comfortable with the medium, you can add words or quotes using paint markers to create meaningful finished pieces without requiring advanced drawing skills.
Professional Layering TIPS
One of the most valuable techniques shared within the community involves a specific layering method that produces exceptionally clean, vibrant designs. After sketching your design onto the white base coat, re-apply white paint to fill in the areas where your design elements will be. This creates what’s essentially a second white layer in specific areas. Once this selective white layer dries, re-sketch your design with greater detail and precision, then apply your colors over this double-white foundation.
Why does this seemingly redundant step matter? The additional white layer ensures absolute opacity beneath your colors, preventing any possibility of the underlying rock color showing through. It also provides a fresh, smooth surface for detailed sketching, making it easier to create precise outlines and complex details. The result is colors that appear remarkably vibrant and designs with crisp, clean edges.
This technique also simplifies the painting process because colors reach full opacity with fewer coats. Rather than building up three or four coats of color directly on the base white, you achieve full coverage and vibrancy in one or two coats over the double-white areas.
Color Application Strategies
When applying colors to your design, patience and planning prevent common problems. The community recommends allowing each color section to dry before painting adjacent areas, which prevents colors from bleeding into each other and creating muddy transitions. While waiting for sections to dry might seem tedious, the clean results justify the time investment.
Building up colors in thin layers rather than applying thick single coats produces more uniform, professional results. Thick paint applications may seem faster, but they often dry unevenly, show brush texture, and take longer to fully cure. Thin layers dry quickly, allowing you to assess coverage and add additional coats as needed without committing to an irreversible thick application.
Acrylic paint dries relatively quickly, with matte finishes typically becoming touch-dry in ten to fifteen minutes. However, the community cautions against rushing, as paint that feels dry to gentle touch may still be vulnerable to smudging if pressure is applied. When in doubt, wait a bit longer.
Section 5: Sealing Techniques for Longevity
Proper sealing represents the final crucial technique that determines whether your rock painting survives the elements or deteriorates rapidly. The rock painting community has extensively tested various sealing methods and products, identifying approaches that provide optimal protection.
The Two-Step Sealing Method
The most reliable sealing approach, recommended by experienced community members, involves a two-step process combining different types of sealers for complementary benefits. The first step applies a thin layer of Mod Podge, the popular craft adhesive and sealer. Mod Podge goes on appearing milky white, which can be alarming, but it dries completely clear within an hour or two.
This initial Mod Podge layer serves a critical protective function: it prevents colors from running or bleeding when spray sealer is subsequently applied. Paint markers, ink pens, and even some paints can react to the solvents in spray sealers, causing colors to smudge or run. The Mod Podge creates a barrier that locks everything in place before the spray sealer is applied.
After the Mod Podge dries completely, the second sealing step applies clear acrylic spray sealer. Krylon and Plaid brands receive strong community recommendations, with the Plaid Patricia Nimocks line specifically mentioned for its non-yellowing formula and UV protection. These spray sealers provide durable, weather-resistant protection that stands up to sun, rain, and handling.
A strategic application technique involves sealing the rock’s bottom first, allowing it to dry completely, then flipping and sealing the top. This approach ensures that even if the bottom sealer hasn’t fully cured when you flip the rock, the design side remains protected. Many community members learned this lesson after damaging carefully painted designs by flipping rocks onto tacky sealer.
Alternative Sealing Methods
While the two-step Mod Podge and spray sealer method works reliably, the community employs several alternative approaches depending on specific needs and desired finishes. UV resin creates a spectacularly glossy, glass-like finish that gives rocks a professional, polished appearance. Application involves squeezing a small amount of UV resin onto the rock and spreading it evenly with a gloved finger, then placing the rock in sunlight for ten to fifteen minutes per side to cure.
However, UV resin requires careful handling. It begins curing immediately upon sunlight exposure, so application must occur indoors. Community members warn that spreading resin outdoors or even near windows causes premature curing, creating sticky messes and uneven finishes. Additionally, UV resin will cure to skin exposed to sunlight, making gloves essential.
Acrylic paint varnish offers another alternative that some painters prefer over Mod Podge. Unlike Mod Podge, which can feel slightly tacky until fully cured and takes considerable time to reach full hardness, acrylic paint varnish dries quickly to a completely non-sticky finish. It’s specifically formulated to seal acrylic paint, providing excellent protection without the extended curing time.
For maximum weather resistance, yacht varnish spray provides marine-grade protection designed to withstand constant moisture and UV exposure. Several community members use yacht varnish for garden rocks that will face particularly harsh conditions, reporting excellent durability even after years of outdoor exposure.
Triple Thick Gloss Glaze from DecoArt receives recommendations for adding selective glossy accents. Rather than coating entire rocks, this brush-on glaze can be applied to specific areas after spray sealing, creating visual interest through contrasting finishes. For example, you might use matte spray sealer overall but apply Triple Thick to eyes in an animal design, making them appear shiny and lifelike.
Outdoor Durability Considerations
Even with proper sealing, outdoor rocks face challenges that indoor pieces never encounter. The community offers realistic expectations about longevity based on extensive real-world experience. UV-protective sealers significantly slow color fading but cannot completely prevent it. Rocks in direct, intense sunlight will gradually lose vibrancy over months or years, regardless of sealing quality. Some community members in particularly sunny climates report noticeable fading within a single summer season.
Climate also dramatically impacts rock durability. In regions with freezing winters, painted rocks face the challenge of freeze-thaw cycles. As temperatures fluctuate above and below freezing, rocks naturally expand and contract slightly. This movement can cause paint and sealers to crack or peel, even with the best application techniques. Community members in cold climates often adopt seasonal approaches, displaying painted rocks from April through September but bringing them indoors during winter months.
The rock painting community emphasizes that understanding these limitations isn’t discouraging—it’s realistic. Rocks are meant to be enjoyed, and if a garden rock fades after a year of brightening your flower bed, that represents successful use rather than failure. Some painters embrace the changing nature of outdoor rocks, regularly refreshing garden displays with new creations and moving older pieces indoors or to locations where fading matters less.
These five essential TECHNIQUES represent the core knowledge that separates successful rock painters from frustrated beginners. By following these community-tested techniques, you’ll create rocks that look professional, last as long as conditions allow, and bring satisfaction throughout the creative process.

A Teacher with 5 years of experience. Our Expertise, is reliable to meet your full Academic development needs . Worked on many crafts and construction projects offering services from design to development to deployment over the years. You will find many of my works in my business portfolio on request.