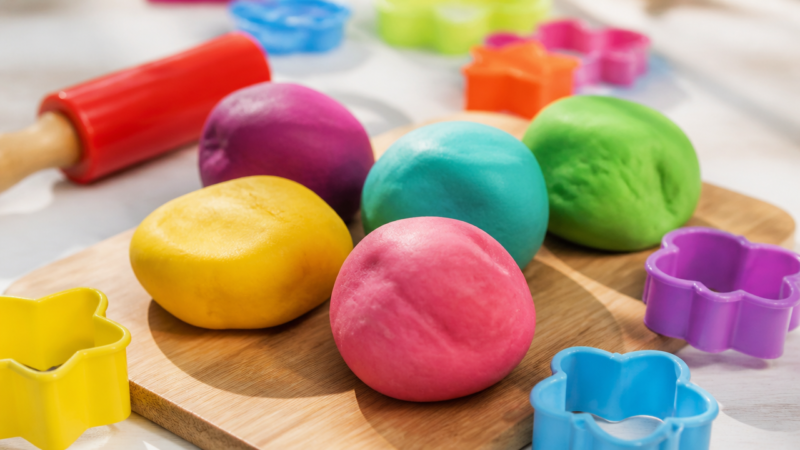
Quick answer: Mix 2 cups flour with 1 cup salt, then slowly stir in about ¾ cup warm water and knead until smooth. Roll to ¼ inch thick, cut shapes with cookie cutters, poke a hanging hole, then bake at 200°F to 225°F for 1 to 3 hours until hard and pale on both sides.
Salt dough is one of the oldest tricks in the craft box, and it’s stuck around for a reason. Three pantry staples, no special tools, and a batch that costs about a dollar. Families have been making these ornaments for generations, and some crafters still have pieces from thirty or forty years ago hanging on the tree. Here’s exactly how to make a batch that turns out smooth, sturdy, and ready to decorate.
| Detail | What to expect |
| Main ingredients | Standard Flour, salt, water |
| Flour to salt ratio | Varies 2:1 is classic, some recipes use 1:1 |
| Bake temperature | Varies 200°F to 250°F depending on the recipe |
| Bake time | Varies 1 to 3 hours depending on thickness |
| Puffing risk | Caution Self-rising flour or an oven that’s too hot |
Common salt dough ratios (parts by volume)
Flour
Salt
Water
Ingredients
- 2 cups all-purpose flour (not self-rising, since it will cause the dough to bubble)
- 1 cup table salt (fine grain works best; skip kosher or coarse sea salt)
- ¾ cup warm water, plus more if needed a spoonful at a time
- Optional: food coloring stirred into the water, or a tablespoon of cinnamon for a scented dough
You’ll also need a large mixing bowl, a rolling pin, cookie cutters, a drinking straw or skewer for hanging holes, a parchment lined baking sheet, and acrylic paint or sealant for decorating once the ornaments are baked and cooled.
Recipes vary a little depending on who you ask. Some crafters use equal parts flour and salt, while others stick with the classic 2 parts flour to 1 part salt. Both work, but the 2:1 ratio tends to roll out smoother and hold fine details like stamped patterns better, which is why it’s the version most bakers recommend for cookie cutter shapes.
Stick with table salt rather than kosher or coarse sea salt. The larger crystals in kosher salt don’t dissolve evenly into the dough, which leaves a rough, gritty texture instead of the smooth finish you want for cutting clean shapes.
Step 1: Whisk the Flour and Salt Together
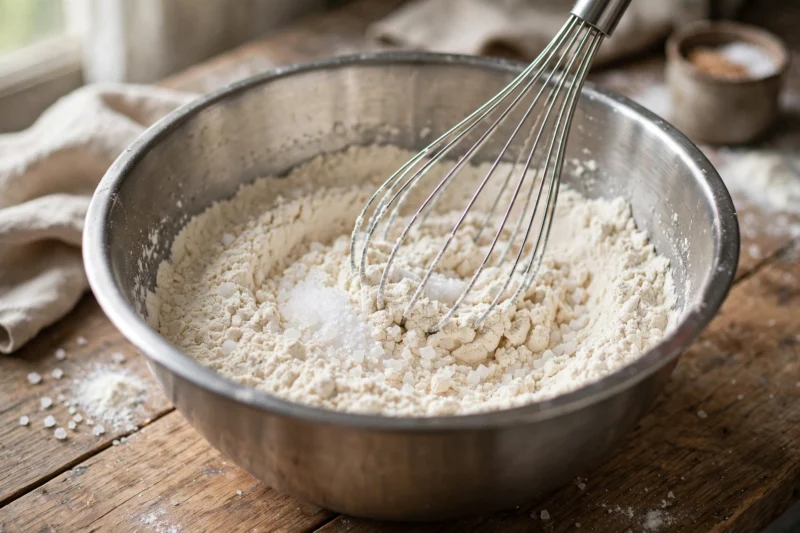
Add the flour and salt to a large mixing bowl and whisk them together until they’re evenly combined. This step matters more than it seems. If the salt sits in clumps, you’ll end up with gritty pockets in the finished dough instead of a smooth, even texture.
Step 2: Add the Water Gradually
Pour in the warm water a little at a time, stirring as you go. Don’t dump it all in at once. Flour absorbs water differently depending on the brand and the humidity in your kitchen, so adding it gradually lets you stop as soon as the dough comes together instead of ending up with a soupy mess you have to fix with extra flour.
If you’re adding food coloring, mix it into the water first so the color spreads evenly instead of streaking through the dough.
Step 3: Knead Until Smooth
Turn the dough out onto a lightly floured counter and knead it with your hands for about 5 to 10 minutes. The dough is ready when it’s smooth, firm, and holds its shape without sticking to your fingers or crumbling apart. If it feels too sticky, work in a little extra flour a teaspoon at a time. If it feels dry and won’t hold together, add water the same way.
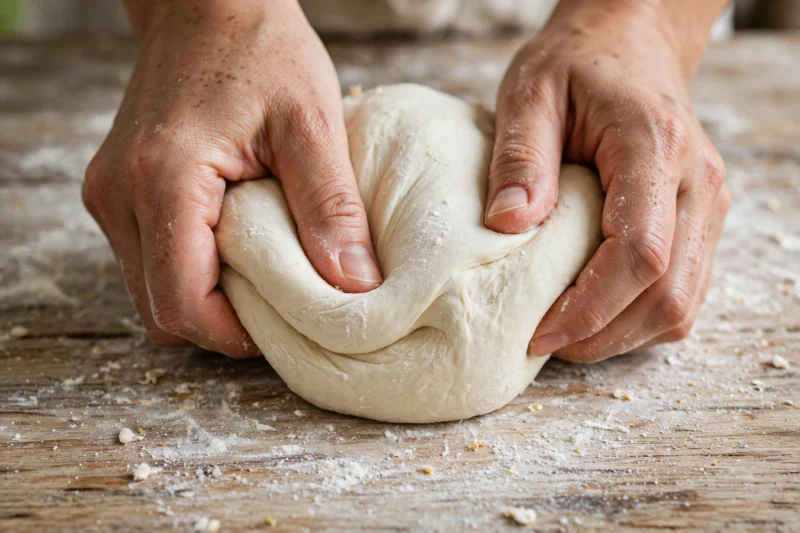
Press a finger into the dough to check it. It should keep the indent without springing back or falling apart, similar to firm cookie dough.
Step 4: Roll Out and Cut Shapes
Preheat your oven to somewhere between 200°F and 225°F. On a lightly floured surface, roll the dough to about ⅛ to ¼ inch thick. Thinner ornaments dry more evenly and are far less likely to puff up in the oven, so don’t be afraid to roll it thinner than feels natural.

Cut shapes with your cookie cutters, lifting each one carefully onto a parchment lined baking sheet. Gather the scraps, re-roll them, and keep cutting until you’ve used up the dough.
Step 5: Poke a Hole for Hanging
Before the dough goes in the oven, use a straw or a skewer to punch a clean hole near the top of each ornament. A straw makes a neat, consistent hole that won’t close up during baking. Skip this step and try to drill a hole after baking, and you’ll likely crack the ornament instead.
Step 6: Bake Low and Slow

Bake at 200°F to 225°F for 1 to 3 hours, depending on the thickness of your ornaments, flipping them halfway through so both sides dry at the same rate. The ornaments are done when they feel hard all the way through and look evenly pale on both sides, with no soft or shiny spots left in the center.
Resist the temptation to raise the temperature to speed things up. A hot oven makes salt dough puff up like a biscuit and brown around the edges, which ruins the flat, cookie cutter look most crafters are going for. Low and slow is what keeps the shapes crisp.
Step 7: Cool, Paint, and Seal
Let the ornaments cool completely on the baking sheet before touching them further. Warm dough doesn’t hold paint well and can still be slightly soft in the middle even when the outside feels done. Once cooled, decorate with acrylic paint, glitter glue, or stamped designs, then let the paint fully dry.

For ornaments that last the longest, finish with a light coat of Mod Podge or clear polyurethane spray. This step is what separates ornaments that crumble after a season from ones that last for decades. Thread ribbon or twine through the hole once the sealant is dry.
Variations Worth Trying
Handprint and footprint keepsakes are a favorite version of this craft, especially for babies and young kids. Roll a thicker round of dough, about 4 to 5 inches across, and press the print firmly into the center before it dries out. Thicker pieces like these need extra time in the oven, often closer to 3 hours, since the center takes longer to dry than a thin cookie cutter shape.
Air drying is an option if you’d rather skip the oven entirely. Leave the shapes out in a warm, dry spot for 4 to 7 days, flipping them regularly so both sides dry evenly. It takes far longer than baking, but it avoids any risk of puffing or browning.
Stamped ornaments look elegant with almost no extra effort. Press a rubber or silicone stamp into the rolled dough before cutting, using a pigment ink pad for the crispest detail. Cut around the stamped design or use it as the centerpiece of a round or scalloped shape.
Scented dough is a small change that makes a big difference in how the finished ornaments feel. Stir a tablespoon or two of ground cinnamon into the dry ingredients before adding water. It tints the dough a warm tan color and gives the ornaments a faint spiced smell that lingers even after baking, which pairs nicely with a rustic or natural themed tree.
Personalized gift tags are another easy variation. Cut small rectangle or tag shaped pieces, poke a hole in one corner, and use a toothpick to carve a name or date into the soft dough before baking. They make a thoughtful addition tied onto a wrapped gift instead of a paper tag.
Why Did My Salt Dough Puff Up in the Oven?
Puffing almost always traces back to one of two causes. The first is self-rising flour, which contains baking powder and will bubble no matter how carefully you bake it, so always double check the bag before you start. The second is an oven that’s running hotter than the dial suggests. If you’ve ruled out self-rising flour and it’s still happening, try dropping the temperature another 25 degrees and giving the ornaments more time instead.
Air bubbles trapped in the dough during kneading can also cause small pockets that puff up in the oven. Knead thoroughly and press the rolled dough gently with your palm before cutting to work out any trapped air. Handprint and footprint pieces are more prone to this than flat cookie cutter shapes, simply because they’re thicker and harder to press evenly.
Conclusion
Salt dough has earned its spot as a holiday tradition because it genuinely works, batch after batch, with ingredients most kitchens already have on hand. Whisk, knead, roll thin, and bake slow, and you’ll end up with sturdy little keepsakes that can realistically outlast the tree they’re hanging on.
FAQ
Is salt dough safe for kids to make?
Yes, the ingredients are non-toxic and it’s a common school and preschool craft. It’s still not edible, and the high salt content can be harmful to pets if they eat a piece, so keep finished and unbaked dough out of their reach.
Can I air dry salt dough instead of baking it?
Yes, though it takes considerably longer, usually 4 to 7 days depending on thickness and humidity. Baking at a low temperature is the faster and more reliable route if you’re on a timeline.
How long do salt dough ornaments last?
Sealed properly and stored somewhere dry, salt dough ornaments can last for decades. The salt itself acts as a natural preservative, which is part of why this craft has stayed popular for so many generations.
Can I fix a cracked salt dough ornament?
Unlike air dry clay, baked salt dough can’t be glued back together in a way that holds up well. If a piece cracks badly, it’s usually easier to reroll fresh dough and cut a new one than to repair it.
Can I make the dough ahead and bake it later?
Yes, wrap unbaked dough tightly in plastic wrap and refrigerate it for up to 3 days, or freeze it for up to 3 months. Let it come to room temperature before rolling and cutting.
References
- Wholefully, “Salt Dough Ornaments: Easy Recipe!” (2025)
- Julie Blanner, “The Best Salt Dough Ornaments (with Video!)” (2024)
- Homestead and Chill, “Easy Salt Dough Ornaments Recipe for Handprints, Shapes and Keepsakes” (2025)
- Better Homes & Gardens, “How to Make Salt Dough Ornaments” (2026)
- A Piece of Rainbow, “Best Salt Dough Recipe for Ornaments & Crafts” (2026)

A Teacher with 5 years of experience. Our Expertise, is reliable to meet your full Academic development needs . Worked on many crafts and construction projects offering services from design to development to deployment over the years. You will find many of my works in my business portfolio on request.