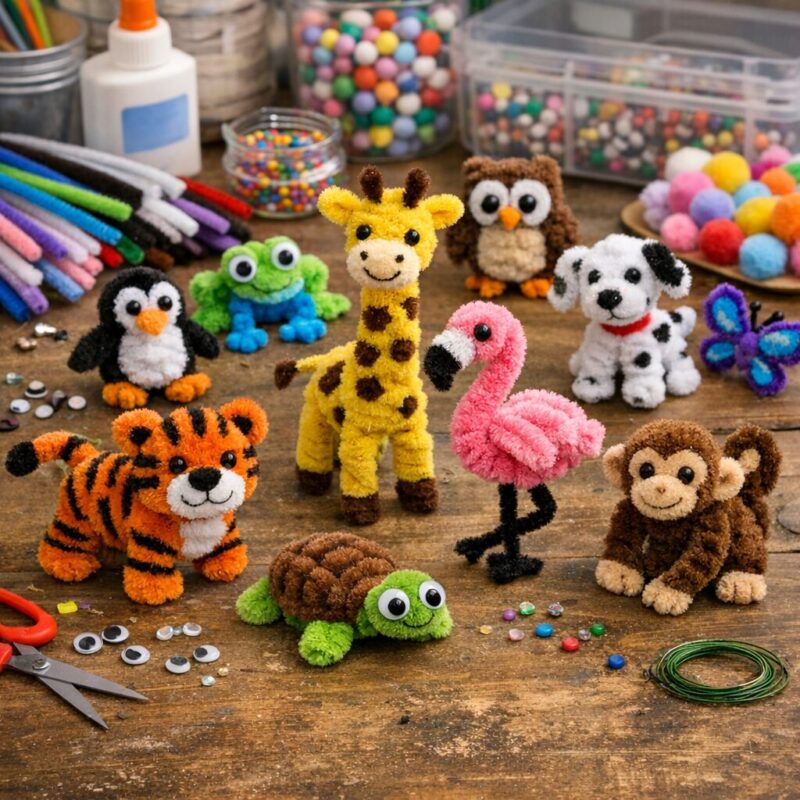
Quick answer: To make a pipe cleaner animal, bend one pipe cleaner into a loop for the body, twist on shorter pieces for legs, ears, or a tail, and curl a small loop at one end for the head. Most animals take three to five pipe cleaners and about ten minutes, no glue or tools required.
Pipe cleaner animals are one of the easiest crafts to teach a child because the whole project is just bending, looping, and twisting soft wire. There’s no drying time, no paint, and almost no mess, so a whole zoo of animals can come together on a kitchen table in an afternoon. Below is the basic method, plus specific steps for seven popular animals and answers to the questions people ask most.
One reason pipe cleaner animals work so well as a craft project is that mistakes cost nothing. If a leg comes out too long or a head ends up lopsided, you just untwist that section and try again instead of starting over with fresh materials. That makes this a good activity for building patience in younger kids, since there’s no pressure to get every twist perfect on the first try. It also means one bag of pipe cleaners can produce dozens of animals over time, since any shape that doesn’t work out can be straightened and reused for the next one.
| Factor | What to know |
| Skill level | Beginner friendly |
| Pipe cleaners per animal | 3 to 5, varies by animal |
| Tools needed | None, scissors optional |
| Time per animal | 5 to 10 minutes |
| Extras for detail | Googly eyes, glue optional |
| Animal | Pipe cleaners needed |
| Spider | 5 |
| Butterfly | 3 |
| Dog | 4 |
| Bunny | 3 |
| Caterpillar | 2 |
| Snake | 1 |
| Cat | 3 |
Pipe cleaners needed per animal, from the table above.
How Do You Make Pipe Cleaner Animals Step By Step?
Every pipe cleaner animal starts from the same five steps, no matter which creature you’re making. Learn this base method once and you can freestyle almost any animal from there.
- Pick your main body pipe cleaner. Fold it in half or bend it into an oval loop, depending on whether the animal has a long body like a caterpillar or a rounder one like a spider.
- Twist on the legs. Wrap shorter pipe cleaners, or pieces cut from a full one, around the middle of the body and bend each into a bent, standing leg shape.
- Shape the head. Twist a small loop at one end of the body piece, or attach a separate short pipe cleaner folded into a circle for a distinct head.
- Add ears, a tail, or antennae. Bend the tips of extra short pieces into points, curls, or loops and twist them onto the head or the back of the body.
- Add the finishing details. Glue on googly eyes, trim any stray wire ends with scissors, and fluff the fibers so the finished animal looks full instead of flat.
How Do You Make a Pipe Cleaner Spider?
Spiders are the most detailed animal on this list, but each step is simple on its own. Follow along in order for a spider that stands up on its own eight legs.
- Fold one pipe cleaner in half to make a fat, round body.
- Wrap four more pipe cleaners around the fold, one at a time, so eight leg ends stick out evenly on both sides.
- Bend each leg at two points, like a real spider leg, so the finished shape stands up on its own.
- Space the eight legs evenly around the body rather than bunching them to one side, so the spider balances upright on a table or shelf.
- Glue on two small googly eyes at the front of the body to finish. Black pipe cleaners give the classic Halloween look, while bright colors make a friendlier version for younger kids.
How Do You Make a Pipe Cleaner Butterfly?
The butterfly comes together from just three pipe cleaners once you know the order to twist them in.

- Bend two pipe cleaners into matching wing shapes, each one an oval with a slight pinch in the middle.
- Cross the two wing pieces over each other so they form an X.
- Twist a third pipe cleaner tightly around the crossing point to hold both wings in place and form the body.
- Bend the two loose ends of that third pipe cleaner upward and curl the tips into small spirals for antennae.
- Spread the wings apart slightly so the butterfly looks like it’s mid-flight rather than flat and folded. Use a full pipe cleaner per wing instead of a folded one for a bigger butterfly that can clip onto a headband or a gift bow.
How Do You Make a Pipe Cleaner Dog?
The dog uses four pipe cleaners built up in layers, body first and details last.
- Bend one pipe cleaner into a long, low loop for the body and head combined, pinching a slight point at one end for the snout.
- Fold two more pipe cleaners in half and twist each one around the body to form four legs, adjusting the lengths so the dog stands level.
- Attach a short curved piece at the back for a tail.
- Fold two small triangles near the head for ears and twist them into place.
- Add a dab of glue at each twist point so the legs don’t slide once the dog gets picked up and carried around. Brown, black, and white read most clearly as a dog, or twist two colors together for a spotted Dalmatian-style version.
How Do You Make a Pipe Cleaner Bunny?
The bunny takes three pipe cleaners: one for the body and ears, two for the legs.

- Fold one pipe cleaner in half and twist it partway up to form a rounded body with two loose ends left at the top.
- Bend those two loose ends into tall, narrow loops for the ears, then flatten the tips slightly so they look like ears rather than antennae.
- Wrap a second short pipe cleaner around the base of the body for two front legs.
- Wrap a third short pipe cleaner around the back for two back legs, bent at an angle so the bunny looks like it’s sitting.
- Glue a small white pom-pom to the back for a fluffy tail. Bend the ears slightly forward for a more alert look, and try pastel colors for a spring-themed version.
How Do You Make a Pipe Cleaner Caterpillar?
This is the simplest animal on the list, just two pipe cleaners twisted and coiled.

- Twist two different colored pipe cleaners together along their full length so they spiral around each other like a barber pole.
- Coil the twisted piece loosely into a wavy, S-shaped line to look like a crawling caterpillar.
- Bend the very front tip upward slightly to mark the head end.
- Glue on two tiny googly eyes at the head end to finish. Green and yellow is the classic combination, but any two bright colors work for a garden-themed version.
How Do You Make a Pipe Cleaner Snake?
A snake takes just one pipe cleaner from start to finish.
- Take one full-length pipe cleaner and bend it into a loose, wavy S-shape from end to end, curving it back and forth like a real snake moving across the ground.
- Pinch one end flat and slightly wider than the rest of the body to form a triangular head.
- Curl the opposite end into a small point for the tail.
- Glue two tiny googly eyes onto the flattened head.
- For extra detail, snip a thin V shape into a small piece of red paper or felt and glue it under the head for a tongue. Twisting two colors together before shaping gives the snake a striped, patterned look without any paint.
How Do You Make a Pipe Cleaner Cat?
The cat needs three pipe cleaners built up the same way as the dog, body first, then legs, then head.
- Bend one pipe cleaner into a rounded oval for the body, leaving extra length at one end to curl upward into a tail.
- Fold a second pipe cleaner in half and twist it around the front of the body to form two front legs.
- Fold a third pipe cleaner in half and twist it around the back for the hind legs, angling them slightly forward the way a sitting cat tucks them in.
- Twist a short piece into a small circle for the head and attach it to the front of the body, then pinch two tiny triangular points into the top of that circle for ears.
- Curl a short length of pink or white pipe cleaner at the end of the tail for a finishing touch, and glue two short pieces of thin thread to the sides of the face for whiskers.
What Tips Make Pipe Cleaner Animals Look More Realistic?
A few small habits separate a rough shape from an animal that actually looks like something. Always bend legs at a joint partway down rather than leaving them as one straight line, since a bent leg makes the animal look like it’s standing rather than propped up. Trim any straight, spiky wire ends with scissors and fold the cut end back into the body so nothing pokes out. Fluffing the fibers of each pipe cleaner between your fingers after shaping restores the fuzzy texture that gets flattened during twisting, and it’s a step a lot of beginners skip. Finally, keep proportions in mind: a body that’s roughly twice the length of the legs reads as an animal, while a body the same size as the legs tends to look more like an insect or an abstract shape. Working on a flat surface rather than in your hands also helps, since it’s easier to check that all four legs are the same length and the animal sits level before you commit to the final twists.
FAQ
What age can make pipe cleaner animals?
Children as young as four can manage simple shapes like a caterpillar with adult help, while kids age seven and up can usually follow the full step-by-step process for a spider or a dog on their own. For toddlers under four, an adult can pre-bend the base shape and let the child add details like eyes or ears instead.
Do I need glue to make pipe cleaner animals?
No, twisting alone holds most pipe cleaner animals together. Glue is only useful for attaching extras like googly eyes or a pom-pom tail that can’t be twisted into the wire itself. A hot glue gun works fastest, but craft glue or even a glue stick holds lightweight decorations like paper eyes just as well.
How do you make pipe cleaner animal legs stand up straight?
Bend each leg at a slight angle partway down instead of leaving it straight, and make sure all the legs are trimmed to roughly the same length so the body sits level. Wider leg stances, angled slightly outward, balance better than legs that point straight down.
Can you reuse or reshape a pipe cleaner animal?
Yes, pipe cleaners can be untwisted and straightened out again, so a finished animal can be taken apart and rebuilt into a different shape if a child wants to try something new with the same materials. Over many rounds of twisting and untwisting the fuzzy fiber does start to flatten and shed a little, so a pipe cleaner that’s been reshaped several times may need swapping for a fresh one for the neatest final result.
References
- Today’s Parent, “10 Easy Pipe Cleaner Crafts” (2017)
- Fuzzy Pipe, “12 Simple Pipe Cleaner Crafts With Tutorials for Everyone” (2024)
- Fuzzy Pipe, “16 Easy Things To Make With Pipe Cleaners” (2024)
- Speech Blubs, “Fun & Easy Pipe Cleaner Crafts for Kids” (2026)

A Teacher with 5 years of experience. Our Expertise, is reliable to meet your full Academic development needs . Worked on many crafts and construction projects offering services from design to development to deployment over the years. You will find many of my works in my business portfolio on request.