Quick answer: The best salt dough ornaments ideas mix keepsakes (handprints, footprints, pawprints) with classic shapes (stars, snowflakes, gingerbread men) and simple texture tricks like pressed leaves or cinnamon. Mix 2 parts flour to 1 part salt with about ¾ part warm water, cut your shapes, bake at 200°F for 1-2 hours, then paint and seal both sides once fully dry.
Salt dough is one of those crafts that never really goes out of style. Three pantry ingredients, an afternoon, and no kiln or special tools required, just flour, salt, and water. It is forgiving enough for a five year old to shape and sturdy enough that a sealed ornament can last for decades on the tree. Whether you want a sentimental keepsake or a quick batch of tree fillers, these 12 salt dough ornaments ideas cover the full range, from sentimental to simple to a little bit fancy.
1. Family Handprint Keepsakes
Roll out a thick slab of dough, press a hand flat into it, then cut around the outline with a butter knife before it springs back. This is the ornament people actually keep for years, since it captures exactly how small a hand was at a certain age. Make it a yearly tradition and line the ornaments up chronologically on the tree so the growth becomes part of the display.

2. Painted Snowflakes with Glitter
Snowflake cookie cutters turn plain dough into delicate winter shapes in seconds. Paint them white or silver once baked, then dust the edges with fine glitter while the top coat of sealant is still tacky so it actually sticks. Keep the dough on the thinner side for these, around a quarter inch, so the fine points of the snowflake do not snap during baking.

3. Pressed Nature Textures
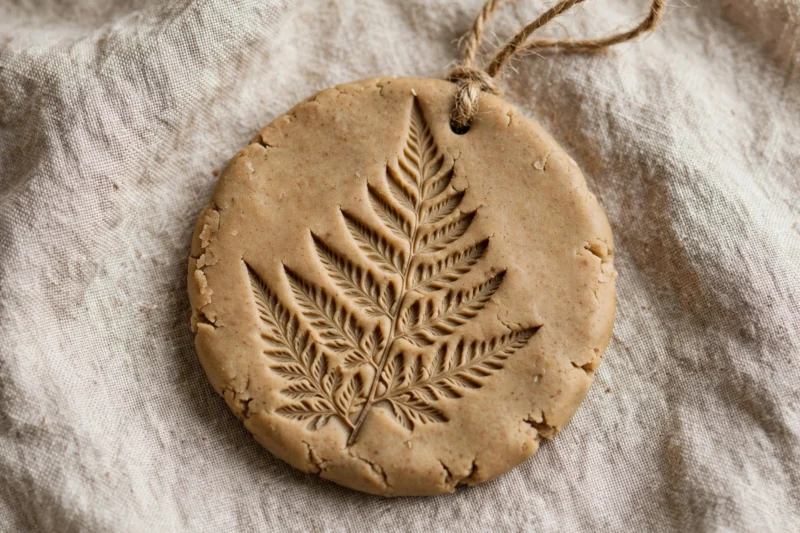
Collect small leaves, pine needles, or flat flowers and press them firmly into the dough before cutting your shape out around them. Peel the plant material off before baking and you are left with a delicate imprinted texture that no cookie cutter can replicate. This works especially well on plain circle or oval shapes, letting the pressed pattern be the entire design, or lightly painted with just a thin white wash over the raised texture so the imprint still shows through.
4. Custom Name Tags and Place Settings
Roll the dough flat, cut small rectangles or ovals, and use a toothpick to write a name or a short message before baking. These double as gift tags tied onto presents or place settings for a holiday dinner table, and they give guests a small keepsake to take home afterward. A tiny hole punched at one end lets them be looped with ribbon either way.

5. Pet Paw Print Ornaments
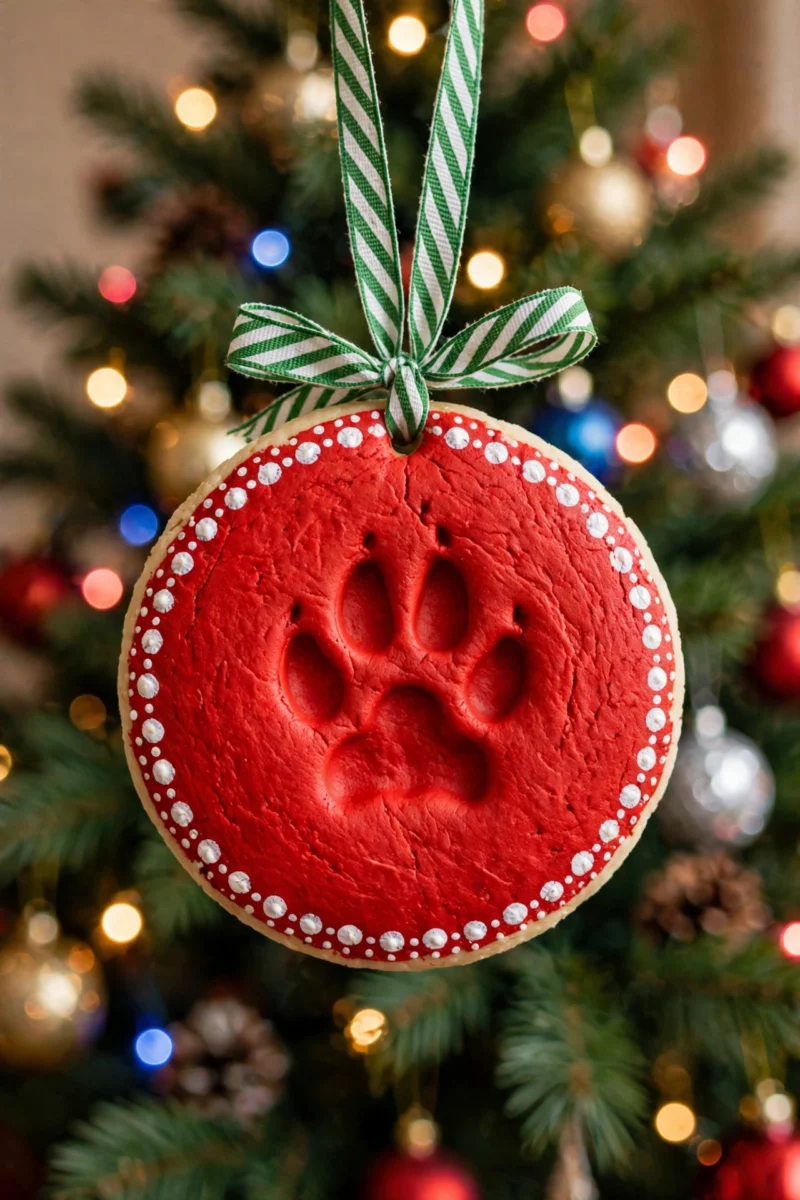
If there is a dog or cat in the house, press a clean paw gently into a flattened piece of dough to capture the print. It takes a little patience and maybe a treat as a bribe, but the result is a genuinely one of a kind keepsake. Cut the dough into a simple circle around the print rather than a complicated shape, so the paw stays the clear focal point.
6. Cinnamon-Scented Ornaments
Mix a spoonful of ground cinnamon into the dough before kneading and the ornaments come out with a warm, spiced scent that lingers for months, even after baking. It pairs naturally with a rustic, unpainted finish since the cinnamon already tints the dough a light brown. Hang a few near the tree’s lower branches so the scent is noticeable at nose height for kids.

7. Classic Star Shapes
Simple, symmetrical, and never out of style, a star cutter is one of the easiest starting points for beginners. A slightly lopsided star cut by a toddler ends up being the most charming ornament on the tree, not the least. Paint them gold or leave them natural with just a light varnish for a more elegant, understated look.

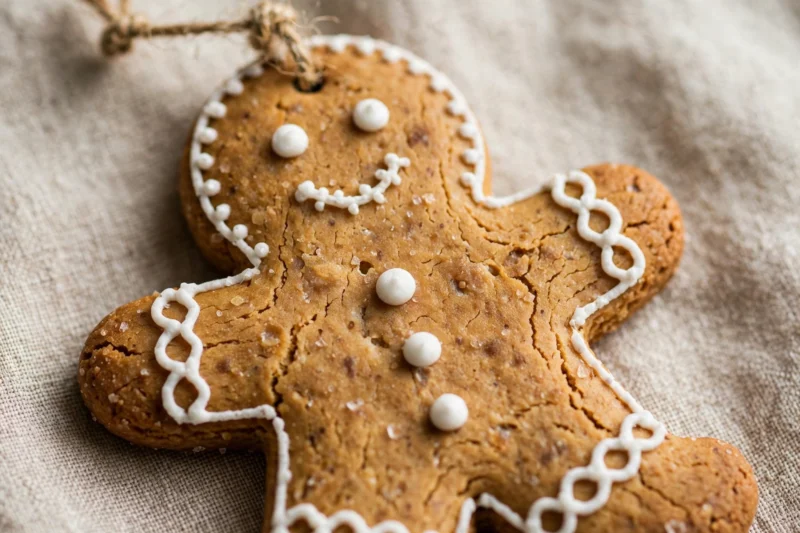
8. Gingerbread Men
A gingerbread man cutter turns plain dough into one of the most recognizable holiday shapes without any extra effort. Paint the body a warm brown and add white icing-style dots and lines with acrylic paint for buttons and a smile. Kids especially love this one since it looks close enough to a real cookie to get a double take.
9. Baby Footprint Keepsakes
Press a baby’s foot gently into a flattened, slightly thicker piece of dough to capture the print without over-flattening tiny toes. This works well as a first Christmas ornament or a milestone gift for a new parent. Keep the dough soft and slightly damp for this one, a dough that is too stiff will not pick up the fine detail of small toes.
10. Minimalist Boho Painted Shapes
Simple circle, arch, and moon shapes painted in muted terracotta, sage, and cream give salt dough a modern, boho feel instead of a traditional holiday look. Leave large areas of the natural dough color exposed rather than covering the whole shape in paint, and finish with a small tassel or jute string instead of ribbon for a more textural hang.
11. Glossy Glitter Finish Ornaments
Any shape gets an instant upgrade with a glossy sealer and a layer of fine glitter brushed on while the sealant is still wet. This finish catches the light well under tree lights and works especially nicely on stars, snowflakes, and moons. Apply a final clear topcoat over the glitter once it sets so it does not shed onto the carpet.
12. Whimsical Painted Character Shapes
A Santa face, a tiny mitten, or a knit sweater shape becomes genuinely charming once fully painted, red hats, rosy cheeks, cable-knit patterns, little polka dots. These are the ornaments that make people stop and smile on the tree, and they are a fun way to practice detail painting with a small brush once the base coat has dried. Add a coat of gloss varnish over the top for a shiny, candy-like finish that photographs beautifully.
Basic Salt Dough Recipe and Bake Times
| Step | Detail |
|---|---|
| Ratio | 2 parts flour, 1 part salt, ¾ part warm water |
| Standard batch | 2 cups flour, 1 cup salt, ¾ cup water (12-20 ornaments) |
| Mixing | Whisk dry ingredients, add water gradually, knead until smooth |
| Baking | 200°F for 1-2 hours, or air-dry 2-4 days |
| Finishing | Paint once cooled, seal both sides after paint dries fully |
FAQ
How long do salt dough ornaments last?
Properly baked and sealed on both sides, salt dough ornaments can last for decades. The salt in the dough helps preserve it, and a good varnish or Mod Podge sealant keeps moisture from softening the ornament over time.
Do I have to bake salt dough or can it air-dry?
Both work. Baking at 200°F for 1-2 hours is faster and gives a more even result, while air-drying takes 2-4 days but avoids the oven entirely, which some people prefer for thicker keepsake pieces like handprints.
Why did my salt dough ornament puff up or crack?
Puffing usually means the oven is too hot or the dough is too thick in spots. Cracking often comes from drying too fast. Bake low and slow, keep thickness even, and let ornaments cool gradually rather than pulling them straight from a hot oven into cold air.
Can I use salt dough ornaments outside?
Salt dough absorbs moisture from the air, so it is not a great fit for outdoor use or humid climates. Keep finished ornaments indoors and away from direct humidity, like near a stovetop or a steamy window, to help them last as long as possible.
References
- Atomm, “How to Make Salt Dough Ornaments (Easy Recipe, 2026)” (2026)
- Classpop, “Salt Dough Ornaments | Guide in 2026” (2026)
- Casolia, “18+ Creative Salt Dough Ornament Ideas to Try” (2026)
- Mod Podge Rocks, “EASY Salt Dough Ornaments That Last Forever” (2026)
- First Day of Home, “29+ Best Salt Dough Crafts (2026)” (2026)

A Teacher with 5 years of experience. Our Expertise, is reliable to meet your full Academic development needs . Worked on many crafts and construction projects offering services from design to development to deployment over the years. You will find many of my works in my business portfolio on request.