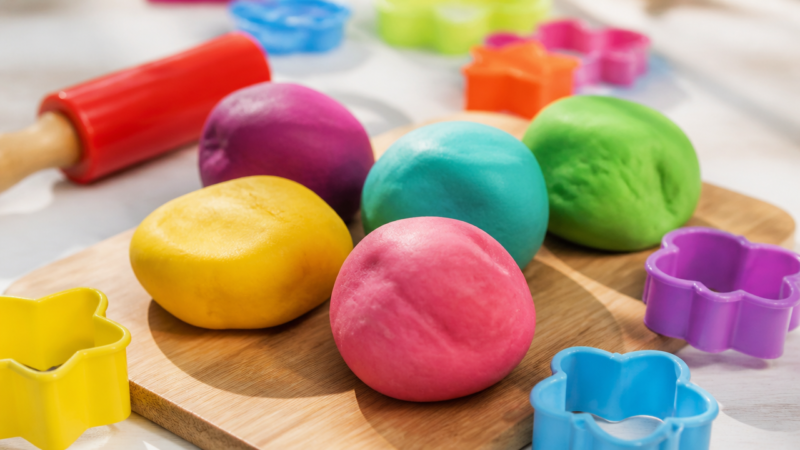
Quick answer: Mix 2 cups baking soda, 1 cup cornstarch, and 1 to 1.5 cups water in a saucepan. Cook over medium heat while stirring until it turns into a thick paste, like mashed potatoes. Cool it, knead it smooth, roll it out, cut shapes, poke a hanging hole, then air dry or bake low and slow until hard.
If you love the look of white porcelain ornaments but don’t want to pay craft store prices, your pantry already has what you need. Baking soda dough turns into a smooth, snow white clay with just three ingredients. No flour, no glue, no trip to the store. Kids can help measure and stir, and the finished ornaments dry a bright, clean white that flour based doughs can’t quite match.
| Detail | What to expect |
| Main ingredients | Standard Baking soda, cornstarch, water |
| Cook time on stove | Standard 5 to 7 minutes |
| Dry method | Varies Air dry 24 to 48 hours, or bake 170 to 200°F for 45 min to 2 hours |
| Finished color | Standard Pure white |
| Cracking risk | Caution Rolling too thick or baking too hot |
Ornaments per batch by cutter size (roughly)
Large cutters
~12 ornaments
Medium cutters
~20 ornaments
Mini cutters
~28 ornaments
Ingredients
- 2 cups baking soda
- 1 cup cornstarch
- 1 to 1½ cups water (start with 1¼ cups, adjust as needed)
- Optional: a few drops of food coloring, or a teaspoon of an essential oil like cinnamon or clove for scent
You’ll also want a medium saucepan, a rubber spatula, a damp cloth or plastic wrap, a rolling pin, cookie cutters, a drinking straw or skewer for the hanging hole, and a parchment lined baking sheet if you plan to bake instead of air dry.
Regular table salt is not part of this recipe, which is what sets baking soda dough apart from classic salt dough. The starch and soda combination is what gives the finished pieces that bright, snow white look, since flour based doughs tend to dry with a slight cream or tan tint instead. If you’ve made salt dough before, expect this dough to feel smoother and less grainy once it’s kneaded.
A kitchen scale isn’t necessary here, but if you want consistent results every time, measure by volume with dry measuring cups rather than scooping straight from the box. Packed baking soda measures differently than loosely spooned baking soda, and that small difference can change how much water the dough needs.
Step 1: Mix the Baking Soda and Cornstarch
Pour the baking soda and cornstarch into a medium saucepan while the pan is still off the heat. Give the dry ingredients a quick stir so they’re evenly combined before you add any liquid. Mixing them dry first stops the cornstarch from clumping once the water hits the pan.
Pour in the water and stir until the mixture looks like thin, runny milk. It won’t look like dough yet, and that’s normal. This watery stage is just the starting point.
Step 2: Cook the Mixture Over Medium Heat
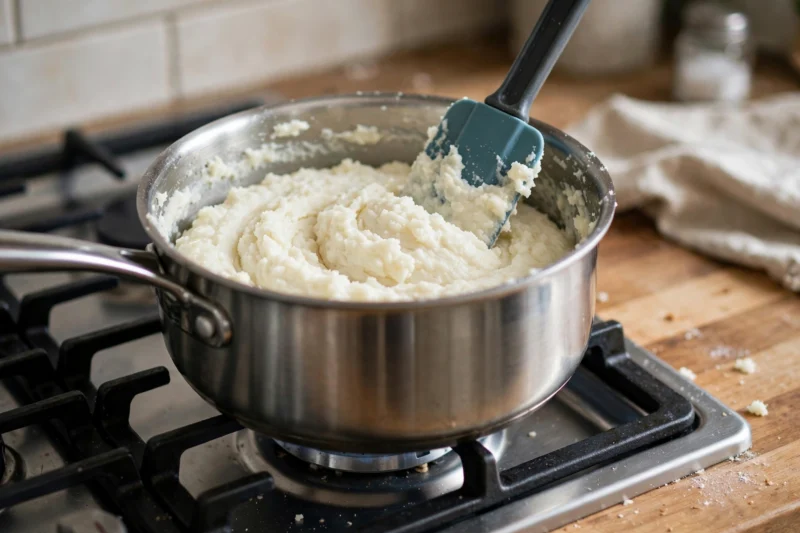
Set the pan over medium heat and stir constantly with a rubber spatula. Don’t walk away here. The mixture needs steady stirring or it will scorch on the bottom while the top stays runny. After about 5 to 7 minutes, it will start to thicken and pull away from the sides of the pan.
Keep stirring until the texture looks like thick mashed potatoes and holds together in a mass. Pull it off the heat right when it reaches that point. Overcooking dries the dough out too much and makes it more likely to crack later.
Step 3: Cool and Knead the Dough
Scoop the dough into a bowl and press a damp cloth or a sheet of plastic wrap directly against the surface. This keeps it from forming a dry skin as it cools. Let it sit for 15 to 60 minutes, until it’s cool enough to handle comfortably.
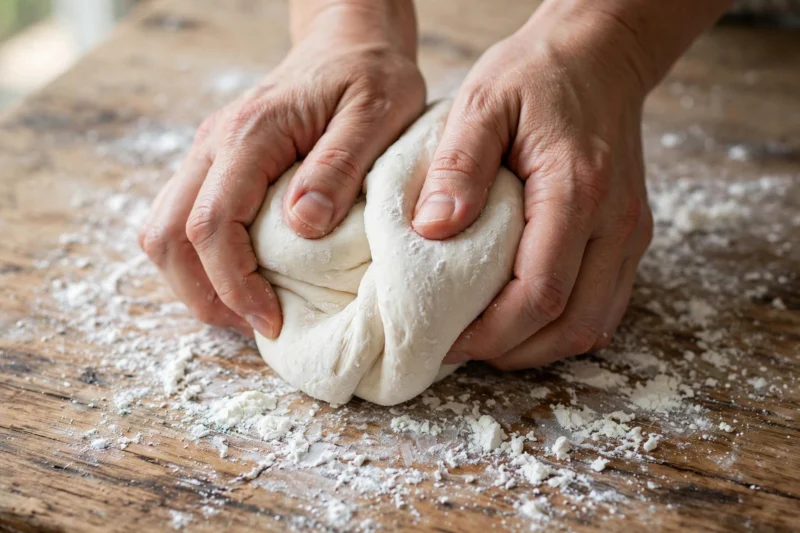
Turn the cooled dough out onto a clean counter and knead it for a minute or two until it’s smooth and silky. If it feels sticky, dust your hands and the counter with a little extra cornstarch and keep kneading. If it feels crumbly and dry, work in a few drops of water at a time.
Step 4: Roll Out the Dough
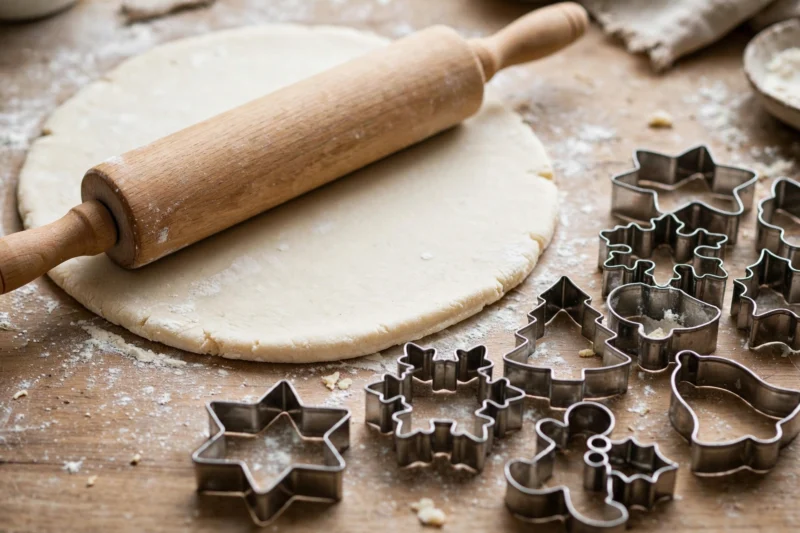
Dust your work surface with a little cornstarch so the dough won’t stick. Roll it out to about ¼ inch thick using a rolling pin. Thinner ornaments dry faster and crack less, so resist the urge to leave them thick. If you want extra texture, press a doily, a lace scrap, or an embossed rolling pin into the surface before cutting.
Step 5: Cut Shapes and Poke a Hanging Hole
Press your holiday cookie cutters into the rolled dough and lift the shapes carefully onto a parchment lined baking sheet. Use a drinking straw or wooden skewer to poke a hole near the top edge of each ornament while the dough is still soft. Adding the hole now saves you from trying to drill through hardened clay later, and it’s one clean poke instead of a crack.
Step 6: Air Dry or Bake Until Hard
You have two options here. To air dry, leave the ornaments on the baking sheet in a warm, dry spot for 24 to 48 hours, flipping them once so both sides dry evenly. To speed things up, bake them on the lowest oven setting, usually between 170°F and 200°F, for 45 minutes to 2 hours, flipping halfway through so they don’t curl.
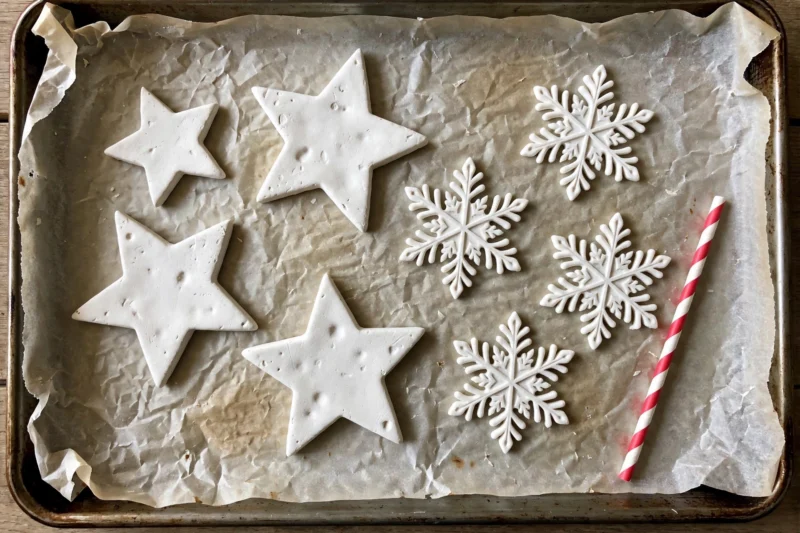
Check for doneness by tapping an ornament. It should sound and feel solid all the way through, not soft or damp in the center. If it still feels cool and slightly squishy, give it more time. Baked ornaments dry faster but can crack more easily than air dried ones, so watch them closely near the end.
Step 7: Decorate and Add a Hanger
Once the ornaments are completely cool, they’re ready for paint, glitter, or watercolor. Acrylic paint holds up best over time. If you want a shiny finish, brush on a thin coat of Mod Podge or a clear sealant once the paint has dried. Finish by threading ribbon or twine through the hole and tying it into a loop.
Variations Worth Trying
Handprint keepsakes work beautifully with this dough. Roll a thicker round, about 1 centimeter, and press a child’s hand or a pet’s paw firmly into the center before it cools too much. Thicker pieces like these need extra drying time since the middle stays soft longer than the edges.
For scented ornaments, stir in a teaspoon of ground cinnamon, cloves, or a holiday essential oil blend while the mixture is still cooking on the stove. The scent fades once the ornaments are fully dry, but it’s a nice touch while you’re crafting.
Mini stars or a garland of small shapes make a pretty addition to a mantel or tree. Cut dozens of tiny stars from a single batch, poke a hole in each, and thread them onto twine with a large needle once they’re dry.
You can also press a design into the dough instead of painting it later. A doily, a piece of burlap, a rubber stamp, or even the edge of a fork can leave behind a pattern while the dough is still soft. Once the ornament dries, the texture catches light and shadow in a way that flat painted pieces don’t, so it’s worth trying even on a simple star or heart shape.
Colored dough is another easy option. Stir a few drops of gel food coloring into the water before you add it to the pan, or knead liquid food coloring into the finished dough a little at a time until you reach the shade you want. Pastels tend to look the prettiest against the natural white base, since deep colors can turn muddy once they’re mixed all the way through.
Why Do My Baking Soda Ornaments Crack?
Cracking almost always comes down to thickness or heat. Ornaments rolled thicker than ¼ inch dry unevenly, so the outside hardens while the inside is still shrinking and pulling apart. Baking at too high a temperature causes the same problem, since the surface dries and sets before the center has a chance to catch up. Roll thin, dry slow, and small cracks that do appear can usually be patched with a dab of fresh dough smoothed over the gap.
Humidity plays a role too. In a damp house, ornaments take longer to dry and are more prone to staying soft in the center even after a full day. Running a fan nearby or drying them next to a heating vent can help pull moisture out faster without raising the temperature high enough to cause cracks.
Conclusion
Baking soda dough turns a few pantry staples into ornaments that look like they came from a boutique shop, and the whole batch costs less than a single store bought decoration. Cook it low, cool it fully, roll it thin, and give it time to dry, and you’ll have a tree full of handmade white keepsakes that hold up year after year.
FAQ
Is baking soda dough safe to touch?
Yes, baking soda and cornstarch are both non-toxic pantry ingredients, so this dough is safe for kids to handle. It’s still not meant to be eaten, and the finished ornaments aren’t food.
Can I use this dough without cooking it on the stove?
No, this particular clay needs heat to bind together into a workable dough. If you’d rather skip the stove entirely, a flour and salt dough is a no-cook alternative, though it has a different texture and dries with a cream tint instead of white.
How long do baking soda ornaments last?
Stored away from moisture, many crafters report ornaments lasting three years or more. Keep them in a dry container between seasons, since baking soda dough can soften or dissolve if it gets wet.
Why is my dough too sticky to roll out?
It likely needs more cornstarch. Sprinkle a little onto your work surface and knead it into the dough a bit at a time until it stops sticking to your hands.
Can I make this dough ahead of time?
Yes, wrap the finished dough tightly in plastic wrap and store it in an airtight container or bag in the fridge for a day or two. Let it come back to room temperature before rolling, since cold dough is stiffer and harder to work with.
Should I bake or air dry my ornaments?
Air drying is gentler and produces fewer cracks, but it takes a full day or two. Baking is faster, usually done in under two hours, but the higher heat raises the odds of cracking or puffing if the dough is rolled too thick. If you’re not in a rush, air drying tends to give the more reliable result.
Can I use these ornaments outdoors?
It’s best to keep baking soda dough ornaments indoors or under cover. Rain, snow, and humidity can soften or dissolve the dough over time, so they’re better suited to a tree, a mantel, or a gift topper than an outdoor wreath or porch decoration.
References
- Arm & Hammer, “DIY Handprint Ornament: Baking Soda Project” (2026)
- Happy Hooligans, “2-Ingredient White Clay Dough Ornaments” (2019)
- The Make Your Own Zone, “Baking Soda Ornaments: DIY White Clay” (2026)
- Sheep Shop, “Baking Soda and Cornstarch Christmas Ornaments” (2023)
- Mama Papa Bubba, “Baking Soda Clay Ornaments” (2013)

A Teacher with 5 years of experience. Our Expertise, is reliable to meet your full Academic development needs . Worked on many crafts and construction projects offering services from design to development to deployment over the years. You will find many of my works in my business portfolio on request.