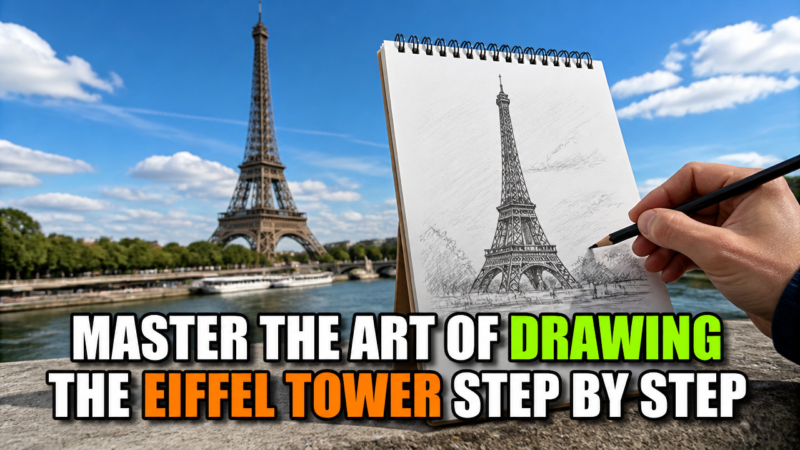
Master the Art of Drawing the Eiffel Tower Step by Step
Learn how to draw the Eiffel Tower with this easy, step-by-step guide. Perfect for beginners and kids, our tutorial simplifies the icon into clear shapes.
Have you ever looked at a sketch of the world’s most famous iron landmark and wondered how to draw the Eiffel Tower without feeling overwhelmed by its complex framework? Getting the lines right for this French icon is a satisfying creative project, whether you are planning an afternoon of family crafting during the summer break or looking to sharpen your own sketching skills. Many beginners struggle with the sheer volume of steel beams, forgetting that the structure is actually a series of manageable geometric parts. By focusing on the silhouette, you can turn a daunting subject into a straightforward and relaxing activity. This guide breaks down the process so you can capture the elegance of the Eiffel Tower on paper, one clear step at a time.
Quick Questions and Answers
Question: Why is the Eiffel Tower easy to draw for beginners?
Answer: The Eiffel Tower is easy to draw because its shape can be broken into simple geometric parts: a wide base, two slanted sides, a middle section, and a pointed top. Beginner tutorials often start with a center line or a basic A-shaped outline, then add platforms, arches, and cross-bracing. This step-by-step structure makes the drawing manageable even for kids.
Question: Can you draw the Eiffel Tower with simple shapes?
Answer: Yes. Many beginner guides build the tower from rectangles, triangles, and straight or slightly curved lines. The main outline usually starts with two slanted sides, then the platforms and cross details are added inside the frame. This approach helps keep the drawing symmetrical and easier to copy.
Question: Do I need a ruler to draw the Eiffel Tower?
Answer: A ruler is not required, but many step-by-step tutorials recommend one to keep the tower straight and symmetrical. It helps when drawing the center line, platforms, and base lines. You can still draw it freehand if you are comfortable with curved and angled lines.
Prerequisites and Materials
Item
Purpose
Notes
Paper
Canvas
Standard sketch paper provides the best feedback.
Felt-tip pen
Defining
Use a black marker for clean, bold structural lines.
Colored pencils
Styling
Ideal for adding depth or replicating the iron tone.
Eraser
Cleanup
Essential for removing initial guide lines.
This project works well for students of all ages. If you are learning how to draw the Eiffel Tower for an intermediate-level challenge, you might prefer a professional-grade graphite pencil initially. Art Projects for Kids provides excellent resources for those just starting out.
Step-by-Step Instructions
Sketching the core silhouette
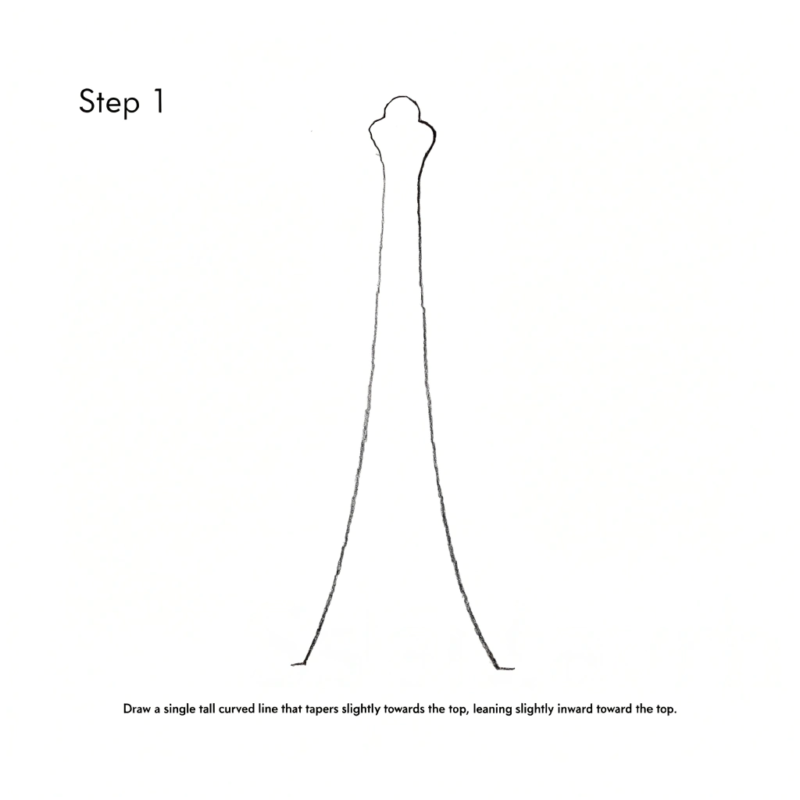
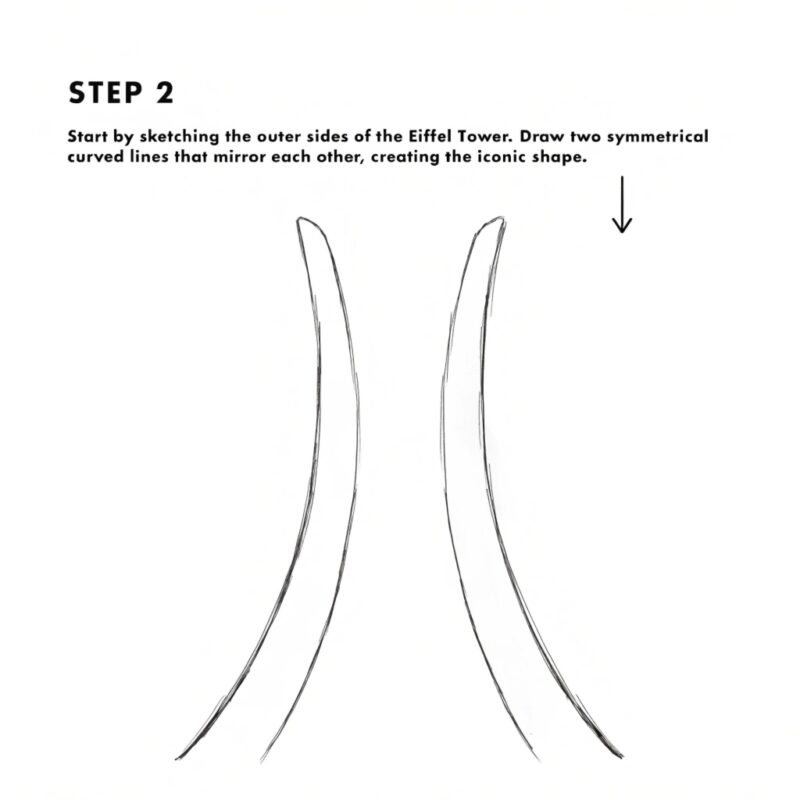
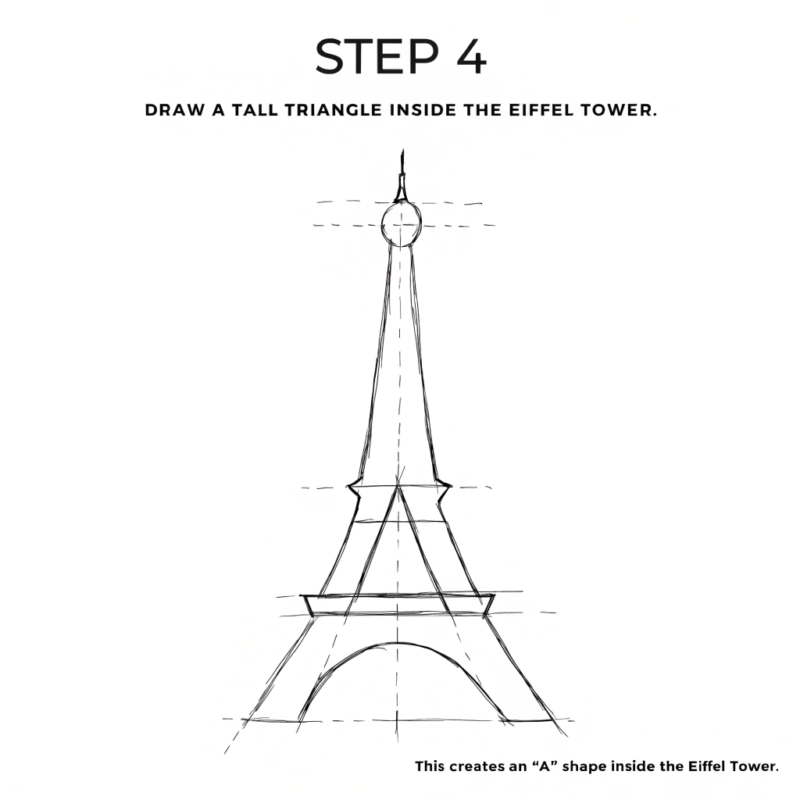
Start by drawing a faint vertical center line down the middle of your page to act as your axis. Using a light pencil stroke, draw two long, slanted lines that form the shape of the letter A, but keep the top narrow and pointed. Ensure the base of these lines widens significantly, as this creates the stable, iconic footing of the structure.
Defining the levels
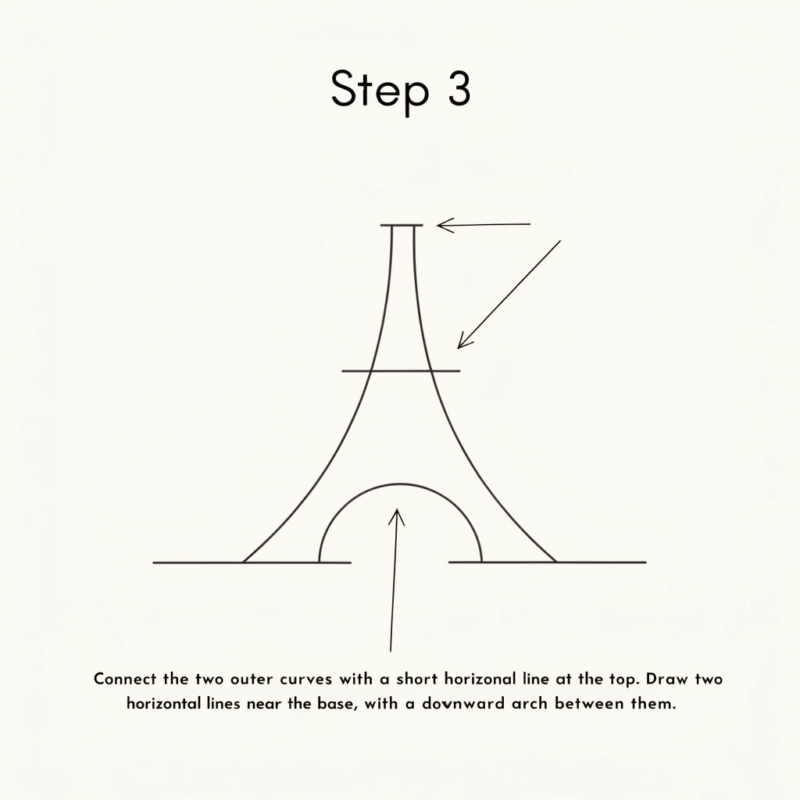
Divide your tower into three distinct segments. Add two horizontal lines spanning the width of the tower to mark the first and second platforms. These crossbeams serve as the visual anchors that give the tower its realistic proportions.
Filling in the structure
Now, fill in the space between your main outer lines with small, repetitive cross-bracing patterns. You do not need to mimic every beam of the 1889 original; instead, draw small X shapes or simple hatch marks to suggest the lattice texture of the iron.
Finalizing details
Take your black felt-tip pen and trace over your light pencil marks to solidify the silhouette. At the very bottom, draw two curved arches connecting the legs, which provides the weight needed at the base foundation.
Adding color
Apply your colored pencils to bring the drawing to life. Many people choose to mimic the metallic, bronze-brown, or grey tones seen in photographs to create a more authentic look.
Mistakes to Avoid
Most beginners fail by trying to draw every single beam visible in a photograph. The real tower is a dense web of thousands of pieces; attempting this on a small piece of paper will only create a messy, cluttered result. Focus instead on the overall profile.
Heavy-handedness is another common trap. If you press too hard with your pencil too early, you will be unable to erase your initial guidelines. Keep your pressure light until you are confident with your proportions.
Neglecting the base foundation often leaves the drawing looking like it is floating rather than anchored. Always ensure the bottom legs reach wide and connect firmly via the arches.
Troubleshooting Common Drawing Issues
If your tower looks lopsided, the issue is likely the center axis. Start over by drawing a single, straight vertical line first, and use it to measure the distance of your outer lines.
When the top appears too flat, sharpen the angle where your two sides meet at the apex. A tall, thin peak is characteristic of the landmark and essential for the silhouette’s success.
If the base feels cramped, widen the stance of the lower legs. As the Eiffel Tower official news site notes, the tower’s beauty relies on this wide-based geometry.
FAQ
Q: Are there easy Eiffel Tower drawing steps for kids?
Yes. Kids’ tutorials usually begin with a center guideline, then add a small top section, long slanted legs, horizontal platform lines, and a curved arch at the bottom. After that, they fill in cross details and outline the shape with a marker. These lessons are designed to be simple and quick to follow.
Q: How do you start drawing the Eiffel Tower step by step?
A common starting point is a vertical center line or a basic outline with two slanted sides. From there, you add the top point, the middle platforms, and the lower arch. Starting with guidelines makes it easier to keep the tower balanced on both sides.
Q: Does the Eiffel Tower drawing need to be symmetrical?
Yes, symmetry is important if you want the tower to look realistic. Most tutorials show the left and right sides matching in angle, width, and platform placement. Using a center line or folding the page in half can help keep both sides even.
Q: Will shading make my Eiffel Tower drawing look better?
Yes. Shading can make the tower look more dimensional and help the metal framework stand out. Many tutorials suggest coloring the beams darker and leaving some areas lighter to show depth. You can also add background shading for the sky or ground if you want a finished scene.
Q: When should I add the details to the Eiffel Tower drawing?
Most tutorials recommend adding details after the main outline is complete. Once the shape, platforms, and arch are in place, you can draw the cross-bracing and smaller structural lines. Doing the details last helps prevent the drawing from becoming messy.
Q: Is it better to draw the Eiffel Tower freehand or traced?
For beginners, tracing or using guidelines can make the process easier. Freehand drawing is better for practice and helps you improve proportion and line control. Many tutorials start with light sketch lines, then trace over them once the structure looks right.
Q: What should a beginner include in an Eiffel Tower sketch?
A beginner sketch should include the tower’s wide base, slanted legs, middle platforms, pointed top, and the arch at the bottom. Adding the cross patterns inside the structure makes it recognizable as the Eiffel Tower. You can keep the details simple at first and add more later.
My Experience With how to draw eiffel tower
I remember the first time I tried sketching this tower, I definitely overthought the iron lattice work. I spent an hour trying to draw individual beams only to end up with a page that looked like a confused spider web. Once I learned to let go of the literal details and focus on the geometric “A” shape, the whole thing finally clicked. The trick is definitely in the center axis line; if your axis is crooked, no amount of detail will save the final look. I found that using a felt-tip pen for the final outline acts as a great “reset” button for the sketch—it defines the outer shape so effectively that the interior cross-hatching just falls right into place. It is a humble, quiet kind of satisfaction when you realize you have actually captured a likeness of a world wonder with nothing more than a few pencils and a spare hour. Now, tell me, do you prefer your sketches clean and minimalist, or do you love to go heavy on the cross-hatched texture?
Next Steps: Enhancing Your Illustration
If you have mastered the basic outline, try experimenting with shading. Apply a darker color, such as charcoal or dark grey, to the side where the light would naturally hit less, creating a sense of 3D volume.
Consider adding a light background. A few strokes representing the clouds or the silhouette of the Parisian skyline can turn your simple sketch into a full environmental scene.
For those curious about the history, researching the original blueprints, as shared by the Eiffel Tower website, reveals how even the engineers had to rely on simplified mathematical patterns to ensure the structure held its own weight.
A Teacher with 5 years of experience. Our Expertise, is reliable to meet your full Academic development needs . Worked on many crafts and construction projects offering services from design to development to deployment over the years. You will find many of my works in my business portfolio on request.