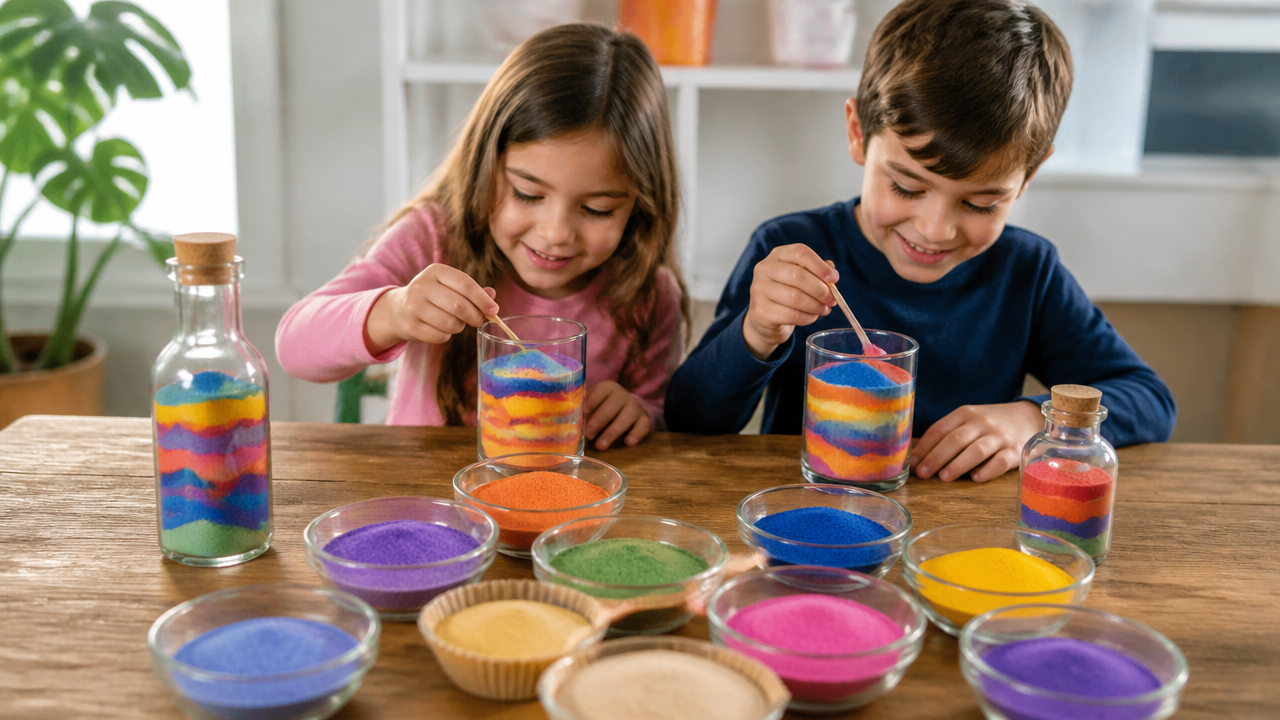
Ever wondered how to turn everyday salt into a stunning glass-jar centerpiece or a custom art piece that sparks imagination? Creating colorful sand art is a classic project that bridges the gap between simple pantry science and genuine creative expression. Whether you are prepping for a rainy afternoon activity or seeking a budget-friendly gift idea, mastering the basic technique delivers a result as beautiful as any store-bought craft. This guide walks you through the fundamentals ofDIY sand art, helping you refine the layering process for your own unique DIY sand art creations.
Quick Questions and Answers
Question: Why does chalk transfer color to sand when rubbed together? Answer: The scratchy texture of the sand wears down the chalk, causing pigment particles to rub off and adhere to the sand. Rubbing longer and more vigorously increases pigment transfer, making the color more vibrant.
Question: Can kids use salt instead of sand for DIY art projects? Answer: Yes, salt works perfectly as a substitute for sand because it is also scratchy and holds chalk pigment well. Many families use salt to color sand art, and it can be easily colored with sidewalk chalk just like regular sand.
Question: Do I need a funnel to pour colored sand into a bottle? Answer: A funnel makes pouring much easier and prevents sand from spilling, but it is not strictly required. You can fold parchment paper into a makeshift chute or carefully pour the sand directly if you have steady hands.
What You Need: Tools and Materials
| Item | Purpose | Notes |
|---|---|---|
| Table Salt | Base material | Inexpensive and creates a fine, clean texture. |
| Liquid Food Coloring | Pigment | Dilute slightly for softer pastel shades. |
| Clear Glass Jars | Display | Spice jars or small vases work best for visibility. |
| Paper | Funnels | Roll into a cone to prevent messy spills. |
| Trays or Plates | Containment | Essential for catching stray sand while mixing. |
| Craft Glue | Adhesive | Used specifically for surface sand painting. |
Step 1: Crafting Your Colored “Sand”
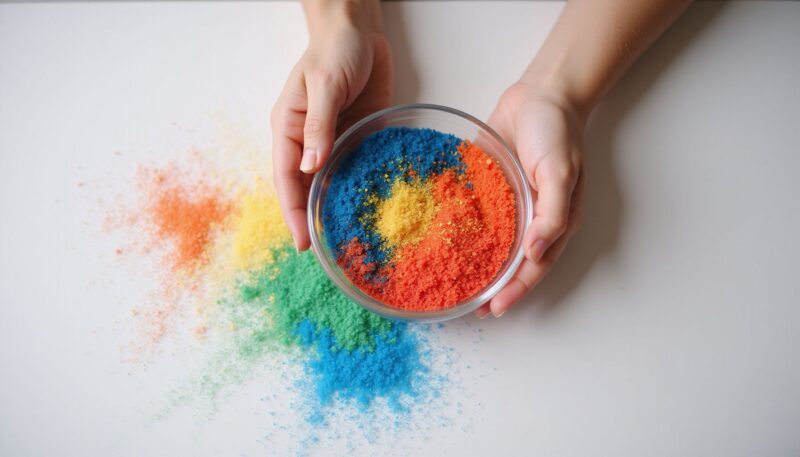
Start by portioning your table salt into small, sealable plastic bags or plastic containers. Add just a few drops of liquid food coloring. Remember that a little goes a long way; you can always add more pigment, but taking it away is impossible once the salt absorbs the moisture.
Shake the container vigorously or knead the bag until the color coats every grain. If you see clumps, keep working the mixture until it looks uniform. This process feels like magic to children, and it is a great time to learn about primary and secondary color mixing. If you need inspiration for other simple projects, you might check out 12 Easy Crafts to Do at Home with Simple Supplies. Once colored, spread the salt on a tray in a thin layer. It must dry completely before you use it, as lingering moisture encourages clumping or mold inside your jars later. According to KiwiCo, keeping materials simple makes this project accessible for children as young as 3.
Step 2: Preparing for Layering
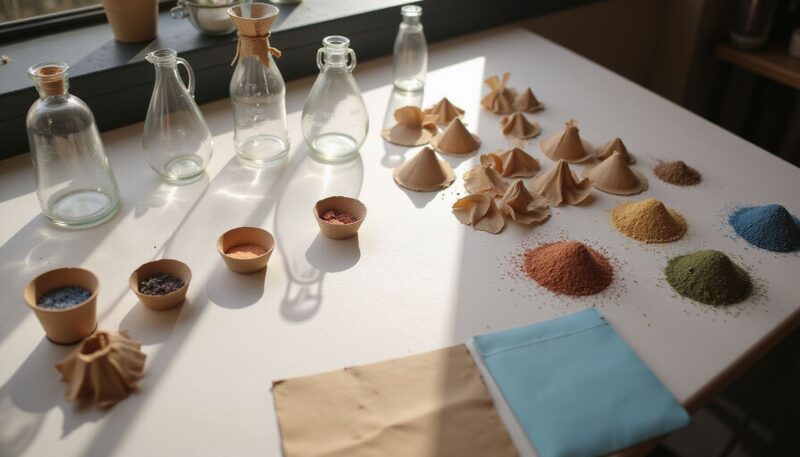
Precision matters when you start the assembly process. Roll a piece of scrap paper into a cone shape to act as a custom funnel. Make sure the pointed end is narrow enough to fit comfortably into the mouth of your bottle but wide enough that the salt does not jam every few seconds.
Tape the seam of your funnel so it holds its shape under the weight of the salt. Set up your workspace on a flat surface covered with newspaper or a large, shallow tray. This containment step saves you from an enormous cleanup job later. When working with older kids, you might find that 14 Easy Art Projects for Teens That Are Super Fun provides great additional inspiration for your next creative session.
Step 3: The Layering Process
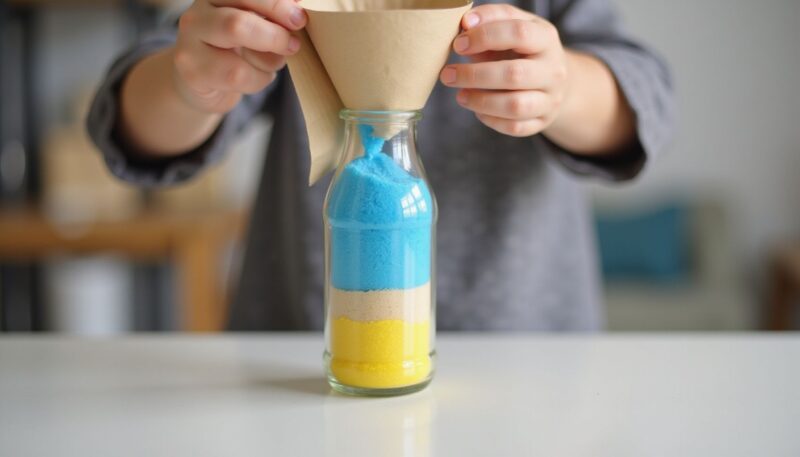
Lay a small, level mound of white or primary-colored salt at the very bottom of your container. Try to maintain consistent thickness for each layer, or intentionally vary them for a more abstract, modern look. As you pour each new color, hold the jar at a slight angle to force the sand to tilt against the glass.
This tilting method creates beautiful, wavy, or alpine-style patterns that look professional when viewed from the outside. If you are feeling adventurous, you can use a long wooden skewer to drag the top layer downward into the layer below, forming elegant “feathered” or marbled designs. For those interested in expanding their artistic repertoire, 11 Aesthetic Sketchbook Ideas to Refresh Your Daily Art Practice offers tips that can cross over into many different mediums.
Step 4: Technique for Sand Painting
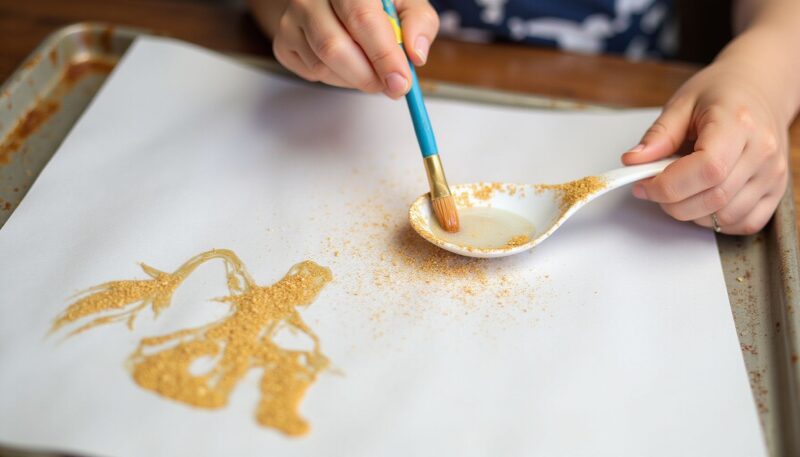
Sand painting works differently than layering. Instead of a container, you use a firm piece of cardstock as your canvas. Draw a simple outline with a pencil, then choose one segment of the drawing to fill at a time. Paint a thin layer of clear school glue onto that section.
If the glue is too thick, stir in a drop or two of water to make it spreadable with a standard paintbrush. Carefully spoon your colored sand over the wet patches, tapping the paper to ensure full coverage. Once the area is coated, tilt the paper to pour off any loose grains back into your container. A report from 100 Directions suggests waiting until the glue sets thoroughly to avoid smudge-prone surfaces later.
Mistakes to Avoid
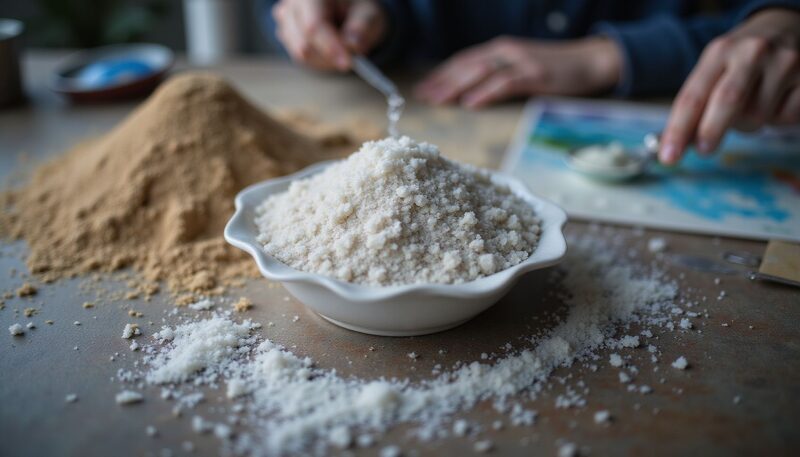
The biggest error most beginners make is using too much liquid coloring early on. This creates “wet” sand that takes ages to dry and risks staining your clothing or your jars. Always start with individual drops.
Do not fill your jars halfway and then leave them alone. If you do not tap the container gently on the table after every few layers, the air pockets will cause the layers to shift as soon as you move the jar. Finally, store your finished containers in a dry, low-humidity area. As noted by Suzy’s Artsy Craftsy Sitcom, humidity can cause salt to deteriorate or shrink, which leaves a frustrating gap at the top of your perfect display.
Troubleshooting: Common Issues
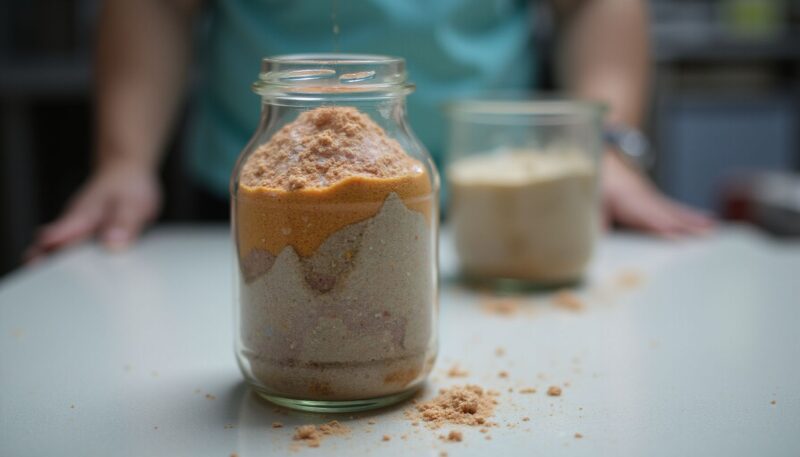
If you find that your sand consistently clogs the funnel, check the grains. Lumpy sand means the color hasn’t been mixed or dried properly, or the funnel opening is simply too tight. Snip just a millimeter off the tip of your paper funnel to improve the flow.
Bleeding colors usually signal that you were too impatient during the drying phase. Always dry your sand for several hours, ideally overnight, to ensure the moisture is fully gone. If you find the layers are getting messy inside the jar, use a small piece of cardboard as a temporary divider until the layer is poured level.
FAQ
Q: Are there ways to create designs inside a sand art jar?
Yes, tilt the jar while pouring to create hills and valleys, or use a skewer to drag top layers down for feathered patterns. Filling the jar completely to the brim prevents air space that could ruin layers when moved.
Q: How do you make sand pictures without a jar container?
Draw an outline on paper, glue one section at a time, and sprinkle colored sand over the wet glue. Tap off excess sand carefully to reveal the design, then let it dry thoroughly for a permanent picture.
Q: Will colored sand stay vibrant if left in a jar for years?
Colored sand stays vibrant if the jar is sealed tightly and kept away from direct sunlight, which can fade pigments. Using chalk-dyed sand in a sealed glass jar typically preserves the color for many years without fading.
Q: When should kids let their sand art dry before moving it?
Sand pictures glued to paper need to dry for at least 24 hours to ensure the glue sets completely. Sand jars do not need drying time but should be sealed immediately after filling to the top to keep layers stable.
Q: Is it safe for toddlers to use chalk and sand for crafts?
Sidewalk chalk and sand are generally safe for toddlers, but parents should supervise to prevent eating the sand or inhaling dust. Using larger pieces of chalk and non-toxic, washable colors helps minimize risks during play.
Q: What is the best way to color sand for multiple colors?
Portion plain white salt into separate plates, then rub a different colored chalk into each portion until the desired shade is reached. This method ensures clean colors without mixing, and you can make as many shades as needed.
Q: How can I make sand art bracelets or necklaces at home?
Mix 6 tablespoons of salt with 3 tablespoons of craft glue, then shape into 1cm beads. Push a skewer through each to create a hole, let them dry completely, then string them together to make wearable jewelry.
My Experience With How to Master DIY Sand Art Crafts for Kids
I first tried making sand art with my nieces during a particularly sticky summer afternoon. We used the salt-and-food-coloring method, and I definitely underestimated the “mess factor.” My kitchen counter looked like a small desert had exploded, but the results were undeniably charming.
I’ve learned that the key to avoiding frustration isn’t better equipment, but better patience during the drying stage. If you rush the drying, you’ll end up with clumps that refuse to slide through the funnel, which ruins the clean, geometric lines kids usually hope to achieve. One pro tip: I started keeping a few extra-wide-mouth jars on hand. They are much easier for younger kids to fill, while the narrow spice jars are perfect for the more patient 8–11 age group. I find it fascinating how such simple chemistry—salt meeting pigment—can hold a child’s attention for an entire hour when a screen fails after ten minutes. It is a messy, salt-crusted, and completely worthwhile endeavor. Have you ever tried this, or did you stick to store-bought pre-colored kits as a kid?
Next Steps
Now that you have mastered the basics, experiment with layering different textures. You could mix fine salt with a bit of sugar in certain layers for a subtle pearlescent sheen. If you are decorating for a holiday, try limiting your color palette to seasonal themes, such as greens and reds for December or warm oranges and yellows for an autumn centerpiece. You can also turn these jars into simple, homemade light features by placing a flameless LED tea light on top or, with careful planning, centered carefully within the salt.
References
- KiwiCo. (n.d.). Sand Art. KiwiCo. https://www.kiwico.com/diy/art-creativity/fun-functional-projects/sand-art
- ARTBAR. (n.d.). Sand Art Bottles with DIY Dyed Sand from the Beach. ARTBAR Blog. https://www.artbarblog.com/sand-art-bottles-with-diy-dyed-sand-from-the-beach
- 100 Directions. (n.d.). Sand Painting Kid Craft. 100 Directions. https://www.100directions.com/sand-painting-kid-craft
- The Make Your Own Zone. (n.d.). DIY Colored Sand Art (Using Salt!). The Make Your Own Zone. https://www.themakeyourownzone.com/diy-colored-sand-art-using-salt
- wikiHow. (n.d.). 3 Ways to Make Sand Art. wikiHow. https://www.wikihow.com/Make-Sand-Art
- Kenarry. (n.d.). Create Art with Sand Painting. Ideas for the Home. https://www.kenarry.com/sand-painting-art
- YouTube. (n.d.). Sand Art Jars ♥ How To Make Colored Sand and Sand Art. https://www.youtube.com/watch?v=6DvHi-UugWg
- Suzy’s Artsy Craftsy Sitcom. (n.d.). How to make Sand Art with Salt!. Suzy’s Artsy Craftsy Sitcom. https://suzyssitcom.com/2016/07/how-to-make-sand-art-with-salt.html

A Teacher with 5 years of experience. Our Expertise, is reliable to meet your full Academic development needs . Worked on many crafts and construction projects offering services from design to development to deployment over the years. You will find many of my works in my business portfolio on request.