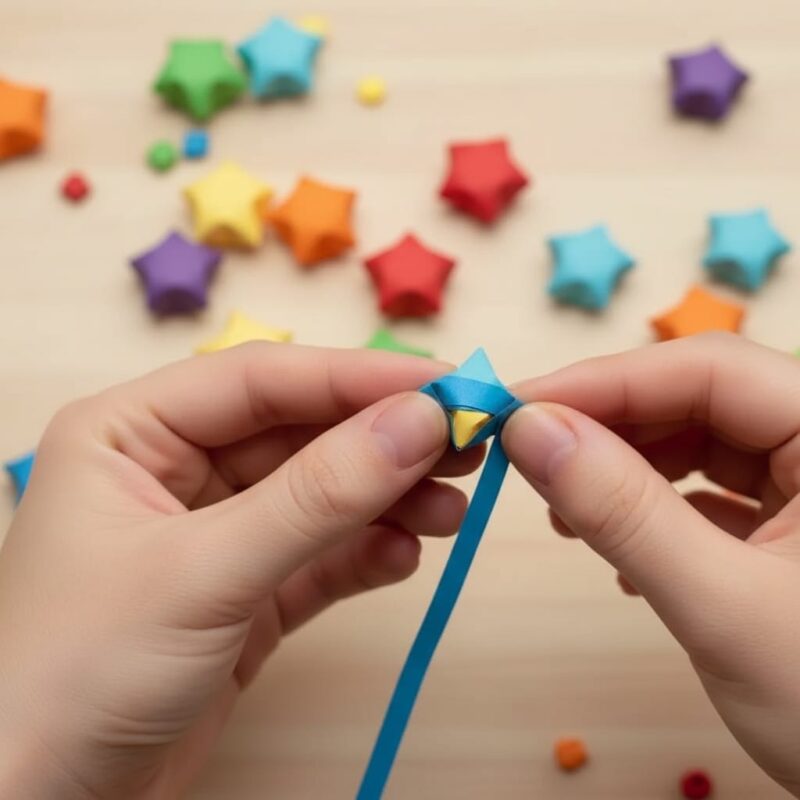

How to make Origami Paper Stars Tutorial Step by Step. While gazing up at a night sky full of stars, and I’ve discovered a way to bring that same sense of wonder and magic indoors through the ancient art of origami star folding. My journey with paper stars began three years ago during a particularly stressful period in my life, when I desperately needed a meditative activity that would quiet my racing mind and provide a sense of accomplishment.
That first origami star was admittedly pretty rough around the edges – lopsided, with uneven points and visible struggle marks from my inexperienced fingers. But there was something deeply satisfying about transforming a simple square of paper into a three-dimensional star through nothing but careful folding. As I held that imperfect little star up to the light and watched it cast delicate shadows on my wall, I was completely hooked.
Since then, I’ve folded hundreds of stars in every size, color, and style imaginable. They’ve decorated my apartment for holidays, served as heartfelt gifts for friends, and even found their way into wedding centerpieces and baby nursery mobiles. Each star represents not just a completed craft project, but a moment of peaceful focus in our increasingly hectic world.

This craft is deceptively simple, yet somehow grounding—like folding therapy. Each step matters, and if you skip or rush it, the star might end up floppy, misshapen, or refusing to puff. Over time, I’ve learned not only how to fold, but why each motion is essential. Now, I want to walk you through the whole six-step process, explaining not just what to do, but what makes each move important—and what can go wrong if you don’t do it carefully. Let’s dive in and turn strips of paper into little bursts of handmade joy.
Table of Contents
- What You’ll Need
- My Six-Step Folding Process (With Why It Matters)
- Step 1: Knot and Pentagon Base
- Step 2: Tuck the Tail
- Step 3: Begin Wrapping Tightly
- Step 4: Maintain Even, Alternating Wrapping
- Step 5: Secure the Final Tail
- Step 6: Gently Puff Into a Star
- Why Getting It Right Matters
- Conclusion
1. What You’ll Need
Here’s what I always have ready before I fold:
- A long, narrow strip of paper—about 10–12 inches (25–30 cm) by roughly ¾ inch (2 cm). This ratio works well for a balanced star.
- Scissors, if you’re cutting strips yourself.
- A flat surface and a little patience.
- Optional: jars, string, or containers for the stars once they’re folded.
The paper choice matters—a strip that’s too thick might resist puffing up, and one that’s too flimsy may crumple or tear easily.
2. My Six-Step Folding Process (With Why It Matters)
Step 1: Tie a Loose Knot and Flatten into a Pentagon
I start by creating a loose knot at one end, then gently flatten it into a pentagon shape. This pentagon is the foundation—it sets the symmetry and structure of the star. If I knot it too loosely, gaps appear and the star might collapse; too tight, and the paper might tear or not allow smooth wrapping. I always wiggle the shape a bit until the edges butt cleanly together before creasing it flat.
Step 2: Tuck the Short Tail Under the Pentagon
Next, I tuck that short tail beneath one of the pentagon’s layers so it disappears. This step hides the tail and prevents it from sticking out or slipping out later. If I don’t tuck it properly—or leave it too long—it sticks out after multiple wraps or ruins the symmetry at the end.
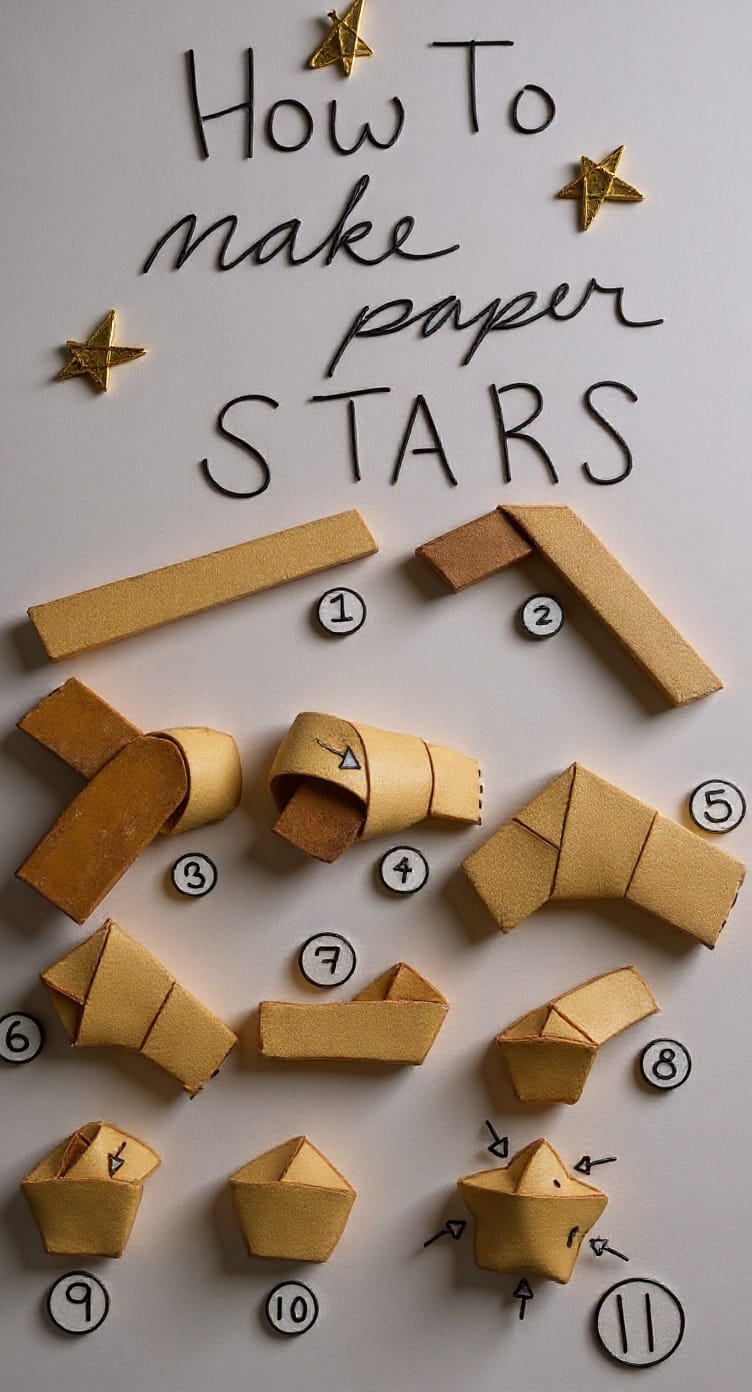
Step 3: Start Wrapping the Long End Around Tightly
Here’s where the real build begins: I take the long end and wrap it snugly around the pentagon’s edges, aligning each fold precisely. This wrapping layer by layer strengthens the shape. If I wrap loosely or misalign an edge, I end up with uneven sides or a floppy star. A commenter once said, “loose folding leads to loose star,” and I totally relate.
Step 4: Alternate Sides and Keep Wrapping Evenly
I flip the star regularly and wrap it from alternating sides—left edge, then right, then left again. This pattern evenly distributes the tension and layers, preserving the five-point balance. Failing to alternate and wrap evenly gives you lopsided stars. Inconsistent tension means some points may warp or one side might cave in before you even try to puff it.
Step 5: Tuck in the Final Tail Securely
When only a short piece of strip remains, I tuck it securely under the top layers of the pentagon. This locks everything in place—no glue needed. If I skip this or it doesn’t tuck fully, the star can unravel or the tail peeks out when it’s puffed.
Step 6: Gently Press the Edges to Puff Into a 3D Star
Finally, I hold the pentagon by its edges, not the flat faces, and gently press inward on each of the five sides—rotating as I go. This “inflates” the star into its 3D form. If I press too hard or flatten a point improperly, the star caves instead of puffs, and it loses that cute, dimensional look. I learned to “leave some air” inside during puffing; over-creasing kills the shape.
3. Why Getting It Right Matters
Let me be honest—rushing any step can make or break the star. A loose knot leads to a floppy center, sloppy wrapping results in a lop-sided shape, and over-eager puffing can deflate the star entirely. It’s meditative when done mindfully. I’ve also seen thin layers collapse, thick paper resist puffing, or misaligned folds ruin symmetry. Folding these stars taught me the payoff of precision and patience. I’ve turned botched stars into joyful practice; one maker in a crafting forum summed it up: folding the same model repeatedly until “the process sinks in.” And they’re right—by practicing deliberately, you can feel how tight each wrap should be and how softly to puff.
4. Conclusion
Folding origami lucky stars is such a simple yet wonderful tutorial in patience, precision, and small rewards. With just one strip and six thoughtful steps, you can end up with something delicate, beautiful, and wholly yours. And when you get it just right—tight knot, clean wraps, balanced layers, and that gentle puff—it really feels like a little triumph.
So go ahead—gather your paper, take your time, and enjoy turning simple strips into lucky stars. Let me know if you want ideas for different papers, color themes, or creative ways to share them once they’re made!

A Teacher with 5 years of experience. Our Expertise, is reliable to meet your full Academic development needs . Worked on many crafts and construction projects offering services from design to development to deployment over the years. You will find many of my works in my business portfolio on request.