Let’s turn those delicate dandelions from “huh?” to “heck yes.” You’ll learn a quick, repeatable method that actually looks realistic without needing a fancy art degree. We’ll build your flower step-by-step, from stem to fluffy seed head, and sprinkle in pro tips that save you from the dreaded smudge monster. Ready to draw something whimsical that still looks legit? Grab a pencil and let’s go.
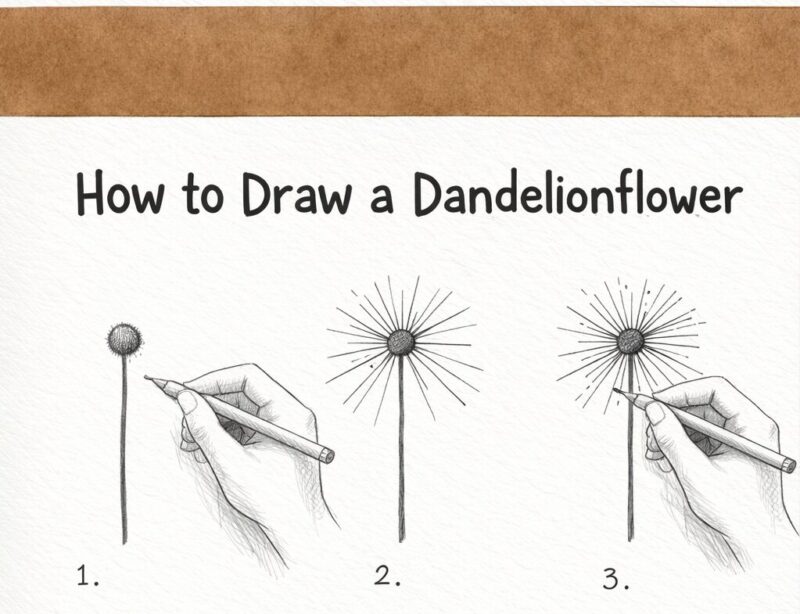
1. Nail The Silhouette: The Stem, Bud, And Seed Head
You can’t fake a strong silhouette. A good outline gives your dandelion instant readability, even before details. We’ll map the pose, get the proportions right, and keep the lines light so you can tweak without drama.
What You’ll Sketch First
Stem: A gentle S-curve works best. Dandelion stems bend slightly and feel springy.
Flower Head: Draw a circle for a puffball or a half-sphere for a yellow flower in bloom.
Bracts (the green “collar”): Add a tiny flared cup below the head. That detail screams “dandelion.”
Leaves: Long ribbons with deep, jagged lobes pointing toward the root. Keep the base slightly wider.
Use light, whispery strokes at this stage. You’re blocking shapes, not committing to forever. FYI, a good silhouette makes even a super simple drawing look intentional.
Quick Proportions
Seed head diameter ≈ 1/3 to 1/2 of stem length you show.
Leaf length ≈ same as stem segment visible (or a touch longer).
Bract cup width ≈ 1/4 of seed head diameter.
Get this right and you can add details without fighting the overall form. Great for sketchbook pages and botanical studies.
2. Build The Puff: Seed Head Structure Without Going Crazy
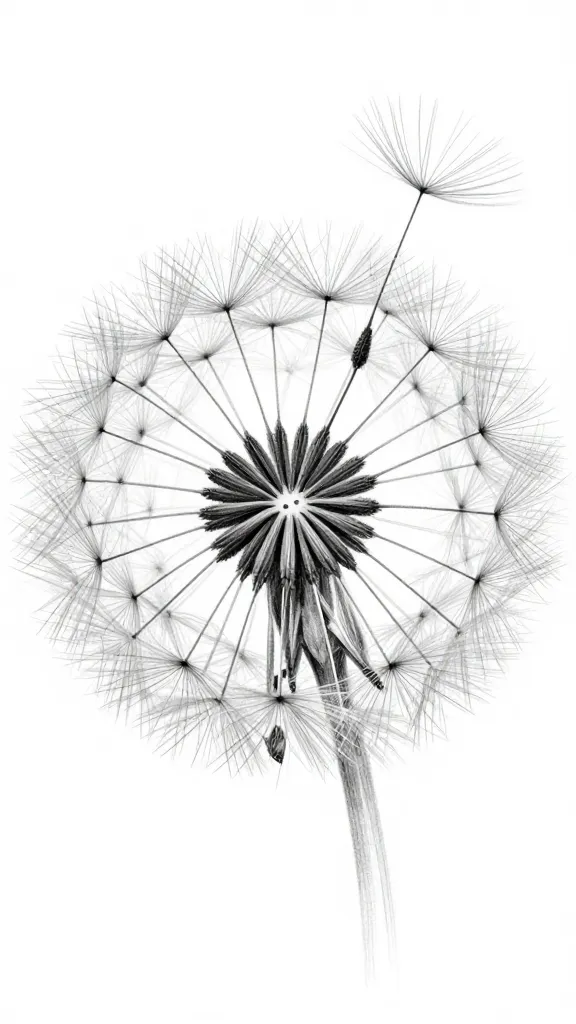
The dandelion’s puffball looks complicated, but it follows a simple logic. Think “sphere with radiating spokes” rather than chaos. We’ll map the structure, then choose a few seeds to define texture—because drawing 200 of them is a choice, not a requirement.
Core Steps
Center Dot: Place a tiny dot at the center of the head. Everything radiates from here.
Guidelines: Lightly draw 8–12 spokes like a bicycle wheel, evenly around the circle.
Seed Clusters: Along each spoke, add tiny starbursts (the parachutes) near the outer edge. Vary spacing for realism.
Edge Softness: Break the circle’s outline. Replace it with short, feathery marks so it looks airy, not like a tennis ball.
Draw only a fraction of the seeds fully. Suggest the rest with faint dots and short lines. Trust me, your brain fills in the fluff and it reads more natural.
Tips For Realistic Airiness
Vary length of the parachute lines (a.k.a. pappus hairs).
Leave gaps on the edge—no perfect halo.
Add 2–3 drifting seeds in the air with light stems and tiny parachutes for movement.
This technique works beautifully for greeting cards, journal pages, and prints when you want a soft, poetic vibe.
3. Get The Leaves Right: Jagged, Bold, And Totally Iconic
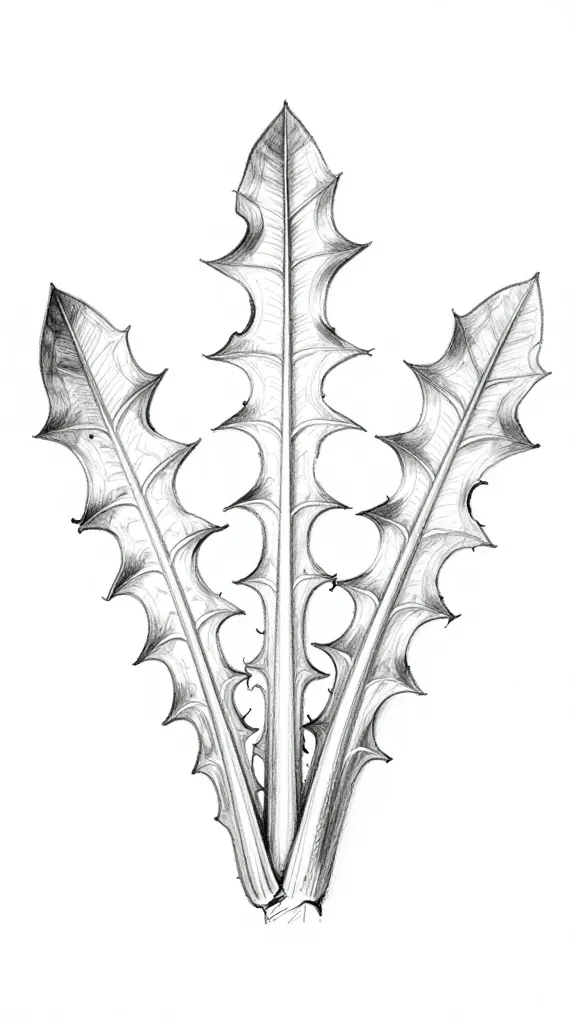
If your leaves look right, your dandelion looks right. They’re bold, serrated, and unmistakable. We’ll carve out those zig-zag lobes so they feel wild but not messy.
Shape Breakdown
Main Ribbon: Draw a long central line (the midrib). Wrap a tapering ribbon around it.
Lobes: Add sharp, triangular bites along both sides, pointing toward the stem.
Asymmetry: Make one lobe larger here and there. Nature loves oddness.
Outline first, then refine the inner vein lines lightly. Don’t overdo it—dandelion leaves don’t show heavy veins like oak leaves.
Texturing Tricks
Edge Variations: Use a mix of long and short notches.
Micro-Frays: Add a few tiny flicks at tips for a “lived-in” look.
Shadow Along One Side: A soft pencil shade on the underside gives instant volume.
Dialed-in leaves add attitude and make quick sketches look finished. Perfect when you want a bolder garden journal entry.
4. Choose Your Style: Sketchy, Inky, Or Soft Shading
Different tools change the vibe fast. Want delicate and ethereal? Go graphite. Want crisp and graphic? Ink it. Want glow and softness? Try colored pencil or watercolor with a light hand.
Materials And What They Do
Graphite (HB–2B): Best for subtle shading and airy puffballs. Erases cleanly.
Fineliners (0.1–0.3): Great for crisp spokes and leaf edges. Use hatching for depth.
Colored Pencils: Build gentle greens for leaves, warm yellow for the flower phase, and cool grays for seeds.
Watercolor: A pale wash behind the puff creates dreamy contrast without drawing every seed.
Technique Ideas
Sketchy Graphite: Keep lines loose. Smudge lightly with a tissue outside the seed head to create glow, but avoid smudging the center.
Inky Linework: Outline the sphere lightly, then break it with tiny ticks. Use crosshatching at the bract cup for form.
Mixed Media: Watercolor wash first, let it dry, then add ink for crisp details. IMO this gives the best “floaty” effect.
Pick one style per piece to avoid visual clutter. Each approach shines on small prints, stickers, and botanical study pages.
Shading The Seed Head Without Killing The Fluff
Don’t shade the whole sphere. Shade the background or the bract cup to make the white fluff pop.
Cast Shadow: A soft oval beneath the stem grounds the plant in space.
Selective Contrast: Darken a few interior spokes near the center to imply depth.
These choices keep the dandelion light and luminous—exactly the vibe you want.
5. Composition Magic: Make It Feel Breezy And Alive
One dandelion is cute. A tiny scene tells a story. Use overlap, drifting seeds, and angles to add movement and mood without overworking the page.
Go-To Layouts
Solo Portrait: Centered puffball, gentle S-curve stem, one leaf angled across the page. Clean and iconic.
Botanical Trio: One closed bud, one yellow flower, one seed head. Arrange in a triangle for balance.
Wind Story: Tilt the seed head slightly and add 3–5 seeds drifting away. Space them unevenly for rhythm.
Little Details That Sell The Scene
Vary stem angles: A slight lean feels natural and playful.
Overlap leaves: Let one leaf cross behind the stem for depth.
Tiny ground hints: Two blades of grass and a soft shadow = instant environment.
Want extra charm? Add a faint circular aura behind the head with watercolor or soft pencil and blend outward. It’s a subtle halo that makes the fluff shine.
When To Use This
Postcards, minimal wall art, tattoo concepts, and nature journaling.
Great warm-up subject before complex florals because it trains your eye for structure.
Good composition turns a nice sketch into a frame-worthy piece. Seriously, it matters.
You’ve got the steps, the structure, and the style options—now it’s your turn. Start with a light silhouette, build that airy puff, and sharpen those iconic leaves. Keep it playful, try a few variations, and watch your sketchbook sprout with dandelions that actually look like dandelions. Go make some magic blow in the wind.
A Teacher with 5 years of experience. Our Expertise, is reliable to meet your full Academic development needs . Worked on many crafts and construction projects offering services from design to development to deployment over the years. You will find many of my works in my business portfolio on request.