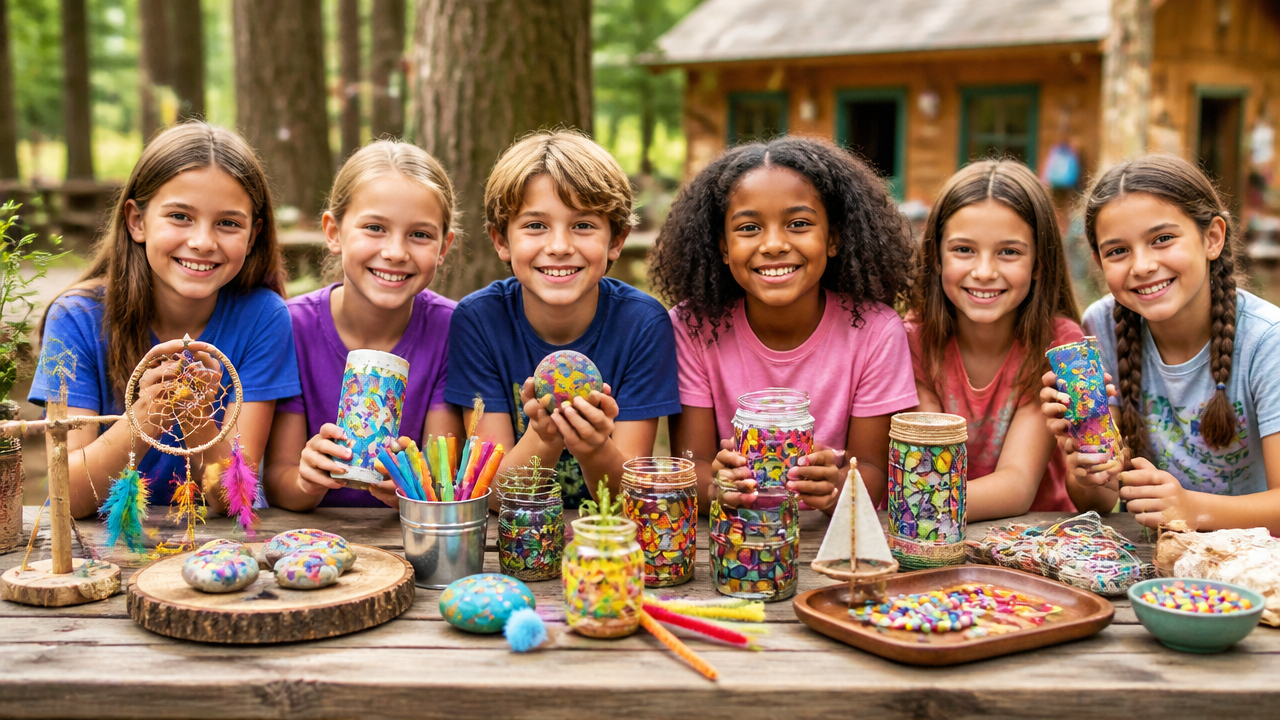
Glue suncatchers are one of those crafts that look way fancier than they are—like stained glass, but way more forgiving and fun to make. I love how light passes through the dried glue, turning simple shapes into bright little color windows. They’re perfect for rainy-day afternoons, summer camp vibes, classroom projects, holiday decorations, or just making your house feel warmer and more cheerful. And the best part? Once you learn the basic glue-and-dry technique, you can make endless designs in your own color style.
Key Takeaways
- I build glue suncatchers on a flat lid or template, usually with wax paper as a non-stick surface.
- I apply glue in controlled layers (often an outline first, then color “filling”).
- Clear glue plus food coloring usually creates the brightest “stained glass” effect.
- Waiting for each layer to fully dry is the secret to crisp lines and less smudging.
- If glue or coloring starts getting runny, I slow down and use smaller amounts to avoid blobs.
Quick Answer
To make glue suncatchers, I cover a flat lid/template with wax paper, draw a simple shape using glue (often in a spiral or outlined pattern), add color in careful layers, let everything fully dry, and then peel the finished piece off for window display.
What You Need (Supplies, Materials, and Substitutes)
| Item | Purpose | Notes |
|---|---|---|
| Clear school glue (like clear Elmer’s) | Builds the stained-glass-like structure | Clear glue usually looks brightest. Clear Elmer’s is often recommended; white glue can work too. |
| White school glue (optional) | Works as a substitute if clear isn’t available | It may look more opaque than clear glue, but designs still pop. |
| Food coloring (liquid) | Adds color to glue | I use a tiny amount at a time so it doesn’t turn runny. |
| Wax paper | Non-stick working surface | Helps the dried craft peel off cleanly. |
| Flat lid or template (jar lid, shallow container, printed shapes) | Creates the “mold” / base | A flat, smooth surface makes peeling easier. |
| Cookie cutters (optional) | Fast repeatable shapes | Great for stars, circles, hearts. Press on wax paper. |
| Toothpick or skewer (outline tool) | Helps me draw thin outlines and fine lines | Also good for spreading glue and nudging colors. |
| Disposable spoon or small cup | For mixing glue + coloring | Keeps mess minimal. |
| Dropper or small squeeze bottle (optional) | Better control for applying glue | If I don’t have one, I can carefully squeeze a bottle or use a spoon. |
| Paper towel / wet wipes | Cleanup and controlling drips | I keep these nearby to wipe overflow fast. |
| Crushed glass or craft sparkle (optional advanced) | Adds texture and faux “fancy glass” | Use carefully with supervision; it’s an advanced look. |
| Alternative glue-like mixture ingredients (optional) | Cornstarch-based “glue” alternative | Example concept: cornstarch + vinegar + gelatin + water to change consistency/finish. |
Step 1: Prep Your Workspace and Choose the Right Base Surface
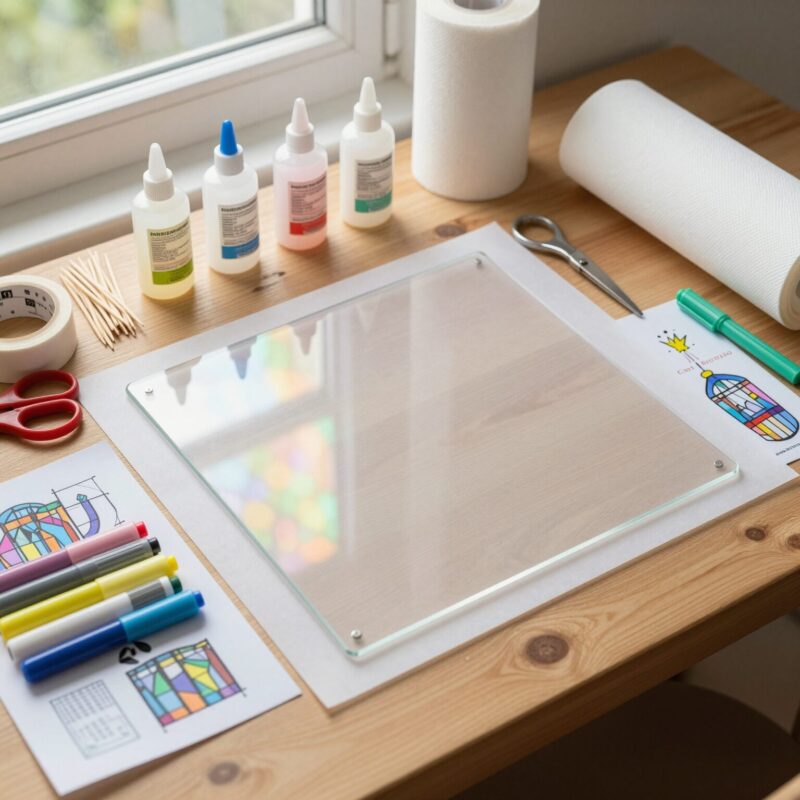
First, I set up a workspace that can handle a little sticky mess. I lay down newspaper, a plastic table cover, or a thick paper sheet. Glue suncatchers are totally worth the effort, but glue drips happen—especially when kids are involved.
Next, I choose a flat “mold” surface:
- A flat lid (like a jar lid or container lid) works great.
- A printed template under wax paper can work too.
- If I want super repeatable shapes, I use cookie cutters on wax paper.
I also place wax paper on top of my base surface. This matters because it’s the thing that helps the dried glue peel off cleanly later. I smooth out wrinkles so my suncatcher doesn’t get weird bumps.
Finally, I plan my design placement. If I’m doing multiple pieces, I space them out so colors don’t smear into each other while I work.
Step 2: Choose Your Glue + Color Plan (Clear vs. Colored)
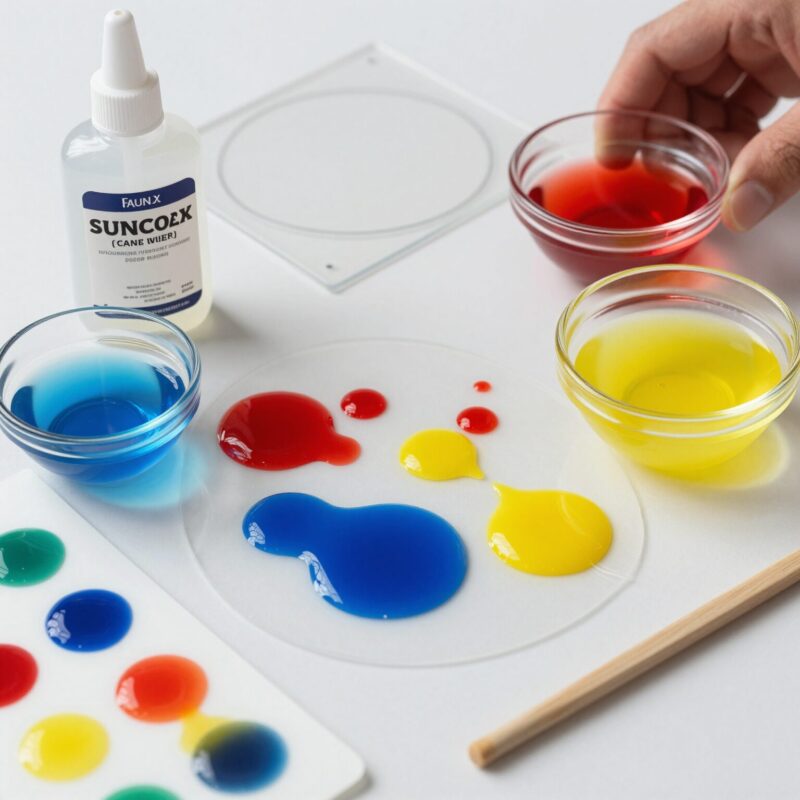
Now I decide how I want it to look in the light.
Option A: Clear glue + food coloring
- This usually creates the brighter, “stained glass” look.
- I mix a little food coloring into glue, or I apply colored glue and let it blend in a controlled way.
Option B: Pre-colored glue
- This can give a more solid, bold color effect.
- If I’m using colored glue already mixed, I focus more on outlining and separating sections so colors don’t turn into one muddy blob.
In practice, I often use clear glue plus small dots or lines of food coloring—because I like that bright stained-glass vibe.
One more thing: I keep my glue thickness in mind. Too thin can dry weak and bendy. Too thick can blob or overflow. I aim for a steady, squeezeable consistency that I can draw with.
Step 3: Use the Classic Glue Spiral Method (Template-to-Peel Process)
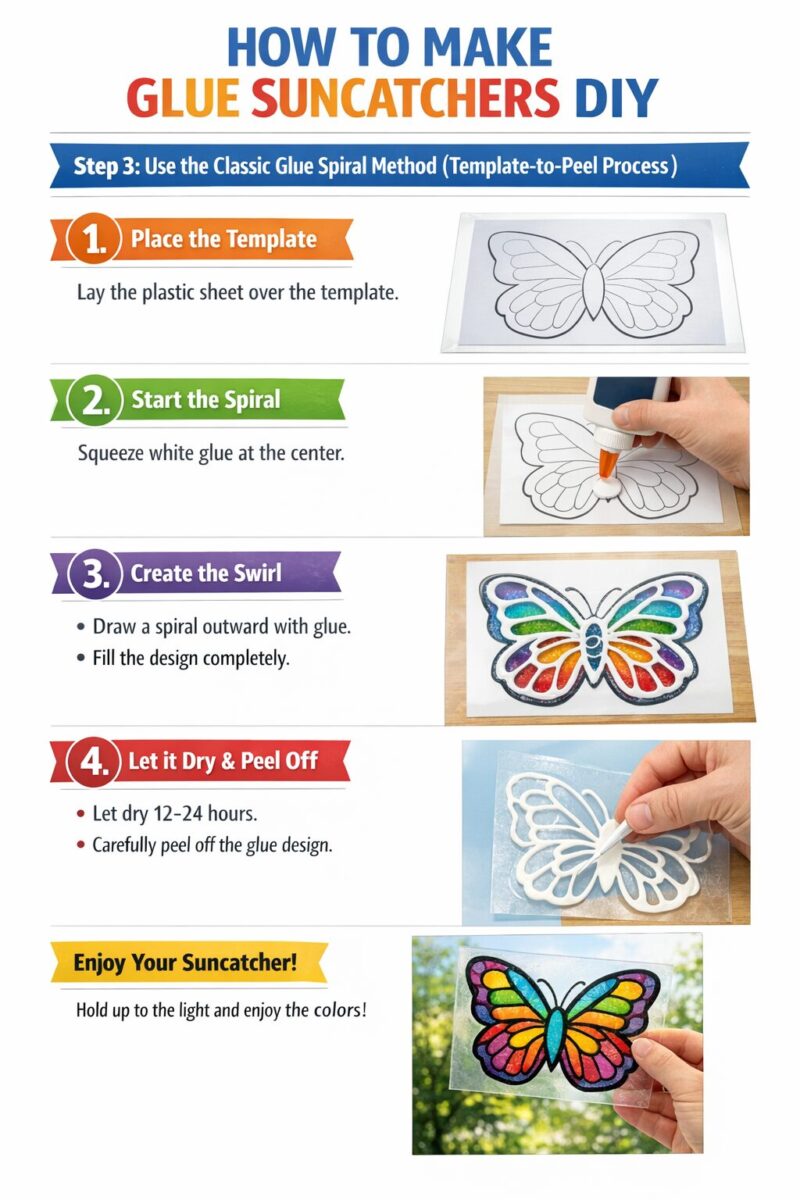
This is the most common DIY method I see: apply glue on a flat lid/template with the lid/top facing up, then let it dry, and peel it off.
Here’s how I do it:
- Place wax paper over the lid/template.
- Squeeze glue onto the wax paper in a spiral (or a thick looped outline around a shape).
- Keep my lines consistent so the piece dries evenly.
- Let it sit untouched until fully dry.
Why spiral/controlled lines work: The glue creates boundaries that hold the “stained glass” shape. And because I’m building on a flat surface, the final piece is easier to remove and display.
Thickness tip:
- If I make the glue too thin, it can look less like glass and more like a flimsy sticker.
- If I make it too thick, it may puff up, overflow, or take longer to dry.
When I’m ready for the reveal, I gently peel the dried piece from the wax paper.
Step 4: Add Color with Food Coloring (In or On the Glue)
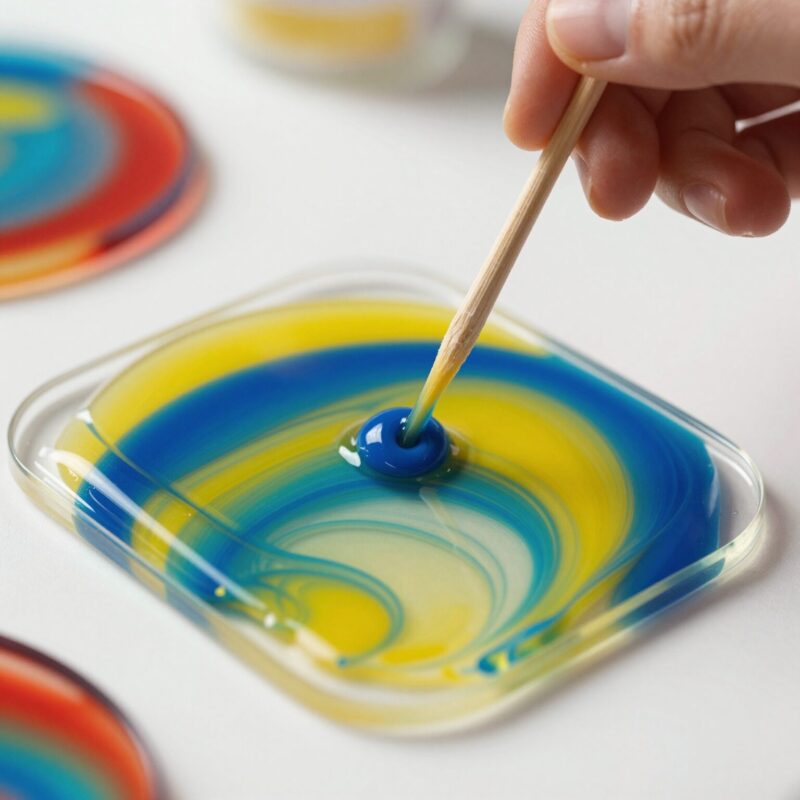
Color is where things get really fun. I add food coloring in one of two ways:
Method 1: Mix color into glue
- I add a tiny drop of food coloring to clear glue in a cup.
- I mix until the glue turns evenly colored.
- Then I apply it to the outlined sections.
Method 2: Apply coloring on top
- I draw glue shapes first (like outlines).
- While the glue is still workable (or sometimes after I outline and let it set enough), I add tiny dots or lines of food coloring on top.
Clear-glue + coloring vs. colored glue:
- If I’m using clear glue, colors often look brighter when sunlight passes through.
- If I’m using pre-colored glue, colors can look more opaque and “solid.”
Important: Food coloring can make the glue mixture runnier if I add too much liquid. So I use small amounts and work slowly. If I see overflow starting, I stop and let it dry instead of trying to “fix” it while wet.
Step 5: Create Crisp Lines with a Colored Outline First
This is my favorite trick for getting clean, stained-glass–style sections: I make a colored outline first.
How I do it:
- I draw the outline with a colored glue (or glue mixed with a bit of food coloring).
- I leave intentional gaps inside the outline for filling.
- I repeat: outline → leave space → don’t merge everything together.
Why it helps: If I rush and mix everything into one blob, the colors can blur and the design loses that “different windows” look. An outline acts like a wall between sections.
Also, I emphasize drying time here. I always let the outline fully dry before I add extra colors in the inside areas. That way, colors don’t smear together, and my sections stay defined.
Step 6: Drying Time and Smear Prevention (Quality Depends on Patience)
Drying is where DIY suncatchers go from “messy craft” to “pretty glass.”
I usually do this:
- I let the first layer (outline or glue spiral) dry completely.
- Then I add the next colors.
- Then I let it fully dry again.
How I tell it’s dry enough:
- Visually: the glue looks matte or less glossy.
- Touch test: I gently tap near the edge (not the wet center). If it feels tacky, it’s not ready.
Smear prevention basics:
- Don’t keep poking or moving it while it’s drying.
- Avoid adding too much glue or too much paint/color at once.
- Work within the boundaries of my template so overflow doesn’t run into other sections.
This is one of those crafts where waiting a bit longer makes a huge difference.
Step 7: Troubleshooting—Why Glue Turns Watery and How to Avoid Big Blobs
Sometimes I mess up, and the glue gets watery or runs. It happens especially when:
- I add too much food coloring (liquid)
- My glue is too thin to begin with
- I apply color too quickly or over-smear the surface
When that happens, I usually fix it with three moves:
- Use less liquid color.
I add color drop by drop, not spoonful by spoonful.
- Apply in smaller layers.
Instead of one big puddle, I do thin lines and tiny fills, letting each layer set.
- Thicker outline first, then fill.
The outline helps contain the color so it doesn’t spread everywhere.
Overflow prevention:
- I slow down my application.
- I stay inside my template lines.
- I keep a paper towel nearby to catch accidental drips.
If I see a blob forming, I stop trying to “spread it out” while wet—because that usually makes it worse. I let it dry and adjust my next piece.
Step 8: Quick and Kid-Friendly Techniques (Including Cookie Cutters)
If I’m crafting with kids (or I just want faster results), cookie cutters are a game changer.
Here’s a kid-friendly version:
- Place wax paper on the table.
- Set cookie cutters on top of the wax paper (or lightly trace the shape).
- Squeeze glue into the cookie cutter shape, filling the interior.
- Add an outline if you want defined sections.
- Let everything dry fully.
- Peel off carefully when dry.
Repeatable shapes: stars, circles, hearts—whatever fits the mood.
This matches the “easy summer craft” approach lots of creators show: low supply, simple workflow, and quick wins. Kids can follow the same core steps every time: shape → outline (optional) → fill → full dry → peel/display
Step 9: Advanced Variations—Texture, Faux Stained Glass, and Testing Glue Brands
Once the basic method feels easy, I like upgrading the look.
Add sparkle or faux stained-glass texture
One advanced idea is layering texture over glue lines:
- I sprinkle crushed glass (or specialty craft glass) over the design after glue is in place.
- I also use craft sparkle on top of glue “windows” for a dazzling effect.
This gives a more dimensional, “real stained glass” vibe. If you try crushed glass, I recommend doing it carefully and with supervision, especially for kids.
Test different glue brands for the best clarity
Another smart move is to test. I compare:
- clear Elmer’s glue vs. regular school glue
- clarity and thickness after drying
- how well colors show through
Even within the same method, different glues dry differently—so testing helps me pick the best one for my look: brighter and glassier or slightly more opaque.
Try an alternative “glue-like” mixture
Some community posts suggest a DIY glue-like mixture using cornstarch + vinegar + gelatin + water. The goal is to create a different consistency or finish than store-bought glue.
I treat this as an experiment: the recipe can produce different textures, and drying behavior may vary. If I’m using an alternative mixture, I do a test piece first so I don’t waste time or supplies on a full design.
Step 10: Final Reveal and Window Display Tips
The moment of truth is when I peel the suncatcher off the lid/template. I do it slowly at the edges first, because that’s where peeling can snag. If it feels stuck, I wait longer—drying time is everything.
Once it’s off, I do a quick check:
- Are the edges clean?
- Did colors stay separated?
- Is it fully dry (no tackiness)?
How to hang or display for maximum color pop
For window display, I usually:
- use a ribbon or string to hang it
- or press a hole near the edge (depending on the design) and thread it carefully
Place it where sunlight hits. The clearer the glue and the brighter the colors, the more it looks like real stained glass.
Storage and handling
To keep shapes from warping:
- I store them flat or gently nested with paper between pieces.
- I avoid heavy bending because the dried glue can be delicate compared to glass.
When it’s time for display again, I handle by the edges and set it where light will do its magic.
Tips
- Start simple: circles, stars, hearts, and triangles are easiest to outline and fill.
- Outline first for crisp sections. Then fill only after the outline is fully dry.
- Use tiny amounts of food coloring. Too much liquid can make glue runnier and cause blobs.
- If you want the best stained-glass look, go for clear glue + coloring rather than super-thick colored glue.
- Make test pieces with different glue brands to learn which one dries clearest for your style.
- Keep everything undisturbed while drying—shifting it too early can smear colors or distort edges.
FAQ
How long do glue suncatchers take to dry?
It depends on thickness and humidity, but in general I let them dry until they’re not glossy and feel fully firm at the edges. Outline layers should dry completely before adding more color to prevent smearing.
Can I use white glue instead of clear glue?
Yes. White glue is a workable alternative. It may look more opaque than clear glue, but your colors can still be bright and decorative, especially against sunlight.
Will food coloring ruin the glue if I add too much?
It can. Food coloring is liquid, and adding too much can make the glue mixture runnier, which leads to overflow and large blobs. I add color a little at a time.
Do I have to use a spiral method?
No. The spiral is one common technique, but you can also do outlines, filled shapes inside cookie cutters, or layered templates. The consistent workflow is shape/template → controlled glue/color → full dry → peel/display.
Are there kid-safe ways to do this?
Yes, especially with careful supervision. I recommend using kid-sized squeeze bottles, a simple cookie-cutter shape, and avoiding crushed glass. Also, protect surfaces and keep wipes/paper towels nearby.
What if my lines smear?
Usually it’s because the outline or first layer wasn’t fully dry. Let layers dry longer next time, and apply color in smaller amounts so it doesn’t push into other areas.
Conclusion
Making DIY glue suncatchers is one of my favorite “easy but wow” crafts. I start by building the shape on a flat lid/template (often with wax paper), then I apply glue in controlled layers—sometimes a spiral, sometimes a crisp outline first—so the colors stay separated. After everything dries completely, I peel it off and watch sunlight turn my simple design into a stained-glass-like window. Once you try your first one, you’ll want to make more—because every new color combo, shape, and texture idea feels like its own little masterpiece.

A Teacher with 5 years of experience. Our Expertise, is reliable to meet your full Academic development needs . Worked on many crafts and construction projects offering services from design to development to deployment over the years. You will find many of my works in my business portfolio on request.