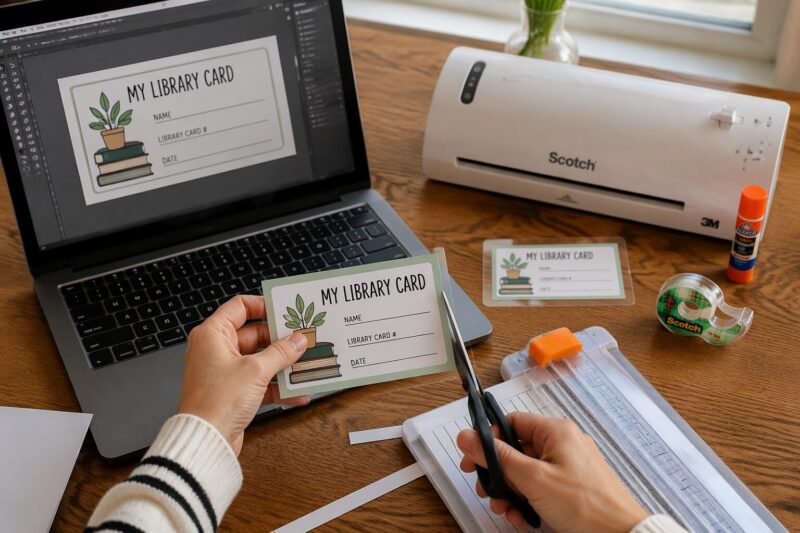
What makes a library card template different from any other card design you might print at home? The answer lies in how it combines identification, tracking, and durability into a single small layout. Whether you are setting up a classroom lending system this fall or organizing a personal home library over the winter break, a well-made template saves time and reduces mistakes. I wrote this guide to walk you through the entire process — from choosing the right format to assembling a card that actually works.
Quick Questions and Answers
Question: What is a library card template used for?
Answer: A library card template creates a standard card for membership, borrowing records, or classroom checkout. Sources describe it as a customizable layout that identifies users, stores key details like names and dates, and supports lending workflows. Some templates are official membership cards, while others are printable classroom-style pockets or decorative versions.
Question: What tools do I need to make a library card template?
Answer: For a digital template, you need a browser-based editor or design software plus an export format such as Word or Google Docs. For a printable version, sources mention a printer, cardstock or heavy paper, scissors or a paper cutter, and optionally tape, glue, staples, or a laminator. Badge-printing workflows may use software like Evolis Badge Studio.
Question: How do I print a library card template at home?
Answer: Edit the template, choose the right paper size, print on cardstock, and cut the cards to size. Classroom Freebies recommends printing envelope parts on thick scrapbook paper, folding on the inside lines, and securing edges before attaching the cards. For best results, the design should be sized to final card dimensions before printing.
Key Takeaways
Standard library card size is 3.375 × 2.125 inches — matching a credit card format for wallet storage.
A good template includes member name, photo, barcode, registration year, and space for issue and return dates.
Browser-based editors like Canva and template sites let you customize without design skills.
Print on cardstock, pair with a book pocket for classroom systems, and laminate for durability.
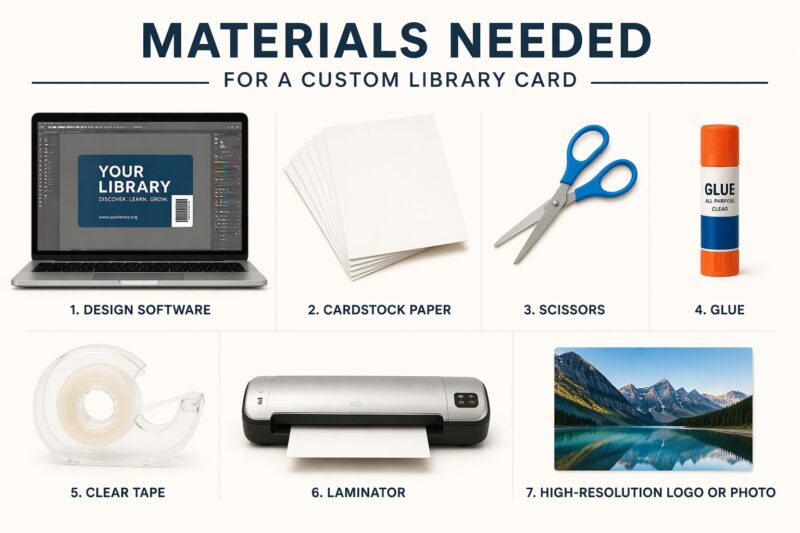
What You Need
Item
Purpose
Notes
Design software
To edit and customize the template layout
Canva, Microsoft Word, or Google Docs all work. Badgy recommends Evolis Badge Studio for professional cards.
Cardstock paper
To print the card itself
80 lb or heavier is best. Avoid standard copy paper — it tears too easily.
Scrapbook paper
To print the book pocket
Thicker than cardstock, holds its shape after folding.
Scissors or paper cutter
To trim cards and pockets to finished size
A paper cutter gives cleaner edges than scissors.
Glue, tape, or stapler
To assemble the book pocket
Craft glue or double-sided tape works well. Staples are fine for classroom use.
Laminator (optional)
To protect cards from wear
Useful for membership cards handled frequently.
Logo or photo file
To personalize the card
High-resolution images at 300 DPI prevent blurry prints.
Step 1: Choose Your Template Type
The first decision determines everything else. Library card templates fall into three main categories, and each one serves a different purpose.
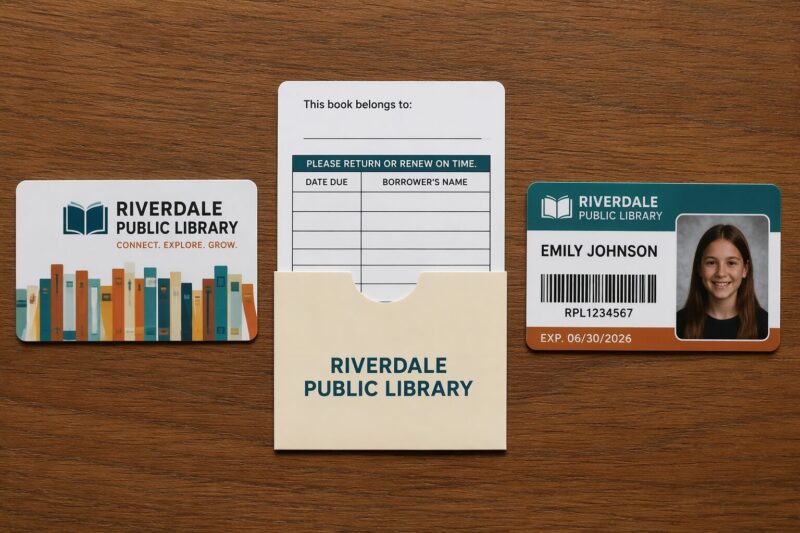
Membership identification cards follow the standard 3.375 × 2.125 inch credit card size. These fit in a wallet and are designed for long-term use. According to Template.net, this size is the most common format because it matches existing card holders and pocket sleeves. If you are creating cards for a real library, a school media center, or a community book exchange, this is the format to use.
Classroom checkout cards work differently. These are smaller cards designed to slide into a physical book pocket glued inside the cover of a book. Classroom Freebies explains that these cards track manual loans — when a student borrows a book, they fill out the card and place it in a designated box. The teacher or librarian checks the box periodically to follow up on overdue items. This system is paper-based and requires no software beyond the template itself.
Personalized membership cards add security features like a photo and barcode. Badgy notes that these cards can include the member’s full name, year of registration, city, school or grade, a picture, and a barcode used to record loans and returns. If you are integrating with a digital library system, this is the option to pick.
Take a moment to decide which type fits your situation before moving to the next step. The rest of the process depends on this choice.
Step 2: Pick Your Design Software
You do not need expensive software. Browser-based editors work fine for most home and classroom projects.
Canva offers a free library template collection that you can browse, customize, and share directly in your browser. The editor lets you drag and drop elements, change colors, and upload your own images. No installation required.
Microsoft Word and Google Docs work too. Template.net states that library card templates can be exported in Word and Google Docs formats, supporting browser-based editing and printable output. These are good choices if you want something simple and familiar.
Evolis Badge Studio is a dedicated badge-printing tool mentioned by Badgy. It is designed for professional card production and includes barcode generation and photo import features. Use this if you plan to print many cards or integrate with a membership database.
I personally recommend Canva for most people. The learning curve is shallow, the free tier is generous, and the templates are already sized correctly. You can jump straight to editing without worrying about layout dimensions.
Step 3: Download and Customize Your Template
Once you have picked your software, find a template that matches your card type.
Template.net offers free library card templates that you can edit directly in the browser before downloading. The templates include editable text areas for the member’s name, registration number, and contact information. Some also include placeholder fields for a photo and barcode.
SampleTemplates says a library card may include name, title, phone number, and email address, along with a picture for security purposes. These fields are standard across most templates. If your template does not include a photo area, add one — it helps with visual identification and deters misuse.
For classroom checkout cards, the layout is different. Template.net recommends including issue and return dates and leaving extra space for additional information if needed. The card should have a small table with columns for the book title, date borrowed, and date returned. Keep the font size readable — 10 to 12 points works well for these fields.
When customizing, follow these guidelines:
Use a clean sans-serif font for names and numbers. Save decorative fonts for decorative elements only.
Keep contrast high. Dark text on a light background prints better than light text on a dark background.
Leave margins. Do not crowd the edges — printers need a small border to avoid cutting off text.
Test with a sample print on plain paper before committing to cardstock.
Template.net advises testing format compatibility with a free printable sample before finalizing the design. This catches alignment issues early.
Step 4: Set Up the Print Layout
Before printing, confirm your template matches the paper size and card dimensions.
Standard library cards measure 3.375 × 2.125 inches. Template.net confirms this is the common credit-card-like format. If your template uses a different size, resizing it before printing prevents wasted cardstock.
Set your document page size to match your printer’s default — usually Letter (8.5 × 11 inches) or A4. Arrange multiple card copies on one sheet to save paper. Most templates already include a multi-card layout, but if yours does not, duplicate the card design across the page manually.
For book pockets, the layout is different. Classroom Freebies instructs users to print envelope templates on thick scrapbook paper and the cards on cardstock. The pocket template includes fold lines and tabs that need to align exactly. Print one test pocket first to verify the folds line up before printing a whole batch.
If you are laminating, leave at least a 1/8 inch border around each card so the laminate seals properly. Laminating machines vary in trim margins, so check your machine’s specifications.
Step 5: Print and Trim the Cards
Now you are ready to print. Use the best print quality setting your printer supports.
Cardstock is the right material for the cards themselves. Copy paper is too flimsy — it curls, tears, and smudges. For book pockets, Classroom Freebies recommends thick scrapbook paper because it holds its shape after folding.
Print one sheet first and inspect it. Check that text is sharp, photos are clear, and barcodes have crisp edges. Badgy says its cards can be printed in seconds after personalization, but that speed assumes the template and printer settings are already dialed in. Rushing this step causes waste.
Once the print looks good, cut the cards. A paper cutter with a sharp blade gives clean, straight edges. Scissors work too, but you will likely end up with slightly uneven borders. Cut along the crop marks if your template includes them. If it does not, use a ruler and pencil to draw light guide lines before cutting.
For book pockets, cut the pocket template out along the outer edge, then fold along the interior lines. Apply glue or double-sided tape to the tabs and press them down to form the pouch. Classroom Freebies suggests stapling as an alternative for classroom use — faster and still durable enough for frequent handling.
Card Type
Paper
Cutting Method
Assembly
Membership card
Cardstock (80 lb+)
Paper cutter
Laminate after cutting
Classroom checkout card
Cardstock
Scissors or cutter
Pair with book pocket
Book pocket
Scrapbook paper
Scissors
Fold, glue, or staple tabs
Professional badge
PVC card stock
Badge cutter
Print with Evolis Badge Studio
Step 6: Assemble the Book Pocket System (For Classroom Use)
If you are building a classroom checkout system, the pocket is as important as the card.
Classroom Freebies walks through the full assembly: print the pocket template on thick scrapbook paper, cut it out, fold on the inside lines, and secure the edges with tape, glue, or staples. The pocket then glues inside the front cover of a book.
Each book gets its own pocket and card. When someone borrows the book, they write the date on the card and place it in a designated box or envelope. The owner checks the box periodically to follow up on overdue items.
This system is entirely analog. No computer, no barcode scanner, no database. It works well for small libraries, classroom reading corners, and home book exchanges. The template handles the hard part — consistent sizing and clear fields — so the manual tracking is simple.
One tip from my own experience: print extra cards and keep them with the pocket templates. Cards get lost. Having spares means you are not scrambling to print replacements mid-semester.
Step 7: Laminate for Durability (Optional But Recommended)
Lamination is optional for classroom checkout cards that stay inside book pockets. It is strongly recommended for membership cards that live in wallets.
A home laminator costs about $20 to $40 and pays for itself after a few projects. Use standard 5 mil pouches for cards — 3 mil is too thin and curls over time. Run the card through the laminator, then trim the excess laminate, leaving a thin border around the card edges.
If you do not own a laminator, clear contact paper works as a budget alternative. Cut a piece slightly larger than the card, peel the backing, and press it down firmly. Trim the excess with scissors. It is not as durable as heat lamination but still protects against spills and smudges.
Badgy notes that professional library cards can include a barcode for recording loans and returns. If your template includes a barcode, make sure it prints at high contrast — black on white is best — and that the lamination does not distort it. Test scan the barcode after lamination to confirm it reads correctly.
Tips
Always print a test copy on plain paper before using cardstock. This catches alignment, font sizing, and margin issues early.
Store unused card templates as PDF files. PDFs lock the layout and prevent formatting shifts between computers.
Keep a master copy of your template in the original editable format (Canva, Word, or Google Docs). This makes future edits fast.
For classroom systems, assign each student a unique borrower number. Write it on their card and keep a master list. This helps track lost cards.
If the barcode does not scan, check the contrast and scaling. A barcode needs clean edges and enough white space around it.
For book pockets, pre-fold all the tabs before applying glue. Dry-fit the pocket first to make sure the folds line up.
FAQ
Q: What should a library card template include?
A: The member’s name, a photo or image, and a barcode or QR code for tracking are the core elements. Common additions include contact information, registration year, issue and return dates, and library branding such as a logo or address. Some templates also include terms for loss or damage and extra space for notes. Keeping the layout clean helps readability.
Q: How big is a standard library card template?
A: Template.net states that library card templates commonly use the standard size of 3.375 × 2.125 inches, which matches the familiar credit-card-like format. This size fits in wallets, pockets, and book-pocket sleeves. If you are designing a checkout card or membership card, matching that size reduces printing and trimming problems. Sticking to this size is the safest approach.
Q: Can I make a library card template without design skills?
A: Yes. Badgy says users do not need to be graphic designers because they can personalize free templates by replacing text and importing logos or images. Template.net also describes browser-based editing that lets users change text and layout directly online. That makes the process accessible even for beginners. The template does the layout work — you just fill in the details.
Q: Why does a library card template need a photo or barcode?
A: A photo helps identify the member visually, and a barcode helps record loans and returns. Badgy lists both as part of a personalized library membership card, and SampleTemplates says a picture can improve security. These elements make the card more useful for both identification and circulation tracking. They also reduce the chance of card misuse.
Q: How long does it take to make a library card template?
A: The design itself can be very fast if you start with a pre-made template and only change the text, colors, or logo. Badgy says cards can be printed in seconds after personalization, while browser-based template editors also shorten setup time. Printing, cutting, and assembling physical pockets take longer and depend on the number of cards you are producing. Plan for about 30 minutes for a batch of 20 cards.
Q: What are common mistakes when making library cards?
A: Common mistakes include leaving out issue or return dates, crowding too much information onto the card, and using fonts that are hard to read. Template.net advises leaving extra space for additional information and using clear layouts — overfilling the design reduces usability. Another issue is choosing the wrong card size or paper type, which causes fit and print problems.
Q: How do I troubleshoot a library card template that prints wrong?
A: First check whether the template is set to the correct final size. Template.net identifies 3.375 × 2.125 inches as a common card dimension. If the output is blurry or misaligned, confirm the paper type, printer settings, and export format before reprinting. If the card still looks wrong, try a sample print on plain paper to verify alignment before using cardstock.
My Experience With How to Create a Library Card Template at Home
I built my first set of library cards for a classroom reading corner two years ago. The template I found online was sized wrong — the cards came out too wide by about a quarter inch. They did not fit in the standard book pockets I had already ordered. That mistake cost me an evening of trimming each card by hand with a ruler and a craft knife.
What I learned is that the template size is not optional. That 3.375 × 2.125 inch dimension from Template.net is the standard for a reason. Every book pocket, card sleeve, and laminating pouch is built around it. Ignoring that number means fighting every other component in the system.
The second lesson was about paper. I tried cheap 60 lb cardstock first. The cards curled at the edges after a week of use. Switching to 110 lb cardstock solved it. Thicker paper costs more but lasts through a whole school year without replacement.
Now I keep a master template in Canva and a PDF backup on my desktop. When I need new cards, it takes about ten minutes to update names and print a fresh batch. If you are setting up a classroom or home library, what is the one feature your template could not live without? I am curious what matters most to other people running small lending systems.
References
Canva. (n.d.). Free and customizable library templates. Canva. https://www.canva.com/templates/s/library/
A Teacher with 5 years of experience. Our Expertise, is reliable to meet your full Academic development needs . Worked on many crafts and construction projects offering services from design to development to deployment over the years. You will find many of my works in my business portfolio on request.