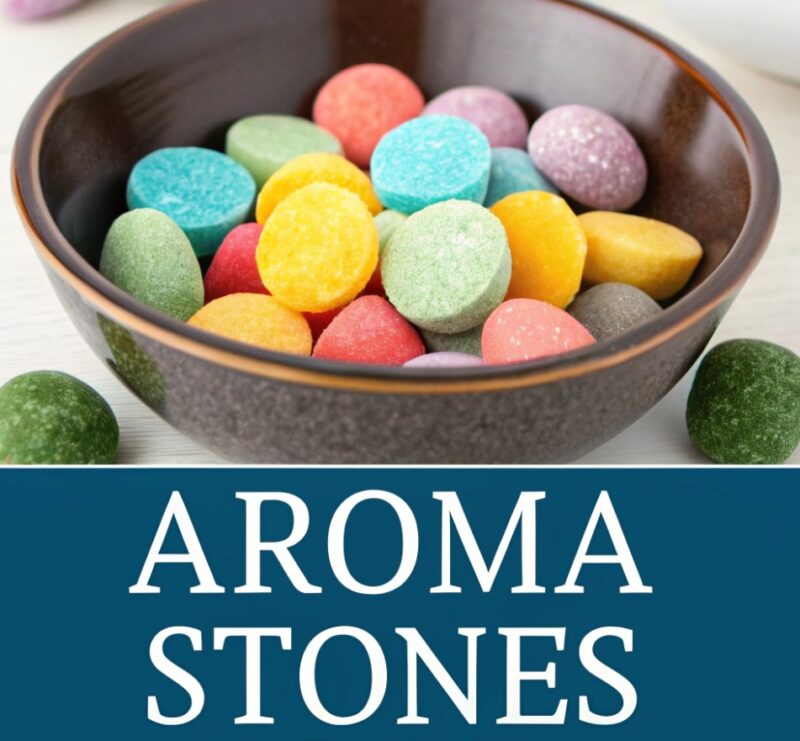

If your space feels a little “blah,” DIY aroma stones are an easy way to add cozy scent without complicated tools. These small, decorative scent stones can quietly freshen a room, dresser, closet, or bathroom with a soft, steady fragrance. I love that you can tailor the scent strength, choose essential oils you actually like, and reuse the stones as you refresh them over time. They’re also a fun project for gifting—because people always ask, “Where is that smell coming from?” You’ll get practical, step-by-step instructions, plus tips for getting the best scent throw and avoiding common mistakes like weak fragrance or cracks. Stick with me, and you’ll have beautiful aroma stones you’ll want to display—and keep using—again and again.
Key Takeaways
- Aroma stones are DIY scent diffusers that absorb essential oils and release fragrance slowly over time.
- You can make them with simple mixes like plaster, concrete, or even clay-based materials depending on the look you want.
- Sealing (lightly) and curing properly helps prevent crumbling and improves scent longevity.
- Use high-quality essential oils and add them gradually to avoid overpowering or evaporating too fast.
- Add optional embeds (like herbs or dried flowers) for visual style, but keep the scent space breathable.
Quick Answer
To make aroma stones DIY, mix a moldable base (plaster or concrete), pour it into small molds, let it cure fully, then apply a few drops of essential oil to the stone surface (or into small holes) and let it absorb. Over time, refresh the scent with a few more drops.
What You Need
| Item | Purpose | Notes |
|---|---|---|
| Plaster of Paris or casting plaster | Main base for the stones | Plaster is easiest for beginners and smooth finishing |
| Mold (silicone molds recommended) | Shapes the stones | Choose small shapes like circles, hearts, or squares |
| Mixing bowl | Combines powder and water | Use one that’s easy to clean |
| Measuring cup/spoon | Gets correct ratios | Even small changes can affect curing |
| Stir stick/spatula | Mixes until smooth | Avoid overmixing if using certain mixes |
| Water (clean, room temperature) | Activates plaster mix | Use as directed for best results |
| Sandpaper (fine grit) | Smooths edges | Use after curing if needed |
| Small dropper or cotton swabs | Applies essential oils | Prevents over-saturating |
| Essential oils | Adds the fragrance | Choose a scent blend you enjoy |
| Optional: rubbing alcohol (for cleanup) | Helps clean tools fast | Not necessary, but handy |
| Optional: sealant (matte craft sealer) | Protects surface and reduces crumbling | Use only light sealing if you want scent release |
| Optional: felt pads or cork pads | Lets you place on furniture safely | Prevents staining on surfaces |
| Optional: protective gloves & mask | Safety | Useful if you’re sensitive to dust |
Step 1: Choose Your Stone Base (Plaster vs. Concrete vs. Clay)
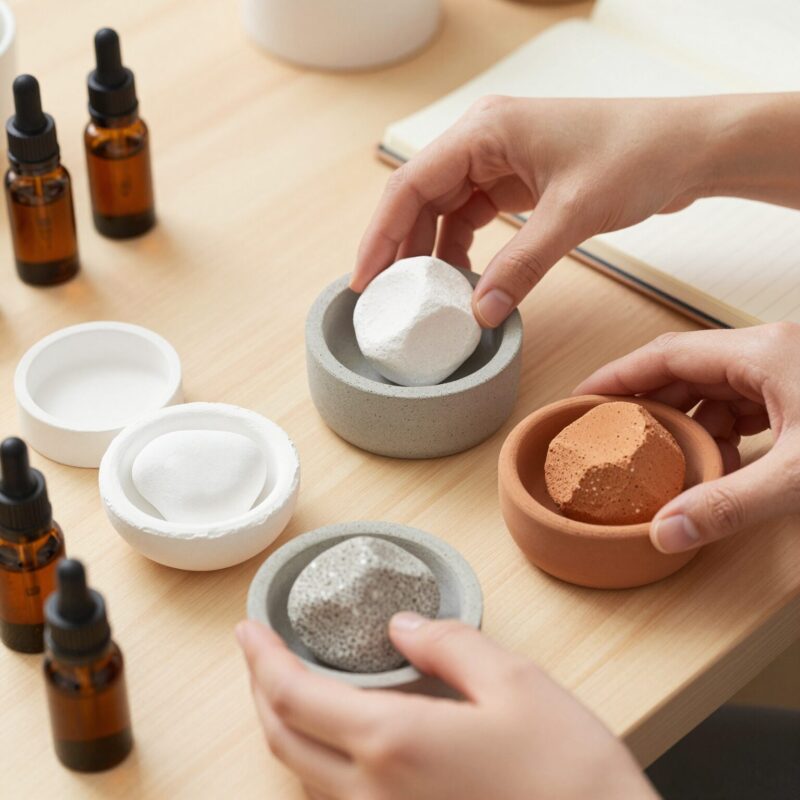
First, I decide what kind of aroma stone I want, because the “base” changes the ease, look, and how the scent behaves.
- Plaster of Paris: My go-to for DIY because it’s beginner-friendly, sets quickly, and gives a smooth finish.
- Concrete (casting concrete or cement mix): Heavier and sturdier, with a more textured look. Great if you want something that feels more “stone-like.”
- Clay-based options: If you’re using polymer clay or air-dry clay, the process is different, but the concept is similar—bake or dry, then scent.
If you’re new, start with plaster and a silicone mold. It’s the least stressful path to a pretty result.
Step 2: Pick a Mold Size and Style
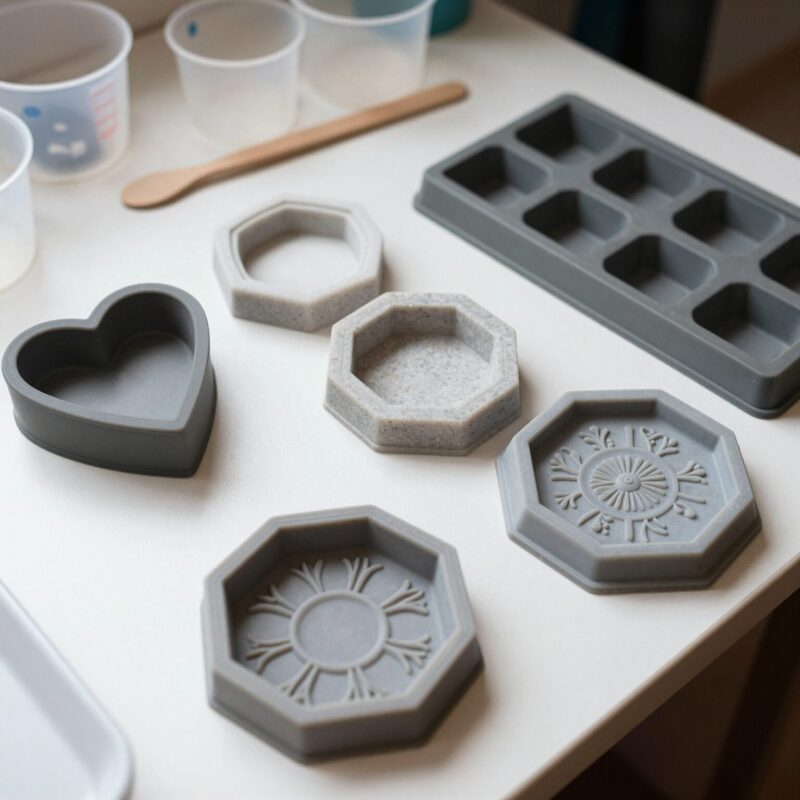
Next, I choose molds that match where I want the stones to live.
- For closets and drawers, I like small flat shapes or mini squares (easy to tuck in).
- For bathrooms, I like shapes that can handle humidity—either slightly thicker plaster or a concrete mix.
- For gifting, I use cute shapes like hearts, circles, or mini tiles.
I also consider whether I’ll add tiny scent holes. If you want stronger scent release, I’ll sometimes press a small tool imprint (like a toothpick dimple) into the mold for later oil absorption.
Step 3: Mix Your Plaster (Or Concrete) Properly

Now comes the mix. This step matters a lot because lumpy stone = weak stone.
- I add powder to my mixing bowl first.
- Then I slowly add clean, room-temperature water (or follow your package directions).
- I stir until it looks like smooth pancake batter—no dry pockets.
- I let it rest for a minute if the instructions say so, then stir lightly again.
Avoid rushing. If the mix is too thick, it won’t fill the mold well. If it’s too watery, the stone can crack or feel crumbly.
Step 4: Pour, Tap, and Set Your Stones
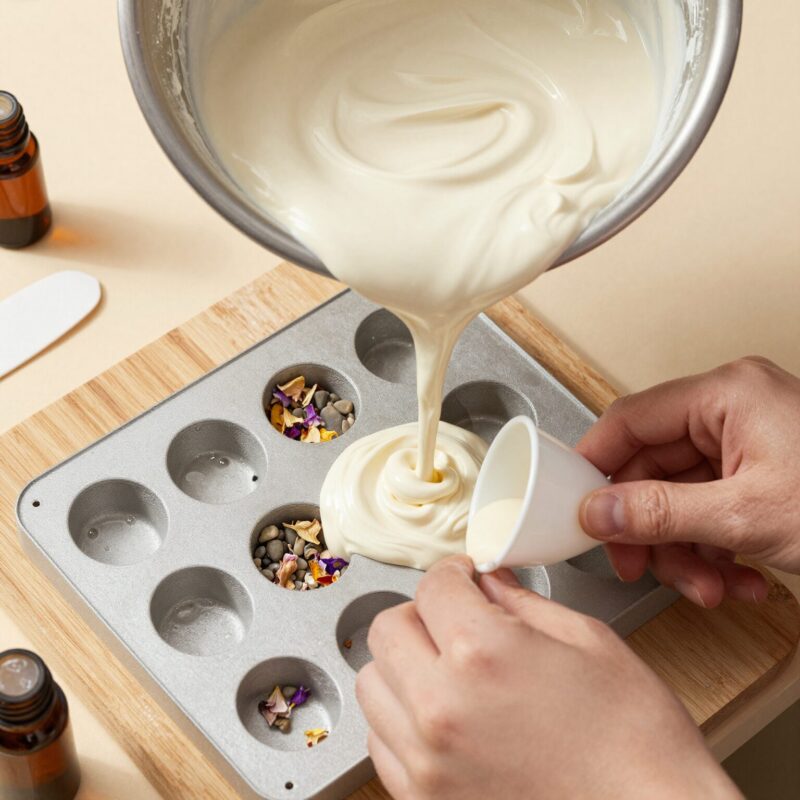
Once the mix is ready, I pour it into the molds.
- I fill each mold completely but don’t overfill to the point it spills.
- Then I tap the mold gently on the counter. This helps pop air bubbles up and prevents pitted spots.
- If I’m using embedded decorative elements (like dried flower petals), I add them carefully so they don’t block the surface where scent will absorb.
Set-time tip: Don’t move the molds too soon. I usually wait until the stone feels firm and stable, then I follow the curing instructions on the product for best strength.
Step 5: Cure Fully (Don’t Skip This)
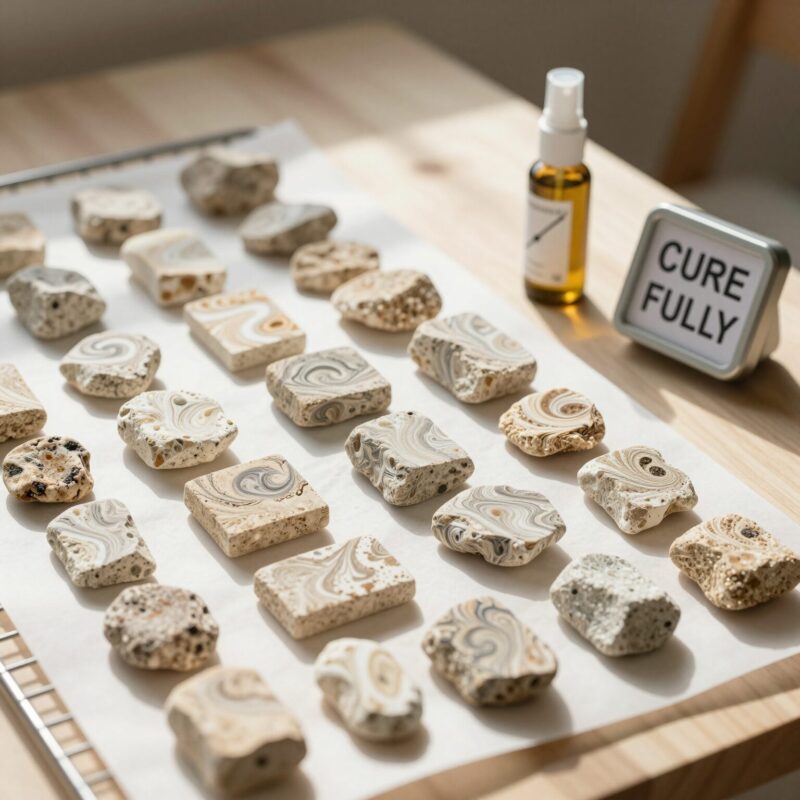
This is where people often rush—and then wonder why their stones break or smell faintly.
I cure my stones fully before applying oil. For plaster, this usually means waiting at least a day, and sometimes longer for thicker pieces. For concrete, curing can take longer.
Here’s what I look for:
- The stone feels hard, not soft or chalky.
- It doesn’t give off moisture.
- Edges look solid and clean.
If you apply essential oil too early and the surface is still damp, the scent may not absorb well, and the finish can get weird.
Step 6: Demold and Sand for a Smooth Finish
After curing, I carefully remove the stones from the mold.
If any edges are rough or slightly uneven, I lightly sand them with fine-grit sandpaper. This makes the stones look nicer and also helps create a surface that absorbs oil evenly.
Quick rule I follow: if I can’t comfortably hold it without it feeling scratchy, I sand a little more.
Step 7: Add Scent “Channels” (Optional but Powerful)
If I want stronger aroma, I add places for oil to grab onto.
- I can dimple the surface with a toothpick before curing (easy and effective).
- Or after curing, I can drill or press a few tiny holes (only if your material allows it).
- Another simple option: I keep the top slightly more porous by avoiding heavy sealing.
I don’t overdo it. Too many holes can weaken the stone, and too much surface disruption can make it crumble.
Step 8: Apply Essential Oils Correctly (Start Light)
Here’s the part I treat like seasoning. More isn’t always better.
- I place the stone on a paper towel or a small dish.
- I add a few drops of essential oil on the surface or into the scent holes.
- I wait and let it absorb.
- If I want stronger scent, I apply another tiny layer instead of dumping oil all at once.
Best practice: Start with 2–6 drops per small stone, depending on size and how strong the oil is. Big stones can handle more, but I still build it slowly.
I also pay attention to how quickly the oil soaks in. If it absorbs fast, I may add a little more after a few minutes.
Step 9: Decide Where to Use Your Aroma Stones
Once scented, I place my stones where they’ll shine.
Great spots:
- Closet shelves (under folded clothes)
- Bathroom counter (away from splashes)
- Nightstand drawer
- Shoebox or shoe drawer
- Car cupholder or storage bin (use caution—essential oils can stain or irritate if spilled)
I like to pair stones with a small protective barrier if I’m worried about oil transfer—like a thin felt pad beneath the stone. This also makes it easier to clean later.
Step 10: Refresh the Scent Over Time
Aroma stones are not “one and done.” They’re more like a slow-release project.
When the smell starts to fade, I refresh them:
- wipe away any residue if needed,
- add a few drops (often fewer than the first time),
- let it reabsorb.
Most stones need refreshing every couple of weeks to months, depending on oil strength, room airflow, and stone type.
If you keep the stone in a very warm or sunny area, the fragrance may fade faster. If you keep it in a cooler, shaded place, it can last longer.
Tips
- Use blends you genuinely like. If you don’t love the scent now, you won’t love it later.
- Choose the right oils: Citrus (lemon, orange) can fade faster; woods (cedar, sandalwood) often last longer. Lavender is usually crowd-pleasing.
- Avoid synthetic fragrance oils if your goal is “natural.” Essential oils tend to behave differently and absorb more predictably.
- Don’t fully seal the stone if you want scent release. A heavy coat can trap fragrance inside and weaken performance.
- Keep stones away from polished furniture finishes unless you use a barrier pad.
- Ventilate while curing and while applying oils. Even though essential oils smell nice, it’s still better to work in a well-aired space.
- Experiment with thickness. Thicker stones hold scent longer, but thinner stones are quicker to dry and scent.
FAQ
How long do aroma stones last?
It depends on stone type, oil strength, and airflow. In my experience, many stones start strong for a couple of weeks and then fade gradually. You can usually refresh them every few weeks to a couple months.
Will essential oils stain furniture or fabrics?
They can. Some oils are more likely to leave residue than others. I recommend placing stones on a small dish or felt pad, especially on light-colored wood.
Can I use fragrance oils instead of essential oils?
You can, but behavior can differ. Some fragrance oils don’t absorb the same way as essential oils. If you try fragrance oils, start with a very small amount and test in a hidden spot first.
Do I need to seal my aroma stones?
Not always. If your plaster feels strong and you’re okay with a natural, slightly porous surface, you can skip sealing. If your stone is dusty or crumbles, a light matte craft sealer can help—but go easy so the fragrance still escapes.
What scents work best for DIY aroma stones?
My favorites are:
- Calming: lavender + cedar
- Fresh: orange + rosemary
- Cozy: vanilla + cinnamon (use carefully; some oils can be stronger) + wood notes
- Clean: eucalyptus + tea tree (great for bathrooms)
Can I make aroma stones without molds?
Yes. You can pour into silicone muffin cups, small paper cups lined with plastic wrap, or even create simple shapes using a flat tray method. Molds just make it easier to get a clean look.
How do I stop my stones from cracking?
Cracking often happens from uneven curing or wrong water ratios. I reduce the risk by:
- measuring water carefully,
- using the recommended mixing ratio,
- not removing stones too early,
- curing on a flat surface.
Conclusion
Making aroma stones DIY is one of those projects that feels small but makes a big difference. I love that I can control the scent strength, choose a vibe that fits my home, and create something pretty enough to leave out—while still being practical enough for closets, drawers, and bathrooms. Once you’ve made your first batch, you’ll probably want to remix scents and shapes, because it’s honestly easy to customize.
If you try this today, start simple: plaster, a silicone mold, and just a few drops of essential oil. Then refresh over time and enjoy that slow, steady “someone cleaned” feeling—without any heavy effort.

A Teacher with 5 years of experience. Our Expertise, is reliable to meet your full Academic development needs . Worked on many crafts and construction projects offering services from design to development to deployment over the years. You will find many of my works in my business portfolio on request.