
What makes dorm crafts stand out from typical room decoration? The answer lies in balancing personalization with practicality—transforming a bland institutional space into something that genuinely feels like yours without risking your security deposit. Dorm craft ideas range from simple washi-tape photo grids to handmade planters, and they work because they’re budget-friendly, renter-safe, and actually fit in a room the size of a closet. Whether you’re settling in for your first semester or preparing for move-in day this fall, these craft projects help you create a home that reflects who you are. Let’s explore the best options and get you started.
Quick Questions and Answers
Question: What are the easiest dorm crafts ideas for beginners? Answer: The easiest dorm crafts are usually no-tools or low-tool projects such as washi-tape photo grids, flower walls made with tape, clipboard art, and simple bulletin boards. These projects are popular because they are inexpensive, removable, and easy to change when your style or room layout changes. Photo displays and lightweight wall decor work well in small spaces and do not require permanent hardware.
Question: Which dorm crafts are cheapest to make? Answer: The cheapest dorm crafts typically use supplies you already have or can buy very cheaply, such as tape, paper, clips, string, and thrifted frames. Examples include coffee-filter wall art, photo grids with washi tape, clipboard displays, and flower walls made with flowers and tape. Projects that reuse records, T-shirts, or old frames keep costs down because the main expense is just a few basic supplies.
Question: How do I decorate a dorm without damaging the walls? Answer: Use crafts that hang with removable tape, picture strips, hooks, clips, or pinboards instead of nails and screws. Washi tape photo grids, lightweight hangers, removable hooks, and tape-based flower walls are especially useful in shared housing or leases with strict damage rules. These options protect your deposit while giving you full creative control.
Choosing the Right Dorm Craft: Selection Criteria
Not every craft works for every dorm. Start by thinking about what matters most to you: decoration, function, durability, or a mix. The biggest rule is non-damaging installation. Dorm walls often come with strict rules about what you can and cannot attach—and wall repairs eat into your security deposit fast. That’s why washi tape, removable adhesive strips, and command hooks are the real MVPs of dorm decorating.
Next, consider space. A dorm room is usually 150–200 square feet shared with another person, so every square inch counts. Multi-functional items—like a frame that doubles as a whiteboard or a tin that holds both makeup and desk supplies—win out over purely decorative pieces. You’re not just adding beauty; you’re solving storage problems.
Skill level matters too. If you’re all thumbs in the craft department, skip anything requiring precise painting or sewing. Stick to projects that rely on arrangement and assembly instead of freehand technique. If you have some craft experience under your belt, clay projects and embroidery hoops open up more options.
Finally, think about portability. You’ll move out at some point. Lightweight, flat, and durable crafts pack down easier and survive the move better than heavy or fragile pieces.
Best-For Use Cases for Dorm Decor
Different dorm situations call for different approaches. If you’re renting and worried about your deposit, stick with anything that peels or lifts without leaving residue. Washi-tape photo grids and flower walls made with flowers and tape are your best bets. They look polished, they photograph well, and they vanish without a trace.
Minimalists benefit from functional crafts that reduce clutter rather than add to it. A DIY cord organizer or a desk-edge storage box keeps your space neat while looking intentional. You’re not decorating just to decorate; you’re solving actual problems while your walls stay nearly bare.
If you want your room to feel undeniably yours, personalization is the move. Custom door name tags, yarn-wrapped wire words, and monogrammed pieces scream “this is my space.” Guests remember personalized touches far longer than they remember generic art.
For comfort lovers—and let’s be honest, most dorm students fall into this category—softer, warmer crafts create a home-like vibe. Moss wall art, dried floral arrangements, woven wall tapestries, and handmade knit blankets transform a sterile dorm into a refuge. These pieces don’t just look good; they actually change how the room feels.
Comparison: Aesthetic vs. Functional DIYs
| Craft Type | Visual Impact | Practical Purpose | Best For | Time to Make | Cost |
|---|---|---|---|---|---|
| Purely Aesthetic (string art, garlands, floral walls) | High—creates mood and style | Decorative only | Mood-setting and visual appeal | 1–3 hours | $5–20 |
| Practical-Functional (whiteboards, organizers, magnetic boards) | Moderate—prioritizes utility | High—organizes and plans | Students who need structure and planning | 1–2 hours | $10–25 |
| Hybrid (photo grids, cork boards, doormats) | High—personal and polished | High—displays and stores items | Balancing personality with productivity | 2–4 hours | $15–40 |
The beauty of hybrid projects is they let you have it both ways. A cork bulletin board holds your schedule and reminders while looking like intentional decor. A photo grid with washi tape displays memories while serving as a personalization statement that fills blank wall space efficiently.
Purely aesthetic pieces are worth making if you have wall space to spare and you want your room to feel a certain way—cozy, energetic, calm, whatever. But if your square footage is tight, functional or hybrid items will serve you better long-term.
Quick Craft Setup: What You Need
Before you start, gather your supplies. The essentials are cheap and reusable across multiple projects. Painter’s tape, washi tape in various patterns, and removable adhesive command strips are your mounting heroes. A hot glue gun costs under $10 and opens up dozens of possibilities. Scrapbook supplies (cardstock, markers, cutters) let you make customized elements quickly.
For specific projects, a few specialized items earn their shelf space. Clay projects benefit from knowing the ‘scratch and score’ method—basically, you lightly cut into clay surfaces before joining them, creating better adhesion. Mod Podge (a craft sealant) gives small projects a professional, glossy finish that lasts through a whole school year.
If you’re making the record succulent planter—one of the easiest and most impressive small projects—you’ll need access to an oven. According to Dallas Baptist University’s dorm craft guide, heat a vinyl record at 350 degrees for five to six minutes until it softens, then mold it into a planter shape. That’s it. One old record becomes a real planter that holds succulents.
Thrifted frames, cookie sheets, and old records from thrift stores cost almost nothing and become the bases for several projects. Start collecting these items now—you’ll use them.
1. Washi-Tape Photo Grid
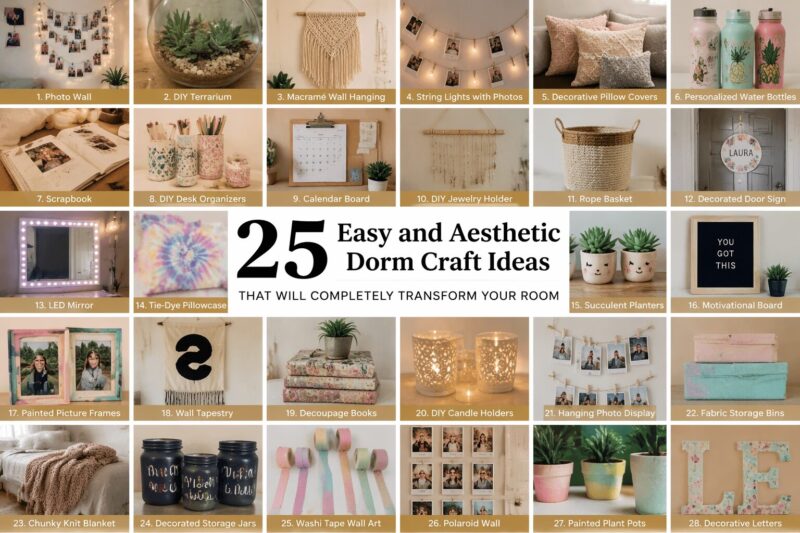
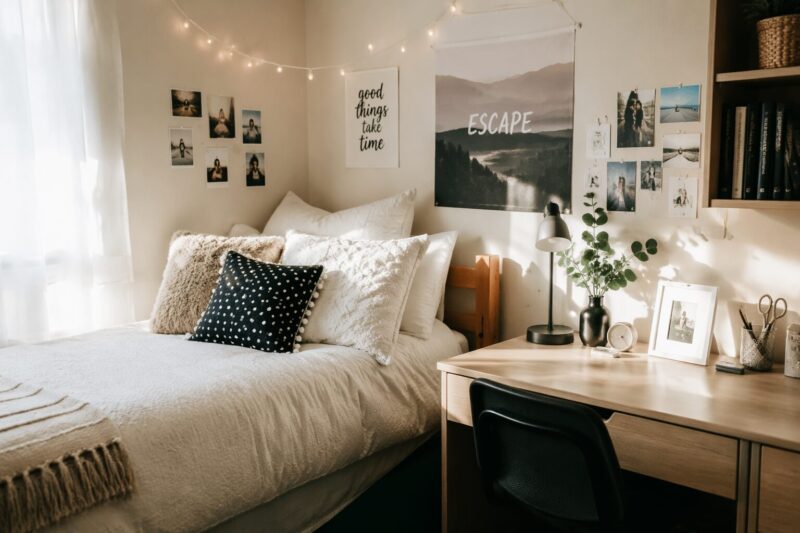
This is the gold standard of dorm crafts: effective, renter-friendly, and infinitely customizable. Print photos of friends, memories, or aesthetically pleasing images (black and white or single-filtered works best for a cohesive look), then arrange them on your wall in a grid using washi tape to hold them up.
The real trick is planning your layout first. Measure your wall space and sketch where each photo goes before you tape anything. That prevents the chaotic, misaligned look that happens when you wing it. Use painter’s tape first to mark your grid lines lightly, then apply washi tape over it once you’re happy with the placement.
Why this works: It’s removable, looks intentional, and fills wall space without being permanent. You can swap photos out whenever you want. Best for renters, budget-conscious students, or anyone who changes their aesthetic frequently.
2. Clay Mini Trays or Decorative Organizers

Small polymer clay trays hold jewelry, coins, or small desk items and look far more polished than store-bought versions. Roll out clay, use cookie cutters or freehand shapes, then add texture with stamps or your fingers. The ‘scratch and score’ method—lightly cutting into clay edges before joining pieces—creates durable joints. Bake according to package directions, then seal with Mod Podge for a glossy, protective finish.
These trays take 30–45 minutes start to finish. You can make several in one evening and gift them or use them throughout your dorm. BOS Magazine highlights how this simple technique elevates a basic craft into something that looks handmade in the best way.
Why this works: Functional decor that solves a real problem—where do you actually put your stuff? Best for: Students who like working with their hands, anyone who wants custom desk accessories, or people who love gifting personalized items.
3. Record Succulent Planters
Old vinyl records become unique planters in one surprising step. Heat a record at 350 degrees for five to six minutes—it softens without warping or damaging the grooves. Wearing oven mitts, carefully mold it into a shallow bowl shape and hold it there for a few seconds as it cools. Once cool, it hardens into a wavy planter perfect for small succulents.
You can find records at thrift stores for 50 cents to two dollars. The entire project costs under five dollars and produces something genuinely impressive-looking. String one up on a wire or place it on a shelf—either way, it becomes a conversation starter.
Why this works: Upcycled, unique, and surprisingly simple. Succulents are nearly impossible to kill, so your planter won’t die from neglect. Best for: Music lovers, thrifty decorators, anyone who wants something truly one-of-a-kind without the craft skill.
4. Personalized Door Name Tag
Make a unique name tag or welcome sign for your door using cardstock, paint, markers, or even wood slices. Add your name, a fun quote, initials, or a pun. Hang it with removable adhesive or a small hook. This single item tells everyone walking past that this room belongs to someone specific—not just a generic dorm space.
You can make this as simple or elaborate as you want. Hand-lettered, painted with watercolors, bedazzled, or minimalist black-and-white—your style, your rules. It’s one of the first things people see, so it sets the tone for your whole room.
Why this works: Instant personalization that costs almost nothing and establishes ownership. Best for: Anyone who wants their space to feel distinctly theirs, introverts who want a friendly boundary signal, or students living in shared housing.
5. Washi-Tape Lampshade
Wrap an existing lampshade or paper lantern with washi tape in patterns and colors you love. This transforms a plain shade into something coordinated with your room’s aesthetic. It’s reversible (you can peel it off), affordable, and takes about 20 minutes.
Overlap strips slightly for full coverage and smooth out air bubbles as you go. The more color combinations you use, the more visual interest it adds. Monochrome tape creates a sleek, minimal look. Patterned tape (florals, geometrics) makes more of a statement.
Why this works: High visual impact, minimal effort, and completely removable. Best for: Anyone who already has a lamp and wants to tie it into their room’s design scheme without buying new lighting.
6. DIY Cork Bulletin Board
Transform a plain cork board into a functional piece of art by painting, staining, or adding a fabric backing. Or keep it simple and mount a DIY version using cork sheets from a craft store glued to a wooden frame. Add your own grid of pins, washi tape borders, or fabric ribbon for visual definition.
This serves double duty: it looks intentional and holds your actual life—class schedule, reminders, photos, to-do lists. The Spruce Crafts recommends a homemade cork board as one of the most practical dorm crafts because it balances aesthetics with real functionality.
Why this works: Solves the organization problem while looking intentional. Best for: Students who need to see their schedule and reminders, organized planners, or anyone who likes the farmhouse aesthetic.
7. Yarn-Wrapped Wire Words
Bend thick craft wire into letters spelling your name, a motivational word, or a favorite phrase. Wrap the wire tightly with yarn in your chosen colors. Hang it on your wall using a small hook or removable adhesive strip.
This craft looks more complicated than it actually is. You can make it monochromatic or use multiple yarn colors for a rainbow effect. It’s lightweight, completely removable, and adds instant personality to blank wall space.
Why this works: Highly customizable, lightweight, and modern-looking. Best for: Anyone who wants a personalized phrase on their wall, students who like working with fiber, or people who change their room aesthetic frequently.
8. Embroidery Hoop Wall Art
Stretch fabric, cardstock, or even paper into an embroidery hoop for instant wall art. You can embroider actual designs, print patterns and frame them, or create mixed-media pieces. The hoop itself becomes part of the frame.
Multiple hoops in varying sizes create visual interest and fill wall space efficiently. You can buy embroidery hoops in bulk cheaply, and fabric scraps make free decoration material. This craft works for people with zero embroidery experience (just use pre-printed designs) or experienced stitchers.
Why this works: Versatile, affordable, and works at any skill level. Best for: Textile lovers, anyone who wants geometric wall elements, or people who like modular decorating (adding or removing pieces as their style evolves).
9. Personalized Doormat
Give everyone who enters a warm welcome by creating a custom doormat using a blank mat from a craft store and a paint marker, vinyl stickers, or fabric paint. Add your name, “welcome,” a funny quote, or an inside joke. Seal it with clear protective spray if needed.
This is one of the first things people notice, so it sets a friendly, intentional tone for your whole space. It’s also practical—it actually catches dirt at the door.
Why this works: Functional, personalized, and immediately noticeable. Best for: Students with an outgoing personality, anyone who loves wordplay, or people who want their dorm to feel actively welcoming.
10. DIY Desk Organizer or Storage Boxes
Decorate small storage boxes or create organizers from cardboard, fabric, and paint. Use them to corral desk supplies, stationery, or small items that otherwise scatter everywhere. Paint them in coordinating colors and stack them neatly. This craft directly solves the problem of limited desk real estate.
You can also turn tin cans into organizers by wrapping them with fabric, yarn, or paper and gluing cork bottoms to protect surfaces. BOS Magazine highlights decorated tins as both decorative and functional—perfect for makeup, supplies, or as a vanity organizer on a small dorm desk.
Why this works: Combines decoration with actual problem-solving. Best for: Students with cluttered desks, organization lovers, or anyone who works best in tidy spaces.
11. Flower Wall Made With Tape
This is the easiest “wow factor” wall project. Arrange dried flowers or even fresh flowers in a scattered pattern on your wall using floral tape or removable painter’s tape. Start with one focal point and build outward. The result is a botanical, trendy wall that looks significantly more sophisticated than the effort required.
You can create a defined area (a corner cluster, an arch over your bed) or scatter flowers more randomly depending on your aesthetic. Dried flowers last forever; fresh flowers work for a few days and then need replacing.
Why this works: Minimal tool requirement, maximum visual impact, completely removable. Best for: Nature lovers, anyone who wants a soft, organic aesthetic, or people who like the farmhouse or bohemian style.
12. String Art or Rope Rainbow Wall
Create geometric patterns or shapes using string, rope, or yarn stretched across nails (or removable hooks) on a board or directly on the wall. A rope rainbow is a current trending option—colorful rope arranged in an arc above your bed or in a corner.
Start by hammering small nails or using adhesive hooks in a pattern, then weave string or rope around them. Geometric shapes—triangles, hexagons, wavy lines—look modern and intentional. This project takes patience but produces something that genuinely impresses visitors.
Why this works: Trendy, personalized, and modern-looking. Best for: Visual learners, people who like geometric design, or anyone who enjoys working with fiber and texture.
Common Mistakes
Overcrowding is the most common mistake in small spaces. You don’t need to cover every inch of wall. A curated selection of pieces with breathing room looks more intentional and makes your room feel bigger. Step back frequently and ask yourself: does this need another piece, or is it good?
Ignoring your lease agreement is dangerous. Some dorms prohibit any wall decoration. Check your housing contract before you start taping anything. The last thing you want is an email from housing about wall violations.
Skipping the cohesion step sabotages otherwise good ideas. Printing photos in different filters, colors, and sizes makes a wall look chaotic. Stick to black and white, a single filter, or a specific color palette. Consistency reads as intentional; randomness reads as cluttered.
Forgetting to measure and plan causes misalignment and tape waste. Sketch your layout first. This takes five minutes and prevents frustration.
Using supplies that damage walls—command hooks that pull paint, tape that leaves residue, nails that leave holes—costs you money. Invest in painter’s tape, removable adhesive strips, and temporary hooks. They’re cheaper than wall repair.
My Experience With 12 Clever Dorm Craft Ideas Every Home Needs
I’ve made probably fifty dorm crafts at this point, and the honest truth is that most of them lived on Pinterest in my head way longer than they lived on my walls. But the ones that stuck? They solved real problems. A cork bulletin board actually meant I saw my schedule instead of missing it. The record planter became the thing every visitor asked about. Washi tape photo grids filled dead space without committing me to anything permanent—which mattered when my aesthetic shifted twice a year.
The real insight is this: dorm crafts work best when they’re either genuinely useful or deeply personal. Decoration for decoration’s sake gets ignored. But a custom door sign or a yarn-wrapped wire that says something meaningful? That becomes part of how people think of your space.
I also learned that skill level is almost irrelevant. The projects that looked most impressive weren’t always the hardest—they just looked intentional. A flower wall with zero embroidery skills looks better than messy embroidery hoops made by someone who’s actually talented. It’s about choosing the right project for your actual abilities, not stretching beyond them for bragging rights.
What dorm craft would you actually make first—something purely decorative or something that solves a storage problem?
FAQ
Q: What dorm crafts also help with organization?
The best organization-focused dorm crafts include bulletin boards, wipe-off boards, desk organizers, magnetic boards, and storage boxes. These projects hold reminders, photos, papers, and small supplies while still looking decorative. Storage solutions that blend function and aesthetics—like decorated tins or DIY organizers—let you declutter without sacrificing style.
Q: Are dorm crafts better than store-bought dorm decor?
Dorm crafts are often better if you want something cheaper, more personal, or customized to your space. Store-bought decor can be faster, but craft options typically do double duty as storage, planning tools, or display pieces. The tradeoff is time—crafts take effort, while purchased decor is ready immediately.
Q: What dorm crafts work best for small spaces?
The best small-space dorm crafts are flat, wall-mounted, or multi-purpose items such as photo collages, string art, bulletin boards, and hanging garlands. These add personality without taking up desk or floor space. Compact functional crafts like desk organizers and decorative tins improve storage without making the room feel crowded.
Q: Can I make dorm crafts on a very low budget?
Yes, many dorm crafts can be made on a very low budget by using recycled items, paper, tape, and secondhand materials. Old records, thrifted frames, and basic supplies like flowers and tape keep costs minimal. Budget-friendly crafting is especially useful if you’re on a student budget—many projects cost under ten dollars total.
Q: What dorm craft ideas are best for a cozy vibe?
The coziest dorm crafts use softer textures and warmer colors, such as woven wall tapestries, knit blankets, dried floral arrangements, moss art, and garlands. These choices make the room feel more home-like. Terrariums and mini zen gardens also create a calm, relaxed atmosphere that students find genuinely soothing.
Q: Which dorm crafts are most personal and unique?
The most personal dorm crafts are custom name signs, photo collages, yarn-wrapped words, monogrammed pieces, and custom phone cases. These reflect your photos, initials, favorite quotes, or color choices rather than generic store decor. Combining photos with a consistent filter or color palette creates a polished, personal look.
Q: What dorm crafts are best if I am not artistic?
The best dorm crafts for non-artists are projects that rely on arrangement rather than drawing skill, such as photo grids, bulletin boards, clipboard displays, and flower walls. Embroidery-hoop wall art and string-based projects are beginner-friendly because the pattern or assembly does most of the visual work. These create strong visual effects without requiring freehand art skills.
Conclusion
Dorm crafts transform a blank institutional space into somewhere that genuinely feels like home—without breaking your budget or your lease agreement. The key is choosing projects that match your skill level, solve real problems, and respect your walls. Whether you go with simple washi-tape grids that cost under five dollars or more involved clay projects, the result is a room that reflects who you are.
Start with one or two projects that excite you. Build from there. Take your time with planning and layout. Remember that wall space in a dorm is precious—use it thoughtfully. The crafts that stick around aren’t the ones that looked flashy on TikTok; they’re the ones that actually work for your life and your space.
Your dorm room doesn’t have to feel temporary. These twelve ideas prove that small effort, thoughtful design, and a few basic supplies can make institutional housing feel like your own.
References
- Craft Loft. (2026). Make your dorm room feel like home with these 15 super easy DIY projects. https://craft-loft.com/blogs/studio-blog/make-your-dorm-room-feel-like-home-with-these-15-super-easy-diy-projects
- Dallas Baptist University. (2026). 10 affordable and easy crafts for your dorm room. https://www.dbu.edu/blog/10-affordable-easy-crafts-for-your-dorm-room.html
- Dorm Therapy. (2026). 26 easy ways to give your dorm room an instant glow up. https://www.dormtherapy.com/dorm-room-ideas-100003984
- Grown and Flown. (2026). Favorite college dorm room ideas for 2026: Adorable and practical. https://grownandflown.com/decorate-college-dorm-room-adorable-easy/
- The Spruce Crafts. (2026). 25 DIYs for the best dorm room decor. https://www.thesprucecrafts.com/fun-easy-diy-dorm-room-ideas-2504949
- BOS Magazine. (2026). Five dorm-friendly crafts: A how-to guide. https://bosmagazine.com/lifestyle/uyszu75l9qjf1cuod5qq1vah6sijur
- Craft Industry Alliance. (2026). What’s new in craft: DIY dorm rooms. https://craftindustryalliance.org/whats-new-in-craft-diy-dorm-rooms/
- Fastweb. (2026). 20 DIY college dorm room & apartment projects. https://www.fastweb.com/student-life/articles/the-10-diy-dorm-room-projects

A Teacher with 5 years of experience. Our Expertise, is reliable to meet your full Academic development needs . Worked on many crafts and construction projects offering services from design to development to deployment over the years. You will find many of my works in my business portfolio on request.