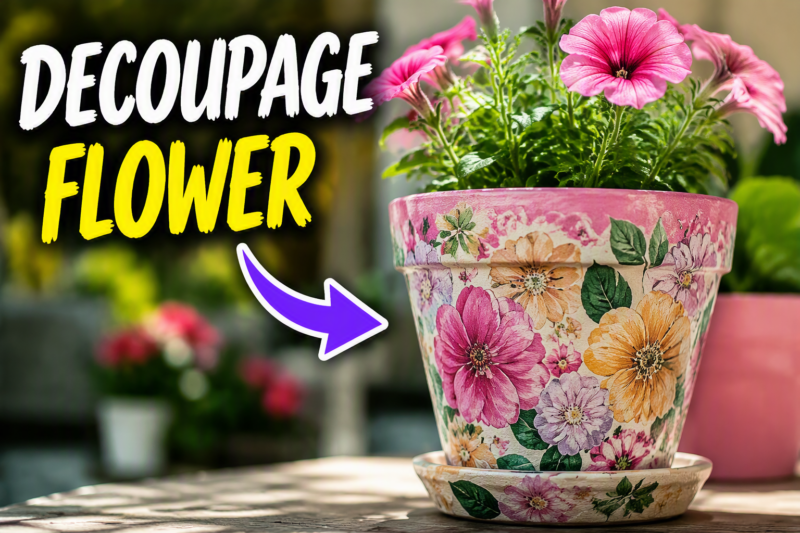


Do you wonder how a plain terra cotta pot can become a personalized garden centerpiece? Transforming basic clay into a vibrant work of art is a simple way to update your outdoor space or create a thoughtful handmade gift. Whether you are planning a summer patio refresh or an early spring plant swap, mastering this craft brings a unique touch to your home. By using standard supplies and a few professional techniques, you can ensure your decorated planters survive the seasons. Let’s look at the best way to get started.
Quick Questions and Answers
Question: What do you need to decoupage flower pots? Answer: Most tutorials use a terra cotta or clay pot, decoupage medium such as Mod Podge or glue, decorative paper or napkins, and a brush or sponge brush. Many also add paint, scissors, and optional sealer if the pot will be used outdoors or with a live plant.
Question: How do you prepare a flower pot for decoupage? Answer: Wash and dry the pot first, and sand rough edges if needed. Several guides also recommend sealing the inside before decorating if the pot will hold soil, then painting a base coat and letting it dry before applying the decorative layer.
Question: Can you decoupage flower pots with napkins? Answer: Yes. Napkins are a common material because their printed top layer gives a delicate decorative look, but they tear easily, so the top ply must be separated carefully and applied gently with thin adhesive layers.
Key Takeaways
- Always seal the interior of terra cotta to stop moisture from lifting your design.
- Use thin layers of adhesive to prevent bubbling and long-term stickiness.
- Plastic wrap is your best friend when smoothing out delicate, paper-thin napkin layers.
What You Need
| Item | Purpose | Notes |
|---|---|---|
| Terra cotta pot | Main surface | A 6-inch size is standard for beginners. |
| Decoupage medium | Adhesive and sealant | Use commercial Mod Podge or a homemade glue-water mix. |
| Decorative paper | Visual design | Choose thin napkins, tissue, or light scrapbook paper. |
| Foam brush | Smooth application | These leave fewer brush strokes than bristle brushes. |
| Sandpaper | Surface prep | Fine-grit (120-220) helps the glue grip the clay. |
| Clay sealer | Waterproofing | Vital if you plan to hold live plants. |
| Plastic wrap | Smoothing tool | Prevents finger oils and pressure from tearing paper. |
Preparing Your Pot for Long-Lasting Adhesion

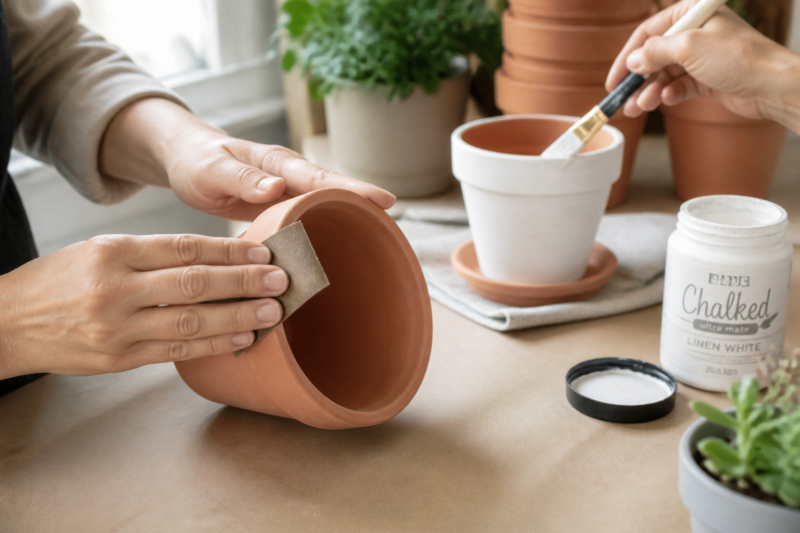
Start by giving your terra cotta pot a thorough wash in warm, soapy water. Dirt and dust are the enemies of good adhesion. Once the pot is bone-dry, use fine-grit sandpaper to scuff the exterior surface. This simple step gives the glue a texture to latch onto.
According to First Day of Home, you should apply a base coat of chalk or outdoor acrylic paint before adding any paper. I find that two thin coats, allowing one hour to dry in between, provide the best opacity. Most importantly, never skip the interior sealer. Terra cotta is porous; if you don’t seal the inside, moisture from the soil will eventually seep through and ruin your beautiful exterior work. If you enjoy this type of project, you might also like 12 Creative Watercolor Craft Ideas for Beginners to expand your decorative skills.
The Step-by-Step Decoupage Process

Start by separating the layers of your decorative napkin. Most napkins have 2 or 3 plies; you only need that ultra-thin, printed top sheet. Carefully peel it back. Next, apply a thin, even layer of your decoupage medium to the section you are working on.
Place your paper fragment onto the wet glue. This is where you grab your piece of plastic wrap. Lay the plastic over the paper and gently smooth it down with your fingers. The plastic acts as a barrier, preventing your skin from tearing the fragile wet paper. Apply a thin top coat of medium over the paper using long, smooth strokes. Give every layer 15 to 20 minutes to dry before overlapping or sealing. If you enjoy making gifts, check out 10 Simple Handmade Crafts to Sell for Kids to Try Today for more fun ideas.
Mistakes to Avoid
The most common error is over-saturating the paper with glue. Too much moisture causes the paper to warp and bubble. Use just enough adhesive to make the paper stick.
Neglecting the interior seal is another mistake that shows up later. A report from Mod Podge Rocks Blog notes that moisture is the primary cause of premature decay in decoupage pots. Finally, do not rush the cure time. Putting a plant in a freshly finished pot is a recipe for disaster. Wait at least 24 hours before adding your plant to ensure the adhesive has reached its full strength.
Troubleshooting Common Issues

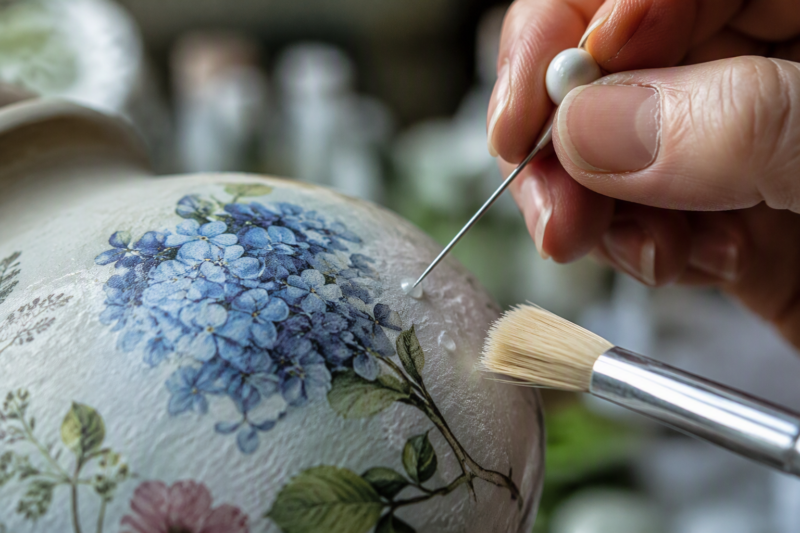
If you see an air bubble, don’t panic. Take a small, sharp pin and poke a tiny hole in the center of the bubble. Gently brush a dot of adhesive over the hole and smooth it down with your finger.
Wrinkling happens to everyone, especially with large sheets of paper. I recommend working with smaller, torn scraps if you find the larger pieces too difficult to handle. This creates a “patchwork” aesthetic that hides minor imperfections naturally. If the paper tears while you are placing it, simply bridge the gap with a tiny piece of matching paper once the base layer is dry.
FAQ

Q: Why do my decoupage napkins wrinkle on pots?
Wrinkling usually happens when the napkin is moved too much, pressed too hard, or applied to a glue layer that is too wet. Some tutorials recommend using plastic wrap to smooth the napkin instead of fingers, which helps reduce sticking and tearing.
Q: How long does decoupage take to dry on flower pots?
Drying time depends on the step. One tutorial suggests 15 to 20 minutes between adhesive coats, another says to let painted coats dry about one hour between applications, and finished outdoor pots may need 3 to 7 days before plant transfer.
Q: Do you need to seal decoupage flower pots?
Sealing is strongly recommended if the pot will be handled often, used outdoors, or contain a live plant. Some guides use clay pot sealer on the inside and outdoor Mod Podge on the outside for extra protection.
Q: Which glue is best for decoupage flower pots?
Mod Podge is the most commonly listed adhesive in the tutorials, especially matte or gloss versions. One source also describes a homemade alternative using 3 parts white glue to 1 part water plus varnish, but commercial decoupage medium is the standard in most step-by-step guides.
Q: How do you get a smooth finish on decoupage pots?
Use thin coats, flatten the decorative paper carefully, and work out air bubbles as you go. A smooth final finish usually comes from multiple light adhesive coats and, in some tutorials, an extra sealing layer after the decoration is fully dry.
Q: Can decoupage flower pots be used outside?
Yes, but outdoor use requires more protection than indoor décor. The guides that address outdoor use recommend sealing the inside, using outdoor paint or outdoor Mod Podge, and waiting several days before placing plants outside.
Q: What is the finished result of a decoupage flower pot?
The finished pot is a decorative planter or gift item with a covered or partly covered surface made from napkins, paper, fabric, or photos. Depending on the materials and sealing, it can look rustic, colorful, distressed, or highly personalized with names, tags, or family images.
Next Steps
Experimenting with texture can really set your project apart. Try adding bits of stenciled structure paste on the rim of the pot before you start your decoupage. This creates a raised, professional-looking detail that looks expensive but costs almost nothing.
Another idea is to create a memory-themed planter for a loved one. Use scanned family photos printed on thin copy paper. Resize them to 1–4 inches for the best fit on the curved surface. Once the pot is sealed and dry, tie a small wooden heart tag around the rim using jute twine. It makes a beautiful, deeply personal gift that feels far more special than anything bought at a store.
My Experience With How to Decoupage Flower Pots Like a Pro
The first time I tried this, I made the classic mistake of using way too much glue. My napkin turned into a soggy mess instantly, and I almost tossed the whole pot in the bin. Persistence paid off, though. I learned that the secret really is in the thinness of the layers. If you rush the drying time, you are essentially trapping moisture that wants to get out, and that leads to those pesky bubbles.
I also discovered that using plastic wrap wasn’t just a “nice-to-have” tip; it was a total game-changer. It allows you to exert firm, even pressure across the entire napkin surface without ripping it. It feels a bit odd to push plastic against wet glue, but it keeps the finish looking professional and bubble-free. Expertly sealing the inside of the pot is the final, non-negotiable step that keeps the project from looking sad and peeling within a month. Once you master the rhythm of “apply, smooth, wait, repeat,” the process becomes almost meditative. What is the biggest hurdle you face when trying new craft projects at home?
Conclusion
Creating your own decoupage flower pots is a rewarding way to bring color into your home. By following the steps above and paying attention to drying times, you will have beautiful planters that last. Whether you are a beginner or looking to refine your technique, these methods ensure a lasting result for any season.
References
- 365 Days of Crafts. (n.d.). Decoupage flower pot tutorial memory gift tutorial. 365 Days of Crafts. https://365daysofcrafts.nikimeiners.com/decoupage-flower-pot-tutorial/
- First Day of Home. (n.d.). How to decoupage flower pots with napkins: Fun DIY for pretty planters. First Day of Home. https://southernhomeandhospitality.com/decoupage-flower-pots-with-spring-napkins/
- Mod Podge Rocks Blog. (n.d.). Decoupage flower pots with pretty napkins. Mod Podge Rocks Blog. https://modpodgerocksblog.com/decoupage-terra-cotta-pots/
- Petite Planet. (2010, January). How to: Decoupage flower pots. Petite Planet. http://petiteplanet.blogspot.com/2010/01/craft-tuesdiy-with-lisa-lopez-decoupage.html

A Teacher with 5 years of experience. Our Expertise, is reliable to meet your full Academic development needs . Worked on many crafts and construction projects offering services from design to development to deployment over the years. You will find many of my works in my business portfolio on request.