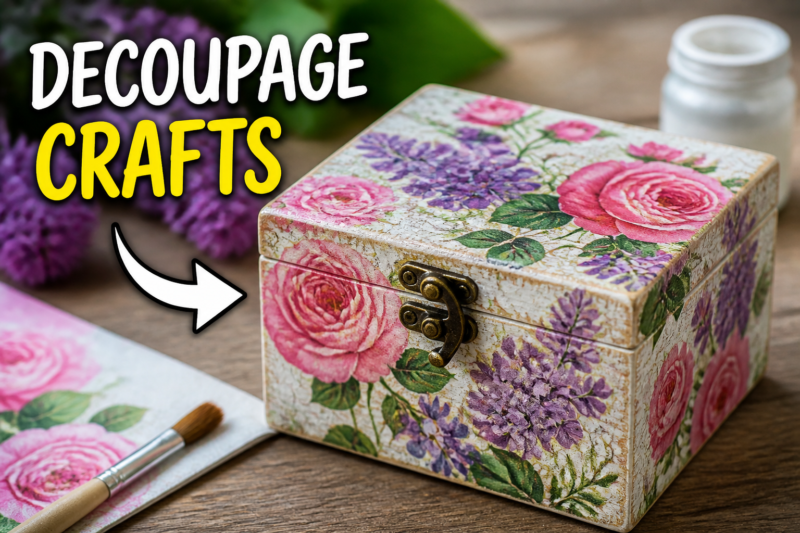


What makes a truly great decoupage project stand out from every other craft you have tried? Decoupage is a versatile craft involving the application of paper, fabric, or pressed flowers onto objects using a clear-drying adhesive. Whether you are a beginner looking for kid-friendly activities or an experienced upcycler renovating furniture, these 9 ideas provide a clear path to professional results. Decoupage turns simple household items into custom decor. You can easily personalize your space for a seasonal gathering or a holiday party with these techniques. Here is how you can start your own project today.
Quick Questions and Answers
Question: What are the easiest decoupage crafts for beginners? Answer: The easiest projects are usually small, flat, or gently curved objects such as cardboard boxes, paper plates, jars, notebook covers, picture frames, and coasters. Beginner guides recommend thin paper or tissue, a glue-sealer like Mod Podge, and a final protective coat after the surface is covered and dry.
Question: What materials do you need for decoupage crafts? Answer: Most beginner projects use cut paper, napkins, magazine clippings, scrapbook paper, tissue paper, or fabric scraps plus a decoupage medium such as Mod Podge or another glue-and-sealer product. Several guides also recommend scissors, a paintbrush, and waxed paper or parchment paper to protect the work surface.
Question: Can you decoupage on wood, glass, and metal? Answer: Yes. The American Society of Interior Designers notes that surface preparation is key for high-quality results on home goods. Decoupage works on wood slices, mirrors, trays, cans, jars, and furniture, which indicates it works on many hard surfaces when properly cleaned and sealed.
Key Takeaways
- Always use a thin layer of medium to prevent heavy bubbles.
- Patience is your best tool; wait for the first coat to dry before sealing.
- Upcycling common household trash like cardboard and jars keeps costs near zero.
1. Map Coasters
Utilize vintage or local maps to cover plain ceramic or wood tiles for a personalized, functional decor item. These work well for gift-giving and require only tiles, paper cutouts, and a moisture-resistant sealer. I suggest applying a final coat of spray sealer to ensure the coasters can handle condensation from glasses. This is a classic 12 Creative Handmade Crafts to Sell on a Budget idea because the materials are cheap and the result looks high-end.
2. Sheet Music Mason Jar Vases
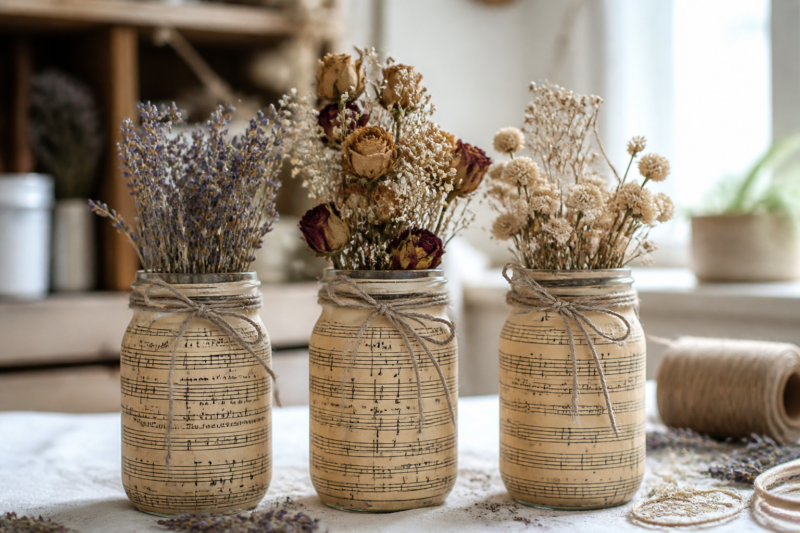
Transform ordinary household jars into rustic, music-themed decor by layering thin sheet music strips. This works by using thin paper that adheres easily to glass without creating excess bulk or creases. Thrift stores or vintage shops often carry old songbooks that provide an authentic aged look for a unique centerpiece.
3. Cardboard Box Organizers
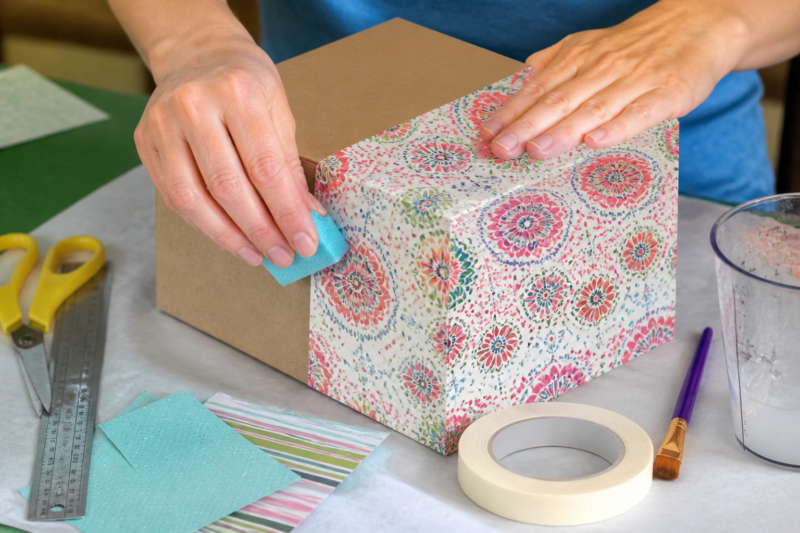
These are perfect for beginners to master the basics of smoothing out air bubbles with a brayer or damp sponge. Use high-quality scrapbook paper to cover all sides of a box, allowing a full 24-hour dry time before adding weight. You should use wax paper under the project to prevent the box from sticking to the work surface during drying.
4. Tissue Paper Paper Plates
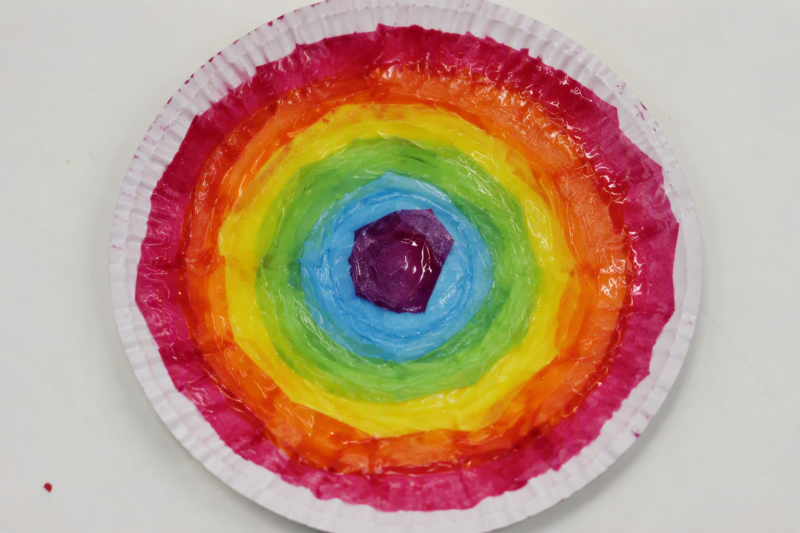
A foundational project for children, this teaches the technique of tearing paper into small, irregular shapes. Paint a thin layer of glue onto the plate, press down tissue paper, and finish with a top-sealant layer to prevent peeling. This allows for easy color-mixing and overlapping patterns to create a stained-glass aesthetic.
5. Fabric-Covered Lampshades
Elevate a plain or thrifted lampshade by applying lightweight cotton fabric or patterned napkins. Use fabric scraps that provide enough tension to cover curves without wrinkling. Avoid heavy fabrics that might block light or create uneven shadows when the lamp is turned on. You can find inspiration for fabric sourcing in 12 Creative Scrap Fabric Projects for Every Budget.
6. Wood Slice Coasters
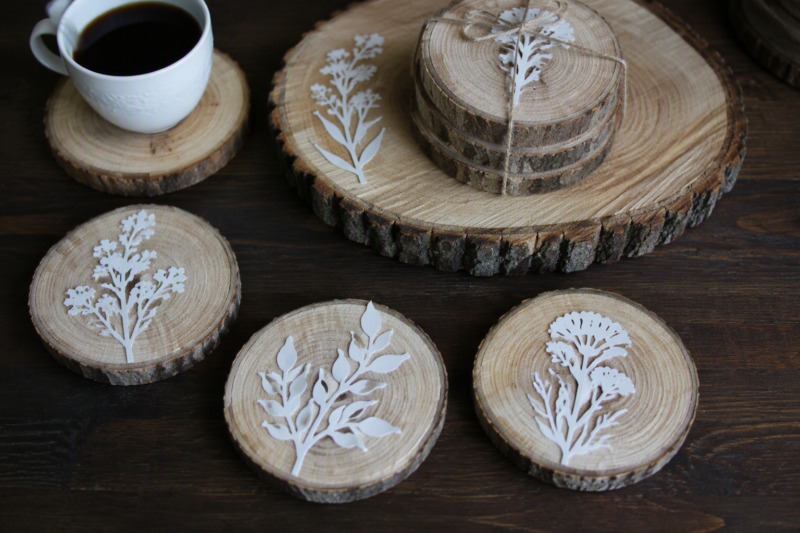
Combine natural aesthetics with modern patterns by decoupaging botanical prints or patterned paper onto rustic wood cross-sections. This project requires multiple layers of varnish or a clear resin topcoat to protect the wood grain and paper design from water damage. Wood slices can be purchased at craft stores or cut from fallen branches for a zero-cost option.
7. 24-Box Advent Calendars
Scale up your skills by decorating 24 individual small boxes for a seasonal holiday project. Each box lid can feature a unique pattern, allowing for modular crafting that fits into limited workspace areas. This is ideal for family-focused holiday traditions where each box can contain a small treat or note.
8. Tumbling Block Risers
Build structural decor items by gluing wooden blocks into a base and decoupaging the surfaces with decorative paper. Pair the wooden base with a wire basket to create a two-tiered rustic riser for kitchen or bathroom displays. This creates a professional-looking piece that appears store-bought but uses inexpensive, upcycled materials.
9. Faux Leather Paper-Bag Frames
Transform standard picture frames into luxury-looking decor by crinkling and gluing paper bags. The process mimics leather texture, providing a high-end look for frames, walls, or even small furniture accents. Use brown grocery sacks for the most authentic paper-bag material, ensuring the bags are clean and free of heavy printing.
| Project | Skill Level | Est. Cost | Best Use |
|---|---|---|---|
| Coasters | Beginner | Low | Daily Utility |
| Vases | Intermediate | Very Low | Home Decor |
| Boxes | Beginner | Low | Organization |
| Furniture | Advanced | Moderate | Statement Piece |
Common Mistakes
Many people rush the drying phase, which leads to sticky surfaces or trapped moisture. If you notice a bubble, don’t panic. Gently lift the corner if the glue is still wet, or use a small needle to prick it and smooth it down if the glue has already set. According to The Spruce Crafts, using too much glue creates a wavy texture that is hard to fix later. Always apply in thin, even coats to ensure a smooth finish on any surface.
FAQ
Q: How do you keep decoupage from wrinkling or bubbling?
The main technique is to apply glue in thin layers, place the paper gradually, and smooth out air bubbles as you go. Welcome to Nana’s explicitly tells crafters to press out bubbles during application, and DLTK Kids also recommends smoothing out bubbles or creases before sealing. If you see a wrinkle, a slightly damp sponge can help soften the paper so you can nudge it back into place before it hardens.
Q: What is the best glue for decoupage projects?
The sources most often name Mod Podge or a similar glue-sealer product as the standard choice. Mont Marte also recommends a multipurpose glue, sealer, and varnish like Deco Pudge, while other guides allow craft glue for kid projects. Professional mediums provide a clear finish that won’t yellow over time, making them a better long-term investment for items you plan to keep.
Q: Are decoupage crafts expensive to make?
They are usually low-cost because many ideas use recycled household items such as jars, tins, boxes, crates, or old books and paper scraps. Mont Marte and Our Crafty Mom both frame decoupage as an upcycling craft, which keeps material costs down for many projects. You can often complete an entire gift set using supplies you already have in your junk drawer or recycling bin.
Q: What decoupage crafts are good for kids?
Paper plates, simple cardboard boxes, picture frames, notebook covers, jars, and pots are all repeatedly listed as kid-friendly projects. DLTK Kids gives step-by-step instructions for those items and suggests tissue paper and school glue or Mod Podge as accessible supplies. These projects are forgiving and allow kids to experiment with colors and textures without needing expensive tools.
Q: How long does decoupage take to dry?
The sources stress that the object must dry completely before further handling or sealing, but they do not give one universal drying time. In practice, drying depends on glue thickness, paper type, and the size of the object, so the safest approach is to follow the product directions on the sealer or glue. Rushing this stage often results in sticky finishes that attract dust or ruin the final coat.
Q: What surfaces work best for decoupage?
Flat or lightly curved surfaces are easiest because the paper can lie down more evenly and smooth out without too many folds. That is why beginner projects often use boxes, plates, coasters, frames, and jars before moving on to lampshades, trays, suitcases, and furniture. Once you get the hang of basic shapes, you can apply these techniques to almost any rigid surface.
Q: How do you seal finished decoupage crafts?
Most guides recommend a final sealing coat over the entire project once the paper is fully dry. The sources mention Mod Podge, craft glue, clear-drying decoupage medium, or a glue-sealer-varnish product, and one coaster project even adds resin for waterproofing. A good sealer protects your hard work from humidity, dust, and daily wear, ensuring the paper doesn’t peel over time.
My Experience With 11 Brilliant Decoupage Craft Ideas for Every Home
I have spent many afternoons covered in a light dusting of paper scraps and dried glue. My first attempt involved a shoebox that I tried to wrap in thick wrapping paper. That was a mistake. I learned quickly that thin, pliable paper like napkins or tissue creates a much smoother finish than cardstock. The most important lesson I picked up is that you don’t need a fancy workspace to get professional results. A kitchen table and a bit of wax paper work perfectly.
The real secret to high-end results is the thin application of medium. Beginners often glob it on, hoping to speed up the process, but that creates a rippled, bubbly disaster every single time. Take your time to brush it on thinly. If the paper starts to curl, let it sit for a minute before trying to smooth it again. It is a slow, meditative process rather than a race to the finish line. I love that decoupage turns trash into something I am actually proud to display on my bookshelf. Have you tried decoupaging anything yet, or are you still planning your first big project?
Conclusion
Decoupage remains one of the most accessible DIY crafts, offering a low barrier to entry while allowing for near-infinite customization. Whether you are upcycling a simple jar or creating an entire set of holiday boxes, focus on patience during the drying phases to ensure your designs remain smooth, protected, and beautiful for years to come.
References
- Our Crafty Mom. (2024). 27 Super Easy and Creative DIY Decoupage Craft Ideas. Our Crafty Mom. https://ourcraftymom.com/diy-decoupage-craft-ideas/
- Welcome to Nana’s. (n.d.). Easy Beginner Decoupage Ideas for Kids. Welcome to Nana’s. https://welcometonanas.com/beginner-decoupage-ideas/
- Mont Marte. (n.d.). 9 decoupage DIY ideas. Mont Marte. https://www.montmarte.com/blogs/inspo/9-decoupage-diy-ideas
- DLTK Kids. (n.d.). DIY Decoupage Crafts for Kids. DLTK Kids. https://www.dltk-kids.com/crafts/decoupage/
- Crafts by Amanda. (n.d.). Decoupage Crafts for Kids. Crafts by Amanda. https://craftsbyamanda.com/category/craft-tutorials/kids-crafts-2/decoupage-crafts-kids-crafts-2/
- Mod Podge Rocks. (n.d.). Over 75 Decoupage Ideas You’ll HAVE to Try!. Mod Podge Rocks. https://modpodgerocksblog.com/decoupage-ideas/
- CC Hobby. (n.d.). Creative ideas for Decoupage. CC Hobby. https://www.cchobby.com/inspiration/creative-activities/decoration/decoupage

A Teacher with 5 years of experience. Our Expertise, is reliable to meet your full Academic development needs . Worked on many crafts and construction projects offering services from design to development to deployment over the years. You will find many of my works in my business portfolio on request.