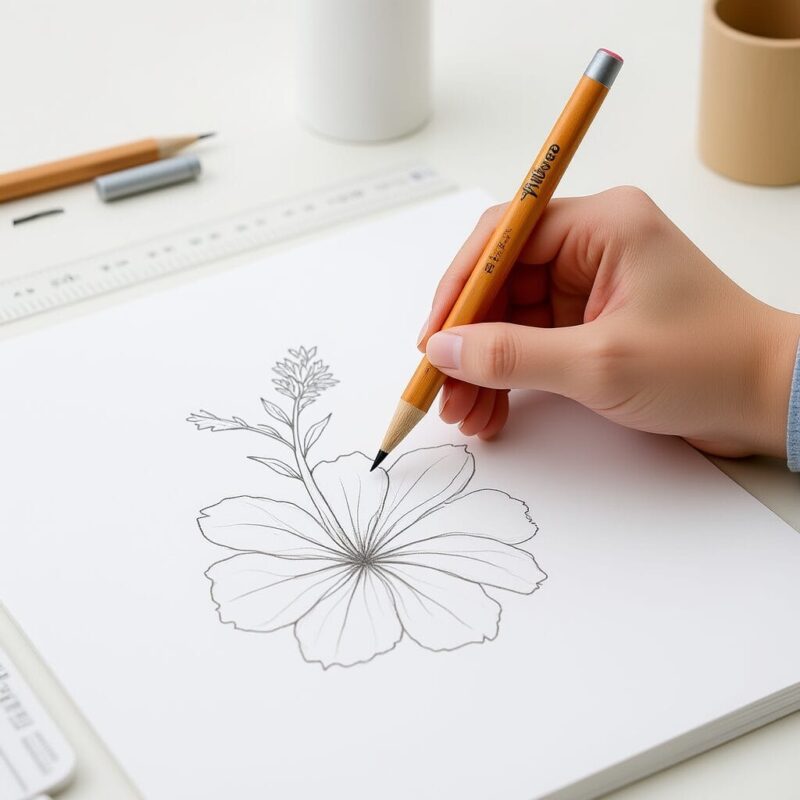
– This Draw So Cute tutorial perfectly demonstrates the elegant simplicity of lily drawing!
There’s something absolutely captivating about lilies that sets them apart from every other flower I’ve drawn. When I first attempted to capture their graceful beauty on paper, I was struck by their perfect balance of elegance and complexity. Unlike the bold drama of a hibiscus or the simple charm of a tulip, lilies possess this sophisticated grace that seems almost architectural in its precision.
I remember spending an entire afternoon in my local botanical garden, just studying different varieties of lilies. Easter lilies with their pure white trumpets, tiger lilies with their distinctive spotted petals, and Oriental lilies with their incredible fragrance and recurved petals. Each variety taught me something new about form, proportion, and the subtle art of botanical drawing.
Understanding the Lily’s Unique Architecture
What makes lilies so fascinating to draw is their structural complexity wrapped in apparent simplicity. Most lilies have six petals arranged in two layers – three outer petals and three inner ones. But here’s what makes them special: these petals often curve backward (recurve), creating these gorgeous, dynamic shapes that seem to dance on the page.
The lily’s reproductive parts are particularly prominent and beautiful. Those long stamens with their pollen-heavy anthers, and the distinctive pistil in the center, create focal points that demand attention and careful rendering. When I draw lilies, I’m not just drawing a flower – I’m drawing a complete botanical sculpture.
Step 1: Establishing the Foundation
I always begin my lily drawings by determining the flower’s orientation. Lilies can face upward, downward, or sideways, and this decision affects everything else in the drawing. For this tutorial, I’ll focus on a side-facing lily, which I find shows off the flower’s elegant profile beautifully.
Using a light 2H pencil, I start with what I call the “gesture line” – a flowing curve that captures the overall movement of the flower. This might be a gentle S-curve if the lily is nodding gracefully, or a more upright line if it’s reaching toward the sun.
Next, I establish the basic proportions with simple shapes. I draw a large oval for the main body of the open flower, and if I’m including a bud or partially opened lily, I add smaller ovals positioned along my gesture line. The key is to think of each lily bloom as occupying its own three-dimensional space.
Step 2: Mapping the Petal Structure
Here’s where my understanding of lily anatomy really pays off. I lightly divide my oval into six sections, but unlike other flowers, I need to account for the fact that lily petals often curve backward. This means some petals will appear foreshortened while others will show their full length and width.
I start with the three most visible petals – usually the ones facing toward the viewer. Each petal has a distinctive shape: narrow at the base where it attaches to the flower center, gradually widening to its broadest point, then tapering to a pointed tip. The edges are typically smooth, creating these elegant, sweeping lines.
The recurved nature of many lily petals means I need to show depth and curvature right from the beginning. I draw the petal edges not as simple curves, but as lines that suggest three-dimensional form rolling away from the viewer.
Step 3: Creating the Prominent Reproductive Parts
This is where lilies really distinguish themselves from other flowers. The stamens are long, prominent, and absolutely crucial to the flower’s character. I draw six stamens radiating from the flower’s center, each topped with a substantial anther loaded with pollen.
These anthers are often a contrasting color to the petals – deep burgundy on white lilies, bright orange on yellow ones – and they’re substantial enough to cast their own shadows. I pay careful attention to their positioning, as they follow specific patterns that vary by lily type.
The pistil, rising from the center, is equally important. It’s typically longer than the stamens and topped with a three-lobed stigma. This central structure gives the lily its distinctive architectural quality.
Step 4: Adding Petal Details and Texture
Now I focus on what makes each lily unique. Some varieties have smooth, pristine petals, while others are decorated with spots, stripes, or subtle color gradations. Tiger lilies, for instance, have these wonderful dark spots scattered across their orange petals, while Oriental lilies might have subtle color changes from their centers outward.
I add the venation patterns that are visible on most lily petals – subtle lines that radiate from the petal base toward the tip. These aren’t always obvious, but suggesting them adds authenticity and helps guide the eye through the flower’s form.
The petal surfaces themselves often have subtle texture variations. Some areas might be more matte, others more glossy, and these differences create interesting light and shadow patterns that I indicate with careful shading.
Step 5: Developing the Stems and Leaves
Lily stems are substantial and sturdy – they need to be to support these large, often heavy flowers. I draw them as slightly tapering cylinders, paying attention to where leaves attach and how they might cause subtle changes in the stem’s contour.
Lily leaves are typically long, narrow, and arranged in whorls around the stem or scattered along its length. They have parallel venation – lines that run from base to tip – and they often have a slightly glossy surface that catches light differently than the flowers.
I pay special attention to how leaves attach to the stem and how they curve in space. Some might curve gracefully downward, others reach upward, and this variety in positioning adds visual interest and natural movement to the composition.
Step 6: Shading for Drama and Dimension
Shading lilies is where the magic really happens. These flowers create dramatic shadow patterns because of their complex, three-dimensional forms. I establish my light source and begin mapping the major shadow areas.
The recurved petals create particularly interesting shadows – areas where the petal curves away from the light become progressively darker. The spaces between petals, especially where they overlap or curve behind one another, offer opportunities for deep, rich shadows that add dramatic depth.
The stamens and anthers cast their own shadows onto the petals, creating intricate patterns that add to the flower’s complexity. I’m careful to observe these shadow shapes accurately, as they’re crucial for making the reproductive parts appear three-dimensional and properly positioned in space.
Working with Different Lily Varieties
One of the joys of drawing lilies is the incredible variety available. Easter lilies, with their pure white trumpets, teach lessons about subtle shading and the challenge of drawing white subjects. Tiger lilies offer the excitement of bold patterns and vibrant colors. Oriental lilies provide lessons in dramatic recurved petals and complex color gradations.
I’ve found that each variety offers its own unique challenges and rewards. Turk’s cap lilies, with their completely recurved petals, push my understanding of three-dimensional form. Madonna lilies, with their historical significance and classical beauty, inspire more formal, studied approaches.
Common Challenges and Breakthrough Moments
My biggest early struggle with lilies was understanding how to show the recurved petals convincingly. These backward-curving forms seemed to defy my usual drawing logic. The breakthrough came when I started thinking of each petal as a ribbon or banner flowing in space, rather than as a flat shape.
Another challenge was the complexity of the stamens and anthers. Early on, I either oversimplified them or got so caught up in details that they overwhelmed the rest of the flower. I learned to see them as integral parts of the flower’s overall design, not separate elements to be added later.
The proportions took time to master too. Lily flowers are often larger relative to their stems than other flowers, and getting this relationship right is crucial for capturing their distinctive character.
Advanced Techniques and Personal Style
As I became more comfortable with basic lily structure, I began experimenting with more dramatic compositions. Lilies lend themselves beautifully to studies of light and shadow, particularly when lit from the side or from behind.
I love creating compositions that show lilies at different stages of development – tight buds, partially opened flowers, and fully mature blooms all in the same drawing. This approach tells a story about the flower’s lifecycle and creates visual rhythm through the variation in forms.
The Meditative Quality of Drawing Lilies
What I find most rewarding about drawing lilies is the meditative quality of the process. These flowers demand careful observation and patient rendering. They can’t be rushed or simplified without losing their essential character.
Each time I draw a lily, I discover something new – a subtle curve I hadn’t noticed before, an interesting shadow pattern, or a unique way the petals interact with light. This constant discovery keeps the process fresh and exciting, even after drawing hundreds of lilies.
Building Your Lily Drawing Practice
I recommend starting with simple lily varieties like Easter lilies or Asiatic lilies before moving on to the more complex Oriental varieties. Focus first on getting the basic proportions and petal arrangements right before worrying about surface details and patterns.
Practice drawing individual petals from different angles to understand their three-dimensional nature. Study how light affects the petal surfaces and practice creating smooth gradations from light to shadow.
Work on the reproductive parts separately until you’re comfortable with their structure and proportions. These elements are so characteristic of lilies that getting them right is essential for creating convincing drawings.
Drawing lilies has taught me patience, observation skills, and an appreciation for botanical complexity. These magnificent flowers continue to challenge and inspire me, and I’m confident they’ll do the same for you. Each lily you draw will deepen your understanding of natural form and your ability to capture beauty on paper.

A Teacher with 5 years of experience. Our Expertise, is reliable to meet your full Academic development needs . Worked on many crafts and construction projects offering services from design to development to deployment over the years. You will find many of my works in my business portfolio on request.