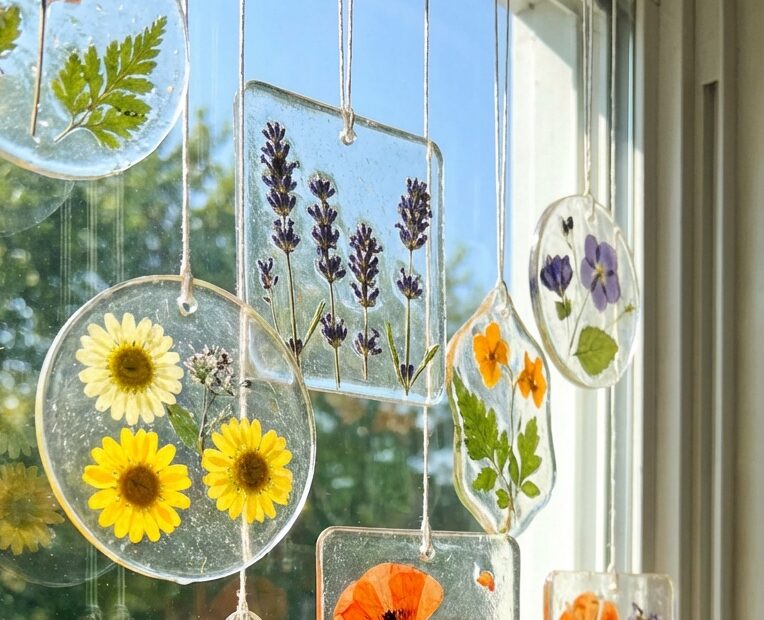

I love this craft because it feels like turning my kitchen into a colorful science project—without buying special supplies. We mix simple ingredients, heat them until they “wake up,” pour the goo into a mold, and then watch it cool into a translucent, glassy film that glows in the sun. It’s a super fun weekend activity for kids and grown-ups, and the results look amazing in windows, on suncatchers, or as gift decorations. If you want an easy eco-friendly-looking DIY that’s beautiful, beginner-friendly, and endlessly customizable, keep reading—because this is about to get seriously colorful.
Key Takeaways
- You can make a moldable, translucent “bioplastic” film using cornstarch + water + a binder (gelatin and/or vinegar).
- A common gelatin-based ratio is ½ cup water, 2 tbsp cornstarch, 1 tbsp white vinegar, and unflavored gelatin powder.
- Optional oil can affect sheen, flexibility, and release (one variation uses 1 cup cornstarch, 4 tbsp water, 1 tbsp vegetable oil).
- Color works best when you remember the film is translucent—start light, then build color gradually.
- Step-by-step mixing and heating help the film form evenly, with fewer streaks and weak spots.
Quick Answer
To make colorful bioplastic suncatchers, I mix cornstarch with water and a binder (often gelatin, sometimes vinegar), stir in food coloring for translucent color, heat until smooth and slightly thick, pour onto a flat or shaped mold, and let it cool fully before peeling it off.
What You Need
| Item | Purpose | Notes |
|---|---|---|
| Cornstarch | Main film-forming ingredient | Use regular cornstarch (not instant pudding mix). |
| Water | Helps cornstarch dissolve and activate | Room temperature water works fine. |
| Unflavored gelatin powder (optional binder) | Creates a clearer, more glassy film | Many tutorials highlight gelatin for reliable “clear” suncatcher sheets. |
| White vinegar (optional helper) | Supports film behavior/setting with starch + gelatin | Often included in gelatin-based ratios. |
| Vegetable oil (optional) | Improves sheen and helps release from molds | One common variation uses it to help the film peel cleanly. |
| Food coloring (gel or liquid) | Adds translucent color | Start small; the film is see-through. |
| Silicone mat or parchment paper | Protects surfaces | Helps reduce sticking when pouring and cooling. |
| Mold (flat surface or cookie cutter setup) | Shapes your suncatcher | Works with windows, hearts, stars, frames, etc. |
| Spoon or whisk | Mixes ingredients smoothly | Avoid lumps for best clarity. |
| Saucepan or microwave-safe bowl | Heats mixture to thicken | Heat gently and stir often. |
| Heat-safe spatula or scraper | Helps pour and spread | Useful for even thickness. |
| Baking rack or flat tray | Holds the pour while it sets | Prevents dust and helps airflow. |
| Scissors or craft knife (optional) | Trims edges | Only needed if you’re making specific shapes. |
| Paper towels | Cleanup | Easy wipe-ups during pouring. |
Step 1: Pick Your Binder Recipe (Gelatin or Vinegar Variations)
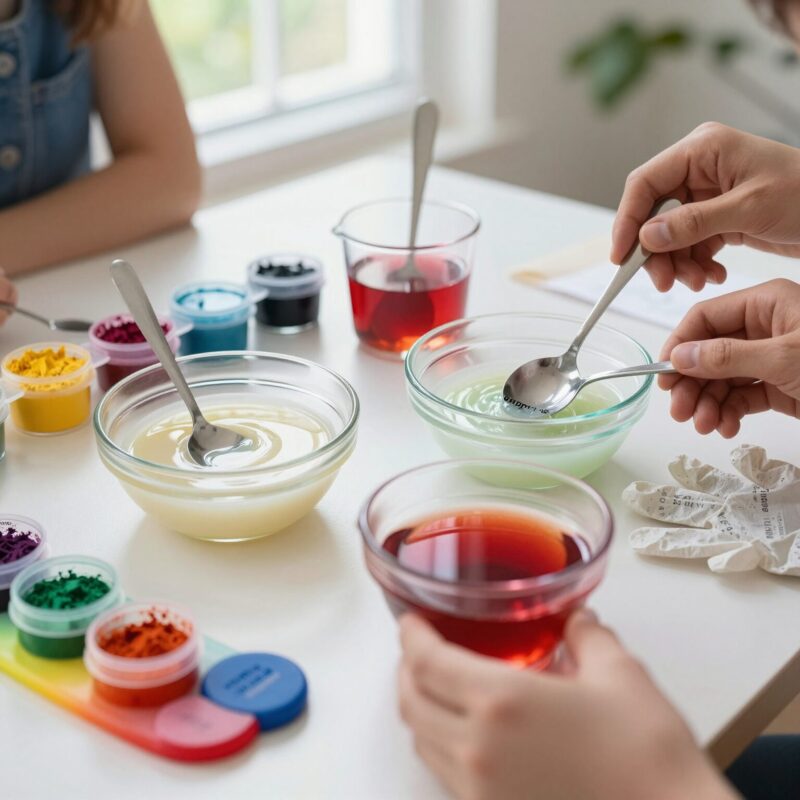
Before I start, I decide which “bioplastic personality” I want: clearer and glossier, or simpler and easier.
Option A (Gelatin-based foundation — often the clearest): A widely cited recipe mixes:
- ½ cup water
- 2 tablespoons cornstarch
- 1 tablespoon white vinegar
- Unflavored gelatin powder (follow your chosen recipe’s amount; many recipes call for a small measured scoop)
This combo is popular because gelatin is specifically highlighted as a reliable binding agent for forming a clear, glassy film.
Option B (Cornstarch + water starting point — simplest): Some makers start with just:
- cornstarch + water
and optionally add a little vegetable oil to adjust texture and prevent sticking.
Tip for beginners: If this is your first batch, I’d go with the gelatin-based approach if you want that “stained glass” glow.
Step 2: Set Up a Clean, Easy-to-Pour Mold Area
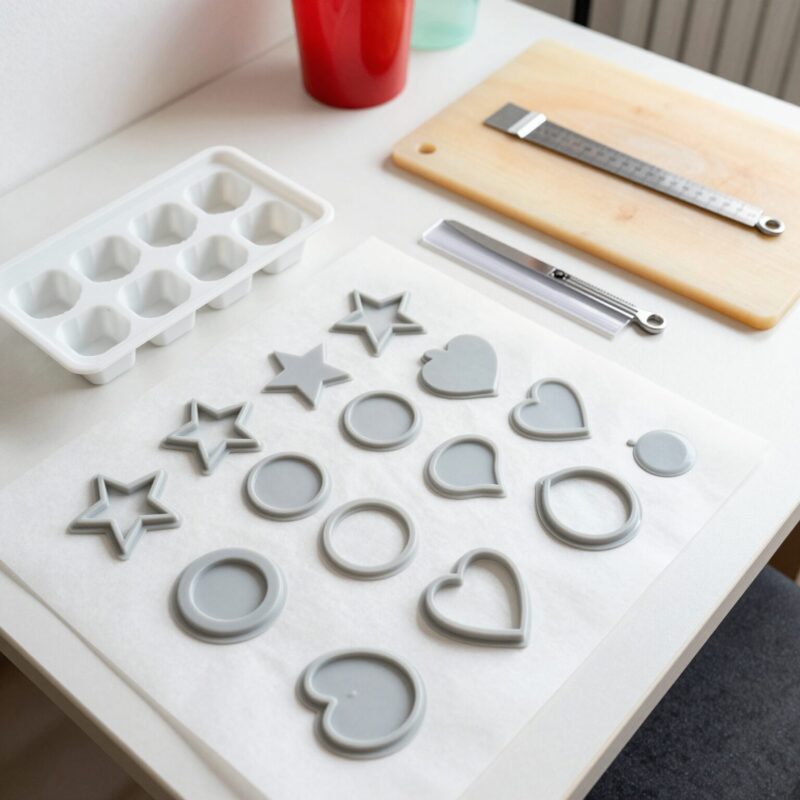
I like to prepare everything first, because once the mixture thickens, it moves fast.
- Cover my work surface with a silicone mat or parchment paper.
- Decide how thick I want the suncatcher:
– Thinner = more delicate, more “stained-glass” light show – Thicker = sturdier, takes longer to set
- If I’m making shapes, I set up a mold method:
– Flat sheets: pour onto a flat surface and cut later – Cutout suncatchers: place a cookie cutter or stencil on a protected surface, or use an insert mold (whatever you have)
I aim for consistent thickness across the mold so the film sets evenly.
Step 3: Mix Dry + Wet Ingredients Until Smooth
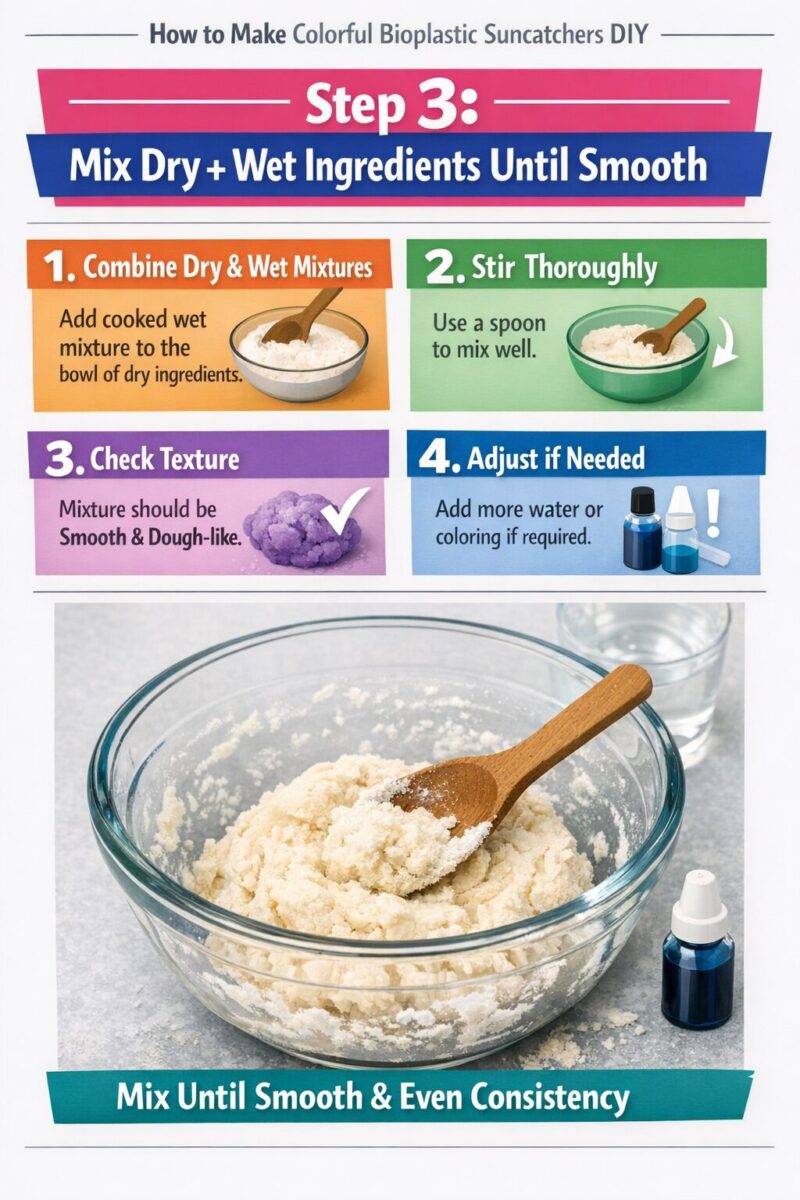
Now I make the mixture without lumps. Lumps are the enemy of clear color.
- In a bowl, I combine the cold water and cornstarch first, stirring until smooth.
- If I’m using gelatin, I stir it in as your recipe directs.
- If I’m using vinegar (common in gelatin recipes), I add 1 tablespoon white vinegar at this stage.
Quick reminder: step-by-step mixing matters. Many short tutorials repeat the same idea—mix, heat/soften, pour, let set—to get consistent film formation.
Step 4: Heat the Mixture Carefully (This Is Where the Magic Happens)
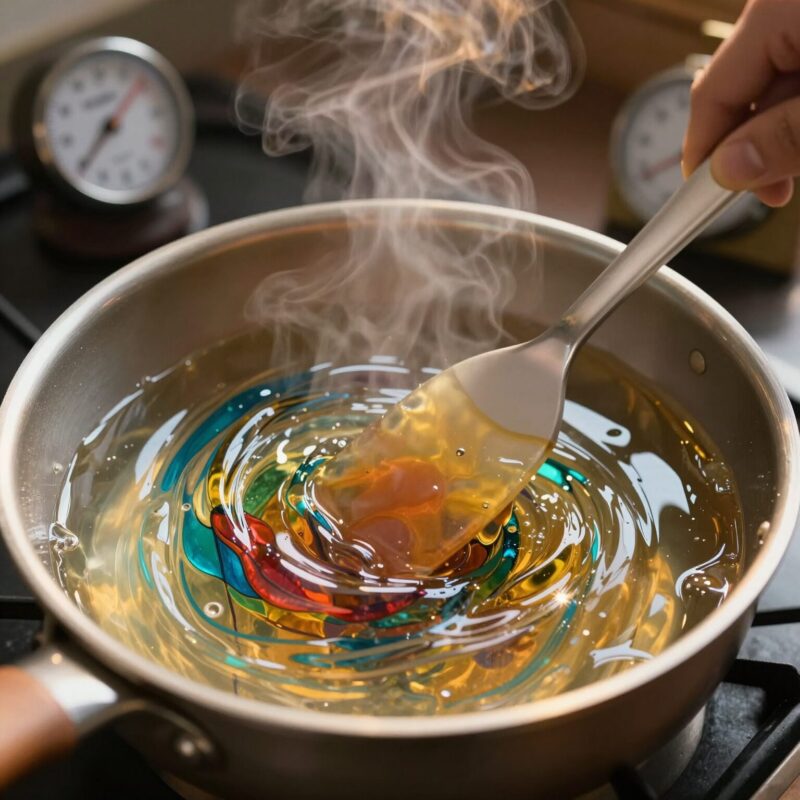
I heat the mixture until it turns glossy, thicker, and more “film-forming.”
- Pour the mixture into a saucepan (or keep in a microwave-safe bowl if that’s your method).
- Heat on medium-low, stirring constantly.
- I watch for a smooth, slightly thick texture—like a thick gel that still pours.
You don’t need to rush. Stirring helps create even clarity and reduces streaky spots. If I stop stirring too long, the mixture can clump or create uneven texture.
Step 5: Add Color for Translucent, Sun-Glow Effects
Here’s the fun part: color.
Because the final film is translucent, sunlight passes through and makes the colors look deeper and brighter. That means I don’t add color like I’m coloring frosting—I add color like I’m painting with light.
- Add a few drops of food coloring to the warm bioplastic mixture.
- Start with small amounts, stir well, and check the shade.
- If I want layered colors, I can:
– mix two colors lightly for marbled effects, or – make separate sheets in different colors, then layer them later (great for frames or window “panels”)
A key creative insight from makers is to experiment with different food coloring shades and mix colors to produce unique translucent hues. I love trying soft gradients—like pink to purple—because the film glows in a pretty way.
Step 6: Pour Onto the Mold and Smooth the Surface
When the mixture is evenly colored and smooth, I pour.
- I pour the mixture onto my mold area (flat surface or inside the shape guide).
- Using a spoon or spatula, I gently spread it to an even layer.
- If I’m using a stencil or cookie cutter approach, I carefully fill the space and try not to over-mess the edges.
This is also when I think about the final display: I plan for a thickness that will hang flat and allow light to shine through.
Step 7: Let It Set Completely (Don’t Peel Too Soon)
This part takes patience, and I’ve learned that rushing causes cracks or tears.
- I leave the suncatcher to cool and set fully.
- What “set” looks like: it changes from liquid/gel to a firm, peelable film.
- When it’s ready, I can lift an edge gently.
If it feels rubbery or sticky, I wait longer. If it’s fully set, it lifts cleanly.
Most tutorials emphasize the step-by-step process for consistent film formation: mix, heat/soften, pour, and let set—so the chemistry and structure line up as the mixture cools.
Step 8: Release, Trim, and Finish the Look
Once the film is set, I remove it carefully.
- If I used a clean silicone mat/parchment, it usually releases more easily.
- If it sticks, that’s often a ratio/texture clue. Some variations show that adding a bit of vegetable oil (like in the 1 cup cornstarch, 4 tbsp water, 1 tbsp oil approach) can help with sheen and release from molds.
If needed, I trim:
- use scissors for small edges,
- or cut with a craft knife for precise lines.
Then I check my work in daylight—this craft is way more beautiful when I see the translucent color in front of the sun.
Step 9: Hang It Where the Sun Can Make It Glow
To get the best suncatcher effect, I place it where sunlight hits directly.
Good ideas:
- taped or clipped to a window
- attached to a string for a hanging decoration
- used on a wreath or mobile
I like to test it in the morning or late afternoon because the angle of the sun makes the colors look extra “stained-glass.”
Tips
- Keep ratios close to the recipe. Small ingredient changes can noticeably impact clarity, flexibility, and ease of removing the film.
- Add color gradually. Too much food coloring can look muddy or uneven in a translucent film.
- Aim for even thickness. Uneven pours often lead to weak spots or cloudy streaks.
- If you’re getting cloudiness: make sure the mixture is smooth before heating and keep stirring while heating.
- If it’s cracking: try a slightly thicker pour or consider adding a little vegetable oil next time for better flexibility.
- If it sticks to your mold: test a release method (more oil next batch, or use silicone/parchment you trust).
FAQ
How do I make the suncatcher more clear and “glassy”?
If I want maximum clarity, I choose the gelatin-based binder because gelatin is repeatedly described as a reliable binding agent for forming a clear, glassy film. I also make sure I stir thoroughly and heat gently until the mixture is smooth before pouring.
Can I make suncatchers with only cornstarch and water?
Yes! A common simpler approach is cornstarch + water, and optional vegetable oil can help with texture and preventing sticking. Just know that gelatin often gives a more consistently “glass-like” result.
Why does vinegar show up in some recipes?
Vinegar (especially white vinegar) is used alongside starch and gelatin in many recipes. It’s often described as helping the film behave better and set more nicely when combined with the other ingredients—so your suncatcher may come out smoother and more stable.
What does vegetable oil do?
Oil can help with release from molds and can affect sheen and flexibility. One shared variation uses 1 cup cornstarch, 4 tablespoons water, and 1 tablespoon vegetable oil, which suggests oil changes how the film peels and feels.
What’s the best way to mix colors?
I start with one color, then add tiny drops of a second color until I get what I like. Because the film is translucent, lighter mixtures can look darker once sunlight passes through. For unique looks, I also try gentle marbling instead of fully mixing.
Are these actually eco-friendly?
Many DIY posts frame bioplastic crafts as a lower-impact alternative to store-bought decorations and emphasize the fun, science-project feel. However, these results don’t always come with detailed biodegradability testing, so I treat them as a reusable-for-a-while craft and dispose of materials responsibly when they wear out.
Conclusion
Making colorful bioplastic suncatchers DIY is one of those crafts that feels both magical and surprisingly achievable. I start with cornstarch and water, choose a binder like gelatin (with optional white vinegar) for that clearer, glassy look, add food coloring for translucent glow, then heat, pour, mold, and let everything set. The best part is that the process turns everyday kitchen items into a mini materials science lesson—plus you get a bright, sunlit decoration that looks like stained glass. So grab your ingredients, pick your favorite color combo, and make something that shines!

A Teacher with 5 years of experience. Our Expertise, is reliable to meet your full Academic development needs . Worked on many crafts and construction projects offering services from design to development to deployment over the years. You will find many of my works in my business portfolio on request.