The first time I tried to draw a puppy – it looked more like a potato with legs than man’s best friend! But here’s the thing I’ve learned through years of practice: drawing adorable puppies isn’t about being perfect; it’s about capturing that irresistible charm that makes us go “aww” every time we see a fluffy little furball.
I’ve taught dozens of people how to draw cute puppies, from complete beginners who’ve never held a pencil artistically to kids who just want to doodle their dream pet. What I love most about this particular subject is how forgiving it is – puppies are naturally imperfect with their oversized paws, floppy ears, and slightly clumsy proportions. This means your “mistakes” often end up making your drawing even cuter!
Today, I’m going to walk you through my foolproof method for drawing an absolutely adorable puppy that’ll melt hearts every time. We’ll start with basic shapes that anyone can master, then gradually add details that bring our little friend to life. I’ll share all the tricks I’ve picked up along the way – from getting those eyes just right to adding personality through expression. Whether you’re sketching for fun, creating art for a child, or just want to improve your drawing skills, this step-by-step guide will have you drawing irresistible puppies in no time!
Table of Contents
- Materials You’ll Need
- Understanding Basic Puppy Proportions
- Step 1: Starting with Basic Shapes
- Step 2: Shaping the Head
- Step 3: Adding the Facial Features
- Step 4: Drawing Those Adorable Eyes
- Step 5: Creating the Perfect Puppy Nose
- Step 6: Adding the Mouth and Expression
- Step 7: Drawing Floppy Ears
- Step 8: Sketching the Body
- Step 9: Adding Legs and Paws
- Step 10: Drawing the Tail
- Step 11: Adding Fur Texture
- Step 12: Final Details and Cleanup
- Common Mistakes and How to Fix Them
- Tips for Different Puppy Breeds
- Adding Personality to Your Puppy
Getting Started: What You’ll Need and Why
Materials You’ll Need
Let me tell you, you don’t need fancy expensive supplies to create amazing puppy drawings! I’ve created some of my favorite sketches with just a basic pencil I found rolling around in my junk drawer. Here’s what I recommend:
Essential supplies:
- A regular #2 pencil or 2B drawing pencil
- An eraser (kneaded erasers are fantastic but any eraser works)
- Plain paper (copy paper is perfectly fine)
Nice-to-have supplies:
- A blending stump or tissue for shading
- A range of pencils (2H for light lines, 4B for darker areas)
- Better quality drawing paper
The most important thing isn’t having perfect supplies – it’s having the willingness to start and keep practicing!
Understanding Basic Puppy Proportions
Before we dive into drawing, let me share something that revolutionized my puppy drawings: understanding what makes puppies look like puppies instead of adult dogs. Puppies have specific proportions that trigger our “cute response”:
- Head size: A puppy’s head is proportionally larger compared to their body than an adult dog’s
- Eyes: Bigger and more prominent, often taking up about 1/3 of the face width
- Paws: Oversized compared to their legs – they haven’t grown into them yet!
- Ears: Usually floppy and often seem too big for their head
- Body: More rounded and pudgy rather than lean and athletic
Keep these proportions in mind as we work through each step – they’re what will make your drawing irresistibly cute!
The Step-by-Step Drawing Process
Step 1: Starting with Basic Shapes
I always tell my students to think like an architect first, artist second. We’re going to build our puppy using simple geometric shapes that anyone can draw. Don’t worry about making perfect circles or straight lines – puppies aren’t geometric anyway!
Start by drawing a large circle for the head. This doesn’t need to be perfect – in fact, a slightly lopsided circle often looks more natural. Below the head circle, draw an oval for the body that’s about 1.5 times the width of the head circle and positioned slightly overlapping the head.
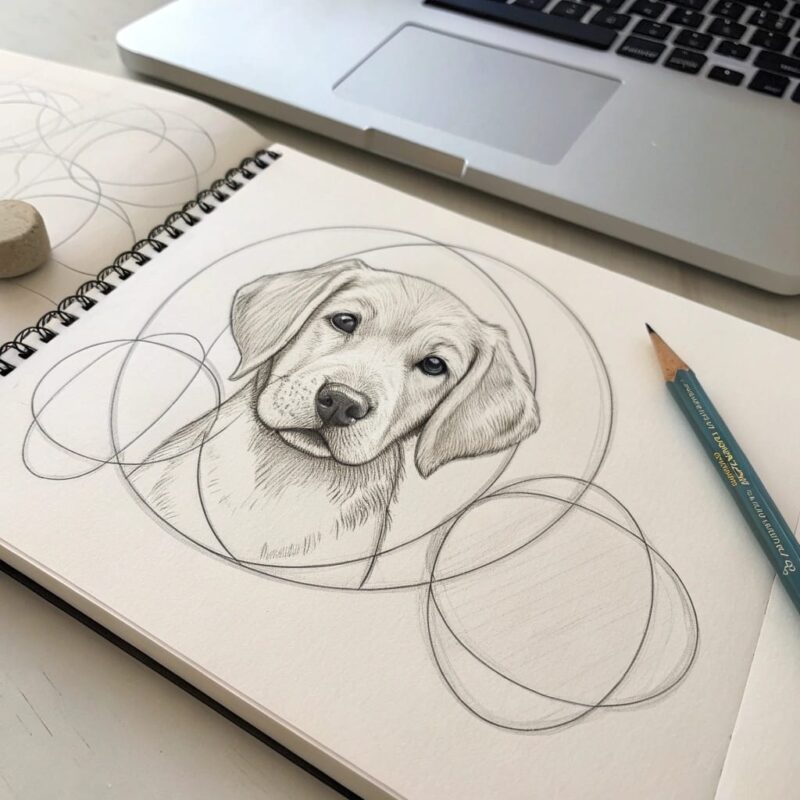
The key here is keeping things loose and light. I use very gentle pencil strokes that I can easily erase later. Think of these shapes as the skeleton that we’ll build our adorable puppy around.
Step 2: Shaping the Head
Now we’re going to transform that basic circle into a proper puppy head! Puppies have rounder, softer features than adult dogs, so we want to avoid any sharp angles.
Starting with your head circle, gently flatten the bottom portion – this will become the muzzle area. The top of the circle can stay round, but soften any harsh lines. I like to imagine I’m sculpting with my pencil, gradually refining the shape rather than trying to get it perfect all at once.
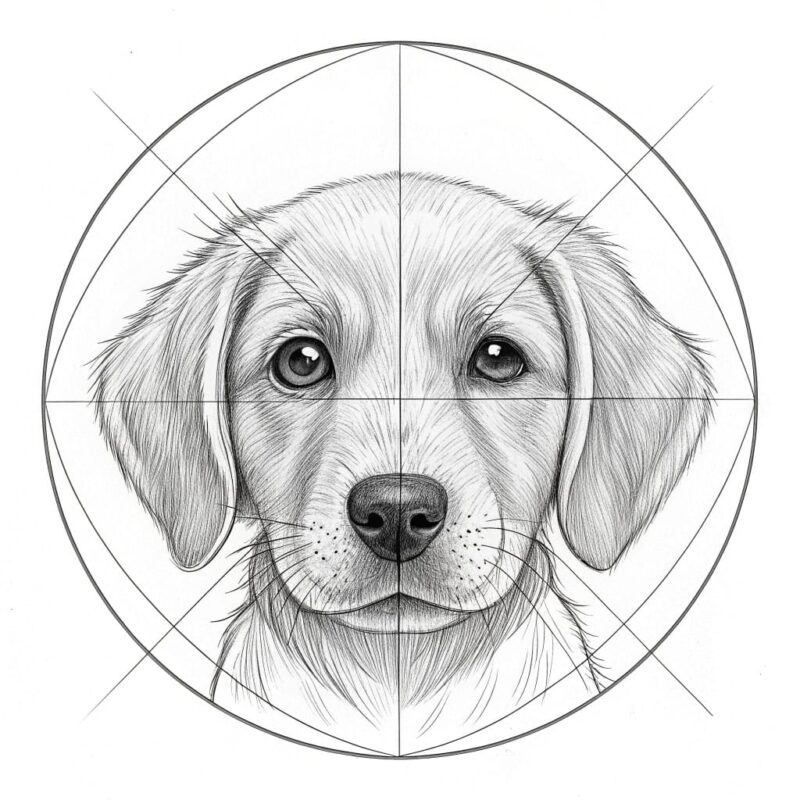
Add a smaller circle or oval extending from the bottom center of the head – this will become the muzzle. Make sure it’s proportionally smaller than the main head; we want that cute puppy look, not a long adult dog snout.
Step 3: Adding the Facial Features
This is where our puppy really starts to come to life! I’m going to share the secret to placing facial features correctly: it’s all about guidelines.
Lightly draw a vertical line down the center of the head – this ensures symmetry. Then add a horizontal line about 1/3 down from the top of the head. This is where we’ll place the eyes. Add another horizontal line about 2/3 down – this marks where the nose will go.
These guidelines aren’t meant to be visible in your final drawing, so keep them very light. They’re just our roadmap to make sure everything ends up in the right place.
Step 4: Drawing Those Adorable Eyes
Eyes are absolutely crucial for achieving that heart-melting puppy expression! I’ve found that slightly oversized eyes with a particular shape work best for maximum cuteness.
Draw two almond shapes along your upper guideline, spacing them about one eye-width apart. Here’s my secret trick: make the eyes slightly larger than you think they should be, then add a small highlight in each eye by leaving a tiny circle unshaded or adding a small white dot.
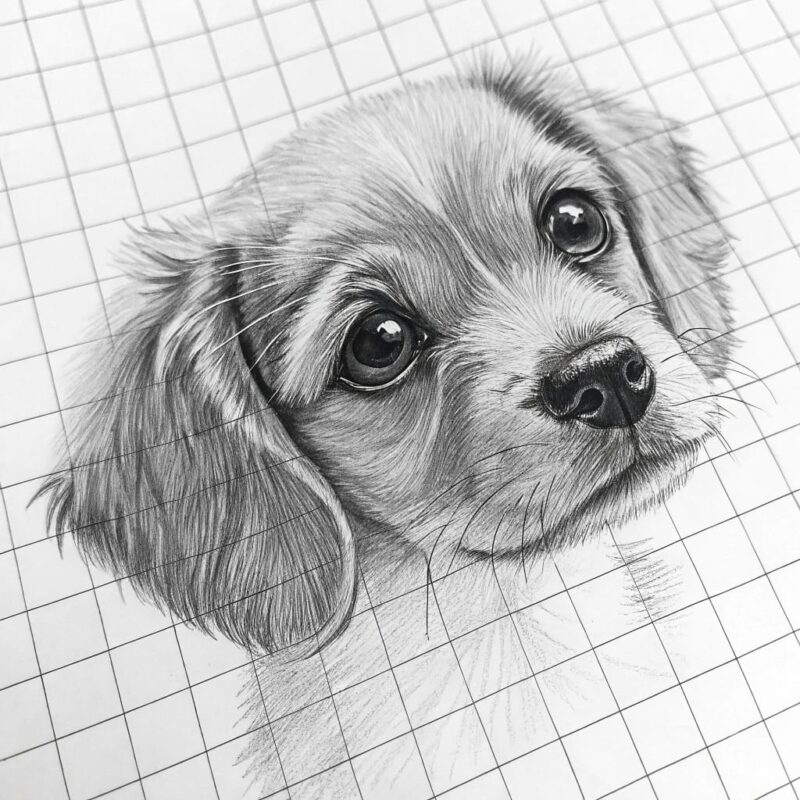
For the most adorable expression, position the highlights slightly off-center toward the top of each eye. This creates that bright, innocent look that makes puppies so irresistible. Don’t forget to add some light shading around the eyes to give them depth.
Step 5: Creating the Perfect Puppy Nose
A puppy’s nose is like their signature – it’s got to be just right! I draw puppy noses slightly larger and more prominent than adult dog noses because everything about puppies is a bit oversized and soft.
Start with a small triangle or heart shape positioned on your lower guideline. Round off any sharp corners – remember, we want soft, cuddly features. Add a vertical line extending down from the nose; this will connect to the mouth later.
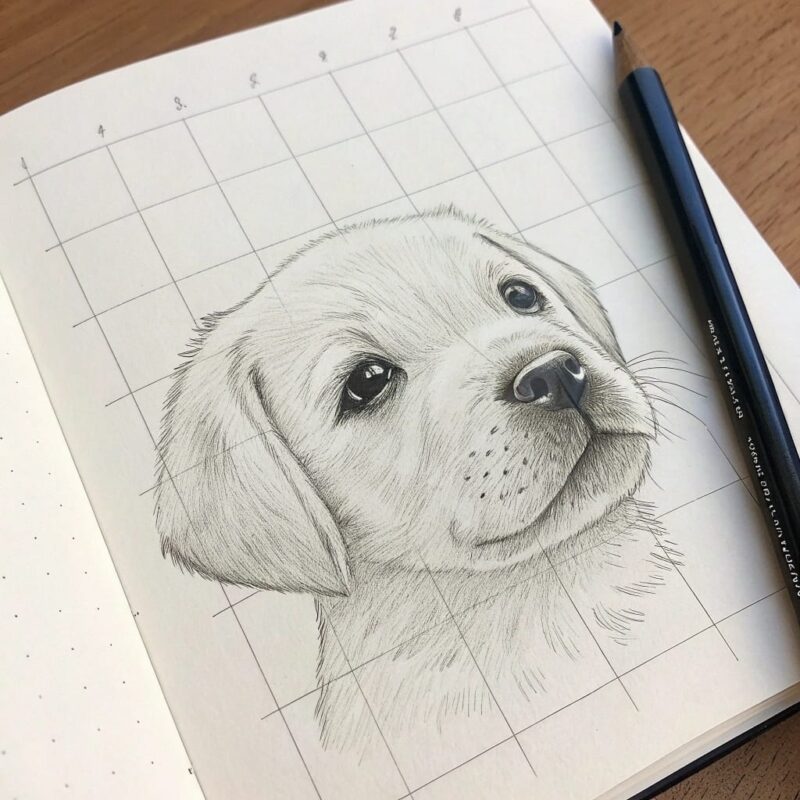
Here’s a detail that makes a big difference: add small curved lines on either side of the nose to suggest the nostrils. Keep these subtle – we want to suggest the form without making it too detailed or realistic.
Step 6: Adding the Mouth and Expression
The mouth is where we really get to inject personality into our puppy! I love drawing slightly open mouths because they suggest panting or excitement, which is so characteristic of happy puppies.
From the vertical line extending down from the nose, draw a gentle curved line to one side, then bring it back and curve to the other side. This creates that classic happy puppy expression. You can even add a small tongue peeking out for extra cuteness!
If you want a more relaxed expression, simply draw two small curved lines extending from either side of the vertical line, creating a gentle smile. The key is keeping the curves soft and friendly.
Step 7: Drawing Floppy Ears
Floppy ears are one of my absolute favorite parts of drawing puppies because they add so much character and movement to the drawing! The way ears fall and fold tells us about the puppy’s mood and breed characteristics.
Start by drawing the ear shapes from the top of the head, making them larger than you might initially think. Puppy ears are often oversized compared to their heads. I like to draw them with gentle curves rather than straight lines – imagine how fabric might drape or fold.
For extra cuteness, make one ear slightly different from the other. Maybe one flops forward more, or one has a different curve. This asymmetry makes the puppy look more natural and endearing. Add some light lines inside the ears to show depth and dimension.
Step 8: Sketching the Body
Now that we have an adorable head, it’s time to give our puppy a body that matches that cute energy! Puppy bodies are rounder and softer than adult dogs – they haven’t developed that lean, athletic build yet.
Refine the oval shape you drew earlier, making it slightly pear-shaped with the narrower end toward the head. Puppies often have that adorable pudgy belly look! Connect the head to the body with gentle curves that suggest a neck, but don’t make it too long or prominent.
The body should feel substantial but not overwhelming compared to the head. Remember, we want to maintain those cute proportions that make puppies so appealing.
Step 9: Adding Legs and Paws
Here’s where we get to add one of the most endearing features of puppies – those oversized paws they haven’t grown into yet! This is actually one of the most fun parts to draw because the slight awkwardness is exactly what makes puppies so charming.
Start with simple cylinder shapes for the legs, making them relatively short and thick. Puppy legs aren’t long and elegant like adult dogs – they’re more like sturdy little posts! Position them slightly wider than they would be on an adult dog to suggest that playful, slightly unsteady puppy stance.
For the paws, draw oval shapes that are noticeably larger than the leg width. Add small lines or curves to suggest toes, but don’t get too detailed. The oversized paws should look soft and padded, ready for lots of playful pouncing!
Step 10: Drawing the Tail
A puppy’s tail is pure joy in motion! Even in a still drawing, we want to capture that sense of movement and excitement that puppy tails are famous for.
I like to draw tails in a gentle S-curve or with an upward curve that suggests wagging. Start from the back end of the body and let the tail flow in whatever direction feels right for your puppy’s personality. Is this a confident, happy puppy with a high, wagging tail? Or a more relaxed pup with a gentle curve?
Make the tail proportional to the body – not too thin or too thick. Add some light lines along the length to suggest fur texture and give it volume.
Step 11: Adding Fur Texture
This is where our smooth shapes transform into a fluffy, touchable puppy! The key to drawing convincing fur texture is understanding that less is often more – we want to suggest fluffiness without overdoing it.
I use short, light strokes that follow the natural direction fur would grow. Around the ears, fur typically grows downward. On the body, it generally follows the body’s contours. Don’t try to draw every individual hair – instead, focus on creating areas of texture that suggest soft puppy fur.
Pay special attention to areas where fur might be fluffier or stick out more, like around the ears, chest, and tail. These little tufts of fur add tremendous charm to your drawing.
Step 12: Final Details and Cleanup
Now comes the satisfying part – adding those final touches that bring everything together! This is where we clean up our construction lines and add the details that give our puppy personality.
Gently erase your guideline circles and construction marks, being careful not to disturb the lines you want to keep. Darken the most important lines – the outline, the eyes, nose, and mouth. Add some light shading under the head, body, and legs to ground your puppy and give it dimension.
Consider adding a simple shadow beneath your puppy to make it feel like it’s actually sitting on a surface rather than floating in space. This small detail makes a huge difference in the overall impact of your drawing.
Troubleshooting and Enhancement Tips
Common Mistakes and How to Fix Them
In my years of teaching puppy drawing, I’ve seen the same mistakes pop up again and again. The good news? They’re all easily fixable!
Problem: The puppy looks like an adult dog Solution: Check your proportions! Make the head larger relative to the body, the eyes bigger, and the paws more oversized. Adult dogs have more balanced proportions, while puppies are all about those adorable size mismatches.
Problem: The expression looks sad or angry Solution: It’s usually in the eyebrows and mouth. Avoid angled lines above the eyes, and make sure the mouth curves upward, even slightly. The angle of the ears can also affect expression – forward-tilted ears look more alert and happy.
Problem: The drawing looks stiff or unnatural Solution: Add some asymmetry! Make one ear slightly different from the other, tilt the head just a bit, or have one paw positioned differently than the others. Perfect symmetry actually looks less natural than slight variations.
Tips for Different Puppy Breeds
While our basic method works for any puppy, different breeds have characteristics that can make your drawing more specific and recognizable:
Golden Retriever puppies: Longer, floppier ears and slightly longer fur around the ears and chest Bulldog puppies: Wider head, shorter muzzle, and slightly more wrinkled features Beagle puppies: Longer ears that hang down, tri-color markings, and slightly longer muzzles Husky puppies: Pointier ears (even as puppies), distinctive facial markings, and fluffier fur
The key is starting with our basic cute puppy and then adjusting specific features to match the breed characteristics you want to emphasize.
Adding Personality to Your Puppy
Once you’ve mastered the basic technique, you can start experimenting with different personalities and expressions. Here are some of my favorite variations:
The Sleepy Puppy: Half-closed eyes, relaxed ear position, and maybe a slightly open mouth suggesting gentle breathing The Alert Puppy: Bright, wide eyes, ears perked forward (even if they’re floppy breeds), and an attentive expression The Playful Puppy: Tilted head, one ear flopping differently than the other, and maybe a tongue peeking out The Mischievous Puppy: Slightly narrowed eyes with a hint of a smile, suggesting they’ve just gotten into trouble
Conclusion
Drawing cute puppies has brought me so much joy over the years, and I hope this step-by-step guide helps you create your own adorable canine companions on paper! Remember, the most important thing isn’t creating a perfect anatomically correct drawing – it’s capturing that special something that makes puppies so irresistibly cute.
Every time you pick up your pencil to draw a puppy, you’re practicing not just technical skills, but also observation and patience. You’re learning to see the world through an artist’s eyes, noticing the subtle details that make each creature unique and special.
Don’t get discouraged if your first few attempts don’t look exactly like you imagined. I’ve drawn hundreds of puppies, and I’m still discovering new ways to capture their charm! Each drawing is a step forward in your artistic journey, and each puppy you create has its own personality and appeal.
The techniques I’ve shared with you today are just the foundation. As you get more comfortable with the basic process, start experimenting! Try different breeds, expressions, and poses. Maybe draw your puppy with a favorite toy, or in a playful position, or interacting with other puppies. The possibilities are endless, and that’s what makes art so exciting.
Most importantly, have fun with it! Puppies represent pure joy and innocent happiness – let that energy flow into your drawing process. When you’re enjoying yourself, it shows in your artwork, and others will feel that joy when they see your adorable puppy drawings.
So grab your pencil, find a comfortable spot, and start creating! Before you know it, you’ll have a whole pack of paper puppies bringing smiles to everyone who sees them. Happy drawing, and remember – every expert artist started with a single line, just like you’re about to make!

A Teacher with 5 years of experience. Our Expertise, is reliable to meet your full Academic development needs . Worked on many crafts and construction projects offering services from design to development to deployment over the years. You will find many of my works in my business portfolio on request.