Learning to make beautiful birthday cards doesn’t require expensive supplies or professional training. With just a few basic materials and clear instructions, you can create impressive handmade cards that look like they came from a boutique stationery shop. These five detailed tutorials will walk you through creating stunning birthday cards, each with its own special technique and appeal.
Tutorial 1: The Classic Fold Birthday Cake Card
Creating a pop-up birthday cake card is easier than you might think, and the result is absolutely delightful. According to the easy birthday pop-up cake card tutorial by DG Handmade, you can complete this impressive card in under 30 minutes.
Materials needed: White cardstock for the base, colored cardstock for the cake layers, markers or colored pencils, scissors, glue stick, and a ruler.
Step-by-step process: Begin by folding your white cardstock in half to create your card base. Next, measure and cut three rectangles in graduating sizes from colored paper—these will become your cake tiers. The largest should be about 3 inches wide, the middle 2.5 inches, and the smallest 2 inches. On each rectangle, make two parallel cuts about halfway down from the top edge, creating a tab in the center.
Fold these tabs backward to create the pop-up mechanism. Apply glue to the outer sections (not the tabs) and attach each tier inside the card, ensuring they’re centered and aligned. When you close the card, the tabs fold flat; when you open it, the cake pops up three-dimensionally. Add final decorative touches like drawn frosting, small paper candles, or colorful patterns on each tier.
Tutorial 2: Secret Message Pull-Tab Card
This interactive card design creates an element of surprise that recipients love. The pull-tab origami envelope card by Saira Art & Craft demonstrates this clever folding technique that requires no special tools—just paper and markers.
Materials needed: One sheet of letter-size paper (preferably colorful or patterned), markers, scissors, and tape or glue.
Step-by-step process: Start with your paper in landscape orientation. Fold the bottom edge up about one-third of the way, then fold the top edge down to meet it, creating a horizontal tri-fold. Open it back up and orient it vertically. Fold both side edges toward the center, leaving about an inch gap in the middle. These folds create pockets.
Cut a strip of paper about one inch wide and as long as your card. This becomes your pull-tab. Before inserting it, write your secret message on this strip. The visible portion can say “Pull me” or have a teaser message, while the hidden portion contains your full birthday wishes. Insert the pull-tab through the pockets you created with your folds. Decorate the front of the card, seal the sides with glue, and your interactive card is complete.
Tutorial 3: Simple Balloon Bouquet Card
This cheerful design looks complex but comes together quickly with basic shapes and creative embellishment. Inspired by handmade birthday card creations by Kajal’s Creative Corner, this tutorial creates a card perfect for any age.
Materials needed: White or light-colored cardstock for base, colored cardstock or patterned paper in various colors, scissors, glue, a black pen or marker, and optional—foam squares for dimension.
Step-by-step process: Fold your base cardstock in half to create a standard card format. Cut out balloon shapes from your colored papers—you can make them all the same size or vary the sizes for visual interest. Aim for five to seven balloons. Simple oval shapes work perfectly; you don’t need to be too precise.
Arrange your balloons on the card front in a clustered bouquet formation. Once you’re happy with the arrangement, glue them down. For extra dimension, attach some balloons with foam squares so they lift slightly off the card surface. Using your pen, draw string lines from each balloon down to a point at the bottom of the card where they all meet, as if someone is holding the bunch. You can draw a small bow where the strings gather. Add your “Happy Birthday” message below or above the balloons, and your cheerful card is finished.
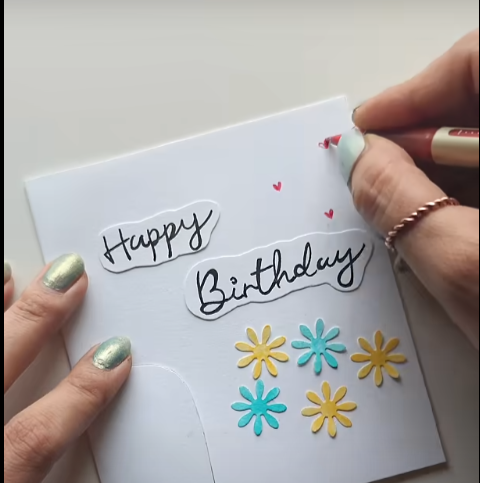
Tutorial 4: Watercolor Rainbow Birthday Card
Creating with watercolors produces beautiful, unique cards with an artistic, handmade quality. Even beginners can achieve stunning results with this simple technique.
Materials needed: Watercolor paper or heavy cardstock, watercolor paints, paintbrushes, water, paper towels, a pencil, and a fine-tip black pen.
Step-by-step process: Cut your watercolor paper to card size and fold it in half. Lightly sketch your design in pencil on the front—a simple rainbow arc works beautifully. With your paintbrush and watercolors, paint each stripe of the rainbow using clean, bright colors: red, orange, yellow, green, blue, and purple. Allow each color to slightly blend with the next while still wet for a dreamy effect.
Let the paint dry completely—this is crucial to prevent smudging. Once dry, use your fine-tip pen to outline the rainbow edges if desired, or leave it soft and undefined for a more artistic look. Add small details like white gel pen highlights or tiny stars. Write your birthday message either directly on the card with the black pen, or on a separate piece of white cardstock that you attach as a banner across the rainbow. The beauty of watercolor cards lies in their uniqueness—no two will ever be exactly the same.
Tutorial 5: Layered Heart Birthday Card
Layering creates impressive dimension and visual interest with minimal effort. This technique, featured in Lucy Patrick’s amazing card designs tutorial, works for any shape but is especially charming with hearts.
Materials needed: Base card (white or colored), three shades of the same color cardstock (light, medium, and dark), heart templates or dies in three graduating sizes, foam tape or foam squares, glue, and a birthday sentiment stamp or sticker.
Step-by-step process: Fold your base card and set it aside. Using your templates or dies, cut out three hearts in different sizes from your three cardstock shades. The largest heart should be cut from the darkest color, the medium heart from the medium shade, and the smallest from the lightest color.
Start assembling by gluing the largest heart to your card front, positioning it slightly off-center for a modern look. Using foam tape, attach the medium heart on top of the large one, centering it carefully. Finally, attach the smallest heart on top using foam tape again. This creates multiple layers of dimension that catch the light beautifully.
Add your birthday sentiment below or beside the layered hearts. You can keep the rest of the card clean and simple, allowing the dimensional hearts to be the focal point, or add small embellishments like dots, stars, or tiny gems around the design. This technique is endlessly adaptable—try it with stars, flowers, or even birthday cake shapes.
Building Your Card-Making Skills
These five tutorials provide a solid foundation for your card-making journey. The beauty of handmade cards is that once you master these basic techniques, you can combine elements from different tutorials to create entirely new designs. Perhaps you’ll add layered hearts to your watercolor cards, or incorporate pull-tabs into your pop-up designs.
However, don’t let lack of specialized equipment hold you back—most of these tutorials require only basic craft supplies you may already have at home.
As you practice these techniques, you’ll develop your own style and preferences. Some people love the precision of geometric designs, while others prefer the organic, imperfect beauty of watercolors. Some crafters enjoy intricate detail work, while others gravitate toward clean, minimalist designs. There’s no wrong approach—the best handmade cards are those that reflect your personal aesthetic and the relationship you share with the recipient.
Remember that card-making is a skill that improves with practice. Your first attempts might not turn out exactly as you envisioned, but each card you create teaches you something new about paper handling, color coordination, composition, and technique. Save your practice pieces to see your progress over time, and don’t be discouraged by mistakes—they’re often the best teachers.
With these five tutorials in your creative arsenal, you’re well-equipped to create thoughtful, beautiful birthday cards for all the special people in your life. The time and care you invest in handmade cards transform them from simple greetings into treasured keepsakes that recipients will hold onto for years to come.

A Teacher with 5 years of experience. Our Expertise, is reliable to meet your full Academic development needs . Worked on many crafts and construction projects offering services from design to development to deployment over the years. You will find many of my works in my business portfolio on request.