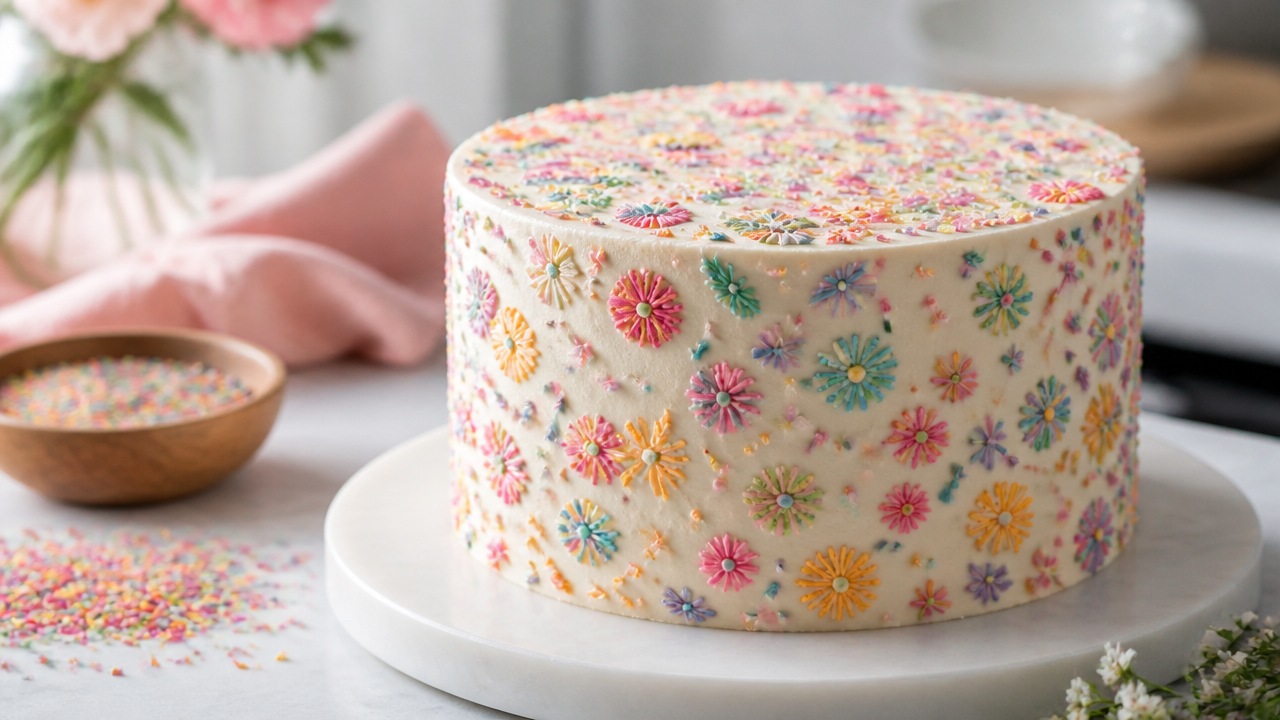
Creating a sprinkle embroidery cake is a precise process that turns a plain frosted dessert into a textured, artistic centerpiece for any celebration. Unlike standard cake decorating that focuses on full coverage, this technique relies on the careful placement of individual sprinkles along a pre-determined design. Whether you are hosting a festive gathering for friends or looking for 13 Amazing Birthday Party Ideas That Save Time, this method offers a way to add personality to your baking. By using simple tools like tweezers and a wooden pick, you can transform your cake into a patterned masterpiece that serves as a unique alternative to classic Birthday Gift Ideas.
Quick Questions and Answers
Question: What is a sprinkle embroidery cake? Answer: A sprinkle embroidery cake is a decorated cake where sprinkles are placed to form a design, often by hand with tweezers or a tracing guide. Sources describe it as a style of sprinkle placement rather than a filling technique, although some tutorials also combine sprinkle decoration with full coverage or hidden sprinkle centers.
Question: How do you make sprinkle embroidery on a cake? Answer: The common method is to frost the cake, trace a design with a stencil or wooden pick, and then place sprinkles one by one with tweezers along the outline. Some decorators work on a chilled buttercream surface so the sprinkles stick more cleanly and the design stays sharp.
Question: What tools do you need for sprinkle embroidery cake? Answer: The main tools are a frosted cake, tweezers, and either a stencil or a wooden pick for tracing the design. For smoother coverage methods, tutorials also use a turntable, icing scraper, fondant smoother, cardboard cake circles, and a cakeboard.
What You Need
| Item | Purpose | Notes |
|---|---|---|
| Tweezers | Precision placement | Essential for picking up individual sprinkles |
| Wooden picks | Design tracing | Use lightly to avoid cracking the frosting |
| Turntable | Decorating access | Allows for steady work around the entire cake |
| Cardboard cake board | Structural base | Should be at least 2 inches wider than the cake |
| Buttercream/Frosting | Adhesive surface | Must be firm enough to hold the weight of sprinkles |
| 10 oz Sprinkles | Visual pattern | Choose shapes that complement your chosen design |
| Optional embellishments | Extra decoration | Edible glitter or candy bows add visual depth |
Preparing Your Cake Canvas
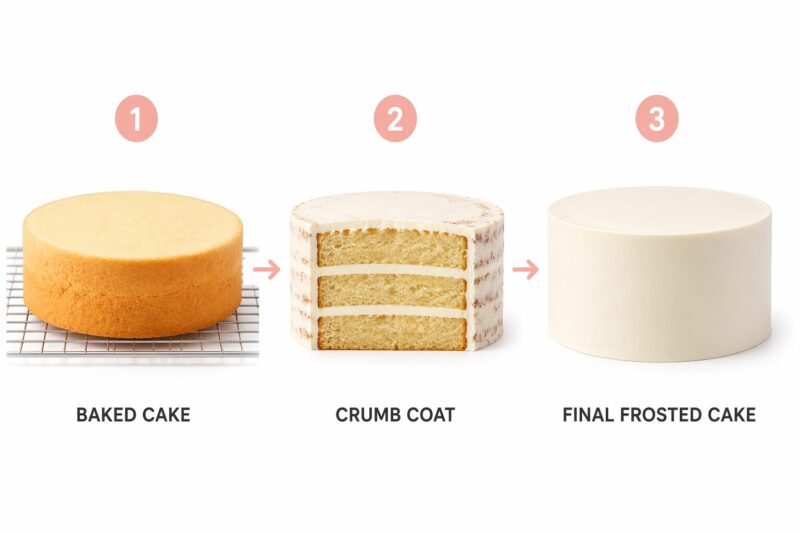
Bake your favorite sponge recipe and let the layers cool in the pan for 10 minutes. Turning them out onto a wire rack early prevents the steam from making the bottom soggy. Once cool, assemble your cake tiers with your choice of filling. Applying a thin crumb coat is necessary to lock in loose crumbs and create a clean foundation.
Chill the assembly for 30 minutes in the refrigerator before applying your final layer of frosting. This sets the structure firmly. A smooth exterior is vital, especially when you plan to use tweezers for embroidery. If you are baking to celebrate, cooking and food safety guidelines ensure your base is sound and hygienic before you spend hours on delicate surface work.
Technique: Tracing and Embroidering Your Design

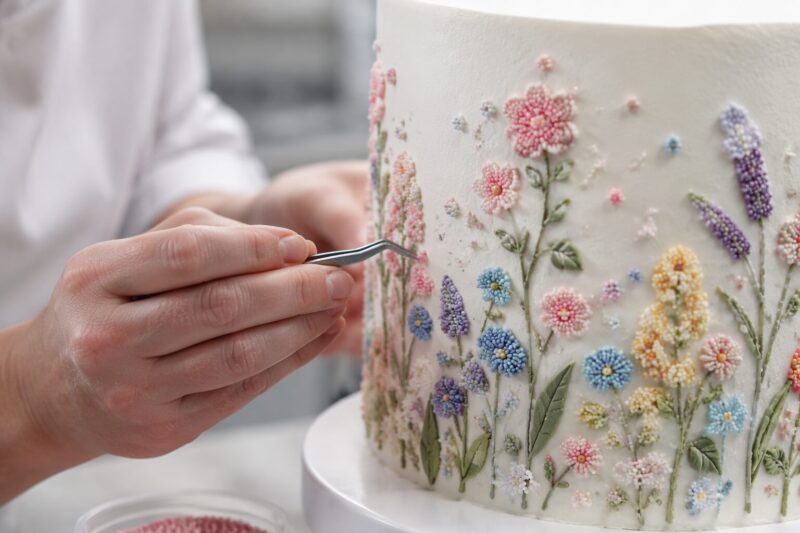
Secure your frosted cake on a turntable. This lets you pivot the surface without pressing your fingers into the side. If you are using a stencil, lay it gently against the chilled frosting to prevent sliding. Use your wooden pick to very lightly drag an outline into the surface.
Do not press too deep, as a crack in the buttercream becomes a permanent mark in your design. Once the outline is visible, you have your guide. Pick up individual sprinkles with your tweezers and press them gently into the frosting, following your path. Think of this as a mosaic; focusing on small sections at a time keeps your spacing consistent and prevents frustration.
Mistakes to Avoid
The most common error is applying heavy pressure. When you press too hard, the underlying frosting distorts and your clean lines disappear. Use gentle taps instead of forceful pushes. Another frequent pitfall is ignoring the resting periods. If your room is warm or the cake is too soft, your design will slide off the bottom of the cake.
Check for gaps after you finish the main details. “Bald” spots are standard in this process. Simply fill these gaps by pressing just one or two extra sprinkles into the empty holes. Always step back and look at the cake from various angles to ensure your embroidery, as noted by Sporckly, captures the intended look.
Troubleshooting: Fixing Common Issues
If you find that the frosting is too soft to hold a pattern, return the cake to the refrigerator for 15 minutes. Cold icing acts like permanent glue for sugar decorations. If you trace a line that turns out crooked, do not panic. Use a warm offset spatula to smooth the surface again, wait for it to set, and re-trace the design.
For dense designs that feel like they might slide, use a tiny dot of fresh frosting to act as an anchor. Think of this as hidden mortar for your sprinkle pattern. Keep your workspace cool, as heat from your hands can soften the buttercream as you rotate the turntable.
FAQs
Q: Can you use buttercream for sprinkle embroidery?
Yes. The tutorials rely on a frosted or buttercream-coated cake because the sprinkles need a sticky surface to adhere to. Some methods chill the buttercream briefly so it firms up without becoming too hard, which makes the sprinkle placement cleaner.
Q: Why do sprinkles fall off cake decorations?
Sprinkles usually fall off when the coating is too soft, too dry, or not pressed into the surface enough. The sources recommend chilling the cake, pressing gently but firmly, and checking for missed spots or holes after the first pass.
Q: How long should you chill a sprinkle cake before decorating?
One tutorial recommends chilling the assembled cake for at least 30 minutes before the crumb coat and another 30 minutes afterward. Another recommends only 10 to 15 minutes after smoothing the buttercream sides, just enough for the surface to set without becoming too firm.
Q: What sprinkles work best for embroidery cake designs?
The best sprinkles are small, easy-to-handle shapes that can be placed individually, since the embroidery style depends on precise placement. For full-coverage styles, multiple tutorials show using large amounts of standard sprinkles mixed by shape and color.
Q: How do you cover a cake with sprinkles evenly?
A common method is to frost the cake, chill it briefly, and then press or roll it through sprinkles in sections while rotating the cake. If gaps appear, the tutorials recommend revisiting the bare spots and pressing more sprinkles into them.
Q: What is the hardest part of sprinkle embroidery?
The hardest part is usually maintaining clean lines and even spacing while placing sprinkles one by one. Tutorials for broader sprinkle coverage also note that working quickly helps before the coating sets, and that the cake may need touch-ups to fix holes or uneven sections.
Q: Is sprinkle embroidery the same as a sprinkle cake?
Not exactly. A sprinkle cake usually means a cake covered in sprinkles or filled with sprinkles, while sprinkle embroidery refers to placing sprinkles in a deliberate design on the frosted surface. Some tutorials combine the two ideas by using embroidered details on a cake that is also heavily decorated.
Recipe Card
Basic Sprinkle Embroidery Cake
A firm-frosted cake featuring detailed, hand-placed sprinkle patterns.
Prep: 45 minutesCook: 35 minutesTotal: 1 hour 30 minutes (excluding chill)Yield: 1 (8-inch) cakeCategory: DessertCuisine: Baking
Ingredients
- 1 baked 8-inch round cake layer
- 2 cups vanilla buttercream
- 10 oz mixed sprinkles (rods, pearls, jimmies)
- 1 tbsp edible glitter
Instructions
- Frost the cake with a smooth layer of buttercream.
- Chill the cake for 30 minutes until set.
- Lightly trace your desired design onto the frosting using a wooden pick.
- Using tweezers, place the sprinkles one by one along the traced lines.
- Fill any gaps with extra sprinkles.
- Serve cold or at room temperature.
Nutrition Info (per serving)
| Calories | 450 |
| Protein | 4g |
| Carbs | 65g |
| Fat | 20g |
| Fiber | 1g |
| Sugar | 52g |
| Sodium | 180mg |
Notes
- Ensure the cake is fully chilled for the best adhesion.
- Use pastel colors for the buttercream to make the sprinkles stand out.
My Experience With How to Make a Sprinkle Embroidery Cake Step by Step
I remember my first attempt at this technique, and let’s just say my “artistic design” looked more like a sprinkle explosion than actual embroidery. The biggest lesson I learned is that patience is non-negotiable. If you try to rush the chilling process, your buttercream turns into a slippery trap for your tweezers. I now swear by a long fridge rest. It turns the cake into a rock-solid canvas, which makes the actual act of placing sprinkles feel like a meditative task rather than a frantic race against melting frosting.
Expertly speaking, the “tackiness” of your buttercream is the most important variable. If it’s too dry, the sprinkles won’t sit, but if it’s too warm, you’ll be chasing your own tail with smear marks. I’ve found that using room-temperature, high-quality sprinkles makes a significant difference; heavy or old ones have a tendency to slide off. Once you get the hang of using the wooden pick to “sketch” your map, the pressure on your hands releases significantly. Do you prefer geometric patterns or floral designs when you start your own embroidery projects?
Next Steps
Experiment with different sprinkle shapes—mixing rods, pearls, and classic jimmies adds depth to embroidery designs. Practice on a dummy cake first if you are planning an intricate design for an event. Store your completed sprinkle embroidery cake in a cool, dry place to prevent premature color bleeding from the sprinkles into the frosting.
References
- TASTE BAKERY. (2026). How to Make a Sprinkle Cake – Easy. YouTube. https://www.youtube.com/watch?v=xTRE5vGXRn8
- Ultimate Sprinkle Cake Tutorial. (n.d.). Ultimate Sprinkle Cake Tutorial. YouTube. https://www.youtube.com/watch?v=hSzwImGOcmY
- Dainty Jewells. (n.d.). Galentine’s Sprinkle Cake Embroidery. Dainty Jewells. https://daintyjewells.com/blog/galentines-sprinkle-cake-embroidery
- Piñata Sprinkle Cake. (n.d.). Piñata Sprinkle Cake. YouTube. https://www.youtube.com/watch?v=w7Tpel9OjWg
- Cupcake Jemma Tips. (n.d.). ALL THE SPRINKLES! Cover your Cake in Sprinkles like a pro with this Top Tip!. YouTube. https://www.youtube.com/watch?v=Jiau4m7Lrvg
- Sporckly. (n.d.). How to Host a Sprinkle Embroidery Cake Party. Sporckly. https://sporckly.substack.com/p/how-to-host-a-sprinkle-embroidery
- Sweetness and Bite. (n.d.). Sprinkle Cake Tutorial. Sweetness and Bite. https://sweetnessandbite.com/sprinkle-cake-tutorial/
- Sugar & Sparrow. (n.d.). How To Cover A Cake In Sprinkles. Sugar & Sparrow. https://sugarandsparrow.com/sprinkle-cake-tutorial/

A Teacher with 5 years of experience. Our Expertise, is reliable to meet your full Academic development needs . Worked on many crafts and construction projects offering services from design to development to deployment over the years. You will find many of my works in my business portfolio on request.