
Raised garden beds have revolutionized home gardening by offering better drainage, improved soil quality, and easier access for planting and harvesting. Whether you’re a complete beginner or looking to expand your existing garden, these twelve layout ideas will help you create a productive and beautiful raised bed garden tailored to your space and needs.
1. The Classic Rectangular Layout
The traditional single rectangular raised bed remains the most popular choice for good reason. There is a reason why this timeless layout works so well.
Step-by-Step Setup: Choose dimensions that allow you to reach the center from both sides—typically 4 feet wide by 8 feet long. This width lets you comfortably reach 2 feet from each side without stepping into the bed, preventing soil compaction. For height, aim for 12-18 inches deep, which accommodates most vegetable root systems. Build your frame using cedar or redwood for natural rot resistance, or opt for composite materials for longevity. Position the bed in a location receiving at least 6-8 hours of direct sunlight daily.
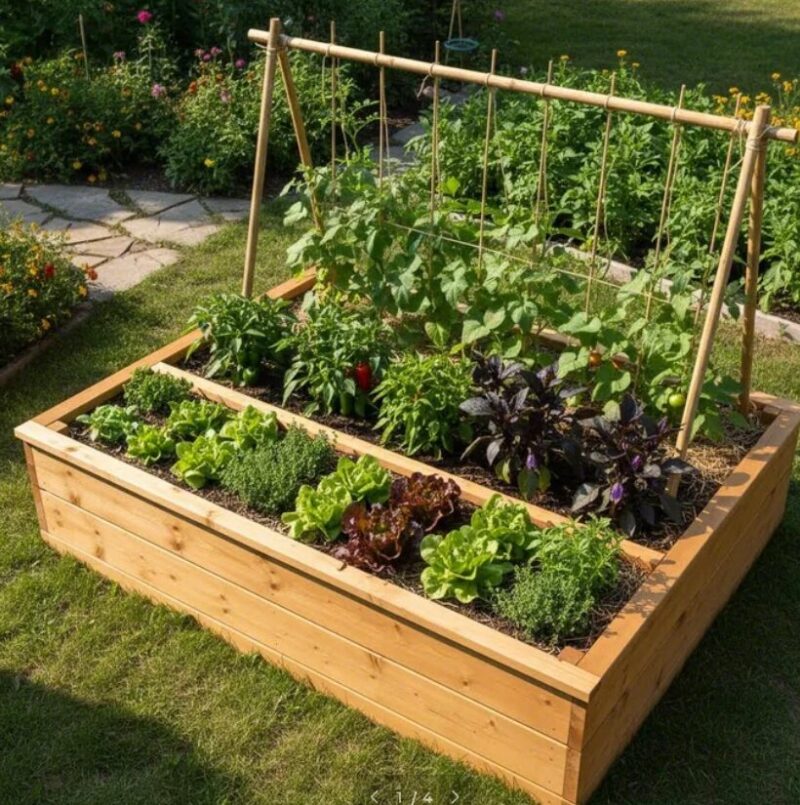
The beauty of this layout lies in its simplicity. You can easily organize plants in rows running the length of the bed, with taller plants like tomatoes and trellised beans on the north side to avoid shading shorter crops. Place medium-height plants like peppers and eggplant in the middle, and reserve the front for low-growers like lettuce and herbs for easy harvesting access.
2. Multiple Raised Bed Garden Layout with Pathways
Create a professional garden system with multiple raised beds and strategic pathways that maximize both productivity and aesthetics.
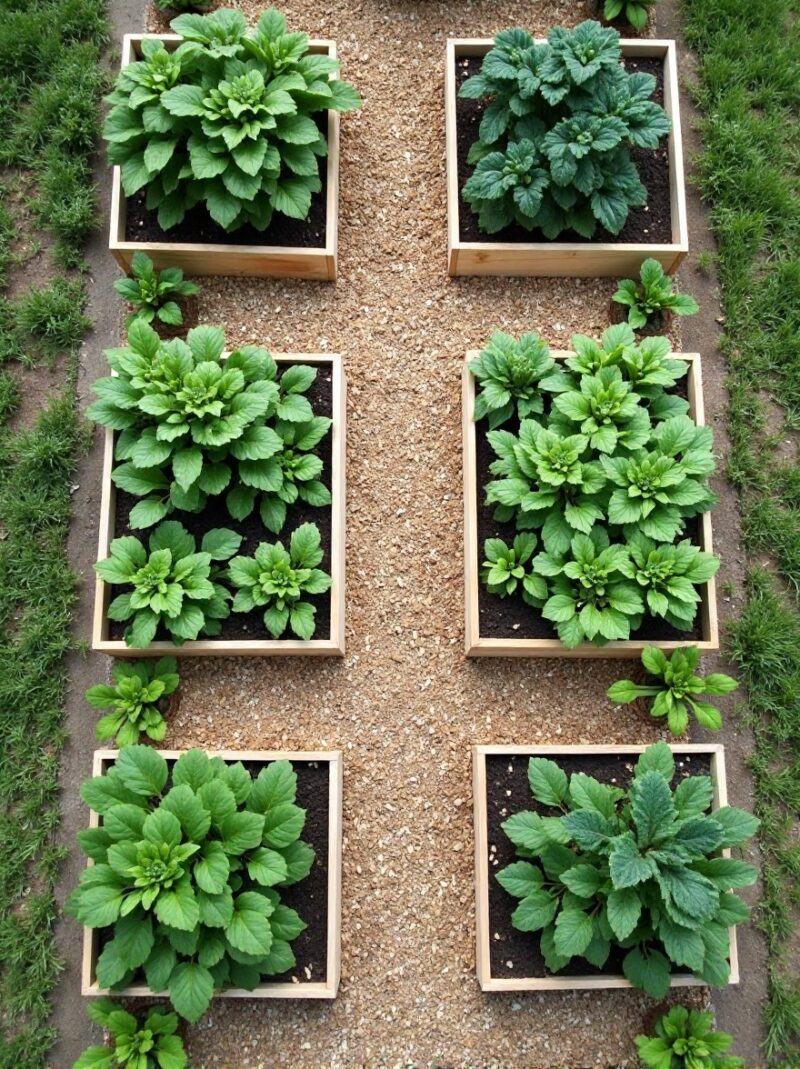
Design Process: Plan for at least three raised beds arranged in parallel, separated by pathways 2-3 feet wide. These pathways provide comfortable walking and wheelbarrow access while you work. Consider the orientation carefully—running beds north to south maximizes sun exposure for most plants, as both sides receive equal light throughout the day. East-west orientation works when you want to strategically shade cool-season crops with taller plants.
This layout creates a cohesive garden space that looks intentional and organized. Cover pathways with wood chips, gravel, or landscape fabric topped with mulch to prevent weeds and create clean walking surfaces. The multiple-bed system allows crop rotation—each season, move plant families to different beds, reducing pest and disease problems while maintaining soil health.
3. U-Shaped Accessible Garden Layout
This accessible design creates three raised beds arranged in a U-shape, perfect for wheelchair users or those with mobility challenges.
Construction Steps: Build three beds forming a U-shape with the opening facing your main access point. Make the center bed the focal point, perhaps slightly larger or featuring a decorative trellis. The two side beds flank it, creating an enclosed garden room feeling. Ensure the central pathway is at least 4 feet wide—sufficient for wheelchair access or turning radius. If needed, create a hard surface pathway using pavers or poured concrete for smooth rolling.
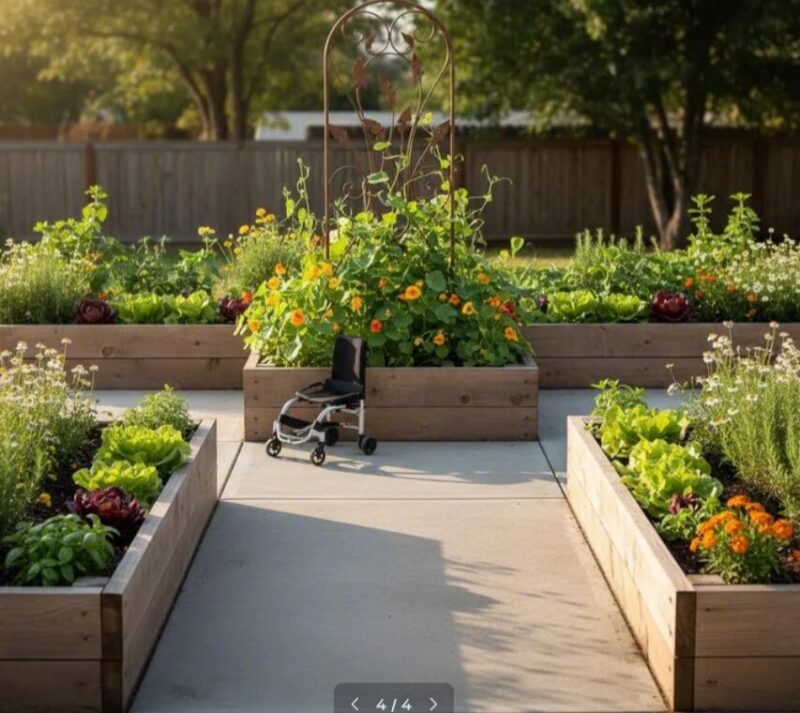
This layout puts all your plants within easy reach from the central pathway. You never need to reach more than 2 feet, and you can access most of the garden from a seated position. Plant frequently harvested items like salad greens and herbs along the inner edges for maximum convenience. Use the back edges for support structures like tomato cages or trellises.
4. Elevated Waist-Height Garden Bed Layout
For those who want to garden without bending, elevated raised beds bring the garden to a comfortable working height.
Building Guide: Construct raised beds on legs, elevating the planting surface to 30-36 inches—roughly waist height for most adults. Build sturdy frames using 4×4 posts as legs, with horizontal bracing for stability. The actual planting box sits on top, typically 12-18 inches deep. This design works beautifully for patio gardens where you’re gardening on concrete or other hard surfaces.
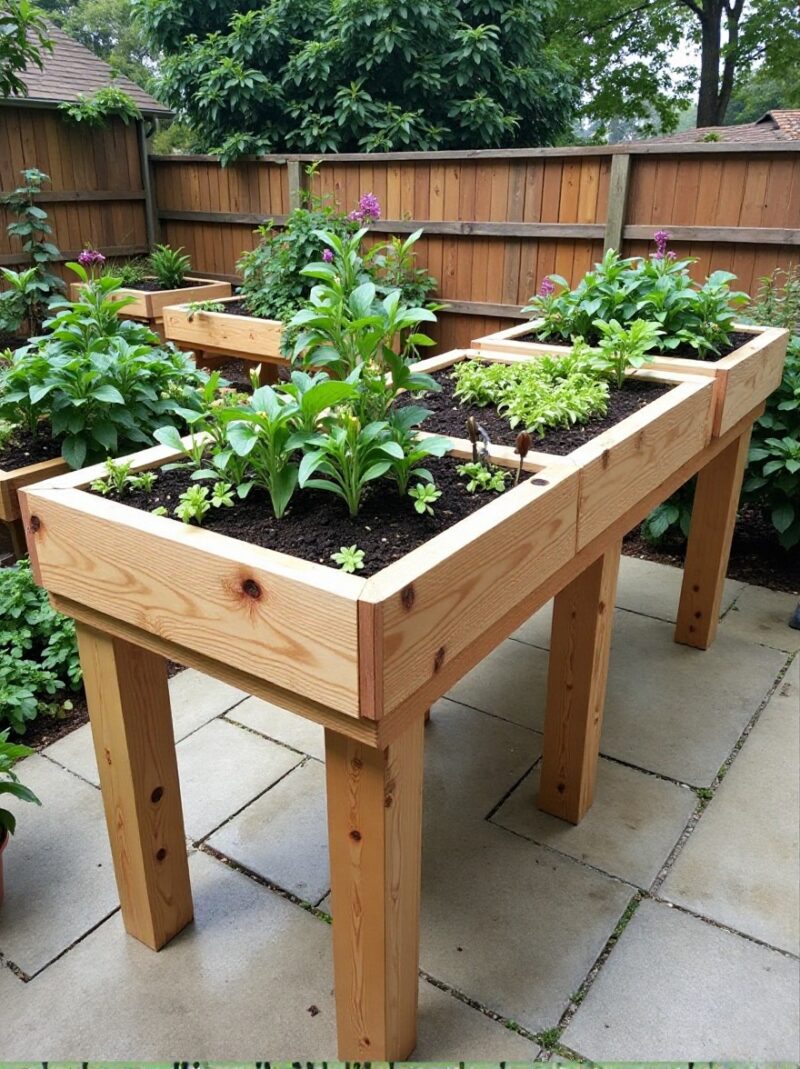
The elevated layout is ideal for smaller spaces like balconies, patios, or courtyards. Arrange multiple elevated beds around the perimeter of your space, leaving the center open for a seating area or grill. This creates an edible outdoor room where your garden surrounds you. The elevation also provides excellent drainage and allows you to create the perfect soil mix without dealing with existing ground conditions.
5. Corrugated Metal Raised Bed Layout
Modern and durable, corrugated metal raised beds create a contemporary garden aesthetic while offering exceptional longevity.
Installation Process: Create a layout using galvanized corrugated metal panels for the bed walls, framed with wood corners and caps. These beds work wonderfully in both contemporary and industrial-style gardens. The metal conducts heat, which can be beneficial in cooler climates by warming the soil earlier in spring. However, in hot climates, consider painting the exterior white or a light color to reflect heat.
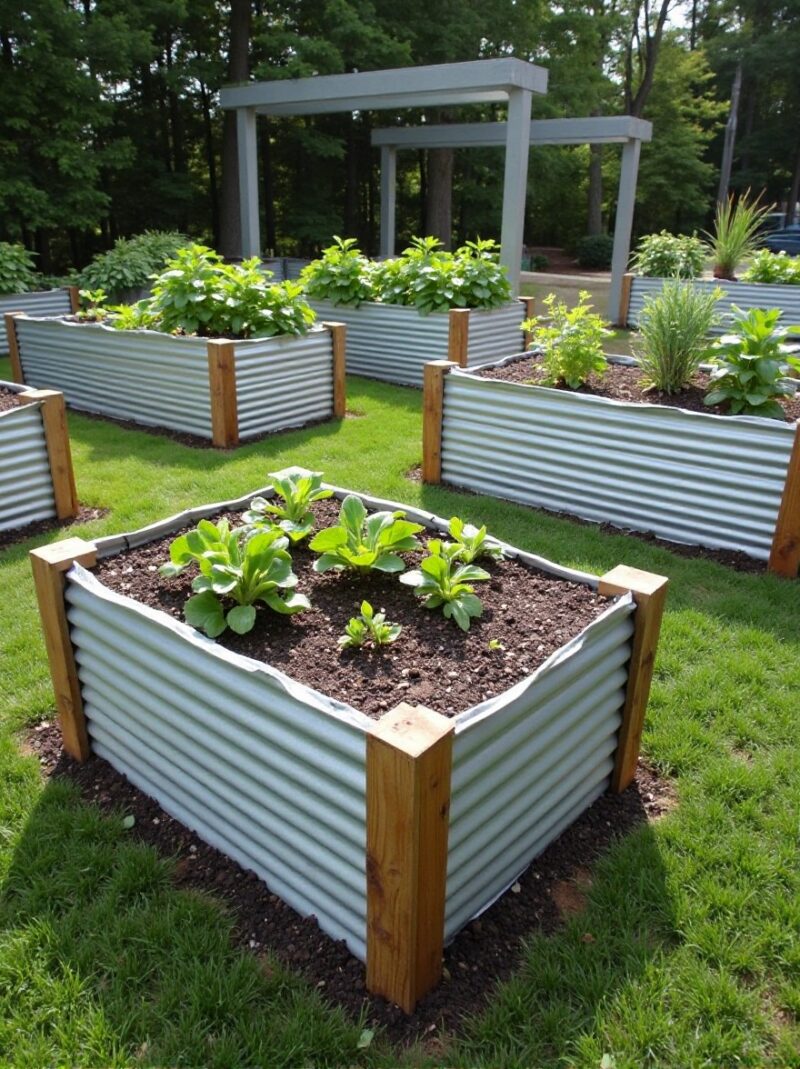
Arrange three to five metal raised beds in a grid pattern for maximum impact. The uniform appearance creates visual cohesion, while the metallic finish adds architectural interest. Line the interior with landscape fabric to prevent soil contact with metal, and ensure excellent drainage by drilling holes in the bottom or leaving gaps. This layout works especially well in modern landscapes with clean lines and minimalist aesthetics.
6. The Perfect 10-Step Designed Layout
Follow this comprehensive design approach to create a raised bed layout that maximizes productivity through thoughtful planning.
Design Steps: Begin by assessing your space—measure the available area, note sun patterns throughout the day, and identify water sources. Choose bed dimensions based on reach (4 feet wide maximum) and available space. Plan pathways wide enough for your needs—consider what equipment you’ll need to move through. Determine bed height based on your soil type and what you’re growing (deeper for root vegetables, shallower for lettuce).
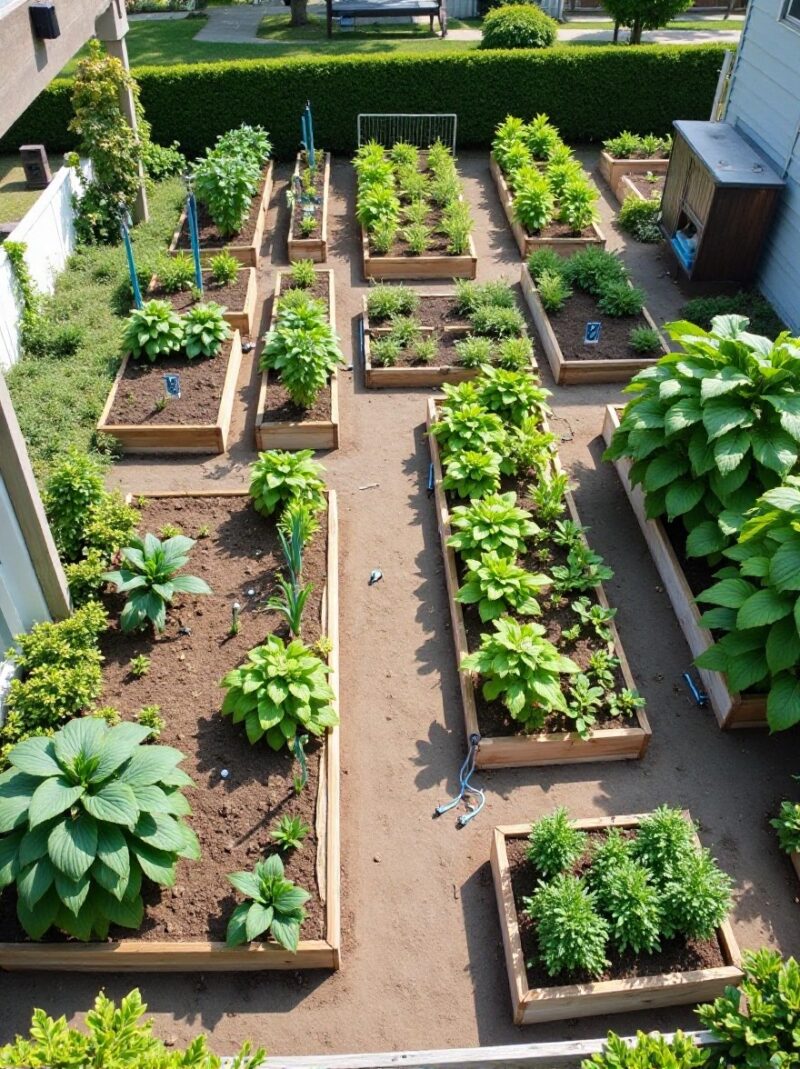
Select materials that fit your budget and aesthetic—cedar for natural beauty, composite for durability, or stone blocks for a permanent solution. Decide on bed orientation for optimal sun exposure. Plan for irrigation—drip lines or soaker hoses work excellently in raised beds. Consider companion planting layouts that maximize space and plant health. Plan crop rotation by drawing out what goes where each season. Finally, think about vertical growing space using trellises, cages, or stakes to maximize productivity.
7. Quick 40-Minute Stackable Block Layout
For instant gratification, this incredibly fast layout uses stackable garden blocks that require no tools.
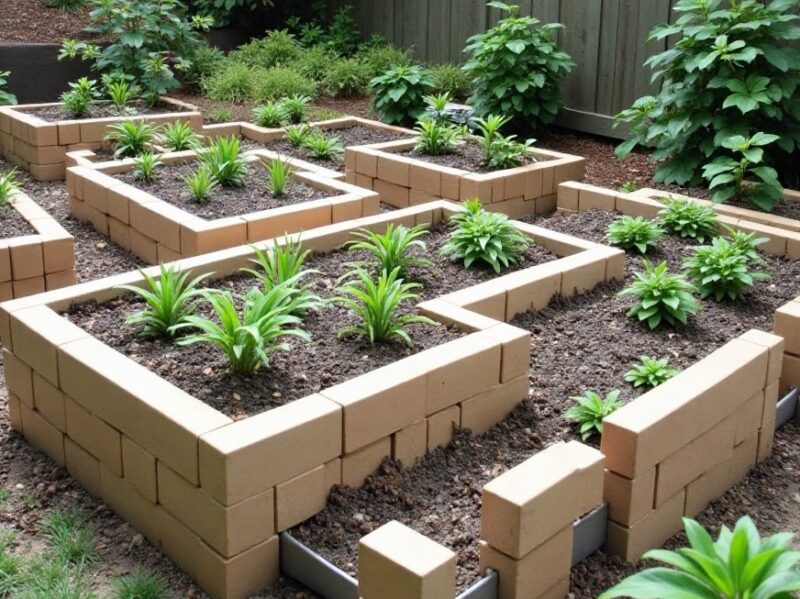
Simple Assembly: Purchase interlocking garden blocks—these ingenious products stack together like LEGO blocks, creating raised beds in minutes. Simply level the ground slightly, then stack blocks to your desired height, typically 2-3 blocks high. Fill with soil and plant. The beauty of this system is expandability—add sections as your garden grows, creating L-shapes, U-shapes, or custom configurations.
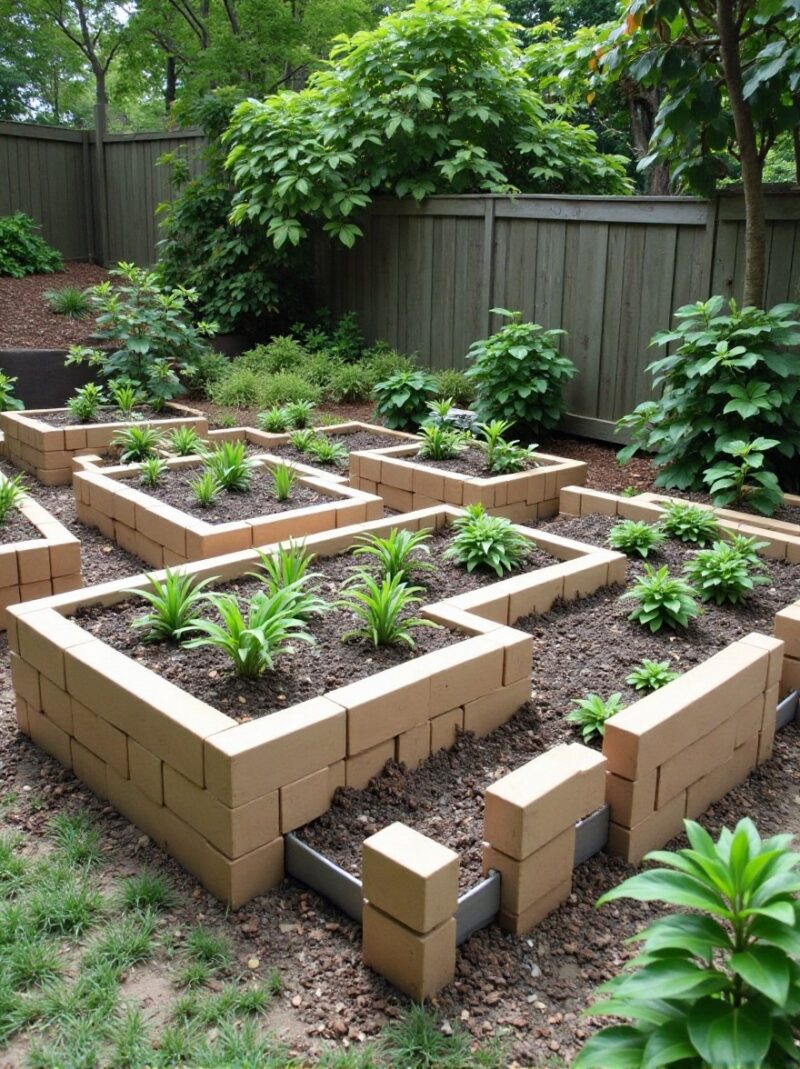
This layout works perfectly for renters or those wanting flexibility. The blocks require no permanent installation and can be disassembled and moved if needed. Start with a single bed to test the location and your interest level. The following season, add more beds, creating an ever-expanding garden. Arrange in a checkerboard pattern with beds alternating with lawn or mulched areas for visual interest and easy access from all sides.
8. Budget-Friendly Recycled Material Layout
These creative recycled designs prove beautiful raised bed layouts don’t require expensive materials.
Construction Ideas: Create raised beds from repurposed materials—cinder blocks stacked two high, galvanized stock tanks (available at farm supply stores), old dresser drawers lined with landscape fabric, wooden pallets disassembled and reconstructed, or even salvaged windows created into cold frames. Arrange these eclectic beds in a cottage garden layout where the mismatched materials add character rather than looking haphazard.
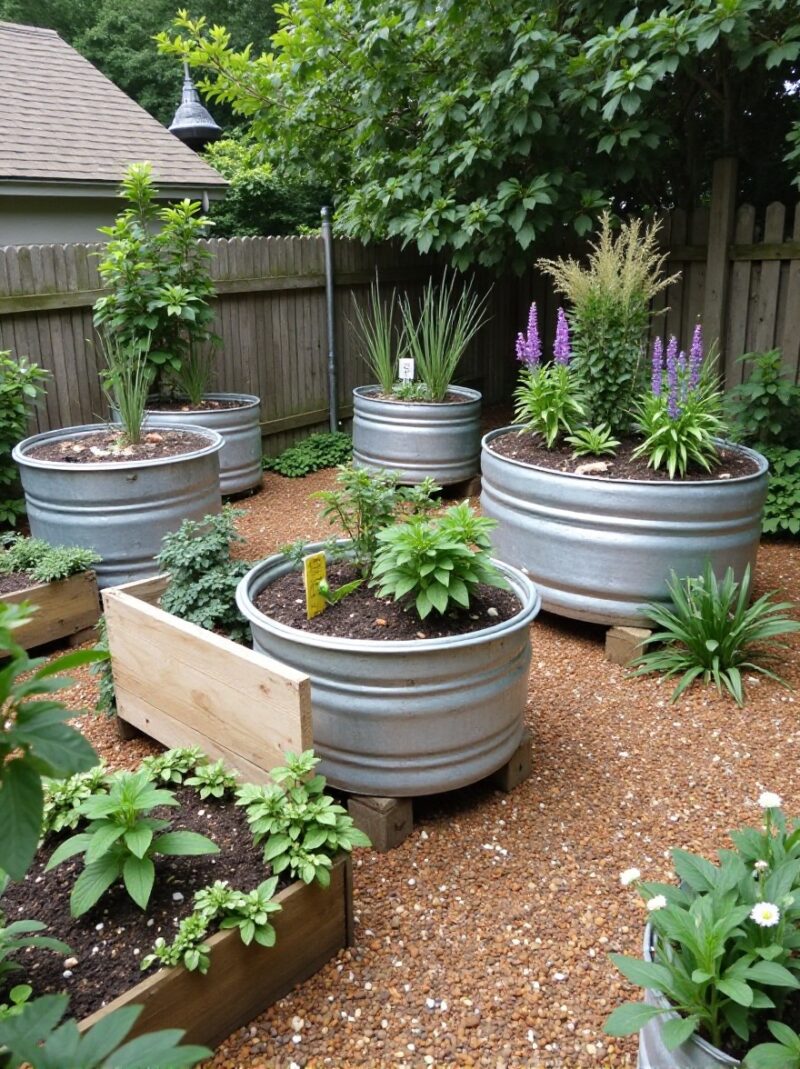
The key to making recycled material layouts work is repetition and organization. Use several of the same type of item—five galvanized tubs in varying sizes, for example—rather than five completely different containers. Arrange them with intention, perhaps in a circular pattern around a central focal point or lined up along a fence. Fill pathways between beds uniformly with wood chips or gravel to create cohesion. The recycled approach saves money while creating a unique, sustainable garden.
9. The Intensive Square Foot Layout
Maximize small spaces with square foot gardening principles applied to raised bed layouts.
Layout Planning: Build a 4×4 foot raised bed—the perfect size for square foot gardening. Divide the bed into sixteen 1-foot squares using string, thin wood strips, or marking with stakes. Each square gets planted with a different crop based on plant size—sixteen radishes or carrots in one square, four lettuce plants in another, one tomato or pepper in a single square, and nine bush beans in another.
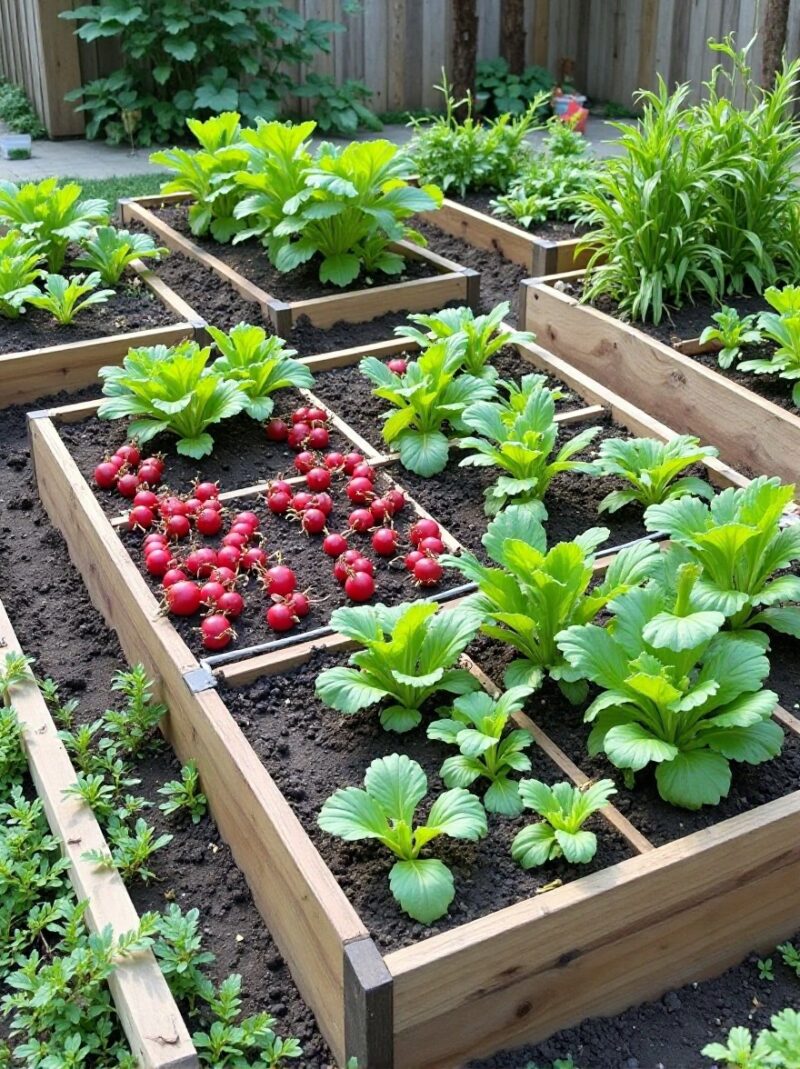
This layout works brilliantly in very small yards or for beginners who want to try many vegetables without overwhelming commitment. The organized grid prevents overplanting while maximizing diversity. Create a mini garden complex with three to four square foot beds, each divided into grids. Rotate what’s planted in each square throughout the season, getting multiple harvests from the same space. The intensive planting also minimizes weeds since plants shade the soil.
10. Massive Elevated Box Layout
Go big with this substantial raised bed design measuring 8 feet by 3 feet, elevated 32 inches off the ground.
Building Process: Construct 4×4 posts as legs, creating a sturdy table-like structure. Build the planting box on top using 2×10 or 2×12 boards for adequate depth. Brace the structure thoroughly—this bed will hold several hundred pounds of wet soil. Line the bottom with hardware cloth to keep out burrowing pests. This substantial layout works wonderfully as a single statement piece in a yard or patio.
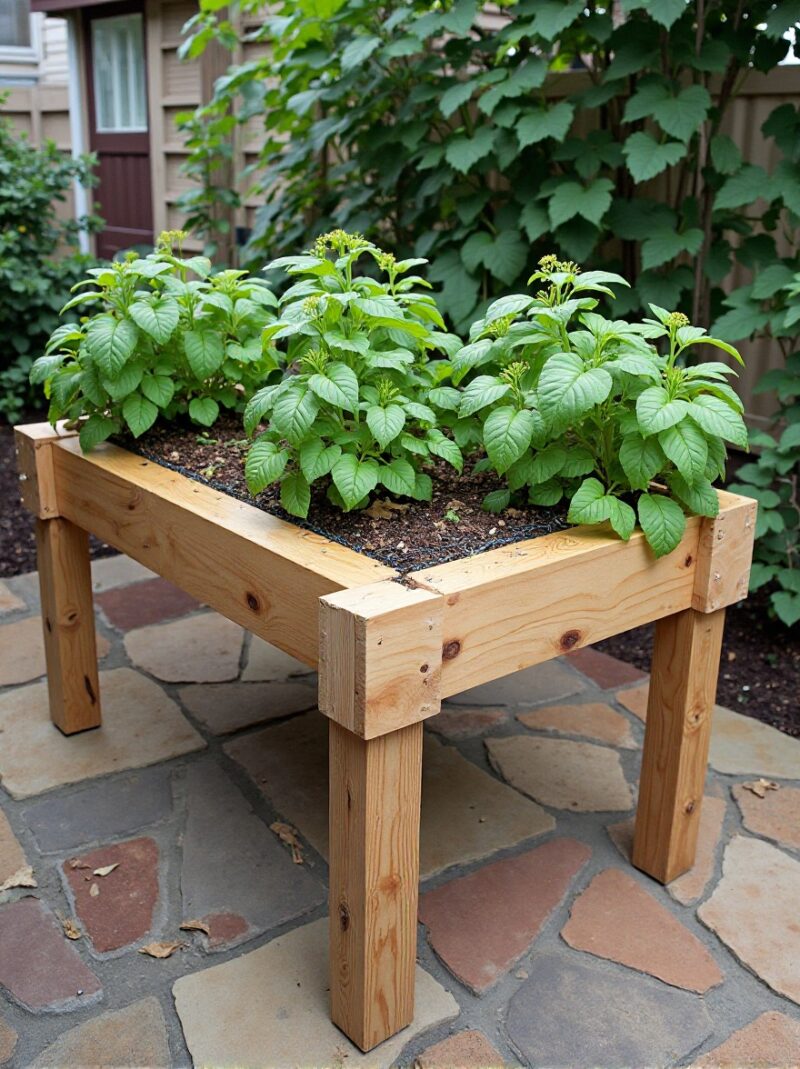
The massive elevated design offers tremendous advantages—no bending, no ground pests like voles or gophers, excellent drainage, and the ability to create perfect soil. Use it as a centerpiece, surrounding it with seating or positioning it as a privacy screen on a deck. Plant heavily with prolific vegetables like cherry tomatoes, bush beans, and salad greens. The elevation and size make this a true garden focal point that’s also incredibly productive.
11. Durable Long-Term Raised Bed Layout
Build beds that last decades with this robust construction approach using the best materials and techniques.
Professional Construction: Use 2-inch-thick cedar boards rather than standard 1-inch lumber for exceptional durability. Install beds on a base layer of hardware cloth buried slightly into the ground, deterring gophers and moles. Reinforce corners with galvanized brackets and use stainless steel screws throughout. Add interior corner bracing every 4 feet on long beds to prevent bowing. Line interiors with pond liner or heavy-duty landscape fabric, leaving the bottom open for drainage but protecting wood from soil contact.
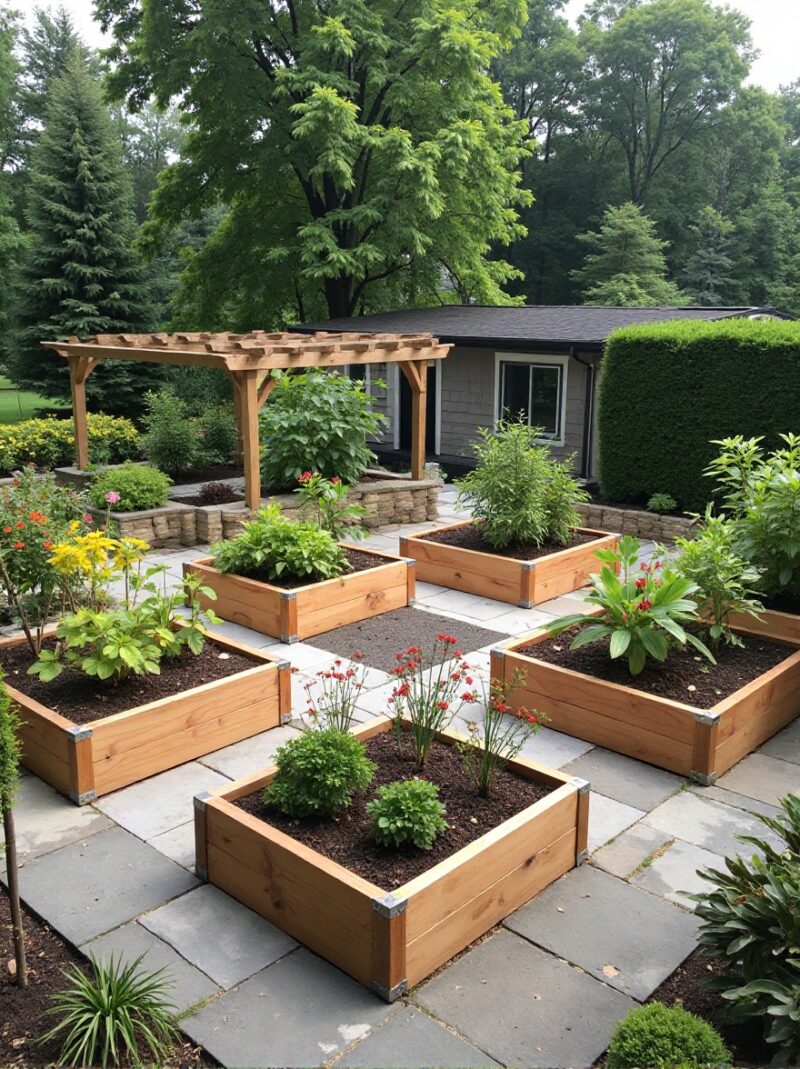
Arrange these premium beds in a formal layout—perhaps four large beds forming a square with a central crossing pathway pattern. This creates four quadrants perfect for crop rotation. The permanence of this installation justifies investing in a beautiful pathway material like flagstone or brick. Add a decorative arbor over one pathway entrance and perhaps a small tool shed or potting bench at one corner. This layout creates a genuine garden room that becomes a property feature.
12. Free-Fill Hugelkultur Layout
Save money on soil while building fertility with this free filling technique that uses organic materials.
Layered Fill Process: Build your raised bed frames, then fill using the hugelkultur method instead of purchasing expensive soil. Start with a bottom layer of logs and large branches—these decompose slowly, creating air pockets and eventually becoming rich humus. Add a layer of smaller branches and twigs. Then add leaves, grass clippings, and garden waste. Follow with a layer of compost or aged manure if available. Top with 4-6 inches of quality soil or compost for planting.
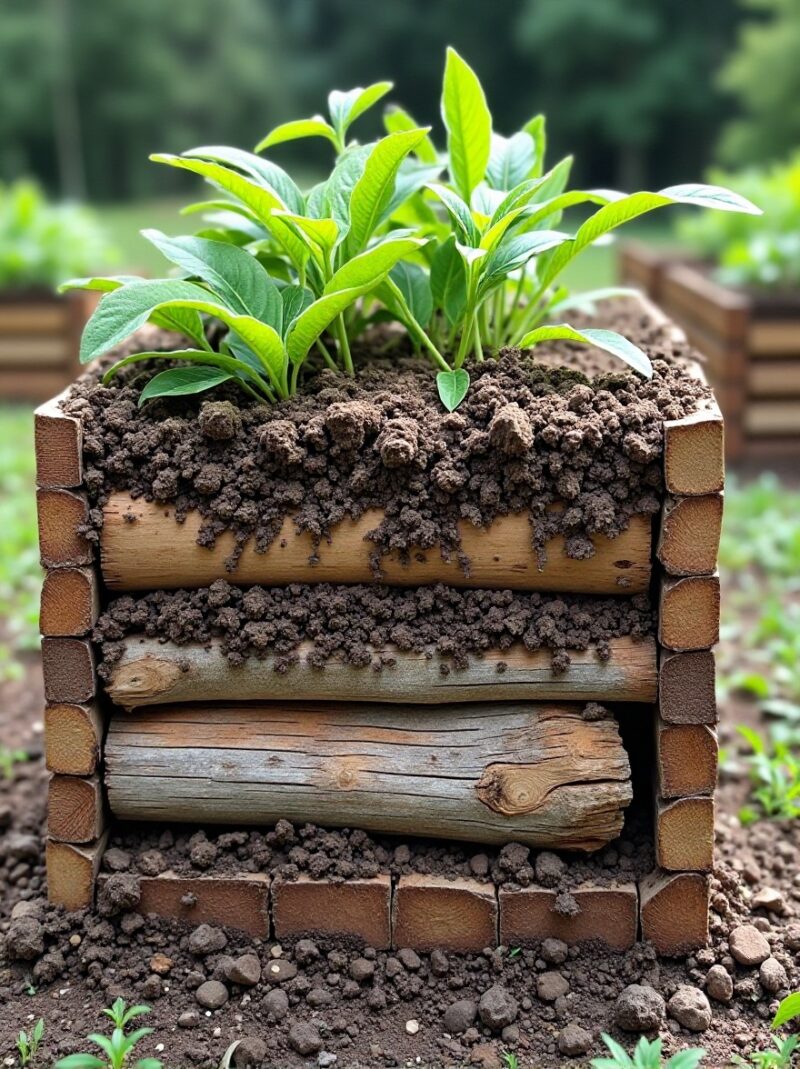
This layered approach reduces the amount of purchased soil needed while creating incredibly fertile, well-draining beds that improve over time. The decomposing wood holds moisture like a sponge while creating spaces for beneficial soil organisms. Arrange multiple hugelkultur beds in any configuration you prefer—the method works in any bed shape or size. The beds will settle slightly as materials decompose, so plan to top-dress with compost annually. Over time, these become the most fertile, productive beds in your garden.
Final Layout Considerations:
When planning your raised bed layout, think beyond individual beds to consider your garden as a complete system. Include space for composting near your beds for easy access to organic matter. Plan for water access—either with a nearby hose bib or by installing permanent irrigation lines. Consider adding a small tool storage area or potting bench within your garden layout. Think about aesthetics—add decorative elements like arbors, garden art, or even a small fountain that makes your raised bed garden a destination, not just a functional space.
Start small if you’re new to gardening—one or two beds allow you to develop skills and routines without becoming overwhelmed. Expand gradually as your confidence grows. Remember that raised bed gardening is incredibly forgiving—the controlled environment means you can create ideal conditions regardless of your native soil. With these twelve layout ideas, you have options for every space, budget, and skill level. Choose the approach that fits your situation, and soon you’ll be harvesting fresh vegetables and herbs from your beautifully designed raised bed garden!

A Teacher with 5 years of experience. Our Expertise, is reliable to meet your full Academic development needs . Worked on many crafts and construction projects offering services from design to development to deployment over the years. You will find many of my works in my business portfolio on request.