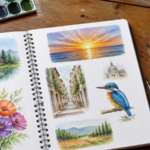
There’s something magical about watching a blank page slowly blossom into life beneath the touch of a watercolor brush. Every stroke feels like breathing color into paper, and when it comes to painting tulips—especially pink tulips—the process becomes even more special. For me, tulips have always carried a quiet elegance. They don’t shout for attention like roses, nor do they overwhelm with complexity. Instead, they whisper beauty, grace, and simplicity. A pink tulip, in particular, feels like a symbol of tenderness, of moments in spring when the air is fresh and hope is close by.
When I first painted a tulip, I wasn’t chasing perfection—I was chasing feeling. I wanted the petals to look soft, like they could sway in the breeze. Watercolor was the perfect medium because it has a way of flowing, blending, and creating unexpected effects, much like nature itself. In this tutorial, I’ll guide you through painting a pink tulip from start to finish, not just as a technical exercise but as an experience—an opportunity to slow down, breathe, and connect with art in its gentlest form. Together, we’ll capture that fragile beauty on paper, one petal at a time.
Table of Contents
- Introduction
- Materials You’ll Need
- Step 1: Sketching the Tulip
- Step 2: Laying the First Wash of Color
- Step 3: Adding Depth with Shadows
- Step 4: Highlighting Petals and Details
- Step 5: Painting the Stem and Leaves
- Final Touches
- Personal Tips & Experience
- Conclusion
🎥 Video Tutorial
1. Introduction
When I first picked up my watercolor brush to paint tulips, I was enchanted by how soft and elegant they looked on paper. The pink tulip, especially, carries such charm—it’s delicate but striking, almost whispering springtime into your artwork. In this tutorial, I’ll walk you through the exact steps I use when painting a tulip with watercolors. You don’t need to be a professional artist—just a little patience and a love for experimenting with colors is enough. Let’s dive in together and create something simple yet beautiful.
2. Materials You’ll Need
To begin, I usually gather everything I’ll need before I even touch the paper. My go-to list includes watercolor paints (with a good pink, green, and a touch of red for shading), watercolor paper, two brushes (a round brush for petals and a fine brush for detail), a pencil for sketching, and, of course, clean water. A tissue or paper towel always comes in handy too—it helps with lifting color and softening edges. Having all your supplies ready makes the process flow smoothly and keeps you focused on the fun part: the painting itself.
3. Step 1: Sketching the Tulip
I always start with a light pencil sketch. Think of it as the blueprint of your flower. The tulip shape is quite simple—it’s almost like an oval with a slight point at the top. From there, I add a few curved lines for petals overlapping each other. I don’t stress about making it perfect; tulips in real life are never perfectly symmetrical, and that’s part of their charm. Once I’m happy with the general shape, I keep the sketch faint, knowing the watercolor layers will do most of the magic later on.
4. Step 2: Laying the First Wash of Color
This is where the painting truly begins to take shape. I wet my brush and mix a soft, watery pink on the palette. With gentle strokes, I lay down the first wash over the petals, making sure not to overload the paper with pigment. This initial wash sets the foundation and creates that luminous, translucent look tulips are known for. At this stage, it’s all about patience. I let the paint dry naturally so the next layers can sit beautifully without muddying the colors. The secret is to let water do most of the blending for you.
5. Step 3: Adding Depth with Shadows
Once the first wash is dry, it’s time to breathe life into the tulip. I add deeper pinks along the petal edges and a hint of red toward the base where shadows naturally fall. Using a slightly drier brush, I control the darker tones, blending softly so they transition seamlessly. This step gives the flower dimension—it goes from flat to full. I often tilt my paper at an angle so the water guides the pigment in a natural direction. If I go too dark, I dab gently with a tissue, which instantly lightens the spot.
6. Step 4: Highlighting Petals and Details
To bring out the delicate structure of tulip petals, I use a fine brush with a more concentrated pink. I follow the curves of each petal, painting thin lines that mimic the veins. These subtle details make the flower appear realistic without overwhelming it. Sometimes I’ll leave tiny white spaces untouched—these highlights suggest where the light hits, giving the tulip its glow. This part is always my favorite because it feels like the flower is waking up on the page, turning from a soft blur into a vibrant, defined bloom.
7. Step 5: Painting the Stem and Leaves
No tulip is complete without its elegant stem and graceful leaves. I switch to a fresh green mix (a blend of green with a touch of blue keeps it natural). The stem is painted with a single downward stroke, slightly curved to mimic real growth. For the leaves, I use broader strokes, starting from the base and pulling outward, letting the brush taper off at the end. By layering darker greens on one side, the leaves gain depth and dimension. The stem and leaves balance the bright pink petals beautifully, grounding the flower in realism.
8. Final Touches
At this stage, I step back and look at the tulip as a whole. If any areas look too flat, I deepen the color slightly. Sometimes I soften harsh edges with a damp brush to keep the painting airy. A hint of purple or crimson at the petal base can enhance richness without overpowering the softness. The goal is harmony—making sure the tulip looks natural yet expressive. I often sign my name with a fine pen or brush at this point, marking the painting complete. That small signature always feels like a proud finishing touch.
9. Personal Tips & Experience
Through practice, I’ve found tulips to be one of the most enjoyable flowers to paint in watercolor. The simplicity of their shape paired with the gentle play of light and shadow makes them ideal for beginners yet satisfying for experienced artists too. I once painted a whole series of tulips in different shades of pink, and each one turned out uniquely beautiful, reminding me of how expressive watercolor can be. My advice: don’t chase perfection. Let the water flow, let colors mix, and enjoy the process as much as the outcome.
10. Conclusion
And there you have it—your very own pink tulip watercolor painting! I hope you found this tutorial fun and easy to follow. Painting tulips has always brought me joy because they embody freshness, renewal, and grace. If you’ve followed along, you now have a tulip that’s completely yours, shaped by your unique brushstrokes. Keep practicing, and you’ll see how each flower you paint grows more refined. Most importantly, enjoy the creative journey. Every painting, no matter how simple, is a reflection of your imagination and patience. Happy painting, and may your tulips always bloom bright!

A Teacher with 5 years of experience. Our Expertise, is reliable to meet your full Academic development needs . Worked on many crafts and construction projects offering services from design to development to deployment over the years. You will find many of my works in my business portfolio on request.