
Introduction to Reusable Bowl Covers
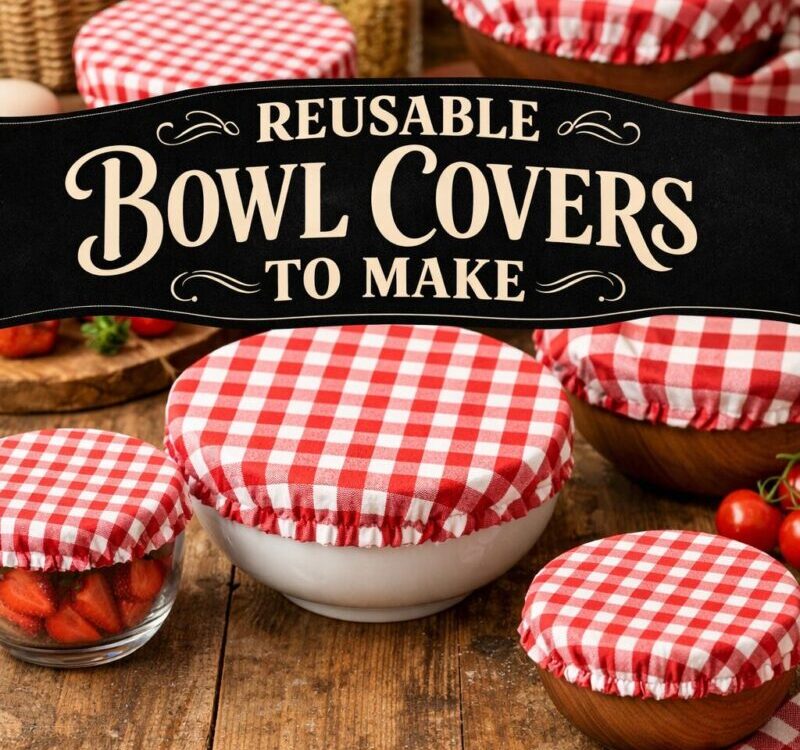
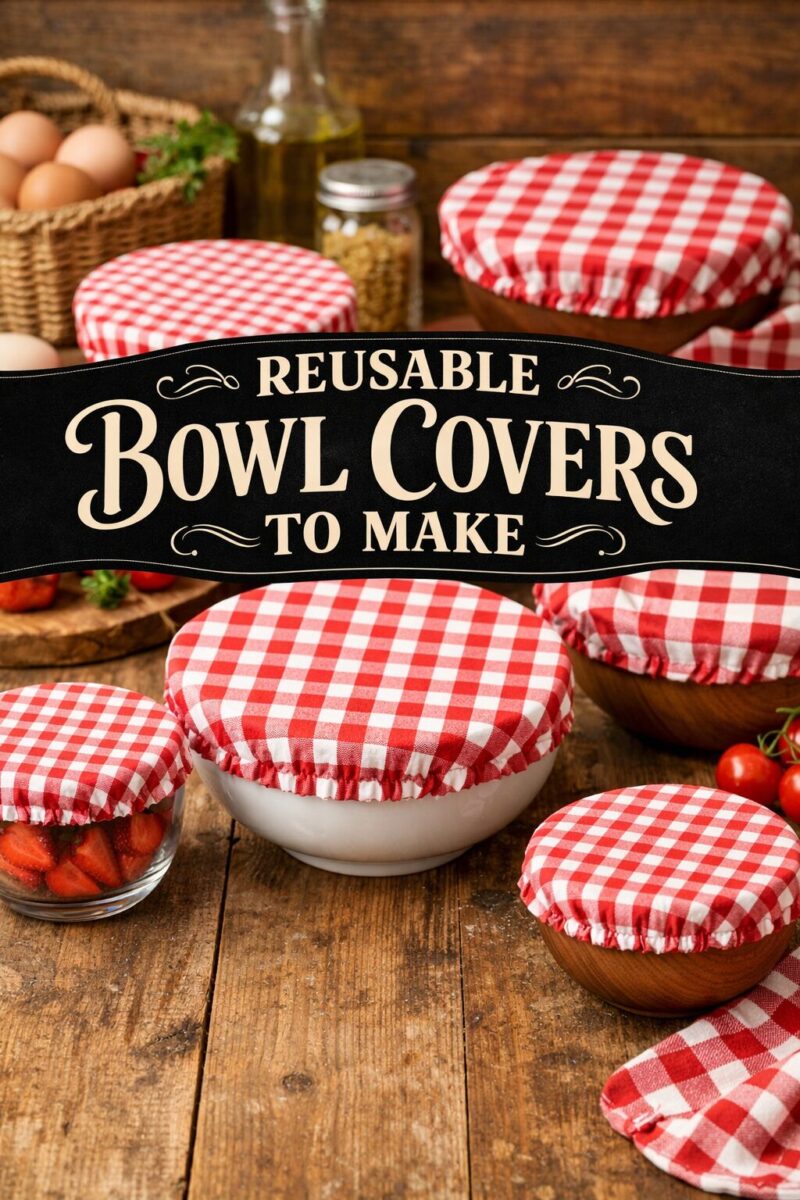
Fabric bowl covers are simple, practical items that help reduce waste in your kitchen. Instead of using disposable plastic wrap every time you need to cover a bowl, you can use a washable fabric cover that lasts for years. These covers are easy to make, even if you’ve never sewn before, and they make excellent gifts for friends and family who enjoy cooking.
The basic design is a circle of fabric with elastic threaded through the edge. The elastic allows the cover to stretch over bowls of different sizes and grip tightly to keep food fresh. You can make them reversible by using two layers of fabric, giving you different patterns to match your kitchen decor or mood.
Making your own bowl covers costs very little, especially if you use fabric scraps from other projects. A set of covers in various sizes handles most kitchen needs, from small prep bowls to large mixing bowls. They’re also perfect for covering dishes when you’re bringing food to potlucks or family gatherings. The fabric protects the food while looking much nicer than aluminum foil or plastic wrap.
This guide will walk you through everything you need to know to make fabric bowl covers. You’ll learn what materials to use, how to measure for different bowl sizes, and several methods for constructing the covers. Whether you want to make a single cover or create sets as gifts, you’ll find clear instructions for success.
Benefits of Fabric Bowl Covers
Fabric bowl covers offer many advantages over disposable alternatives. First, they’re environmentally friendly. Americans throw away billions of feet of plastic wrap every year, and it doesn’t biodegrade in landfills. Switching to reusable covers significantly reduces this waste. Over time, a set of fabric covers replaces hundreds of pieces of plastic wrap.
Second, they’re economical. After the small initial investment in materials, you never need to buy plastic wrap or foil for covered bowls again. The covers last for years with proper care, making them much cheaper than constantly buying disposable products. If you already have fabric scraps at home, your cost might be almost nothing.
Third, fabric covers are more attractive than plastic wrap. When you bring a dish to a gathering covered with a cute fabric cover, it looks homemade and thoughtful. The covers can match your kitchen’s color scheme or express your personality through fun patterns. They turn an ordinary covered bowl into something special.
Finally, they’re functional. The elastic creates a better seal than plastic wrap often does, actually keeping food fresher. They won’t tear like plastic wrap, and they don’t stick to themselves in annoying ways. You can wash them in your regular laundry, making cleanup simple. The fabric protects food better than plastic wrap when you’re transporting dishes, preventing spills in your car.
Materials and Tools You’ll Need
Cotton fabric (quilting cotton or upcycled cotton from clothes, sheets, or tablecloths)
1/4 inch wide elastic
Fabric scissors
Measuring tape or ruler
Pins or sewing clips
Matching thread
Safety pin (for threading elastic)
Pinking shears (optional, for reversible covers)
Sewing machine (optional)
Iron
Dinner plate or bowl (for tracing circles)
Measuring and Sizing Your Covers
Proper sizing ensures your covers fit well and look professional. Start by measuring the bowl you want to cover. Place your measuring tape across the very top of the bowl, measuring the diameter from one outer edge to the opposite outer edge. Write this measurement down.
Next, decide how much overhang you want. For bowls you’ll cover while storing in the refrigerator, add 4 inches to the diameter measurement. For bowls you’ll transport or cover while rising dough, add 5 to 6 inches for extra fabric to grip around the sides. Larger covers work for smaller bowls, but covers that are too small won’t stay on properly.
Here’s a simple formula: Measure your bowl’s diameter, add 4 to 6 inches, and that’s your fabric circle diameter. For example, if your bowl measures 8 inches across, cut your fabric circle 12 to 14 inches in diameter. The elastic will gather the edge, creating the grip around the bowl.
Making covers in different sizes handles various kitchen needs. Measure several bowls you use frequently and create a set. A typical set might include covers for 6-inch, 8-inch, and 10-inch bowls. Some sewers also make very large covers for mixing bowls or rising bread dough. Label your covers by size if you’re making many, so you can grab the right one quickly. Watch this bowl cover tutorial
The Basic Single-Layer Method
The simplest bowl cover uses one layer of fabric. This method is perfect for beginners because it involves minimal steps. Start by cutting a circle of fabric in your chosen size. You can trace around a dinner plate, use a compass, or measure and mark the radius from a center point.
Fold the edge over about 1/2 inch all around the circle, pressing with your iron to create a crease. This folded edge will become the casing for your elastic. Pin or clip the fold in place, making sure it’s even all around. Leave a 2-inch gap un-pinned—you’ll thread the elastic through this opening.
Sew around the entire circle close to the inner folded edge, creating a tube or channel. When you reach the gap, reinforce the stitching at each side of the opening with backstitching. This prevents the stitches from coming loose when you pull the elastic through.
Cut your elastic to about 3/4 of the circle’s circumference. Attach a safety pin to one end of the elastic and push it through the casing opening. Work it all the way around the circle until it comes out the opening again. Don’t let the other end of the elastic disappear into the casing—hold onto it or pin it outside the opening.
Overlap the elastic ends about 1 inch and sew them together securely, either by hand or machine. Use a zigzag stitch if possible, which allows the elastic to stretch. Push the joined elastic inside the casing and sew the opening closed. Your cover is complete!
The Reversible Double-Layer Method
- Reversible covers use two layers of fabric, giving you two different patterns in one cover. They’re also more durable than single-layer covers. Start by cutting two circles of fabric in the same size—these can be matching fabrics or contrasting patterns.
- Place the two circles together with the right sides facing each other (pretty sides touching). Pin around the entire circle, leaving a 3-inch gap un-pinned. Sew around the circle with a 1/4 inch seam allowance, leaving the gap unsewn. This creates a bag that’s sewn inside out.
- Trim the seam allowance to about 1/8 inch all around, except at the gap. This reduces bulk when you turn the cover right side out. Be careful not to cut your stitching. Some sewers use pinking shears for this step, which also helps prevent fraying.
- Turn the cover right side out through the gap. Poke out the edges gently so the circle is smooth and round. Press the entire cover flat with your iron, folding in the raw edges at the gap so they’re even with the seam. Pin the gap closed.
- Topstitch around the entire circle about 1 inch from the edge. This creates the casing for elastic while also closing the gap. Make sure you sew through both layers. The topstitching will be visible on both sides, so use thread that coordinates with both fabrics or use matching thread on top and in the bobbin.
Thread elastic through the casing just like in the single-layer method. The reversible cover takes more steps, but the result is more polished and professional-looking. You can flip it to either side depending on your mood or the occasion. Learn the fastest method here
Threading Elastic: Tips and Tricks
Threading elastic through a casing can be tricky the first time, but these tips make it easier. Always attach a large safety pin to one end of the elastic before starting. The safety pin acts like a needle, making it easier to push through the casing and feel where it is as you work it around.
Hold firmly to the other end of the elastic or pin it to the fabric outside the opening. It’s frustrating when the elastic disappears into the casing and you have to start over. Some sewers pin both ends before starting—one end pinned inside the casing opening and one outside.
Work slowly, bunching the fabric along the elastic as you push the safety pin through. You’ll need to scrunch lots of fabric onto a small section of elastic, then gradually work the pin forward. Don’t pull too hard or you might separate the safety pin from the elastic.
If your elastic gets twisted inside the casing, you’ll feel it when you pull it all the way through. The cover won’t gather evenly if the elastic is twisted. Simply remove the elastic and start again, being more careful to keep it flat as you thread it.
Before sewing the elastic ends together, test the fit on your bowl. Pull the elastic until the cover opening is slightly smaller than your bowl, then mark where the ends should join. Try the cover on the bowl to make sure it fits snugly but not too tightly. Adjust if needed before sewing the elastic permanently.
Variations and Customization Options
Once you master the basic bowl cover, try these variations to add personality and functionality. Add topstitching around the center of your cover in a decorative pattern. Concentric circles, spiral designs, or simple straight lines add visual interest and reinforce the fabric layers.
Use fabric combinations to create themed sets. Make holiday-themed covers with seasonal patterns, or create covers that match your kitchen decor. Mixing patterns like stripes with florals or dots with solid colors creates eye-catching reversible covers.
Some sewers add a small fabric loop to the center top of the cover. This makes it easier to grab and remove the cover from a bowl. It also gives you a place to hang the cover when not in use. To add a loop, cut a small strip of fabric, fold it into a narrow tab, and sew it to the center before assembling the cover.
Consider making covers from laminated cotton or oilcloth for extra moisture resistance. These fabrics wipe clean easily and work well for covering bowls with wet or damp contents. They require slightly different sewing techniques (use a longer stitch length and walking foot if available), but they’re still manageable for beginners.
For bowls you use outdoors, like at picnics, add decorative weights around the edge to keep the cover from blowing away. You can sew small pockets around the perimeter and insert coins, washers, or decorative beads for weight. Just make sure any weights you add are washable.
Caring for Your Fabric Bowl Covers
Proper care keeps your bowl covers looking good and working well for years. Wash them regularly, especially if they’ve covered bowls with raw ingredients. Toss them in your regular laundry with similar colors. They don’t need special treatment—warm water and regular detergent work fine.
Avoid using fabric softener or dryer sheets, which can leave a residue that reduces the fabric’s absorbency. Air drying is gentlest on the elastic, but you can use a medium-heat dryer if you prefer. High heat may shorten the elastic’s lifespan over time.
Store your covers folded or rolled in a kitchen drawer so they’re handy when needed. Some people keep them in a basket on the counter for easy access. If you have multiple sizes, you might store them nested inside each other from smallest to largest.
Check the elastic occasionally. Over time and with many washings, elastic can lose some stretch. When a cover no longer grips bowls securely, it’s time to replace the elastic. Simply open up a small section of the casing seam, remove the old elastic, thread in new elastic, and sew the opening closed again.
Treat stains promptly for best results. If a cover gets food stains, treat them with stain remover before washing. Most fabric stains come out easily with normal washing. The covers are so quick to make that if one becomes too stained or worn, you can simply make a new one.
Making Bowl Covers as Gifts
Fabric bowl covers make wonderful gifts, especially when presented in attractive sets. Package three to five covers in different sizes together, tied with ribbon or placed in a pretty basket. Add homemade baked goods or jam in the bowls for an extra-special gift.
Consider your recipient’s style when choosing fabrics. Vintage-style fabrics work well for someone who loves retro aesthetics. Bright, modern patterns suit someone with contemporary taste. Fabric stores often carry seasonal prints around holidays, perfect for seasonal gift-giving.
Include care instructions with gift sets, especially if the recipient isn’t a sewer. Write a small card explaining how to use the covers, how to wash them, and why they’re better than plastic wrap. This adds a thoughtful touch and ensures the recipient gets the most use from your gift.
Make matching sets for weddings, housewarmings, or holiday gifts. Coordinate the fabrics with the recipient’s kitchen colors if you know them. New homeowners especially appreciate practical handmade gifts that help them set up their kitchen.
For craft fairs or selling online, price your covers based on materials and time. Sets of three typically sell well and showcase your work nicely. Display them on actual bowls so customers can see how they work. Include information about the environmental benefits of reusable covers, which many shoppers value. See another bowl cover method
Troubleshooting Common Problems
If your elastic breaks while threading it through the casing, you used too much force. Start over with new elastic and work more patiently. Make sure your casing opening is large enough—at least 2 inches makes threading much easier.
When the cover doesn’t grip the bowl well, the elastic is probably too loose. Remove the elastic and cut it shorter, usually about 2/3 to 3/4 of the circle’s circumference. Test the fit before permanently sewing the elastic ends together. Different fabrics and elastics behave differently, so you might need to adjust.
If your fabric circle isn’t perfectly round, it won’t fit bowls properly. Take more care when cutting, or create a paper template first. Use a compass or trace around a perfectly round object like a plate. Cutting slowly and carefully creates better circles than rushing.
Puckering around the casing seam means your tension was too tight or you pulled the fabric as you sewed. Press the cover and check if the puckering relaxes. For future covers, let the machine feed the fabric naturally without pulling. Adjusting your thread tension might also help.
When one side of the cover bunches up more than the other, the elastic is twisted inside the casing. Unfortunately, the only fix is removing the elastic and threading it again, making sure it stays flat. This is why it’s important to work carefully when threading elastic.
Advanced Tips for Perfect Bowl Covers
Use spray starch when pressing your circles before sewing. The starch makes the fabric slightly stiff, which helps it hold its shape and makes sewing easier. The stiffness washes out, leaving a soft, pliable cover.
If you’re making many covers, create templates from plastic or cardboard in your most-used sizes. Trace around these templates instead of measuring each time. This saves time and ensures consistent sizing across multiple covers.
Choose thread color carefully for reversible covers. If your two fabrics are very different colors, use neutral thread like gray or tan. Alternatively, match the top thread to the top fabric and the bobbin thread to the bottom fabric for a custom look.
Pre-wash your fabric before cutting circles. Cotton fabrics shrink when washed, so pre-washing prevents your finished covers from shrinking the first time you clean them. Press the fabric smooth before cutting for the most accurate circles.
Add a small bead of fabric glue to the elastic ends before sewing them together. This prevents the ends from slipping through your stitches or fraying over time. Let the glue dry before sewing through it.
Mark your elastic length before cutting it from the roll. Measure 3/4 of your circle’s circumference, then cut. This is more accurate than guessing, especially when making covers in multiple sizes. Keep notes about what elastic lengths worked best for different sized covers so you can reference them for future projects.
Environmental Impact and Sustainability
Switching to fabric bowl covers is a small change that makes a real environmental difference. Plastic wrap is used once and thrown away, but fabric covers can be used hundreds of times. Over a year, one family can eliminate dozens of rolls of plastic wrap by using reusable covers instead.
Making covers from upcycled materials is even better for the environment. Old pillowcases, worn-out clothes, or thrifted fabric work perfectly for bowl covers. This keeps fabric out of landfills while creating something useful. The fabric doesn’t need to be perfect—small stains or worn areas can be cut around.
Natural fiber fabrics like cotton are better choices than synthetic fabrics for food-related items. Cotton is biodegradable at the end of its life, unlike polyester or nylon. It’s also safer around food since it doesn’t contain the chemicals sometimes found in synthetic fabrics.
When your covers eventually wear out after years of use, they can be composted if they’re 100% cotton, or cut up for cleaning rags if they contain synthetic content. This circular approach to materials—using them fully before disposing of them thoughtfully—is at the heart of sustainable living.
Teaching children to make and use fabric bowl covers introduces them to sustainable practices early. They learn that reusable items can be just as convenient as disposable ones, shaping habits that last a lifetime. Making covers together is a fun family activity that has lasting benefits.
Conclusion: Your Journey with Bowl Covers
Making fabric bowl covers is a rewarding project that combines creativity, practicality, and environmental consciousness. The skills you learn transfer to other sewing projects—working with circles, creating casings, and threading elastic all appear in various patterns and techniques.
Start with one or two covers to practice the technique. Once you’re comfortable, make sets in different sizes for your own kitchen. You’ll quickly appreciate how convenient and attractive these covers are compared to plastic wrap. They become part of your cooking routine, reaching for them as naturally as you’d grab a spoon or bowl.
As you make more covers, experiment with different fabrics, sizes, and embellishments. Each set can be unique, reflecting your creative choices. The basic technique stays the same, but the possibilities for customization are endless.
Share your creations with others, either as gifts or by teaching friends and family to make their own. Bowl covers spark conversations about sustainable living and inspire others to make small changes in their own homes. Your handmade covers might encourage someone else to start sewing or to look for other ways to reduce waste.
Most of all, feel proud of the practical, beautiful items you’ve created. Every time you use a fabric bowl cover instead of plastic wrap, you’re making a choice that’s better for the environment and more satisfying than using disposable products. You’ve taken simple materials and turned them into something useful that will serve you well for years to come.

A Teacher with 5 years of experience. Our Expertise, is reliable to meet your full Academic development needs . Worked on many crafts and construction projects offering services from design to development to deployment over the years. You will find many of my works in my business portfolio on request.