What makes a DIY egg carton flower craft such a great choice for your next home decor project? You can turn simple recycled cartons into a lasting floral display without needing expensive supplies. Whether you are prepping for a sunny spring afternoon or looking for a creative gift idea, this project offers a fun, beginner-friendly way to get crafty. By following a few simple steps, you can build a beautiful egg carton flower bouquet that brightens up any room in your house. Here is how you can get started today.
Quick Questions and Answers
Question: What is the goal of an egg carton flower craft? Answer: The goal is to turn recycled egg cartons into decorative flowers, often arranged as a bouquet, jar display, or spring decoration. Tutorials commonly aim for a handmade, colorful result rather than a realistic flower, and several guides explicitly show finished flowers placed in vases or jars.
Question: What materials do you need for egg carton flowers? Answer: Most tutorials use an egg carton, scissors, glue or a hot glue gun, paint, and something for stems such as wooden dowels, bamboo skewers, pipe cleaners, or floral wire. Some also add buttons, pom-poms, tissue paper, or a jar for display.
Question: How do you prep an egg carton for flower crafting? Answer: Prep usually starts by cutting the carton apart into workable sections or individual cups. Some guides recommend cutting the base into groups first, while others say to cut rough strips after the paint dries so the pieces are easier to shape.
What You Need
| Item | Purpose | Notes |
|---|---|---|
| Cardboard Egg Carton | Base structure | Must be cardboard; plastic will not work. |
| Sharp Scissors | Cutting petals | Adult supervision is required. |
| Hot Glue Gun | Assembly | Provides a fast, strong bond. |
| Acrylic Paint | Coloring | Use vibrant colors for better results. |
| Bamboo Skewers | Stems | Can be trimmed to your desired length. |
Preparing Your Carton Materials
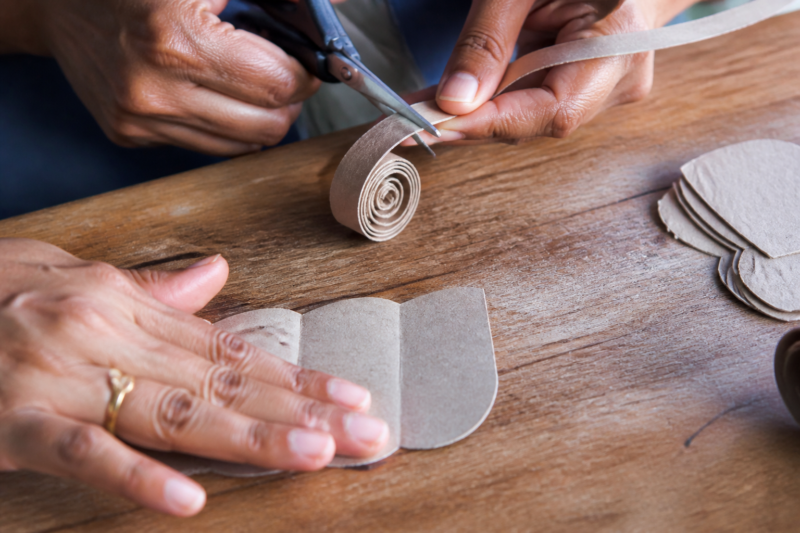
Before you pick up a paintbrush, you need to break down your materials. Start by separating the carton into 12 individual cup compartments. This makes it easier to manage the pieces as you shape them. You can use the lid of the carton to cut out leaf-shaped forms to add greenery to your final bouquet. If you want to make roses, cut a long strip of the carton and roll it tightly into a snail-shell center before gluing it. For a tulip look, squash the cup flat and make diagonal, curved cuts to simulate overlapping petals. According to the Environmental Protection Agency, recycling cardboard keeps waste out of landfills, making this craft a responsible choice for your home.
Step 1: Cutting the Cups

Use your sharp scissors to cut the egg carton base into individual cups or segments. Don’t worry about being perfect. You can clean up the edges later. Focus on getting the cups separated first.
Step 2: Shaping the Petals

Take your individual cups and shape the top edges into petal forms. Cut rounded, pointed, or zig-zag notches to give each bloom a unique look. Keep the depth of your cuts in mind as you work.
Step 3: Painting the Components

Paint the inner and outer surfaces of your carton shapes using acrylics or kids’ paint. Set them aside on a piece of scrap paper and allow them to dry completely. This wait is vital to ensure the glue bonds well to the cardboard texture later.
Step 4: Creating the Stem Hole
Once your painted pieces are dry, take a kitchen skewer to poke a small hole in the very center of the base. This provides a clear path for your stem material to pass through. Be careful not to tear the cardboard during this step.
Step 5: Attaching the Stems

Slide your stem, such as a bamboo skewer or floral wire, through the hole you created in the base. Secure it firmly with a small dab of hot glue from the back. Hold it steady for a few seconds until the glue sets.
Step 6: Finishing the Center

Glue a decorative item like a button, pom-pom, or bead over the top center of the flower. This covers the stem entry point and adds a pop of texture to the bloom. You can experiment with different colors to create a diverse arrangement.
Mistakes to Avoid
A common mistake is trying to glue wet pieces. If you rush the painting process, your hot glue will struggle to stick, and your flowers might fall apart. Avoid using plastic cartons, as they do not take paint well and are difficult to cut safely. Always keep an eye on your materials and ensure you have enough structure left at the base of the cup to hold the stem. If you are working with children, prioritize safety. As American Academy of Pediatrics resources suggest for general home activities, close supervision with tools is the best way to prevent accidents during craft time.
Troubleshooting Common Issues
Is your stem feeling loose? Apply an extra dab of hot glue at the base where the stem meets the cardboard to reinforce the connection. If you notice your paint flaking off, try using a slightly thicker layer of acrylic paint or a coat of primer. If your flowers look a bit flat, try nesting two cups of different sizes together. This simple trick adds immediate 3D volume to your bouquet, making it look much more professional.
FAQ
Q: How many flowers can one carton make?
A single 12-egg carton usually provides enough material to construct three large, multi-layered flowers. If you prefer smaller, simpler blooms, you can often stretch one carton to create five or six individual pieces.
Q: Can I use markers instead of paint?
Yes, markers are an excellent mess-free alternative for younger children. While they might not offer the same deep coverage as acrylic paint, they are perfect for adding patterns and smaller details to the petals quickly.
Q: How long do they last?
When kept in a dry environment, these crafts can last indefinitely. Cardboard is quite durable, though the colors may fade if you keep your arrangement in direct, constant sunlight for several months.
Q: Should you paint egg carton flowers before or after cutting?
Most experienced crafters favor cutting and shaping the cups first. This allows you to paint the individual petals precisely before final assembly, which is much cleaner than trying to paint around a stem once the flower is built.
Q: How do you make the petals look more realistic?
You can cut thin slits, rounded edges, or diagonal curves to create petal shapes instead of leaving the carton cups intact. Some crafters also fringe the edges or separate the carton into two layers to make the flowers look fuller and more complex.
Q: Can kids make egg carton flowers safely?
Yes, but the cutting and hot-glue steps require adult help. Kid-friendly versions of this project rely on washable paint, markers, pipe cleaners, and simple assembly, while adults handle the sharp scissors and glue guns.
Q: How long does an egg carton flower craft take?
The total time depends on how many flowers you are making and how long the paint takes to dry. The actual assembly is quite fast, but you should budget about an hour for the paint to cure completely before moving to the final steps.
Q: What is the easiest egg carton flower shape to make?
The simplest option is a basic petaled cup made by cutting the top of an egg cup into simple slits. Tulips and roses are also very popular, but those variations require slightly more practice with cutting and rolling techniques.
Q: What mistakes should you avoid in egg carton flower craft?
Avoid cutting your pieces before deciding on your flower shape. Always wait for your paint to dry fully before applying glue, and never attempt this craft without adult supervision if you are using scissors or a glue gun.
Q: How do you finish and display egg carton flowers?
Most crafters finish by attaching a stem and placing the flowers in a jar, vase, or mounted display. Some people like to use a cardboard backing or a clean, recycled glass jar to hold the completed bouquet securely in place.
My Experience With How to Make Egg Carton Flowers Step by Step
I remember the first time I tried this project, I made the classic mistake of using way too much glue on the first stem. It was a messy disaster, but it taught me that a little goes a long way. After switching to smaller, precise dabs, the process became much smoother. My favorite part is finding new ways to decorate the centers. Buttons from old shirts or stray pom-poms make for fantastic, high-texture centers that really make the flowers pop.
The secret to making these look like real decor rather than just a school project is in the layering. Don’t be afraid to double up your cups; that little bit of extra cardboard adds a depth that makes the whole bouquet feel intentional. It’s an incredibly relaxing way to spend a rainy afternoon. I’ve found that even if you aren’t the “artistic” type, the forgiving nature of cardboard makes it nearly impossible to fail. Once you finish your first set, you’ll start seeing egg cartons in a whole new light. Have you tried creating your own display yet, or do you have a favorite color scheme you’re planning to use?
Next Steps
Once your flowers are complete, arrange them in a glass vase or jar filled with tissue paper or sand for stability. You can also explore combining your floral arrangements with other handmade items. Check out How to Create Wood Bead Crafts Step by Step to add some wooden accents to your bouquet base. For a more detailed look at floral construction, How to Make a Beaded Flower Step by Step offers techniques you can adapt for your mixed-media projects.
Conclusion
Making these flowers is a rewarding way to reduce household waste while creating something beautiful. By focusing on the prep work and allowing your paint to dry properly, you can ensure your project lasts for years. Enjoy the process of crafting your own unique bouquet.
References
- Moms and Crafters. (2026). Make a beautiful and easy flower bouquet! Moms and Crafters. https://www.momsandcrafters.com/egg-carton-flowers/
- YouTube. (2026). Egg Carton Flower Making Tutorial. YouTube. https://www.youtube.com/watch?v=vn2rQkVQZzg
- The Craft Train. (2026). Egg carton flowers. The Craft Train. https://thecrafttrain.com/egg-carton-flowers/
- The Imagination Tree. (2026). Egg Carton Flowers. The Imagination Tree. https://theimaginationtree.com/egg-carton-flowers/
- Crafty Art Ideas. (2026). How To Make DIY Egg Carton Flowers. Crafty Art Ideas. https://craftyartideas.com/egg-carton-flowers/
- Thoughtfully Sustainable. (2026). How to Make Pretty Egg Carton Flowers – Thoughtfully Sustainable. Thoughtfully Sustainable. https://thoughtfullysustainable.com/egg-carton-flowers/
- YouTube. (2026). Egg Carton Flowers with Ms. Amanda. YouTube. https://www.youtube.com/watch?v=IgdZLfVEwu4
- Sugar, Spice and Glitter. (2026). How to Make Egg Carton Flowers with Kids. Sugar, Spice and Glitter. https://sugarspiceandglitter.com/egg-carton-flower-craft/

A Teacher with 5 years of experience. Our Expertise, is reliable to meet your full Academic development needs . Worked on many crafts and construction projects offering services from design to development to deployment over the years. You will find many of my works in my business portfolio on request.