Let’s turn your notebook margins into a mini botanical garden. You’ll learn quick, easy steps that make your doodles pop without needing “real artist” energy. These five methods stack from super simple to delightfully extra, so you’ll always have a flower that fits your mood. Grab a pen, maybe a latte, and let’s bloom.
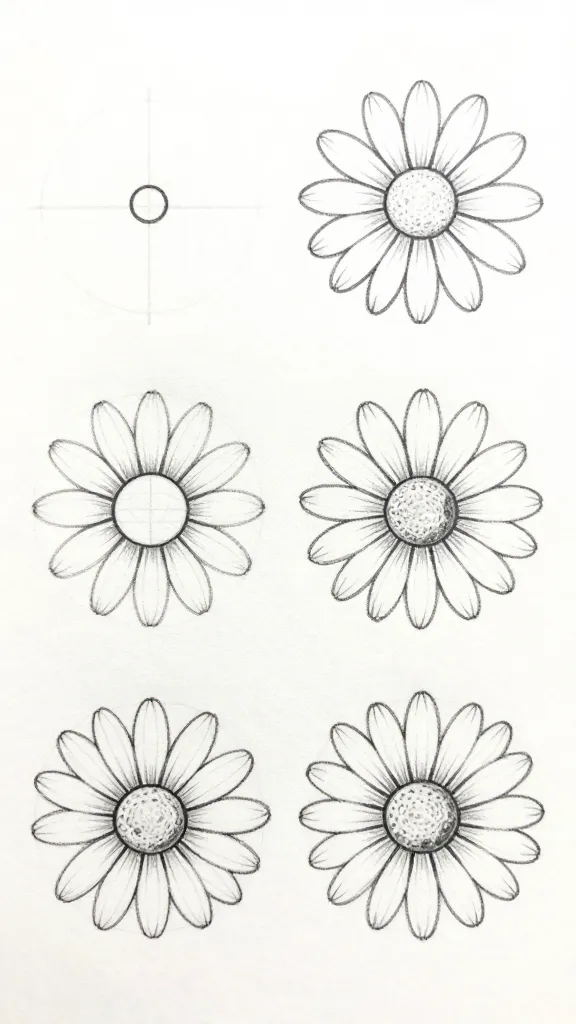
1. Start With The Daisy: Circles, Petals, Repeat
The humble daisy is the gateway flower. It looks crisp, reads clearly at any size, and you can draw it in seconds. You’ll nail basic shapes and spacing, which sets you up for every other flower style.
Step-By-Step:
Dot the center. Draw a small circle. Keep it tight and tidy.
Add petals like a clock. Place 4 petals at 12, 3, 6, and 9 o’clock. Then fill the gaps. Petals look best as narrow ovals that taper slightly where they meet the center.
Vary length. Make every other petal a touch longer to create rhythm.
Outline details. Add tiny lines from the center into each petal for texture.
Stem + leaf. A single curved line works. Add a simple leaf almond shape with a midrib line.
Tips:
Rotate your page so your hand draws the same petal shape each time. Easier = cleaner.
Leave a sliver of white between petals for definition, especially if you’ll color later.
Try a double ring center (two circles) and fill the space with dots for a cute, punchy core.
Use daisies for borders, bullet points, and quick accents. They’re beginner-proof and instantly cheerful, FYI.
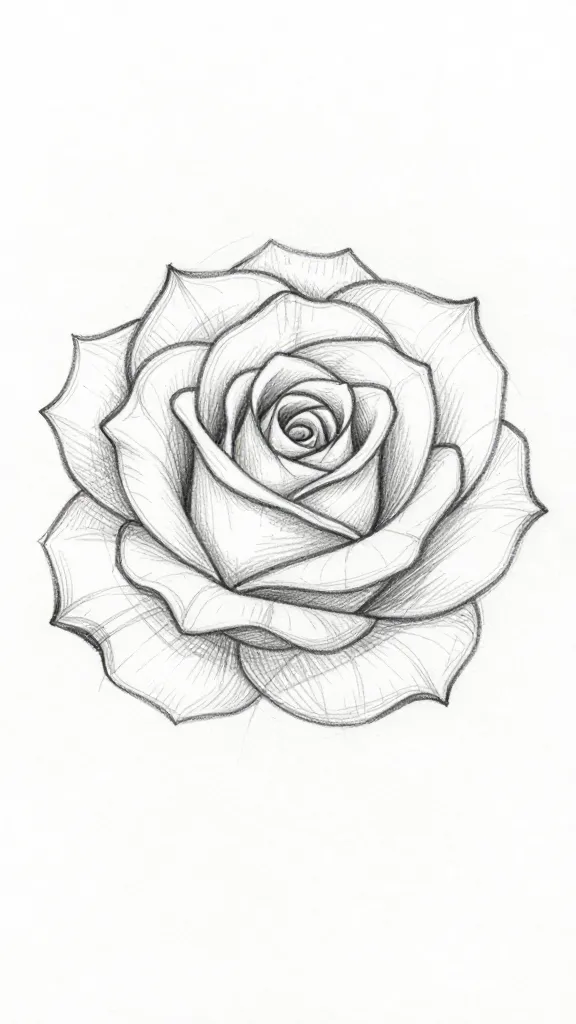
2. Level Up With A Whimsical Rose: Spiral + C-Curves
Roses look complicated, but this doodle version keeps it simple and stylish. The trick? A spiral core with loose, swoopy C-shapes that fake depth without overthinking it.
Step-By-Step:
Spiral center. Draw a small, loose spiral—don’t cram it tight. Think cinnamon roll, not coil spring.
Petal rings. Around the spiral, add C-shaped strokes. Alternate directions and sizes.
Build layers. Keep adding petal rings outward, slightly overlapping the last layer. Tilt some petals outward to suggest the rose opening.
Edge flicks. On a few outer petals, add a tiny notch or flick to mimic a ruffled edge.
Leaves + thorns. Two teardrop leaves with serrated edges and a couple of tiny V-shaped thorns on the stem—subtle, not medieval.
Shading Shortcut:
Hatch short lines at the petal bases where they tuck under others.
Darken the inner spiral slightly to pull the eye inward.
Leave the petal tips lighter for a soft bloom effect.
This rose shines on gift tags, journal headers, or anywhere you want a little drama. Seriously, it looks fancy with minimal effort.
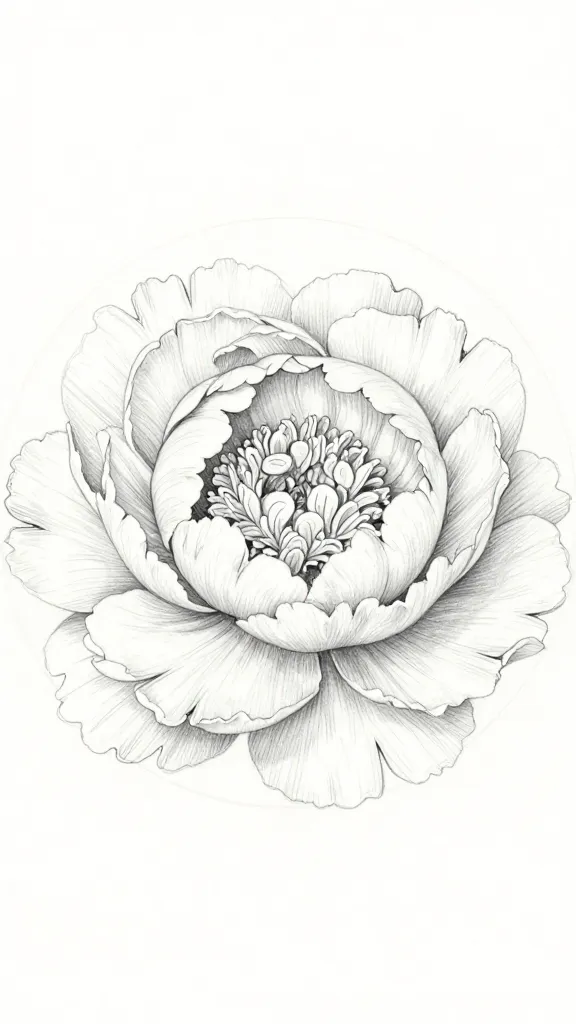
3. Draw A Lush Peony: Overlapping Scoops And Petal Piles
Peonies are all about volume. You’ll stack simple “scoop” shapes to build a plush, ruffled flower that feels luxe without painstaking detail. Think fluffy, not fussy.
Step-By-Step:
Light circle guide. Sketch a soft circle to keep your bloom contained. Don’t press hard—you’ll erase it or ignore it later.
Ruffled core. In the center, draw a bumpy cluster of small U-shapes and short arcs.
Inner petals. Add overlapping scoops around the core, each one slightly taller than the last. Vary the heights.
Outer bowl. Draw wider, shallower scoops hugging the guideline to form a cupped edge.
Leaf cluster. Peony leaves come in threes with pointed tips. Draw a trio fanning from behind the bloom.
Texture Tricks:
Add vein flicks from the base of larger petals—short, curved lines that fade out.
Shadow where petals overlap using soft hatching. Concentrate it under the upper petal’s lip.
Break a few petal edges with tiny zigzags to sell that ruffle moment.
Use peonies when you want a focal flower on a page. They anchor compositions and make your other doodles look extra polished, IMO.
4. Craft A Chic Tulip: Minimal Lines, Maximum Style
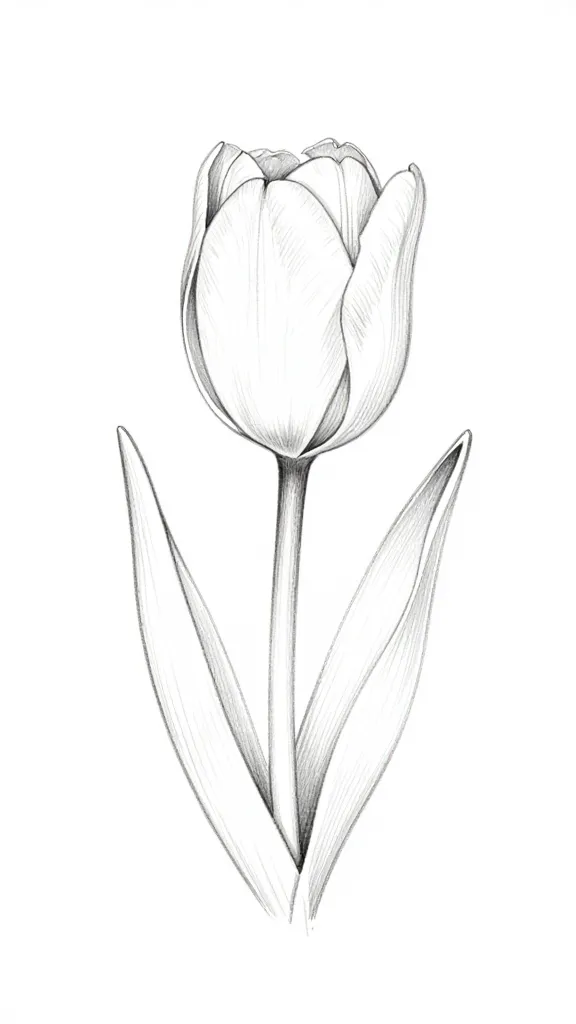
Tulips prove that fewer lines can feel elegant. With just a few shapes, you get crisp silhouettes perfect for modern spreads or minimalist stationery.
Step-By-Step:
Center petal. Draw a long teardrop with a blunt top—think paddle, not needle.
Side petals. On each side, add a curved petal that overlaps the center slightly and meets at the base.
Cup form. Add a tiny inward curve at the top edges of the side petals to show the bloom cupping in.
Stem. Draw a straight or slightly arched stem. Keep it confident—one smooth stroke.
Leaves. Long, ribbon-like leaves that hug the stem. Let them cross for a sleek look.
Style Variations:
Closed bud: Two slim petals wrapped together with a shorter stem.
Open tulip: Flare the top edges and show a hint of stamens with tiny dots and short lines.
Dutch row: Draw three tulips at staggered heights for an instant border or header.
Tulips thrive in clean layouts. Pair them with neat lettering or geometric frames for balance you’ll love.
5. Build A Wildflower Wreath: Stems, Sprigs, And Tiny Blooms
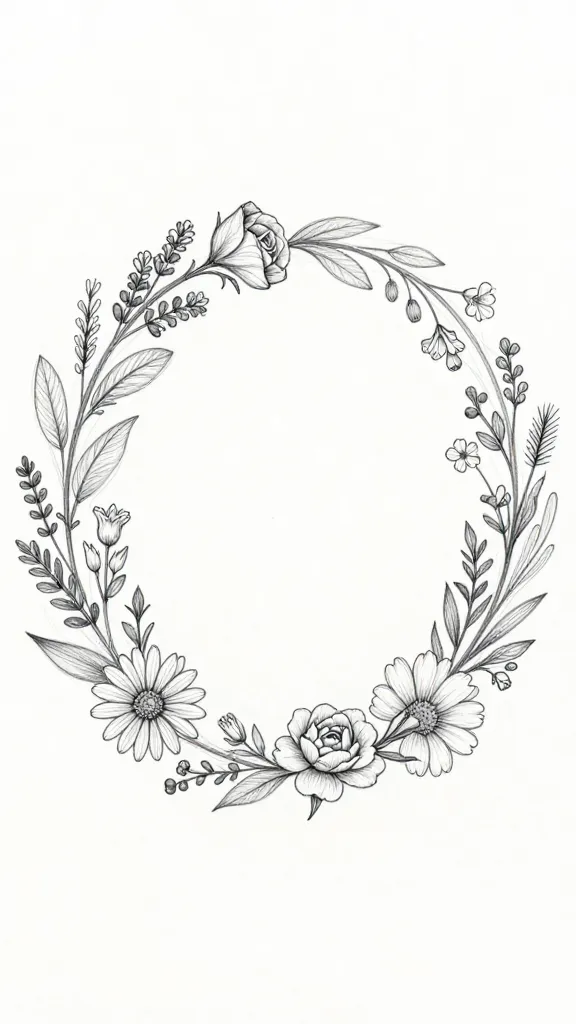
Time to go big. Combine your new flower skills into a lightweight wreath that frames quotes, dates, or your to-do list. It looks intricate, but the structure keeps it simple.
Base Structure:
Light circle guide. Trace a round object or sketch a circle lightly.
Double vine. Draw two parallel, slightly wobbly lines around 70–80% of the circle for a hand-drawn vibe.
Anchor blooms. Place 3–5 larger flowers (daisies, small roses, baby peonies) evenly around the circle like points on a clock.
Fillers And Foliage:
Leaf trios: Small almond leaves in groups of three along the vine.
Baby buds: Tiny circles or teardrops on short stems. Cluster them near the anchors.
Berry pops: Dots with a mini highlight spot left white. Connect with thin stems.
Herb sprigs: Lavender-like spikes (a central line with tiny ticks) and wispy grasses.
Assembly Steps:
Start with your anchor flowers and lightly shade their centers.
Weave leaves in alternating directions to keep flow dynamic.
Fill gaps with sprigs and berries, keeping some negative space so it breathes.
Thicken a few vine sections for contrast and visual rhythm.
Balance & Finishing:
Check spacing by squinting—dark patches mean you need a leaf on the opposite side.
Add micro details last: dot clusters, tiny sparkles, or line breaks in petals for shine.
If coloring, keep a limited palette: two greens, one accent color, and a neutral. It reads cohesive instantly.
Wreaths make perfect frames for quotes, dates, or mood trackers. They feel polished, giftable, and way more impressive than the time they take—trust me.
Ready to fill your pages with blooms? Start with a daisy, add a rose when you’re feeling fancy, and build your way to a full-on floral wreath. Keep it loose, keep it fun, and let your pen do the growing. You’ve got this, flower friend.
A Teacher with 5 years of experience. Our Expertise, is reliable to meet your full Academic development needs . Worked on many crafts and construction projects offering services from design to development to deployment over the years. You will find many of my works in my business portfolio on request.