
Want to transform your family Halloween portrait from predictable to genuinely memorable? Zombie poses for a family photoshoot offer a chance to break free from stiff smiles and professional backdrops, swapping them for creepy, cinematic energy that actually captures who you are as a group. Whether you’re channeling The Walking Dead or just looking for something more interesting than the standard seasonal photo, zombie poses let families tap into horror aesthetics while keeping the shoot fun and bonding-focused. The beauty of a zombie-themed family photoshoot lies in blending that undead atmosphere with real moments—awkward angles, straight faces, and surprisingly endearing chaos all at once. Let’s explore the poses that make this shoot format so effective.
Quick Questions and Answers
Question: Why do families choose zombie poses for Halloween photoshoots? Answer: Zombie poses break away from traditional family portrait stiffness, offering a creative, cinematic alternative that feels fresh and intentional. They allow families to bond over a shared theme, experiment with makeup and costuming, and capture genuine personality rather than forced smiles—all while leaning into Halloween spirit.
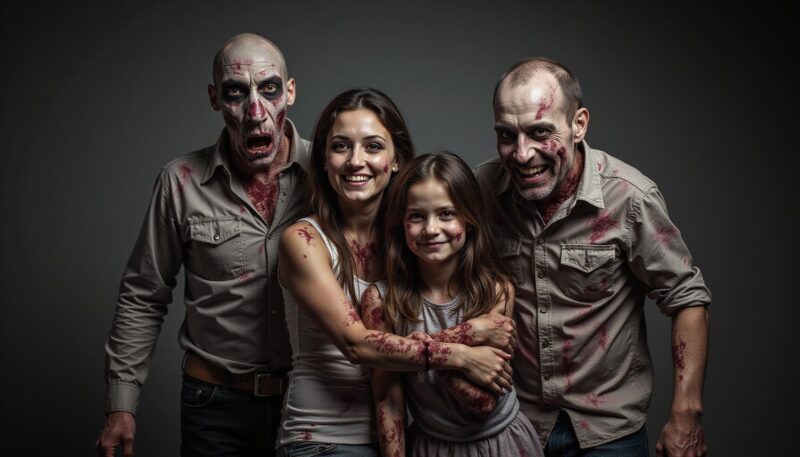
Question: How can you create zombie makeup for a family photoshoot? Answer: Start with a pale base using foundation or white greasepaint, add dark shadows under eyes and cheekbones, and use liquid latex or scar wax for wound effects. Red or black contacts enhance the infected look, while fake blood and disheveled clothing complete the undead aesthetic without requiring expensive prosthetics.
Question: What are the best zombie poses for a spooky family photo? Answer: The most effective poses include lurching walks in unison, straight-faced statuary positioning near props, dynamic arm reaches mimicking creature anatomy, relaxed graveyard groupings, and staged “survivor vs. zombie” scenarios. These poses feel less posed and more naturally creepy when limbs appear broken or unnatural.
How to Select Your Zombie Shoot Concept and Theme
The first step isn’t finding poses—it’s deciding what kind of zombie energy your family wants to project. Are you going full gritty horror, or does your version lean playful? This matters because your answer shapes everything from makeup intensity to location scouting.
Evaluate your family’s comfort level honestly. Some families thrive on authentic gore effects and will spend an afternoon perfecting prosthetic wounds. Others prefer the vibe without the intensity—pale makeup, tattered clothes, and unsettling expressions, but no fake blood. Neither approach is wrong; the key is alignment so everyone feels genuinely into the shoot rather than uncomfortable.
The Walking Dead aesthetic remains the benchmark for cinematic zombie shoots. If that’s your north star, you’re aiming for gritty textures, weathered environments, and that signature exhausted-but-dangerous energy the show nails. Study a few reference scenes from the show or similar media—notice how lighting hits faces, how posture reads as broken rather than confident, how the background contributes as much as the subjects.
Find your thematic anchor. Maybe it’s a “horde escaping the graveyard” or “family of survivors hiding in an abandoned house” or just “we’re the undead having a lazy afternoon.” That theme won’t be spelled out to viewers, but it guides your pose choices and keeps the shoot cohesive rather than scattered.
Top Tier Zombie Pose Categories for Families
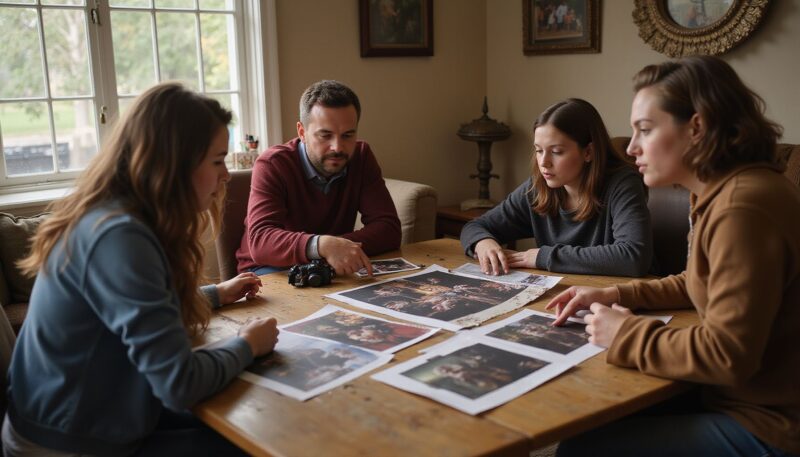
The Lurching Horde
Walking together in slow, uncoordinated motion is deceptively powerful. Have your family space out slightly and move toward the camera with deliberately staggered steps—one person’s left foot forward while another leads with their right. Bent knees, drooping shoulders, and hollow stares make this feel genuinely unsettling.
The photographer captures this mid-motion, not at rest. Motion blur in the background, a slight diagonal composition, and catching the family mid-stride creates momentum. It’s the closest thing to a traditional family walk-and-wave, except everyone looks like they’re barely holding it together.
The Stationary Scare
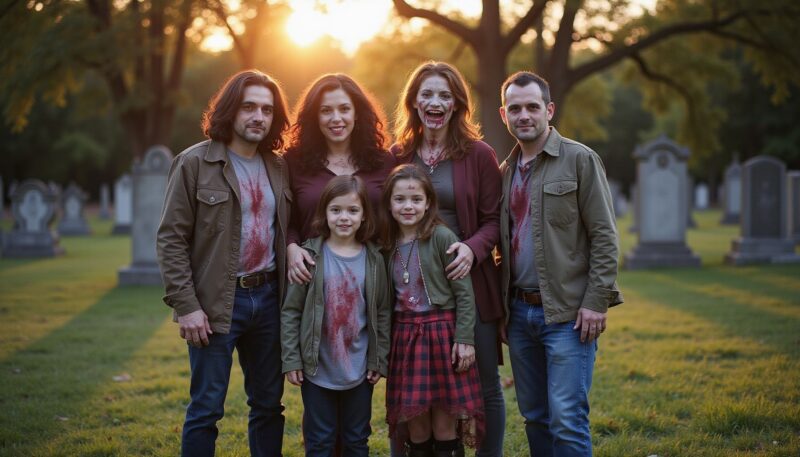
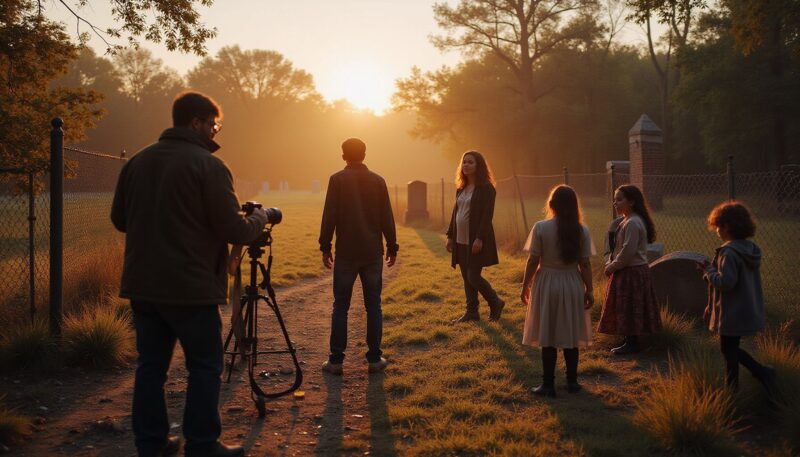
Position family members in a frozen tableau near tombstones, a dilapidated porch, or against weathered brick. Straight faces, arms at odd angles, and zero attempt to look “friendly” or photogenic. This is where contact lenses really pay off—red or solid black eyes against dead expressions create immediate visual impact.
The beauty here is that people almost can’t help looking creepy when they’re asked to stand still and not smile. Relax that usual portrait tension, and genuine unease registers on camera.
The Creature Anatomy Reach
Professional monster reference art from sources like PoseMy.Art shows how creatures position limbs unnaturally—joints bent wrong, fingers splayed, shoulders twisted. Borrow that vocabulary for a pose where family members reach toward the camera or each other with arms positioned in ways human bodies don’t naturally sit.
A child’s hand stretched upward with fingers spread wide. A parent leaning back with one arm extended and the other bent at an inhuman angle. These poses read as “something’s wrong here” without requiring explanation.
The Victim Escape
Stage a narrative: some family members are “zombies” and others are “survivors.” The survivors might be backing away slowly while the zombies advance, or kneeling defensively while the undead loom. This creates dynamic spatial relationships and gives the photo story.
Photographer Tiffany Renfroe created a shoot using exactly this framework, and the results showed genuine tension even though everyone knew what was happening. The narrative gives people something to do beyond “look creepy,” and that purpose translates to authenticity.
The Resting Undead
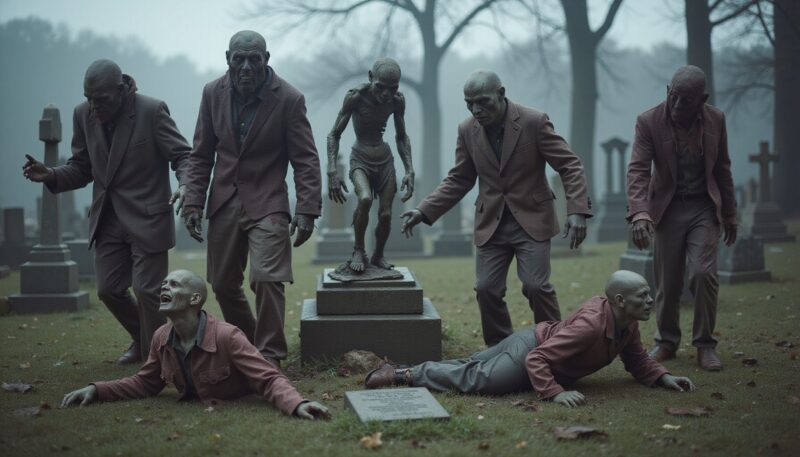
A group shot where the family is literally lounging in the graveyard—sitting on tombstones, draped across old steps, or clustered together in the dirt. Tattered clothes, pale makeup, blank expressions. It’s weirdly intimate; everyone’s close together but nobody’s performing happiness.
This works brilliantly on old townhouse porches or amidst cemetery debris. The informality reads as more disturbing than a perfectly composed shot would.
Comparison of Zombie Styling Assets
| Styling Asset | Best Results | Difficulty | Cost | Duration |
|---|---|---|---|---|
| Special Effects Makeup (prosthetics, wounds) | Highly realistic, cinematic quality | High | $40–150 for materials | 45–90 minutes to apply |
| Eye Color Modification (red or black contacts) | Striking, immediate impact on creepy factor | Low–Medium | $20–60 per pair | 5 minutes to insert |
| Pale Base + Contouring (foundation, shadows) | Effective, versatile, works with any theme | Low | $15–40 | 20–30 minutes total |
| Tattered Clothing (thrifted, torn, distressed) | Authentic worn aesthetic, narrative support | Low | $10–30 | Already owned or quick thrift find |
| Environmental Props (tombstones, fog machines, old furniture) | Elevates location authenticity exponentially | Medium | $0–200+ depending on DIY vs. rental | Setup time varies |
Special effects makeup yields the most visually striking results but demands either a skilled makeup artist on-site or serious DIY practice beforehand. If you’re attempting prosthetics or liquid latex, do a test run on one family member at least a week prior.
Eye color contacts deliver immediate impact with minimal effort. FDA-approved theatrical contacts in red, black, or white are readily available online. The insertion learning curve is real—some people adapt in minutes, others need practice—so don’t try this for the first time on shoot day.
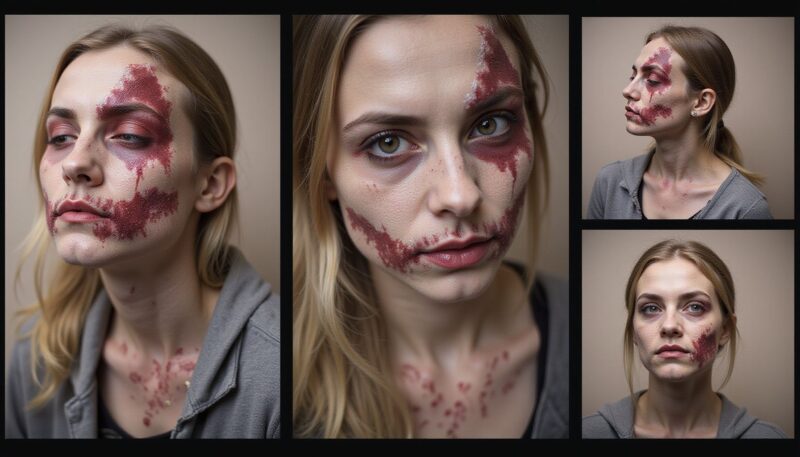
Pale base plus contouring (foundation, powder, dark eyeshadow) works beautifully without special effects. Focus the shadows under cheekbones and eye sockets to create that hollowed, undead look. This approach is forgiving, affordable, and achievable in 20–30 minutes per person.
Thrifted or pre-owned clothing completes the zombie aesthetic without budget strain. Torn sleeves, dirt stains, and mismatched garments all read as “undead” faster than carefully curated costumes.
Environmental props anchor the shoot in a specific reality. Tombstones make the difference between “people with zombie makeup” and “a family that’s actually undead in this graveyard.” Fog machines add atmosphere; old furniture suggests abandonment. Scout your location first, and ask permission before bringing props or using special effects makeup anywhere other than private property.
Who These Poses Are Best For
The Walking Dead Enthusiasts
If your family rewatches the show, debates character arcs, or just loves the apocalyptic vibe, a high-cinema zombie shoot is your moment. You’ll enjoy studying reference materials, investing time in makeup, and scouting locations that mirror the show’s aesthetic. The outcome matters to you; you want the photos to actually feel like they belong in that universe, not just look like people in costumes.
DIY Halloween Fans
You’re not hiring a professional makeup artist or renting a studio backdrop. You’re raiding the dollar store, using stuff you already own, and shooting in your backyard or a local cemetery. The goal is creating memories and having fun, not magazine-quality results. These poses work because they embrace imperfection—crooked makeup, genuine laughter breaks, and authentic chaos all read as part of the aesthetic.
Artfully Inclined Households
If someone in your family draws, sculpts, or studies character design, zombie poses offer a chance to apply that knowledge. Using 3D model collections and monster anatomy references to inform poses turns the photoshoot into a creative project, not just a seasonal obligation. The parents might be genuinely excited about posture and limb placement in ways that sound weird until you see the results.
Families Seeking Alternatives to Traditional Portraiture
Standard family photos feel obligatory and stiff. Everyone’s smiling at the camera, wearing matching pastels, positioned by someone shouting “Say cheese!” A zombie shoot lets you opt out of that entirely. The photos feel earned rather than forced, and they actually capture how your family relates to each other—through humor, creativity, and shared weirdness.
Expert Planning Advice for a Successful Shoot
Start by studying pose references at least two weeks before your shoot date. PoseMy.Art hosts a dedicated zombie pose collection with 3D models that show limb positioning from multiple angles. Shutterstock offers thousands of zombie pose images across different styles and body types. Spend an hour scrolling these resources and screenshotting poses your family actually wants to attempt. This isn’t about copying exactly; it’s about understanding how “broken” posture reads on camera.
Scout your location in advance, ideally during the same time of day and weather conditions you plan to shoot. Cemeteries offer natural props but may have restrictions—call ahead and ask permission. Abandoned buildings, overgrown gardens, dilapidated fences, and old townhouses all work beautifully. Take photos of the space yourself; notice where shadows fall, where the background looks most interesting, and which spots have the best foreground-background depth.
Plan your makeup timeline backward. If your shoot starts at 10 a.m. and makeup takes 90 minutes per person, people should be sitting down at 7:30 a.m. (Add 30 minutes of buffer.) Have someone designated as the makeup artist—ideally someone who’s either done it before or watched a tutorial twice through beforehand. Assign roles: photographer, makeup lead, prop wrangler, director of poses.
Maintain straight faces throughout the actual shoot. This is the hardest part. Someone will crack a smile or laugh, and it breaks the aesthetic instantly. Agree beforehand that you’re all committing to the deadpan look—literally. Funny moments can happen between shots, but the second the photographer raises the camera, expressions go blank.
Bring extra makeup, contacts solution, and water. Makeup runs or smudges in the field, contacts need flushing, and people get dehydrated. Keep these supplies accessible so touch-ups happen quickly without derailing momentum.
Common Mistakes
Overdoing makeup texture often backfires. Thick, cake-like foundation looks worse on camera than a well-blended base. Use primer, apply foundation in thin layers, and set with powder. Professional makeup artists know this; DIYers often don’t. Test your makeup look on camera (not in the mirror) before the shoot day.
Smiling ruins everything. I get it—there’s pressure to look friendly or prove you’re “okay” even in character. The second someone smiles, the undead vibe evaporates. Practicing blank expressions in a mirror feels ridiculous until you realize that practice is exactly why professional actors can hold them.
Choosing a location without scouting first wastes hours of shoot time. You arrive expecting a graveyard aesthetic and find bright sunlight, manicured landscaping, and families picnicking nearby. Scout in person, ideally during the same hour you plan to shoot.
Skipping contact lens practice is risky. Never insert contacts for the first time on shoot day. Some people can’t wear them at all; better to know that in advance. If you’re using them, practice insertion and removal at least three times beforehand.
Forgetting permissions gets you asked to leave. Private cemeteries, gated estates, and state parks often require advance approval or have photography restrictions. Call ahead. Respect posted rules even if they seem inconvenient.
Lighting that’s too bright flattens the eerie mood. Overcast days or golden hour shooting (early morning or late afternoon) work better than midday sun. If you’re shooting midday, seek shade or cloudy conditions. Shadows and directional light enhance the creepy factor; flat, even lighting kills it.
FAQ
Q: Are zombie photoshoots safe for babies and young kids?
Young children can absolutely participate, but adjust the intensity. Skip prosthetics and fake blood if a toddler is involved—pale makeup and tattered clothes convey the look without scariness. Older kids (8+) typically enjoy makeup application and posing. Never force a child into a shoot if they’re genuinely uncomfortable; anxiety reads on camera and ruins the memory. Keep the tone playful for younger participants; this is family fun, not a horror film set.
Q: Can you do a zombie family photoshoot at home?
Absolutely. Your backyard, porch, or indoor spaces work perfectly. Natural light near windows creates mood. A disheveled garden or overgrown corner becomes an instant creepy backdrop. Focus on makeup and posing rather than location grandeur. Home shoots save money and time, though they lack the cemetery or abandoned-building atmosphere. Work with what you have; creativity matters more than setting.
Q: What props work best for a zombie family photoshoot?
Tombstones (rented, DIY foam, or even cardboard) immediately establish graveyard context. Fake blood, weapons (plastic swords, broken bats), chains, or abandoned furniture all enhance the narrative. Fog machines add atmosphere but aren’t essential. Thrifted items like old mirrors, broken picture frames, or weathered doors contribute to the undead aesthetic. Props should support your theme without overwhelming the family—one or two focal pieces work better than clutter.
Q: How do you edit photos to look like zombies?
Post-processing amplifies what’s already there. Increase contrast and reduce saturation to create a desaturated, eerie tone. Darken shadows around eyes and cheekbones. Enhance any red tones in contacts or makeup. Add grain or noise for a grittier look. Don’t overdo digital effects; authentic makeup and posing do most of the work. A skilled photographer captures the zombie aesthetic in-camera; editing refines rather than creates it.
Q: Does it cost a lot to hire a photographer for zombie photos?
Hiring a professional photographer costs $500–2000+ depending on experience, location, and shoot length. Many photographers offer themed shoot packages. DIY photography (using a tripod and smartphone timer, or enlisting a photographer friend) costs nothing to $100. The difference lies in editing quality, pose direction, and final image polish. Decide whether professional results matter for your family or if the memory and fun factor supersedes polish.
Q: When should you plan a spooky family Halloween shoot?
Late September through early October offers the best timing. This allows scheduling with photographers before they’re booked solid, gives you time to gather costumes and plan poses, and ensures photos are ready to share before Halloween. Shooting too close to October 31st creates rushed prep and stressed family dynamics. Outdoor locations photograph best during mild weather with minimal rain risk. Plan at least 4–6 weeks ahead if hiring a professional.
Q: Which outfits look best for zombie family poses?
Tattered, mismatched, and aged clothing reads most effectively. Torn jeans, ripped sweaters, oversized flannel shirts, and layers all work. Thrift stores stock these items cheaply. Avoid pristine, colorful, or fitted outfits—they undermine the undead aesthetic. Mud stains, dirt, and dishevelment enhance authenticity. Consistency across family members matters; everyone should look roughly equally worn, whether that’s all in rags or all in semi-destroyed street clothes. Let your costumes look lived-in rather than crafted.
My Experience With 9 Practical Family Zombie Poses for a Photoshoot
I’ve shot enough zombie family photos to know that the most successful ones aren’t the most elaborate. The family that rented a fog machine and professional makeup artist? Their photos looked polished but stiff. The family that threw on some pale foundation, grabbed thrifted clothes, and practiced blank stares in my backyard for an hour? Those photos breathed—they felt genuine, unsettling in the best way.
Here’s what I learned: posing matters infinitely more than production value. A family nailing the “lurching horde” walk with nothing but pale makeup and commitment looks more effective than an over-styled shoot where everyone’s too aware of the camera. The real magic happens when people stop performing and just exist in character.
The contacts thing surprised me most. I expected them to feel gimmicky, but on camera? They’re the difference between “zombie costume” and “something’s fundamentally wrong.” Red eyes against a dead expression create immediate visceral impact. Worth the $30 investment and the learning curve.
One insight worth sharing: environmental props matter way more than lighting does. A gorgeous sunset won’t sell the undead aesthetic the way a weathered tombstone will. Hunt for locations with pre-existing texture and decay. Your phone camera will forgive flat lighting if the space itself tells the story.
Have you tried a zombie photoshoot with your family? I’m curious whether you went full special effects or kept it minimal—and which approach felt more authentic to you.
Latest Updates
As of 2026, smartphone cameras have improved enough that professional-grade zombie photoshoots no longer require expensive equipment. Computational photography handles lighting challenges that would have required dedicated strobes years ago. Digital editing tools continue to get smarter at post-processing, meaning you can capture the raw vibe in-camera and refine tone and color in minutes rather than hours.
Location scouting has become easier too. Google Earth and Street View let you preview cemetery aesthetics or overgrown properties before visiting in person. Social media communities dedicated to Halloween photography and zombie aesthetics share behind-the-scenes breakdowns regularly, so reference material is abundant and free.
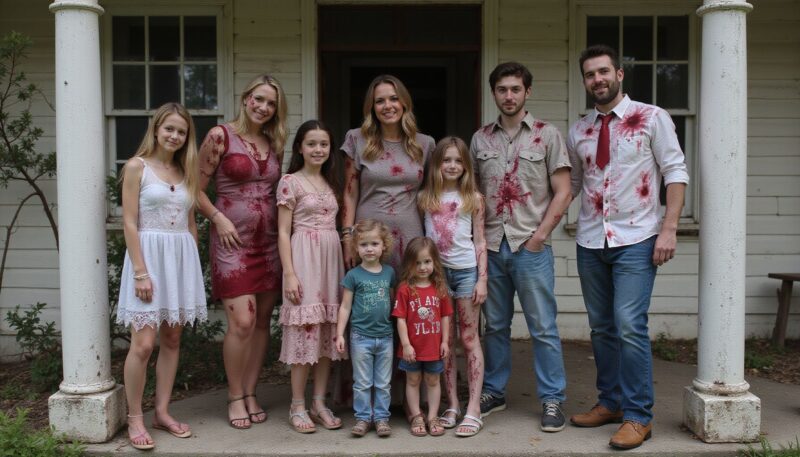
The one trend worth noting: families increasingly mix tones within a single shoot. Some members go full “The Walking Dead” grittiness while others stay playful or partially committed. This hybrid approach actually works because it reflects reality—apocalypse survivors wouldn’t all look equally worn. The contrast between committed and half-committed zombie family members reads as more authentic than uniform intensity.
References
- Renfroe, T. (2024). 21+ Zombie-Themed Family Photoshoot That Looks Straight Out Of The Walking Dead. Auxx. https://www.auxx.me/zombie-family-photoshoot/
- PoseMy.Art. (n.d.). Zombie Poses. PoseMy.Art. https://posemy.art/zombie-poses/
- Shutterstock. (n.d.). Zombie Pose Images, Stock Photos, 3D objects, & Vectors. Shutterstock. https://www.shutterstock.com/search/zombie-pose

A Teacher with 5 years of experience. Our Expertise, is reliable to meet your full Academic development needs . Worked on many crafts and construction projects offering services from design to development to deployment over the years. You will find many of my works in my business portfolio on request.