Picture this: you’re getting ready for a special evening, and nothing in your jewelry box quite matches your outfit. Instead of rushing to the store, imagine reaching for a beautiful, handcrafted beaded necklace that you made yourself – one that perfectly complements your style and tells your unique story. Creating your own beaded jewelry isn’t just a craft; it’s a form of self-expression that’s both relaxing and rewarding. These 3 beaded necklace tutorial to try will transform you from a jewelry admirer into a jewelry creator, giving you the skills to craft stunning pieces that rival anything you’d find in boutiques.
Key Takeaways
• Simple materials create stunning results – Basic beads, wire, and clasps can produce professional-looking necklaces
• Three skill levels covered – From beginner-friendly single strands to advanced multi-layered designs
• Cost-effective creativity – Making your own jewelry saves money while providing personalized accessories
• Therapeutic benefits – Beading reduces stress and provides a mindful, meditative activity
• Endless customization – Mix colors, textures, and patterns to match any style or occasion
Getting Started: Essential Supplies for Your Beaded Necklace Journey
Before diving into these 3 beaded necklace tutorial to try, gathering the right materials ensures smooth sailing through each project. The beauty of beaded jewelry lies in its accessibility – most supplies are affordable and readily available at craft stores or online retailers.
Must-Have Materials 🛍️
Basic Beading Supplies:
- Beading wire or thread (0.014-0.019 inches for most projects)
- Crimp beads (small metal tubes for securing wire)
- Jump rings (small metal circles for connections)
- Lobster claw clasps (secure and easy-to-use closures)
- Needle-nose pliers (for gripping and bending)
- Wire cutters (for clean cuts)
- Crimping pliers (specialized tool for crimp beads)
Bead Selection Guide:
| Bead Type | Best For | Price Range | Durability |
|---|---|---|---|
| Glass beads | Elegant designs | $5-15 per strand | High |
| Wooden beads | Bohemian styles | $3-10 per strand | Medium |
| Crystal beads | Formal occasions | $10-30 per strand | High |
| Pearl beads | Classic looks | $8-25 per strand | High |
| Seed beads | Intricate patterns | $2-8 per pack | Medium |
Pro Tip: Start with glass or wooden beads for your first projects – they’re forgiving, affordable, and create beautiful results while you’re learning the techniques.
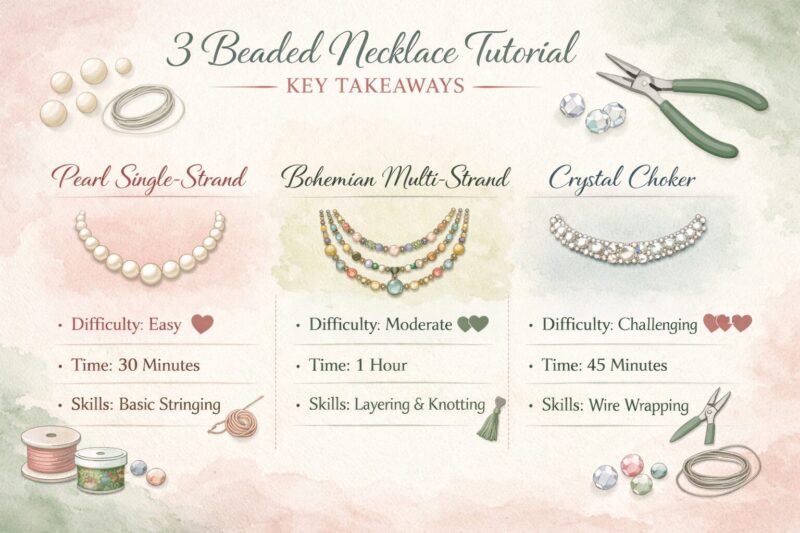
Tutorial #1: Classic Single-Strand Pearl Necklace
This timeless design serves as the perfect introduction to beading. The classic single-strand pearl necklace teaches fundamental techniques while creating an elegant piece suitable for any wardrobe.
Materials Needed
- 60-80 pearl beads (8mm diameter)
- 24 inches of beading wire
- 2 crimp beads
- 1 lobster claw clasp
- 1 jump ring
- Crimping pliers
- Wire cutters
Step-by-Step Instructions
Step 1: Prepare Your Workspace
Set up a clean, well-lit area with a bead mat or towel to prevent beads from rolling away. Organize your materials within easy reach.
Step 2: Cut and Thread
Cut 24 inches of beading wire. Thread one crimp bead onto the wire, followed by the jump ring. Loop the wire back through the crimp bead, creating a small loop with the jump ring secured inside.
Step 3: Secure the First End
Using crimping pliers, flatten the crimp bead to secure the wire loop. Trim any excess wire close to the crimp bead.
Step 4: Add the Pearls
Thread pearl beads onto the wire one by one. For an 18-inch finished necklace, use approximately 65-70 beads, depending on their size. Keep gentle tension on the wire to prevent gaps.
Step 5: Finish the Second End
Thread the second crimp bead onto the wire, then add the lobster claw clasp. Loop the wire back through the crimp bead and several pearl beads for extra security.
Step 6: Final Crimping
Pull the wire tight to eliminate gaps between beads, then crimp the second crimp bead. Trim excess wire.
Styling Tips ✨
- Formal events: Pair with little black dresses or business attire
- Casual wear: Layer with longer necklaces for a modern look
- Color variations: Try cream, gray, or colored pearls for different moods
Tutorial #2: Bohemian Multi-Strand Beaded Necklace
Ready to level up? This bohemian multi-strand design combines various bead types and colors, creating a statement piece that showcases intermediate beading skills.
Materials Needed
- Mixed beads in 3-4 coordinating colors
- 72 inches of beading wire (24 inches × 3 strands)
- 6 crimp beads
- 3-strand clasp set
- Needle-nose pliers
- Crimping pliers
- Bead board (optional but helpful)
Design Planning
Color Scheme Ideas:
- Earth tones: Browns, golds, and deep oranges
- Ocean vibes: Blues, greens, and silver accents
- Sunset palette: Reds, oranges, and warm yellows
- Monochromatic: Various shades of one color family
Step-by-Step Instructions
Step 1: Plan Your Design
Lay out beads on a bead board or towel, creating three different patterns. Vary bead sizes and colors across strands while maintaining visual balance.
Step 2: Create the First Strand
Start with the shortest strand (typically 16-17 inches). Attach one end to the top loop of your 3-strand clasp using the crimping technique from Tutorial #1.
Step 3: Bead the First Strand
Follow your planned pattern, mixing bead sizes and colors. Consider using larger beads as focal points and smaller beads as spacers.
Step 4: Complete Remaining Strands
Create the second strand (17-18 inches) and third strand (18-19 inches), ensuring each has a unique but complementary pattern.
Step 5: Balance and Adjust
Before final crimping, hold the necklace up to check balance and drape. Adjust bead placement if needed.
Step 6: Secure All Ends
Crimp all six wire ends to the appropriate clasp loops, ensuring proper strand length graduation.
Troubleshooting Common Issues
Problem: Strands tangling
- Solution: Use a necklace detangler or store on a multi-strand jewelry stand
Problem: Uneven draping
- Solution: Adjust middle strand length – it should be 1-2 inches longer than the shortest strand
Problem: Color clashing
- Solution: Add neutral spacer beads between bold colors to create harmony
Tutorial #3: Elegant Crystal Choker with Pattern Detail
This advanced project introduces pattern work and precision beading, creating a sophisticated choker that showcases your growing skills. The elegant crystal choker requires attention to detail but produces stunning results.
Materials Needed
- 200+ small crystal beads (4mm)
- 50+ accent beads (6mm, contrasting color)
- 20 inches of beading wire
- 4 crimp beads
- Magnetic clasp
- Bead stops or tape
- Magnifying glass (optional)
- Pattern chart (create your own or find online)
Creating Your Pattern
Simple Pattern Ideas:
- Alternating sequence: 3 main color, 1 accent, repeat
- Diamond pattern: Create diamond shapes with accent beads
- Gradient effect: Gradually transition between two colors
- Geometric design: Use graph paper to plan complex patterns
Advanced Techniques
Double-Wire Method:
For added strength and professional finish, this choker uses a double-wire technique where two wires run parallel through each bead.
Step 1: Prepare Double Wire
Cut two 20-inch pieces of beading wire. Tape or clamp them together at one end, leaving 2 inches of tail.
Step 2: Thread Both Wires
Pass both wires through each bead simultaneously. This creates a stronger foundation and prevents stretching.
Step 3: Follow Your Pattern
Work slowly, checking your pattern frequently. Use good lighting and take breaks to prevent eye strain.
Step 4: Maintain Tension
Keep consistent tension throughout the project. Too loose creates gaps; too tight makes the choker rigid.
Step 5: Professional Finishing
Use two crimp beads on each end for extra security. Hide crimp beads inside larger accent beads when possible.
Finishing Touches for Professional Results
Quality Control Checklist:
- ✅ All beads properly seated
- ✅ No visible wire gaps
- ✅ Crimp beads securely flattened
- ✅ Clasp functions smoothly
- ✅ Overall length appropriate for choker style (14-16 inches)
Advanced Tips and Techniques for All Three Tutorials
Wire Selection Wisdom
Different projects require different wire types. Flexible beading wire works best for most projects, but consider these factors:
Wire Diameter Guidelines:
- 0.014 inches: Small, lightweight beads
- 0.018 inches: Medium beads, most versatile
- 0.024 inches: Large, heavy beads
Professional Finishing Secrets
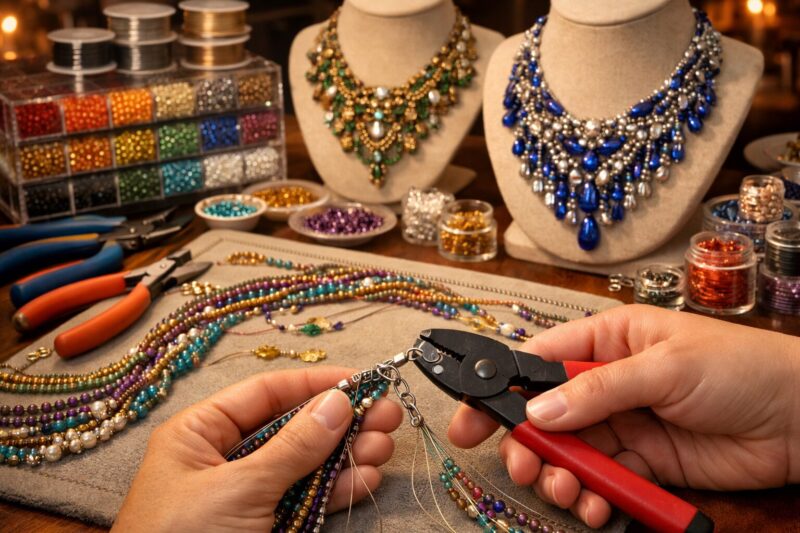
Crimp Bead Mastery:
- Insert wire through crimp bead
- Add clasp component
- Loop wire back through crimp bead
- Pull tight to eliminate slack
- Crimp in two places for security
Hiding Your Work:
- Thread wire tails back through several beads before cutting
- Use crimp covers to hide visible crimp beads
- Choose clasp colors that complement your design
Troubleshooting Guide
| Problem | Cause | Solution |
|---|---|---|
| Wire breaking | Wrong wire gauge | Use thicker wire for heavy beads |
| Beads sliding | Insufficient tension | Re-crimp with proper tension |
| Clasp failure | Poor attachment | Use two crimp beads per connection |
| Uneven spacing | Inconsistent threading | Use bead stops to maintain position |
Caring for Your Handmade Beaded Necklaces
Proper care ensures your creations last for years. Different bead materials require specific care approaches.
Storage Solutions
- Individual pouches prevent tangling and scratching
- Jewelry boxes with compartments organize multiple pieces
- Hanging organizers prevent stress on wire connections
Cleaning Guidelines
Glass and Crystal Beads:
- Gentle soap and water
- Soft cloth drying
- Avoid harsh chemicals
Pearl and Delicate Beads:
- Dry cloth cleaning only
- Professional cleaning for valuable pieces
- Store away from direct sunlight
Expanding Your Beading Skills: What’s Next?
Mastering these 3 beaded necklace tutorial to try opens doors to countless creative possibilities. Consider these next steps in your beading journey:
Advanced Techniques to Explore
- Wire wrapping for custom connectors
- Bead embroidery for textile integration
- Memory wire projects for structured designs
- Kumihimo braiding for cord-based necklaces
Building Your Bead Collection
Smart Shopping Strategies:
- Buy quality tools once rather than replacing cheap ones
- Purchase beads in bulk for better pricing
- Join beading groups for supply swaps and tips
- Attend craft fairs for unique, handmade beads
Turning Hobby into Business
Many beaders eventually sell their creations. Consider:
- Local craft fairs for direct customer interaction
- Online platforms like Etsy for broader reach
- Custom orders for personalized pieces
- Teaching workshops to share your skills
Conclusion
Creating beautiful beaded necklaces combines artistic expression with practical skill-building, offering both personal satisfaction and stunning accessories for your wardrobe. These 3 beaded necklace tutorial to try provide a solid foundation in essential beading techniques, from basic stringing to advanced pattern work. Whether you’re crafting a classic pearl strand for timeless elegance, experimenting with bohemian multi-strand designs for creative expression, or challenging yourself with intricate crystal choker patterns, each project builds confidence and expertise.
The journey from beginner to accomplished beader happens one bead at a time. Start with the classic pearl necklace to master fundamental techniques, then progress through the multi-strand bohemian design to explore color and texture combinations. Finally, challenge yourself with the crystal choker to develop precision and pattern skills.
Your Next Steps:
- Gather materials for your chosen tutorial and set up a dedicated workspace
- Start with Tutorial #1 if you’re new to beading, or jump to your skill level
- Practice the techniques until they feel natural and comfortable
- Experiment with variations using different colors, bead types, and patterns
- Share your creations with friends and family, or consider selling your pieces
Remember, every expert beader started exactly where you are now. With patience, practice, and creativity, you’ll soon be designing and creating stunning beaded necklaces that reflect your personal style and showcase your growing skills. The therapeutic benefits of beading, combined with the practical value of handmade jewelry, make this craft both rewarding and sustainable.

A Teacher with 5 years of experience. Our Expertise, is reliable to meet your full Academic development needs . Worked on many crafts and construction projects offering services from design to development to deployment over the years. You will find many of my works in my business portfolio on request.