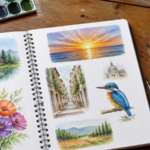
Watercolor feels scary—until you try a few simple projects that actually teach you control. Once you learn a couple repeatable techniques, you can make satisfying paintings without fancy gear or years of experience. I love that watercolor is forgiving: mistakes turn into textures, and every session makes you better. These projects are designed to build your skills step by step—like smooth gradients, clean edges, and easy layering. I’ll show you how to set up, what to practice, and how to finish each one so you get real results at home.
Key Takeaways
“Easy” watercolor projects still teach real skills like wet-on-wet transitions, edge control, and layering values.
Keeping the right amount of water on your brush (and blotting after rinsing) helps prevent blooms and backruns.
Masking tape can make watercolor look more “pro” by protecting crisp borders.
You’ll master more by repeating patterns (petals, shapes, simple landscapes) than by chasing perfection.
Quick Answer
Pick any 1–2 projects to start, and focus on one technique at a time: smooth gradients, diluted transitions, soft layered shapes, and (optional) tape-defined edges. Complete the painting by letting it fully dry before removing masking tape, and practice the same wash control habits each time.
What You Need
Item
Purpose
Notes
Watercolor paper
Holds pigment and water
Choose a small pad if you’re starting (thicker paper helps prevent buckling)
Brushes: 1 round/standard + 1 liner/detail
Different jobs in one kit
A small detail/liner brush is great for last-minute touches
Water jars (2 recommended)
Keep paints clean and control dilution
One jar for rinsing, one for “fresh” water helps reduce muddy color
Palette (or mixing surface)
Mix consistent colors and values
Even a simple palette works—just mix off to the side
Pencil + eraser
Light sketching and planning
Sketch lightly so pencil doesn’t show through
Masking tape (optional)
Crisp edges and protected borders
Remove only when the artwork is fully dry (at an angle)
Starter watercolor set (few colors)
Beginner-friendly color range
Ultramarine blue, indigo, sap green, may green, yellow ocher, naples yellow, payne’s gray are common picks
Cloth/tissue/rough cloth
Blotting your brush
Blot after rinsing—not completely dry—to prevent backruns
Core Techniques Behind “Easy” Projects
Before I jump into the 14 projects, I want to share the few technique “secrets” that make them easier. Think of these as your toolbox.
## Wet-on-wet transitions (the magic behind smooth watercolor)
To get soft blending, I often paint one wash, then add a new wash into it while there’s still moisture. A helpful beginner workflow is to dip the brush into rinse water to dilute the pigment, then blot it so it isn’t dripping.
Important detail: I don’t fully clear every bit of color from my brush. Instead, I keep a little color on the brush head, but more diluted than before. That’s what creates smooth tonal transitions instead of harsh color breaks.
## Preventing blooms and backruns (so your washes stay calm)
Sometimes watercolor “spills” in ways you didn’t plan. That’s often from too much water.
Here’s what I do to reduce that:
Rinse the brush in rinse water.
Blot the brush (not completely dry).
Pull the next wash gently.
If you add a wash with too much water, paint can move back into earlier wet areas (a “backrun”). Blotting helps you control the flow.
Building shapes with simple layers
Most “easy” projects use a layered approach:
Start with light washes to block in big shapes.
Let areas settle slightly.
Add darker values after the first layer is in place.
That’s how you get depth without over-detailing.
Edge control with masking tape (optional, but awesome)
If you like clean borders, I use masking tape:
Tape down edges or borders you want to keep crisp.
Paint over it (it protects the paper).
Wait until everything is completely dry, then remove tape at an angle so you don’t tear paper.
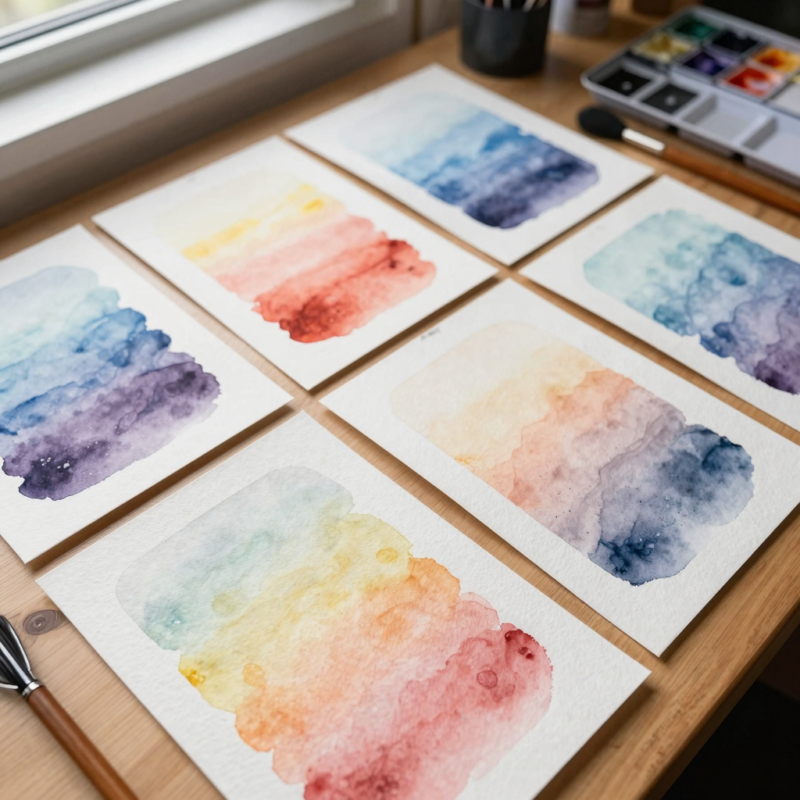
Step 1: Simple Gradient Wash Studies
This is my go-to “warm-up project” because it teaches you the most important skill: controlling how much pigment and water you’re using.
Step 1: Sketch and plan your strip
Draw a few rectangles or strips with pencil. Keep them simple—like 3–6 small bars.
Step 2: Mix a light and a dark version
On your palette, mix one light wash (more water) and one dark wash (less water).
Step 3: Paint left to right
Start with the lighter wash on the left. Then reload your brush with a slightly stronger mix and blend toward the middle.
Step 4: Practice “rinse + blot” for smooth transitions
Between bars, rinse your brush, blot it (not fully dry), and pull the next value. I do this to keep the gradient smooth instead of patchy.
Step 5: Let it dry and compare
When dry, look at which bars had the smoothest transitions. That tells you where your water control is strongest.
Step 2: Two-Color Sky/Background
This project builds your ability to blend one color into another without hard edges (unless you want them).
Step 1: Lightly sketch a horizon line (optional)
If you want a horizon, lightly draw a line across your paper.
Step 2: Paint the first color wash
Wet the sky area lightly (or work wet-into-wet). Lay down Color A (like ultramarine blue).
Step 3: Add Color B into Color A
While the first area is still damp, load your brush with Color B (like indigo). Touch it in gently and let it spread.
Step 4: Dilute your brush to fade
If the second color looks too strong, rinse your brush, blot it, and pull it through the edge of the blended area.
Step 5: Stop when it looks right
Watercolor blooms can happen quickly. I’ve learned that the best time to “stop” is when the transition feels soft and even.
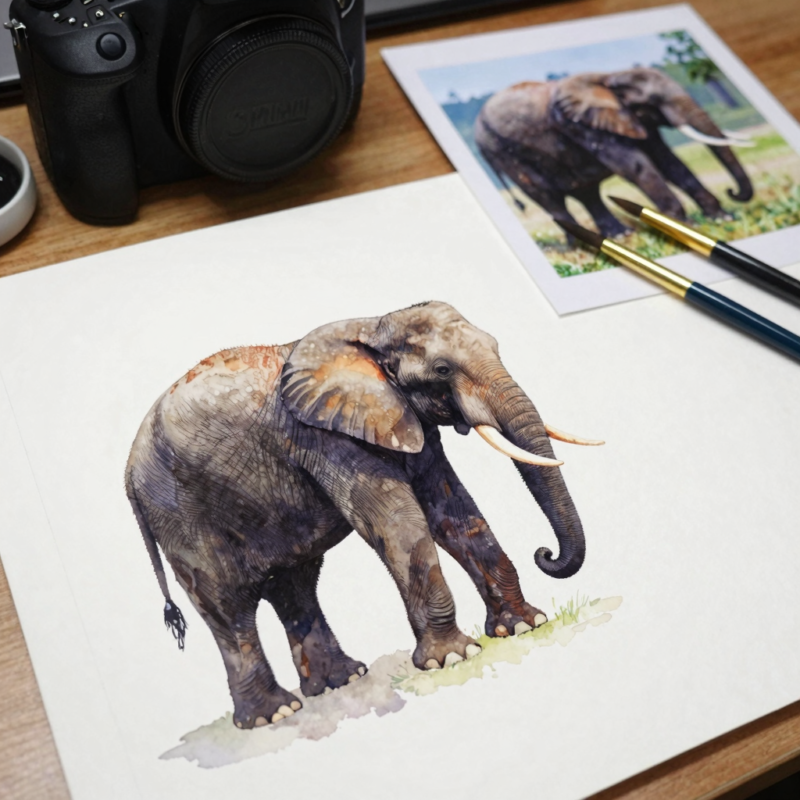
Animals can look impressive without being complicated if you focus on silhouettes and a few key features.
Step 1: Sketch a simple elephant outline
Draw a basic head/body shape and a short tail. Don’t aim for realism yet.
Step 2: Paint the body with one wash
Use a broad brush and a mid-tone mix (payne’s gray + a little blue works well). Fill most of the shape evenly.
Step 3: Darken key areas
Add slightly darker pigment under the head, around legs, and near the eye area. Don’t over-detail—just place values.
Step 4: Add facial details last
Switch to a liner brush for:
small eye dot/line
ear edge suggestion
trunk curve
Step 5: Let the edges be soft (on purpose)
I keep the silhouette edges slightly blended for a watercolor look rather than trying to make every line razor sharp.
Step 6: Leaf/Green Study (Sap/MaY Green Style Palette)
This project helps you master repeated marks and subtle value changes—especially with greens.
Step 1: Sketch a branch or a simple cluster
A few stems and leaf blobs is plenty.
Step 2: Mix two greens (or one green + diluted green)
I often use a darker green (sap green) and a lighter green (same green with more water, or may green diluted).
Step 3: Paint stems first
Use a brush to draw or suggest branch lines.
Step 4: Paint leaves in batches
Use quick leaf shapes:
Start with lighter green
Add darker green in the “shadow” side of leaves
Step 5: Vary values with rinse + blot
When you want lighter leaves, rinse, blot, and reload with diluted pigment.
Step 7: Minimal Flower Bouquet
Flowers don’t have to be complicated. This is all about repeating simple petal shapes and changing intensity.
Step 1: Draw a loose bouquet layout
Sketch a few circles/ovals for flower centers and stems.
Step 2: Paint petal shapes around each center
Use a medium brush for big petals and a liner for small ones.
Step 3: Adjust color intensity by water-to-paint ratio
If petals look too heavy, water it down next time. If they look too pale, use stronger pigment.
Step 4: Add a few leaves
Use greens and place them sparsely—too many leaves can make it messy quickly.
Step 5: Add final center details
A small brush dot or a tiny line can make flowers feel complete.
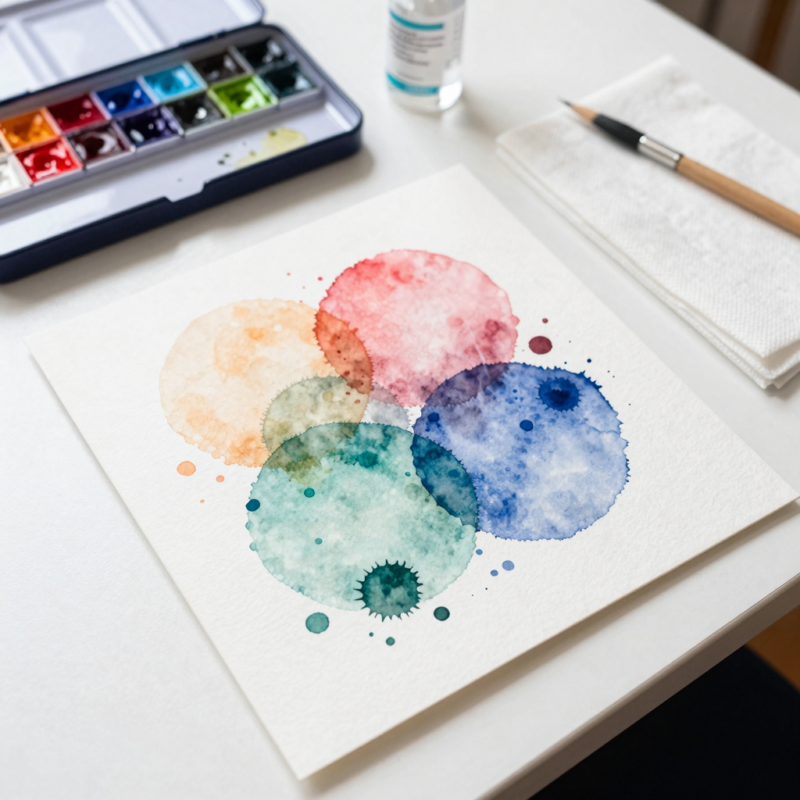
Step 8: Abstract Color Play Card (Low-Stakes Experiment)
This one is for when you want freedom and texture practice. It’s also great for learning how watercolor behaves.
Step 1: Choose a color theme (2–4 colors)
For example: blues + a splash of indigo, or greens + a touch of yellow ocher.
Step 2: Wet a few areas (optional) and drop in pigment
You can either paint on dry paper for crisp shapes, or add pigment into damp areas for blooms.
Step 3: Use the rinse-and-blot method to create fading edges
I love using this to make “smoky” transitions.
Step 4: Add random marks
Try splatters, lines, or small dots with your liner brush.
Step 5: Let it dry fully, then evaluate
I like turning these into a set—like a mini collection of test pieces I can reference later.
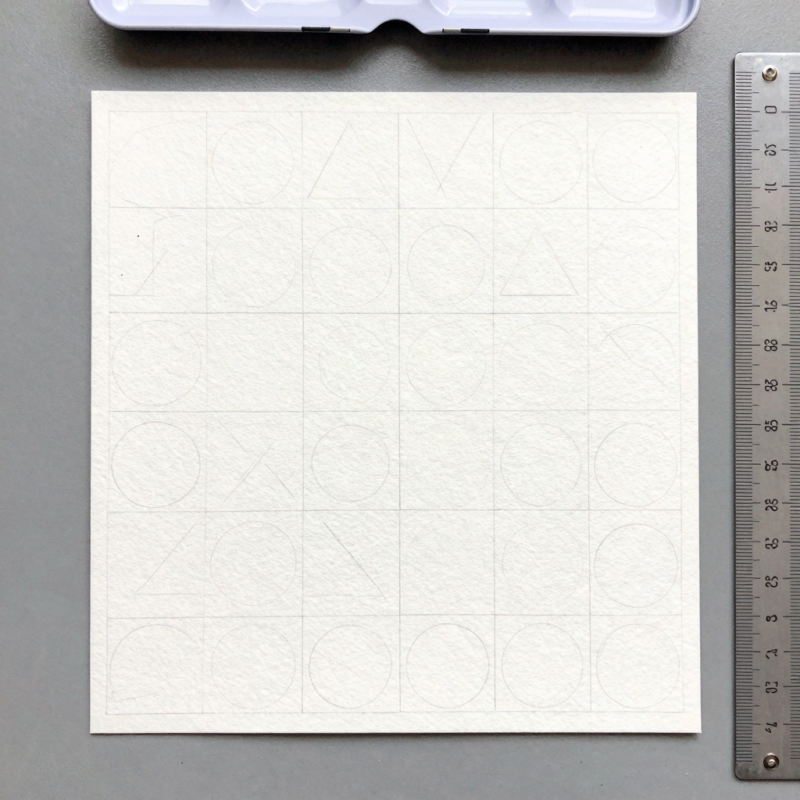
Step 9: Simple Geometric Pattern Tile
This project is perfect if you like structure. Tape makes it even cleaner, but it’s doable without.
Step 1: Draw a tile grid
Pencil lines are fine. Keep shapes simple: rectangles, triangles, and circles.
Step 2: Optional tape borders
Tape around the tile so your background stays crisp.
Step 3: Paint one shape at a time
Start with light colors. Let them settle before adding darker shapes nearby.
Step 4: Keep edges controlled
If you want clean borders, use less water so pigment doesn’t spread too far.
Step 5: Remove tape after drying (if you used it)
Peel at an angle away from the paper surface.
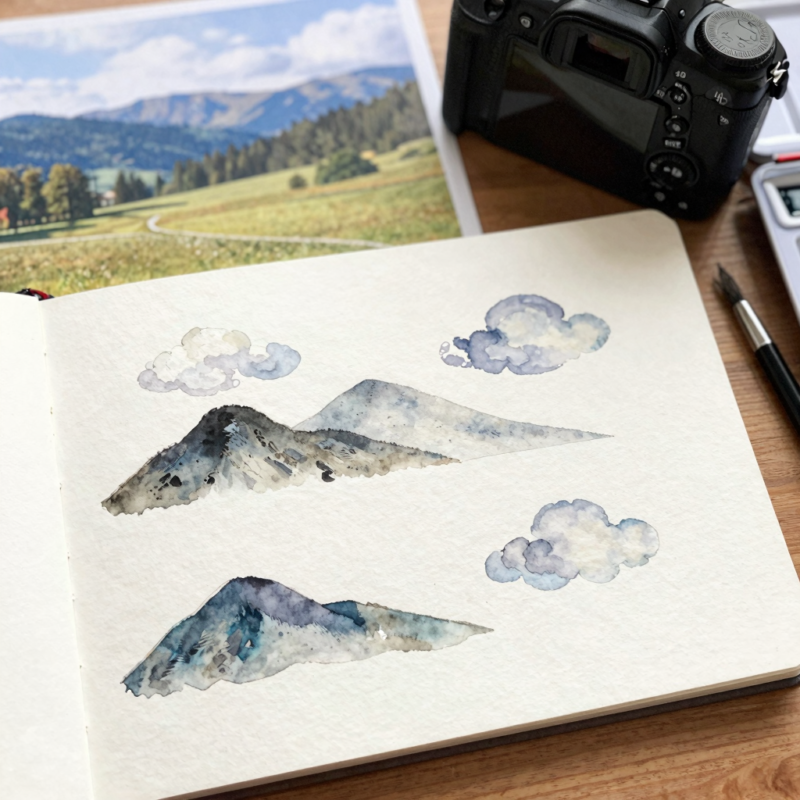
Step 10: Easy Mountain/Cloud Forms
Mountains and clouds teach you layering values—without needing tiny details.
Step 1: Paint the base sky wash
Use light blue to cover the background area.
Step 2: Add cloud masses with damp blending
While it’s still damp, add slightly darker blue/indigo cloud shapes.
Step 3: Paint mountains in simple shapes
After the sky settles, add mountain shapes using a medium value (like indigo + a touch of gray).
Step 4: Create depth with darker foreground
Use a stronger mix for the bottom ridge. Keep distant mountains lighter.
Step 5: Soften edges if needed
Rinse, blot, and gently lift/soften the edge of a ridge that looks too sharp.
Step 11: Bowl of Fruit (3–5 Items Maximum)
This helps you learn grouping and basic shadow placement.
Step 1: Sketch the bowl and simple fruit shapes
Choose 3–5 items: an apple oval, a lemon oval, maybe a grape cluster circle.
Step 2: Paint fruit with simple washes
Avoid too many details. Paint each fruit as a shape first.
Step 3: Add shadows under fruit
Shadows make it look real even if the fruit isn’t detailed.
Step 4: Add a few highlights by leaving paper blank
Highlights are your “shine,” and watercolor loves white space.
Step 5: Finish the bowl outline
Use a slightly darker mix for the bowl rim and inner shadow.
Step 12: Woodland Branch with Leaves
This is a great “quick impact” project: it looks pretty even when you keep it simple.
Step 1: Sketch a branch line
Draw one main branch that curves slightly.
Step 2: Paint the branch first
Use a brown-gray or gray-green mix and a steady hand.
Step 3: Layer leaf clusters
Paint leaf clusters as grouped strokes. Don’t paint every leaf.
Step 4: Use two greens for contrast
light green for top areas
darker green for under/side areas
Step 5: Add depth with tiny shadow marks
A few darker cluster strokes are often enough.
Step 13: Seashell or Stone Study
Texture in watercolor is all about value changes and leaving highlights.
Step 1: Choose one shell/stone outline
Sketch lightly. Keep the shape simple.
Step 2: Paint a base wash
Use a light neutral (gray + a hint of blue works nicely). Let it dry or partially dry.
Step 3: Add contour shadows
Paint darker lines or bands where the shell curves. Keep them subtle.
Step 4: Leave highlights unpainted
I paint around bright spots so the shell looks glossy or smooth.
Step 5: Final touch with a small liner
Add just a few tiny lines to suggest ridges or texture.
Step 14: “Your Own Easy Scene” Using What You Learned
This is where your practice becomes a real artwork you can be proud of.
Step 1: Choose one technique focus
Pick one:
gradient practice
tape-defined edges
layered landscape
Step 2: Limit your palette
Choose 3–5 colors max. I usually pick one blue, one green, one yellow, and a gray.
Step 3: Build your scene in 2–3 layers
Layer ideas:
Light base wash (sky/background)
Middle shapes (hills/trees/objects)
Dark accents and shadows (foreground)
Step 4: Use a small brush for “last 10%”
Add details like a few leaves, window shapes, or a shoreline line. Don’t add too much.
Step 5: Sign it and let it dry
Make sure it’s fully dry before you move or frame it.
Tips
Use two water jars if you can—one for rinsing, one for fresh dilution. It reduces muddy colors.
Blot your brush after rinsing. It’s one of the biggest beginner improvements for smooth blends.
Work from light to dark. If your first layer is too dark, it can be hard to fix.
Repeat a favorite project twice. The second time, your control improves fast.
Keep a “test scrap” sheet nearby to check your values and water levels.
FAQ
Why do my watercolor washes keep blooming or backrunning?
Usually it’s too much water. Rinse the brush, then blot it (not completely dry) before pulling the next wash. Also give the previous layer a moment to settle so the paint has less “room” to run.
Do I need masking tape for crisp edges?
No. Masking tape is optional. You can also achieve clean edges by using less water, letting layers settle, and painting around shapes carefully. Tape just makes crisp borders easier.
What brushes are best for beginners?
I recommend at least two: a standard round brush for washes and a smaller detail/liner brush for final marks. You don’t need many sizes at first—just the right purposes.
Can I use fewer colors than the recommended palette?
Absolutely. Many beginner guides use a small set because it’s easier to mix consistent tones. Pick a blue, a green, a yellow, and a gray, then practice mixing lighter/darker versions with water.
## How long should I wait before removing masking tape?
Wait until the painting is completely dry. When you remove tape, peel it back at an angle, away from the paper surface, to reduce tearing.
Conclusion
I’ve found that the fastest way to master watercolor at home is to practice with projects that teach you the same core skills again and again—smooth gradients, controlled wet-on-wet blending, simple layering, and optional crisp edges with tape. With just paper, a couple brushes, a few colors, and the habit of rinsing, blotting, and layering light to dark, you can build real confidence quickly. Pick one project from the list, try it today, and then repeat the style you liked most. Your next painting will feel easier than the last—and that’s the real fun part.
A Teacher with 5 years of experience. Our Expertise, is reliable to meet your full Academic development needs . Worked on many crafts and construction projects offering services from design to development to deployment over the years. You will find many of my works in my business portfolio on request.

















I enjoyed the watercolour tips.
I enjoyed the watercolour tips
Thank you
Mary ODonnell
thanks for stopping by
Where do we get the links for the tutorials?
which of these so i can drop the Link