A blank scrapbook page can feel intimidating. The right layout removes the guesswork so your photos and story shine. Recent scrapbook guides show that a handful of repeatable structures—grids, hero photos, strips, and clusters—cover most pages and finish in under an hour. These ideas work for paper or digital albums and suit beginners as well as busy scrapbookers. Pick the layout that matches your photos and the page almost designs itself.
Quick answer: Use these 12 easy scrapbook page layouts—hero photo, clean grid, timeline strip, cluster, pocket page, and more—to arrange photos and journaling quickly. Start with the story type (one big moment, event recap, or sequence), then place photos and add a short title or caption.
Current layout collections agree that structure first, then photos, saves time. Limit embellishments so the images stay the focus. The twelve ideas below cover single moments, multi-photo events, and sequential stories with clear, practical steps.
Layout
Best For
Photo Count
Time
Hero Photo
One big moment
1-4
20-40 min
3×3 Grid
Event recaps
6-9
25-45 min
Timeline Strip
Sequences
4-6
20-35 min
Cluster
Casual stories
3-5
25-40 min
Pocket Page
Quick fills
4-8
15-30 min
Typical Page Time (minutes)
30
35
25
30
20
Hero
Grid
Strip
Cluster
Pocket
1. Full-Bleed Hero Photo
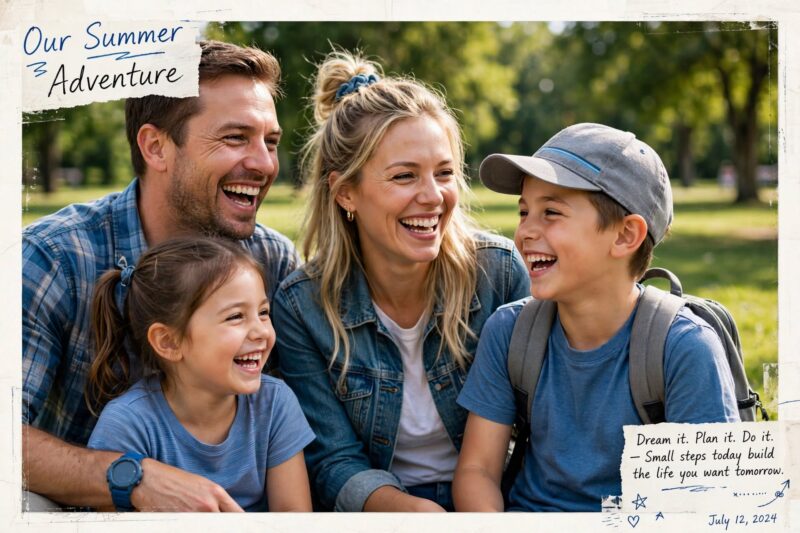
One strong photo fills most or all of the page. Title and short journaling sit in a corner or on a small overlay. This layout works when a single image carries the emotion of the day. Recent story-type guides list it first for milestones such as birthdays or first days.
Print the photo large enough to dominate. Keep extra elements minimal so the image stays the focus. The page feels bold and finishes quickly.
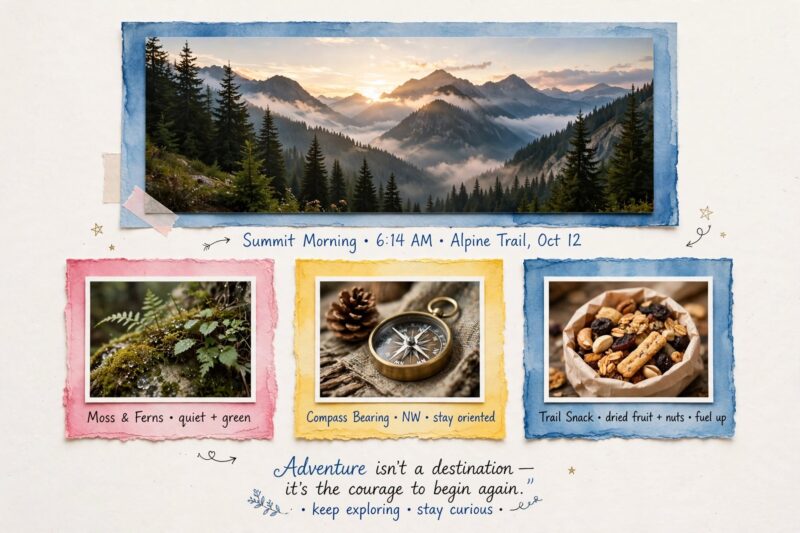
2. Hero Photo Plus Mini Grid
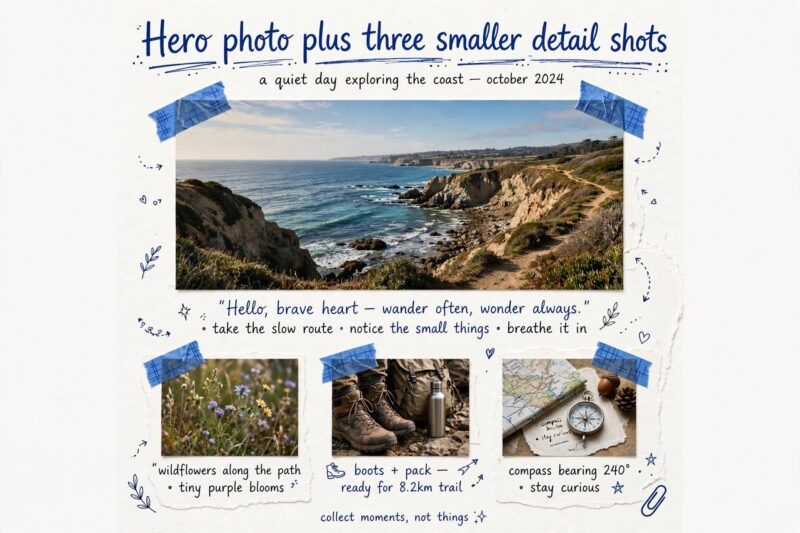
Place one large photo in the upper portion of the page. Add three to six smaller detail shots below or beside it. The big image anchors the story while the smaller ones supply context. Current beginner lists recommend this for events that have both a standout moment and supporting shots.
Crop the smaller photos consistently. A short title and one journaling block complete the page without clutter.
3. Clean 3×3 Grid
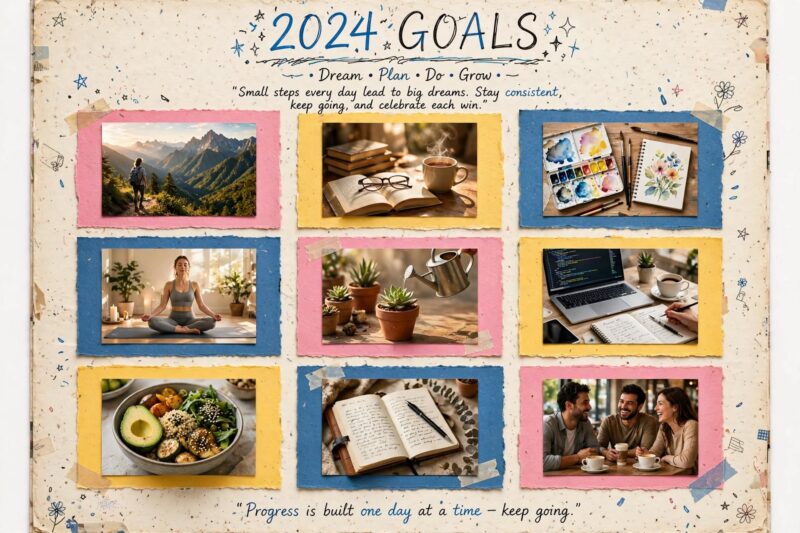
Arrange nine equal-sized photos in three rows of three. Leave even space between them and add a title above or journaling below. The grid does the design work so the photos shine. Recent timeless-layout articles call the 3×3 the most reliable multi-photo structure for beginners.
Use similar orientation and color tones for harmony. Neutral backgrounds keep the page calm and let each photo breathe.
4. Timeline or Story Strip
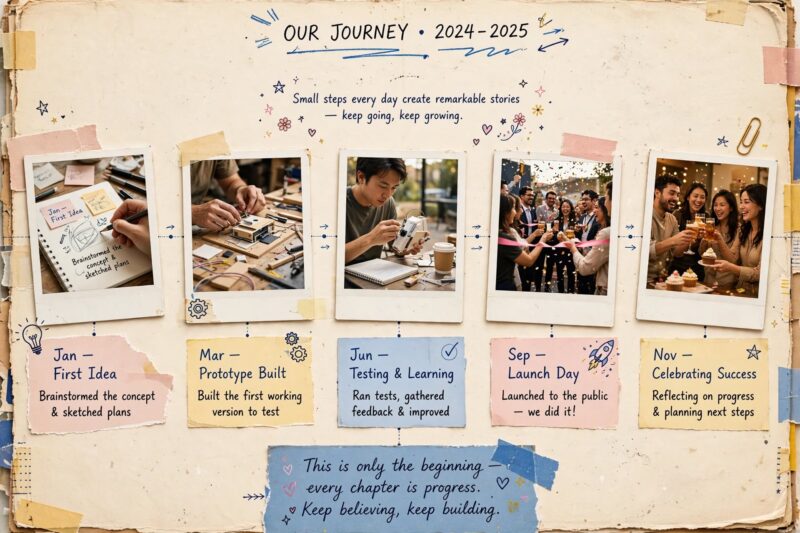
Line up four to six photos left to right or top to bottom in the order the moments happened. Add short captions under each. The sequence feels like a mini movie and makes journaling easier. Current guides still feature the strip for trips, parties, and day-in-the-life pages.
Keep the photos the same height for a clean band. A single title at the top or side ties the story together.
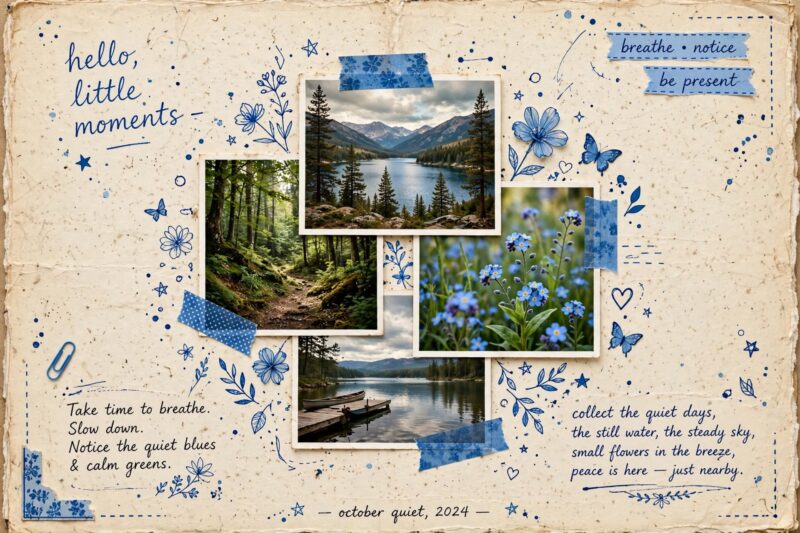
5. Center Cluster Layout
Group three to five photos in the middle of the page and surround them with a tight cluster of embellishments or paper layers. The photos stay the focus while the accents add energy. Recent design tips note that clusters feel casual and work well when you want a less formal look.
Overlap the photos slightly and keep the cluster balanced. White space around the group prevents the page from looking crowded.
6. Horizontal Strip Layout
Place one or two large photos on a solid background and frame them with horizontal bands of patterned paper or color. The bands create a modern, clean look with minimal effort. Timeless-layout articles still list the horizontal strip as one of the fastest polished designs.
Keep the bands the same width for rhythm. A short title and one journaling line finish the page.
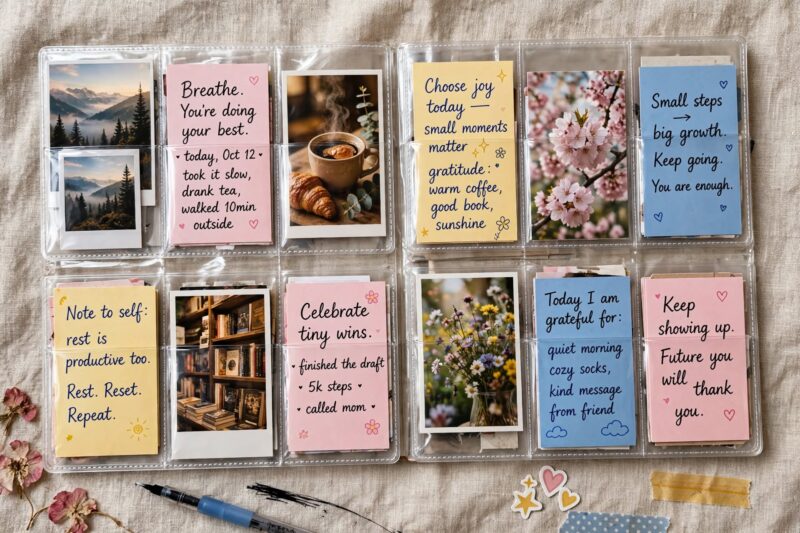
7. Pocket Page Spread
Use pocket-page protectors and slide photos, journaling cards, and ephemera into the slots. No glue is required for the photos themselves. Current pocket-page ideas highlight this style for weekly or event spreads because it is fast and flexible.
10. Quote Plus Four Moments
Mix photo sizes and card styles within the pockets. The finished page looks organized and can be rearranged later if needed.
8. Asymmetrical Balance
Place a larger photo or block on one side and balance it with smaller elements on the other. Visual weight, not perfect symmetry, creates the calm. Recent design guides note that asymmetrical layouts feel modern and leave room for journaling.
Test the balance by stepping back from the page. A single title or date can anchor the lighter side.
9. Before / During / After
Use three photos in sequence to show progress or change. Label each stage and add a short summary. This structure works for projects, trips, or personal growth stories. Current story-type layouts still recommend it when the narrative has a clear beginning, middle, and end.
Keep the photos the same size for clarity. A simple timeline line or arrows can connect the stages if desired.
Feature a meaningful quote or short text block as the focal point. Surround it with four supporting photos. The combination feels reflective and works for quieter memories. Recent reflective-layout ideas list this structure for pages that need more words than images.
Choose a readable font or handwriting style. The four photos can be small and evenly spaced so the quote stays dominant.
11. Diagonal Cascade
Overlap photos at a slight angle so they cascade across the page. The movement feels energetic and works with mixed photo sizes. Current creative-layout lists still include the cascade for pages that need a lively feel without a strict grid.
Start with the largest photo and layer smaller ones. Keep the overall direction consistent so the eye travels smoothly.
12. White Space Focus
Place one or two photos and a short title with generous empty space around them. The openness feels calm and modern. Recent minimalist-layout trends note that white space helps the eye rest and makes the chosen images more powerful.
Resist the urge to fill every corner. A single embellishment or date is often enough. The finished page looks intentional and uncluttered.
Layout
Story Type
Key Feature
Tip
1. Full-Bleed Hero
Single moment
One large photo
Minimal extras
2. Hero + Mini Grid
Moment + context
Large + smalls
Consistent crops
3. 3×3 Grid
Event recap
Nine equal
Even spacing
4. Timeline Strip
Sequence
Left-to-right
Short captions
5. Center Cluster
Casual
Grouped photos
White space around
6. Horizontal Strip
Clean modern
Bands + photos
Even band width
7. Pocket Page
Quick / flexible
Slots
Mix cards & photos
8. Asymmetrical
Modern balance
Uneven weight
Step back to check
9. Before / During / After
Progress
Three stages
Same size photos
10. Quote + Four
Reflective
Text focal
Readable font
11. Diagonal Cascade
Energetic
Overlapping angle
Consistent direction
12. White Space Focus
Minimal
Open space
Resist filling
Basic supplies for paper pages include 12×12 cardstock or patterned paper, acid-free adhesive, a paper trimmer, photos, and a few embellishments. For digital pages the same layouts work inside most scrapbooking software or Canva. Choose a simple color palette so the photos remain the star. Title and journaling can be printed, handwritten, or typed depending on your style.
FAQ
How many photos should go on one scrapbook page?
Most pages work well with three to six photos. One strong image is enough for a hero layout. Nine fits a clean grid. More than that often feels crowded unless you use a pocket page.
Which layout is easiest for beginners?
The clean 3×3 grid or a single hero photo. Both rely on simple placement and leave little room for design mistakes.
Do I need lots of embellishments?
No. Three or fewer well-placed accents usually look better than a crowded page. Let the photos and a short title do most of the work.
Can these layouts work for digital scrapbooking?
Yes. The same structures translate directly into digital templates and software. Many recent digital guides use exactly these formulas.
How do I choose a layout quickly?
Start with the story: one big moment, many event shots, or a sequence. Match the story type to the matching layout above and the page almost designs itself.
Conclusion
Scrapbook page layouts work best when the structure comes first. The twelve ideas above—hero photo, hero plus mini grid, clean 3×3, timeline strip, center cluster, horizontal strip, pocket page, asymmetrical balance, before/during/after, quote plus four, diagonal cascade, and white-space focus—cover nearly every story type. Each one finishes in under an hour once the photos are chosen. Start with a grid or single hero page so the process feels easy. Keep embellishments light and the color palette simple. The photos and a few clear words will carry the memory. Open a blank page, pick one layout, and place the first photo today. The next page will already feel faster.
References
MyScrapBook Studio. “Scrapbook Page Layout Ideas: 12 Designs Organized by Story Type.” 2026. https://www.myscrapbookstudio.com/blog/scrapbook-page-layout
MyScrapBook Studio. “Scrapbook Page Layout Ideas for Beginners: 12 Easy Designs You Can Finish Tonight.” 2026. https://www.myscrapbookstudio.com/blog/scrapbook-page-layout-ideas-for-beginners
MyScrapBook Studio. “10 Creative Scrapbook Layout Ideas to Transform Your Photos.” 2026. https://www.myscrapbookstudio.com/blog/creative-scrapbook-layout-ideas
Hip Kit Club. “50+ Scrapbook Page Ideas With Real Layout Photos.” 2026. https://blog.hipkitclub.net/scrapbook-page-ideas/
Simply Paper Crafts. “Scrapbook Trends: What’s Hot for 2024–2025.” 2026. https://simplypapercrafts.com/scrapbook-trends/
Scrapbook Workshop Kits. “The Best Scrapbooking Page Layouts for Beginners.” 2025. https://www.scrapbookworkshopkits.com/post/easy-scrapbook-page-layouts-for-beginners-simple-stylish-ideas
A Teacher with 5 years of experience. Our Expertise, is reliable to meet your full Academic development needs . Worked on many crafts and construction projects offering services from design to development to deployment over the years. You will find many of my works in my business portfolio on request.